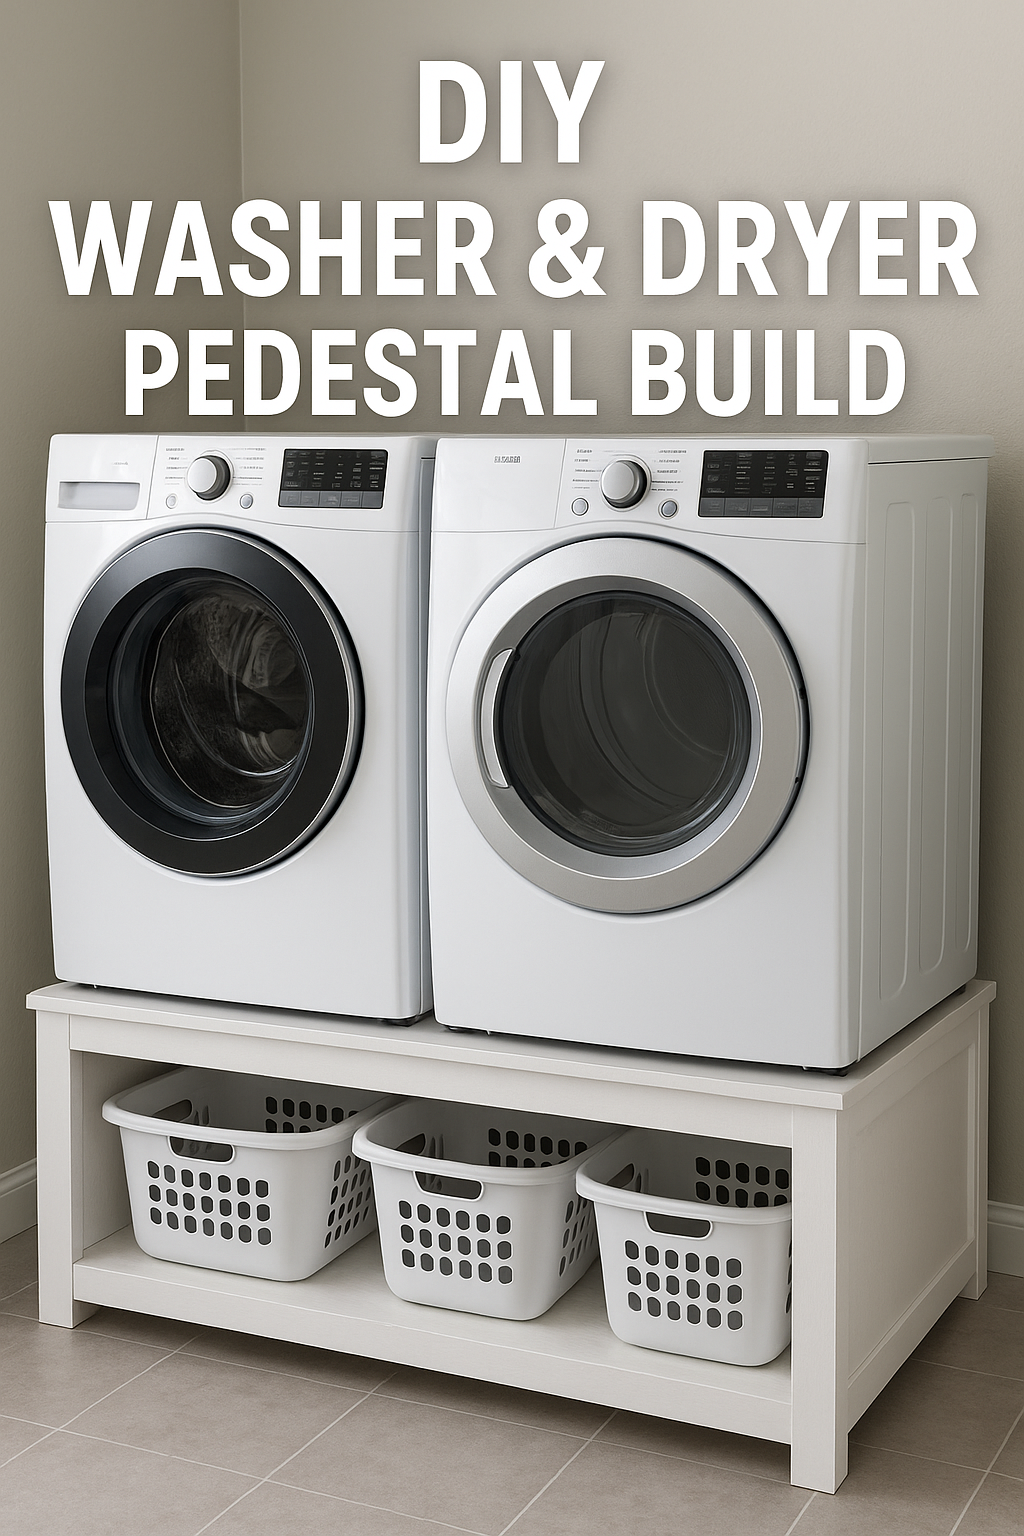
I built my own washer and dryer pedestal instead of paying retail.
I figured I was stepping into the future when I hauled in my front-loading washer and dryer. Sleek, shiny, supposedly easier on water and power bills. They made my old top-loader look like something out of a thrift store. For a few days, I actually admired them—like new furniture.
Then reality set in. By the end of the week, I was crouched on the floor, pulling out a pile of soggy jeans, grumbling at myself. My back was already tired of the “upgrade.”
So I looked at pedestals. You know the ones—those glossy stands they prop the display models on in the store. They do look good. But when I saw the price tag? I couldn’t help it, I laughed. A couple of hundred dollars for hollow boxes that don’t even hold detergent? Not a chance.
Instead, I did what I usually do when something feels overpriced—I grabbed plywood, a few 2x3s, and made a mess in the garage for the weekend. By Sunday, I had a pedestal that lifted the machines to a comfortable height and left me some room underneath for baskets.
This isn’t a “perfect” set of instructions. It’s more like me showing you what I did, where I stumbled, and how you can tweak it to work in your own laundry room.
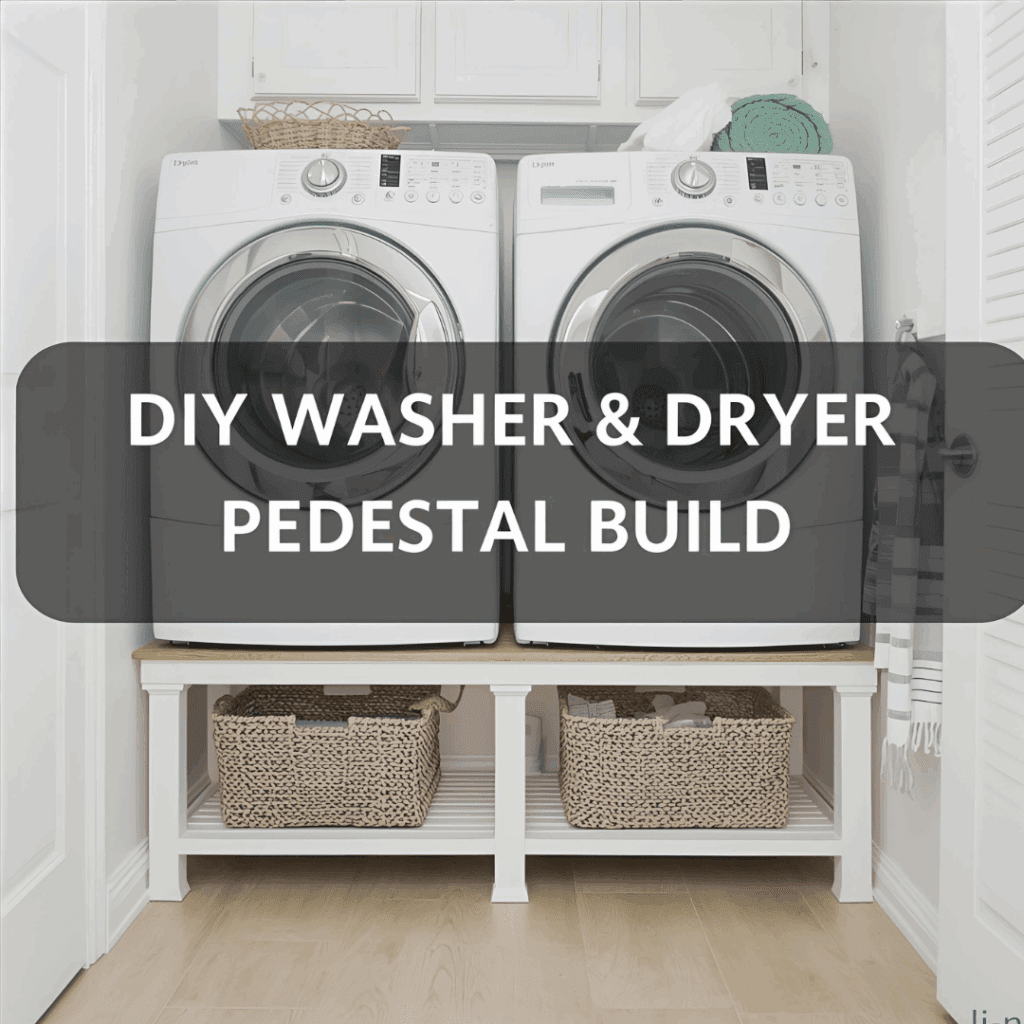
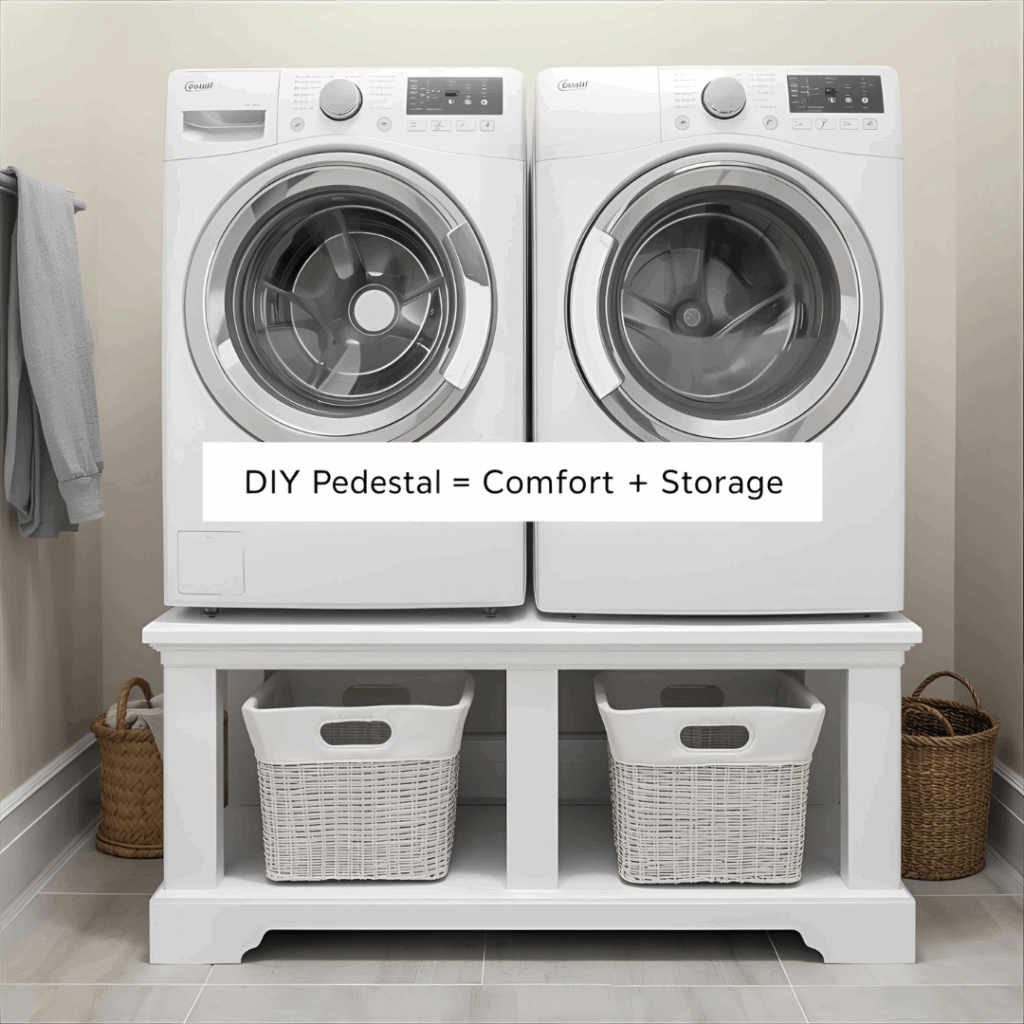
Why a Washer and Dryer Pedestal is Worth It
If you’ve never used one, it might not be obvious why people bother with pedestals. I had the same thought at first. But after living with mine, I can tell you there are a few big reasons:
Comfort: Raising the machines saves your back. Laundry is enough of a chore without squatting like you’re at the gym.
Storage: That big space underneath is perfect for baskets, hampers, or cleaning supplies.
Customization: You decide the height, finish, and whether you want drawers, doors, or just open shelves.
Cost savings: I built my pedestal for less than a quarter of what two store-bought stands would have cost.
For me, the biggest win was comfort. After the first load on the pedestal, I realized I wasn’t hunched over anymore. That alone made the project worthwhile.
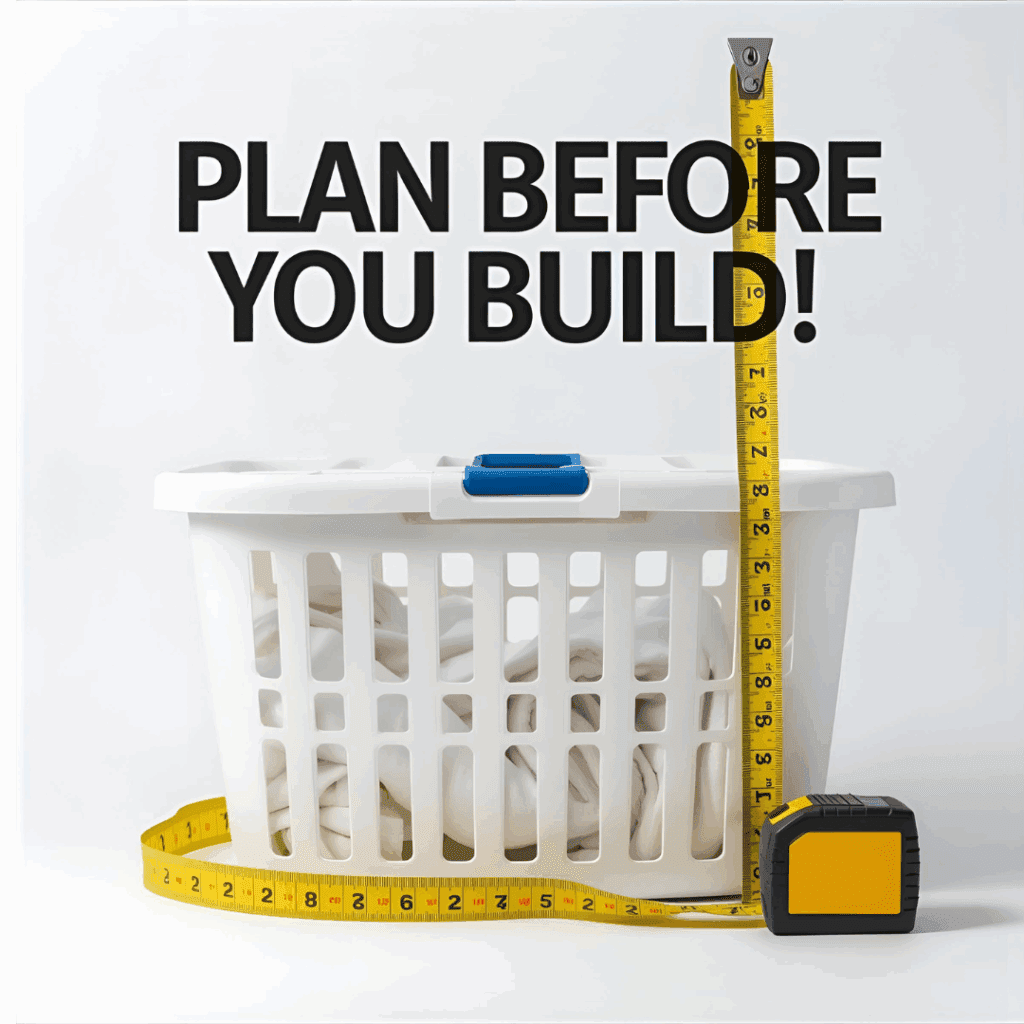
Planning the Build
The key to building a pedestal that works is starting with measurements. Every washer and dryer model is slightly different, so don’t rely on “one size fits all” plans.
Here’s how I measured mine:
Machine footprint – I pushed the washer and dryer side by side where they’d live permanently and measured the total width and depth. My set measured roughly 56″ wide by 31 ¾” deep. That became the size of my pedestal top.
Basket clearance – I knew I wanted to slide laundry baskets underneath. The baskets I use are about 12″ tall, so I planned for a pedestal height of 19–20 inches. That left enough breathing room for the baskets to slide easily.
Comfort height – You want the machine doors to end up somewhere between waist and chest height. Too low, and you’re still bending; too high, and reaching the controls becomes awkward.The right washer and dryer pedestal height depends on comfort and basket clearance
If you’re building one, my advice is to measure twice and mock it up with boxes or scrap wood before committing to final cuts. Seeing the machines elevated helps you visualize the right height.
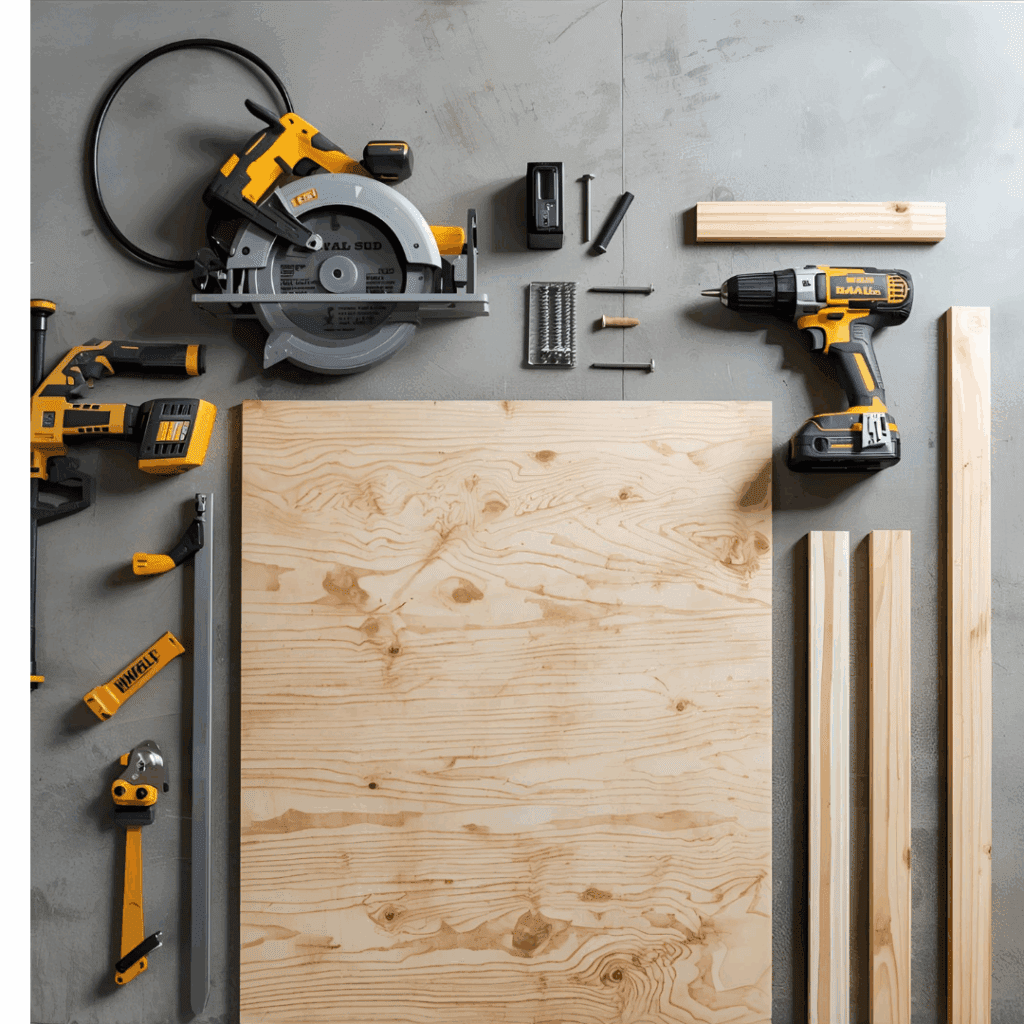
Tools and Materials for a Washer and Dryer Pedestal
The good news? You don’t need a full woodshop to pull this project off. I knocked mine together with pretty basic gear. Here’s what actually came out of the garage for the build:
Circular saw – mine is nothing fancy, but it cuts the plywood just fine. If you’ve got a table saw, even better, but not required.
Drill/driver – I used one with a countersink bit so the screws didn’t stick up. Trust me, you don’t want a washer sitting on proud screw heads.
Clamps – cheap bar clamps to keep the panels from sliding around while I drove screws.
Measuring tape and square – measure twice, cut once (I still cut one board wrong).
Level – don’t skip this. If the pedestal isn’t dead level, your washer will rattle like crazy.
Safety gear – ear protection, glasses, and a dust mask. Plywood dust is no joke.
Materials
½” plywood sheets – one for the top, one for the bottom, and scraps cut down for the sides and back.½” plywood is more than enough strength for a DIY washer and dryer pedestal.
2×3 studs – lighter than 2x4s but still plenty strong. I like them because they save a little height.
1×4 trim boards – these cleaned up the front edges so it looked more like cabinetry than a crate.
Wood screws – I kept a box of 1 ¼” and 2 ½” handy; you’ll use more than you think.
Wood glue – just to stiffen everything up.
Paint or stain – whatever matches your laundry room. Mine ended up white, same as the trim.
Baseboard trim (optional) – I tacked a piece along the bottom so it blended into the wall.
If you want to get fancier, you can add cabinet doors, drawers, or beadboard plywood for a decorative front. I stuck with open storage and baskets, but the frame is sturdy enough to support whichever option you like.
Step-by-Step: How to Build a Washer and Dryer Pedestal
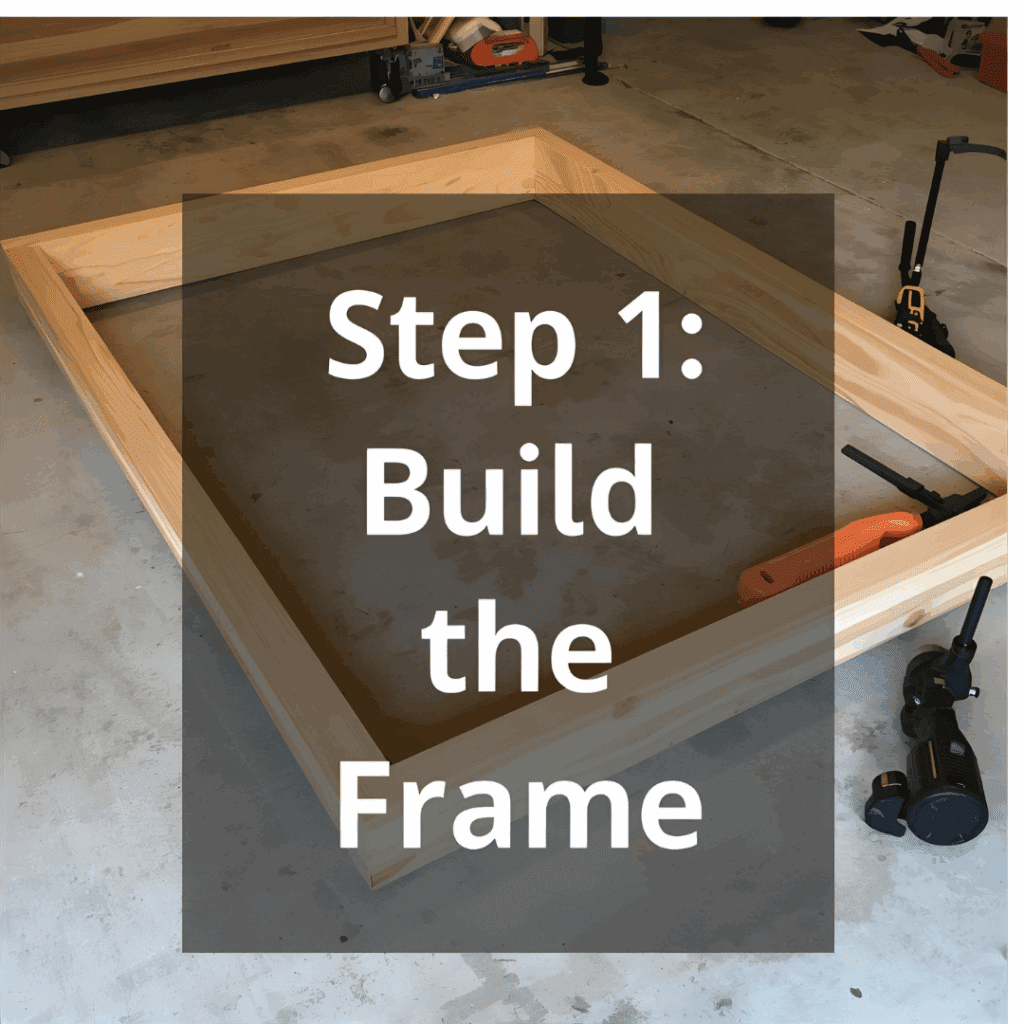
Step 1: Build the Frames
The frame is the backbone of the pedestal. I built two identical ladder-style frames out of 2x3s—one for the top, one for the bottom.
Cut two long rails and several short crosspieces.
Screw the crosspieces in place so they divide the frame into three or four sections.
Double-check for square before tightening everything down.
Tip: Pre-drill the holes in your 2x3s. It prevents them from splitting and speeds up assembly.
👉 I laid my frame on the garage floor to check the square and discovered just how uneven my concrete slab was.
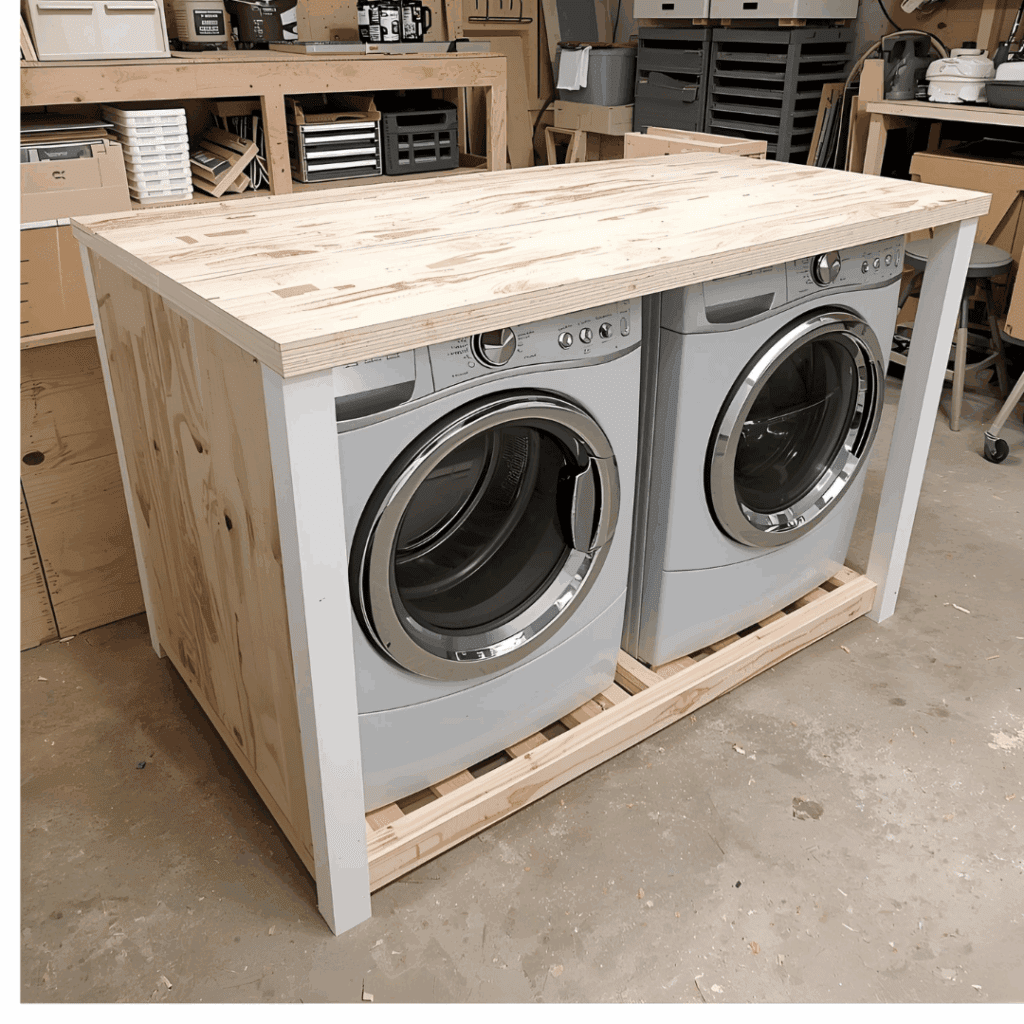
Step 2: Attach the Plywood
Each frame got a piece of ½” plywood screwed on top. The bottom frame’s plywood acts like a shelf and adds rigidity; the top frame’s plywood is the surface your washer and dryer will sit on.
I cut my plywood to 56″ x 31 ¾” to match the footprint of my machines. The frame underneath was about 1 ¼” smaller in each direction, so the side panels could fit flush.
👉 I balanced the plywood sheet across two sawhorses to make the cuts, and yes—one corner still came out a hair short, which I filled later with trim.
Step 3: Add the Sides and Back
With the frames ready, I cut the side and back panels from ½” plywood. The height was based on the clearance I wanted for laundry baskets plus the thickness of the frames.
I screwed these panels into place, making sure they sat flush with the edges of the plywood shelves. For extra strength, I added scrap 2×3 blocks in each corner and drove screws through the sides into those blocks.
At this stage, the pedestal already felt solid, like a giant plywood crate.
👉 I actually stood on it and gave it a little bounce just to make sure it would handle the weight.
Step 4: Reinforce and Trim
To make it look more like furniture, I trimmed the front and corners with 1×4 boards. These also helped hide the edges of the plywood and gave me a place to attach future doors if I wanted.
A horizontal 1×4 across the top front not only dressed it up but also added stiffness.
👉 Cutting the trim took longer than I expected because I wanted the corners to line up cleanly without big gaps.
Step 5: Finishing Touches
I filled the screw holes with wood filler, sanded the edges smooth, and painted the pedestal white to match my laundry room trim.
To make it blend with the wall, I tacked on a strip of baseboard along the bottom. Honestly, that little detail made it look custom-built instead of like a shop project.
👉 The paint job was the most satisfying part—watching raw plywood transform into something that looked store-bought.
Storage Options for Your Washer and Dryer Pedestal
I left the front open because I like sliding baskets in and out without opening doors. If you prefer a cleaner look, here are some variations:
Cabinet doors: Cut the opening into two sections, add stiles, and hang doors on hinges. Great for hiding detergent and chemicals.
Drawers: Mount drawer slides inside and build shallow drawers for dryer sheets or stain removers.
Bins: Use matching plastic or wicker baskets that slide neatly inside.
The nice part about a DIY pedestal is that you can choose whichever setup matches your laundry style.
Lessons Learned
A few things I discovered along the way:
Level is everything. If your pedestal isn’t perfectly level, your washer will dance across the room during the spin cycle. I spent extra time shimming mine before tightening it down.
Don’t skimp on screws. I probably used twice as many as the plans called for. Better safe than sorry.
Check door clearance. My washer door needed an extra inch of swing room; I almost missed it.
Weight test before use. I stood and jumped on mine before setting the machines up. If it holds me, it’ll hold a washer.
Cost Breakdown
Here’s roughly what I spent:
Plywood: $60
2×3 studs: $25
Screws and glue: $15
Trim boards: $20
Paint and filler: $15
Total: around $135. Compare that to $500+ for two store-bought pedestals, and the savings are obvious.
Safety Considerations
Anchor to the wall if you’re worried about vibration.
Avoid particle board or cheap materials—they won’t hold up.
Seal the wood if your laundry room has moisture issues.
I also recommend putting anti-vibration pads under the washer and dryer feet. It makes a noticeable difference.
Washer and Dryer Pedestal FAQs
Q: How tall should a washer and dryer pedestal be? A: Most folks build them anywhere from 12–20 inches high. The sweet spot is high enough to stop the endless bending, but not so tall that you’re reaching over your head to hit the buttons. Mine ended up around 18″, which put the doors right at waist level—comfortable without being awkward.
Q: Can I build one pedestal for both machines? A: Yes, and honestly it’s easier that way. That’s what I did. One big platform keeps the machines at the same height and feels more solid than two separate stands. Just be sure you reinforce the frame across the full width; those washers get heavy when they’re full of water.
Q: Will plywood really hold the weight? A: I wondered the same thing at first. The answer is yes—if you use a decent frame underneath. The plywood is really just the skin on top. The 2×3 frame I built underneath has carried two full-size machines for over a year without so much as a squeak. I even stood on it myself to test before loading the washer on, and it didn’t budge.
Q: What if I want drawers? A: You can definitely add them, but plan. Drawers mean more framing and strong rails. Go for heavy-duty slides rated at 100 pounds or more, because detergent jugs and baskets add up quickly. I stuck with open storage for simplicity, but if I did it again, I might add one shallow drawer just for dryer sheets and oddball supplies.
Final Thoughts on Building a Washer and Dryer Pedestal
Building a washer and dryer pedestal was one of the simplest but most rewarding projects I’ve done. It cost less than buying ready-made stands, gave me a more functional laundry room, and—most importantly—saved my back.
If you have a free weekend and basic tools, I’d encourage you to try it. Customize the height to your comfort, leave the front open or add doors, and paint it to match your home. Once it’s in place, you’ll wonder why you didn’t build one sooner.
How to Build a DIY Couch With Storage by Admin May 31, 2025 DIY A couch is more than just a piece of furniture. It’s where we relax after a long day, binge-watch our favorite shows, or chat with…
Floating Shelves: Stylish Storage & Easy DIY Guide by Admin September 8, 2025 DIY I still remember the first time I put up floating shelves. It wasn’t some big renovation—just a Saturday project in my living room. Instead of…