Skateboarding began well before the first commercial skateboard came out in 1959. Anyone who has seen Marty McFly in the movie Back to the Future will probably remember him breaking the handle off a kid’s homemade scooter when he visits 1955 in order to turn it into a skateboard. While it’s clear that there was no Marty McFly going back in time to do that, it’s just as clear that the teens in that time period were coming up with the idea on their own. Commercial skateboard manufacturing merely made a business out of what those kids were doing.
Early skateboards were simple affairs, compared to what is produced today. While the general idea is the same, a considerable amount of technology has gone into improving the decks, trucks and wheels used in their manufacture. Most noticeably is the shape of the deck, which will often be curved and have “kicks” on one or both ends.
The deck of a skateboard is a hand-laid plywood construction. While one might think this means that plywood could be used in its manufacture, that wouldn’t really be true. Early skateboards were cut out of plywood, but that didn’t allow for any curving of the deck or the addition of kicks.
Essentially, making a skateboard deck is the same as any bentwood project, with the exception of its width. Most bentwood furniture is made of narrow strips, while a skateboard deck is made of 10” wide strips. Still, there are some modern bentwood pieces which use wide veneers, just like skateboards do.
The Skateboard Press
In order to make any skateboard deck, a mold is required. The mold will provide the contour for the deck, including the kicks at the ends. Each style of skateboard requires its own mold, providing the exact contour needed for laminating the veneers together to make the plywood deck.
Something is going to be needed for supplying pressure to the mold and the veneers being formed into the deck as well. For a simple, one-time skateboard deck, bar clamps are sufficient. But anyone who is going to make a number of skateboards will quickly realize that bar clamps aren’t enough for mass production, some sort of press is needed.
A press can easily be made out of a 2”x 4” frame, with hydraulic bottle jacks to provide the pressure. The overall size of the frame will need to have a large enough bed to accommodate the mold. The height will also need to take into account the size of the mold, as well as providing enough space for the bottle jacks to fit between the top of the mold and the upper part of the press’ frame. Two bottle jacks are normally used, one over the location for each truck, although for more complex skateboards, an additional jack can be added in-between, to provide pressure over the curve.
An alternative to this is to use a vacuum bag. The thin Air Press Vacuum Bag is a common one used in the manufacture of skateboard decks, because it is made in a convenient size for accommodating a skateboard deck mold.
For the mold design, look at successful commercial designs, copying them. Draw out the desired design, showing both the outline of the deck and its profile. These drawings, especially the profile, will need to be transferred to the mold. Molds are normally made in a way that the top surface of the skateboard deck faces down during the molding process. For the mold itself, there are three common options:
Use Existing Skateboards
The simplest way of making a skateboard mold is to use existing skateboard decks. This requires two matching skateboard decks, which will nest together. For the glue-up, the trucks will need to be removed and then replaced later. The glue-up for the new deck being made is placed between these two decks, using clamps to hold them together.
Foam Skateboard Mold
High-density closed-cell foam (Styrofoam) is a commonly used material for making skateboard molds. While that may not seem all that strong, it actually works quite well. We’re trying to bend pieces of veneer here and glue them together to form plywood, not trying to bend the plywood itself.
The foam is fairly easy to cut and shape, allowing for a considerable amount of leeway in the shaping of the skate board deck. However, it would be a mistake to think that this can be done quickly. It actually takes a fair amount of effort to properly shape the mold. It is done in four steps:
Lay out the overall profile of the skateboard, creating guidelines for the kicks and center curve. The kicks allow the rider to step on one end, raising the wheels on the opposite end. Most modern skateboards have two, one at each end. The center part of the skateboard is often made with some sort of curvature, usually along the edges, which provide for greater stiffness.
Rough cut the kicks and curvature of the mold with a utility knife, Japanese pull saw or serrated bread knife. An electric carving knife, of the type used to carve a thanksgiving turnkey works well too.
Finish shaping the mold with a surform file and/or plane. These cut like a cheese grater, so they will take material off of the closed-cell foam quite well, whereas a regular file will merely mess up the surface. Caution should be taken, because these tools can take off a lot of material quickly.
Smooth out the finished mold by sanding it with sanding blocks. Blocks allow the sanding process to help level the surface, whereas hand sanding might add unwanted dips or other unevenness in the surface of the foam. It doesn’t have to be perfectly smooth, but any irregularities will show up in the surface of the deck.
Foam skateboard molds are usually only one-sided and are commonly used with a vacuum bag.
Wood Skateboard Mold
Molds can also be made out of any scrap wood or plywood that might be sitting around the workshop. The only real requirement is that the pieces be long enough to accommodate the full length of the skateboard, roughly 36” and that they be wide enough to cut the contour of the skateboard out of.
Unlike foam molds, wood molds are often used in pairs of an upper and lower half. While it is possible to use only a lower mold and work with a vacuum bag, the main reason that people make wood molds is to use them in a press. In commercial operations, this allows for as many as five skateboards to be shaped and laminated at the same time.
To make a pair of wood molds, first cut the scrap wood to a consistent size. Then lay out the profile for the skateboard on the pieces, working off a pattern. Cut this line on a band saw, saving both pieces. All the top pieces are then laminated together, like pieces of a butcher-block tabletop and all the bottom pieces are laminated together in the same manner. Once dry, the surface of both mold halves need to be ground and sanded smooth.
Please note that it is not necessary for the wood mold halves to meet perfectly. In fact, if you have a curved center part, it is unlikely that the pieces will meet. The wood veneer that is making up the skateboard deck will find its own line between the molds, wherever there is a gap. This will generally be up against the part which is applying the pressure; or, to put that another way, up against the part that is on the inside of the curve.
Making the Skateboard Deck
A skateboard deck is normally made out of seen layers of maple veneer, although other materials can be used. Maple works well for skateboard decks because the short growing season in the northern climates where it grows creates narrow rings, which translate into a very fine grain which is strong, yet retains some flexibility.
Some skateboard manufacturers will add other materials, such as aluminum, fiberglass sheet or graphite into the mix, in place of wood veneers. There are pros and cons to this, which I will leave to the skateboarding experts. The bottom veneer of the skateboard may be made up of other types of wood or even a mix of wood types creating a geometric design for aesthetic purposes.
The veneer needs to be cut into pieces which are large enough for the skateboard deck pattern, usually 8” x 36”. Of the seven layer, four should be with the grain parallel to the length of the board and three should be with the grain perpendicular to the skateboard’s length. It may be necessary to make these veneers up of multiple pieces of veneer, edge-laminated together.
Select the best veneer pieces for the top and bottom faces of the skateboard deck. Of the two, the bottom is actually more important, as the top is usually covered with an adhesive grip surface, something like sandpaper.
To lay up the skateboard deck, cover the mold with something to use as a mold-release that the glue won’t stick to, such as waxed paper.
Spread the glue on each pair of veneer surfaces which will face each other with a paint roller and then stack them in order, starting with what will be the top surface of the deck. It is necessary to apply the adhesive to both sides of the glue joint, so as to ensure there are no voids. Don’t worry about using too much glue. wood glue, epoxy or special glue for skateboard decks can be used.
Once the entire stack is laid up on the mold, ensure that the edges of all the pieces are even. Then, if using a two-part mold, place the top part of the mold in place and either clamp it with bar clamps or put it in a press and apply pressure to form the veneers into the final shape of the deck.
Leave the deck for at least eight hours for the glue to dry.
When Using a Vacuum Bag
Using a vacuum bag is a little different, as it is the vacuum that provides the clamping force, not a press or bar clamps. Typically, a vacuum bag is only used when a one-piece mold is used, which will be underneath the stack of veneers being laminated together.
Before putting the laid-up deck into the vacuum bag, it can help to tie the veneer stack to the mold with large rubber bands, holding the stack in place.
Open the bag with the air outlet nozzle facing up and slide the deck and mold into it, centering it in the bag. Place the breather netting on top of the veneer stack, directly below the air outlet. Seal the bag with the sealing tape provided.
Using either a vacuum pump, a shop vac, or the manual pump that comes with the vacuum bag, suck out the air in the bag. If using a shop vac, it will most likely be necessary to switch over to the manual pump to finish, as a shop vac cannot draw out all the air. As the air is drawn out, the bag’s position needs to be adjusted, ensuring that it doesn’t get trapped between layers and that it is smooth, applying even pressure. It is also necessary to smooth out the surface of the veneer, forming it to the mold.
Making a Skateboard from Scrap Material
A number of different people have come up with alternate materials to make skateboards from, including five-gallon plastic buckets and pallet wood. In any of these cases, the trick is in turning the alternative material into veneer layers that can be used in making the lay-up for the deck.
This is easy with plastic buckets, which are the right thickness to replace one or more of the veneer layers. But it’s a bit harder when using pallet wood. Since the pallet wood is considerably thicker than the veneer needed for making the deck, it needs to be resawn and planed, then edge glued together and sanded smooth, in order to make it into veneers. While possible, this is a lot of extra work, just to save a bit of money.
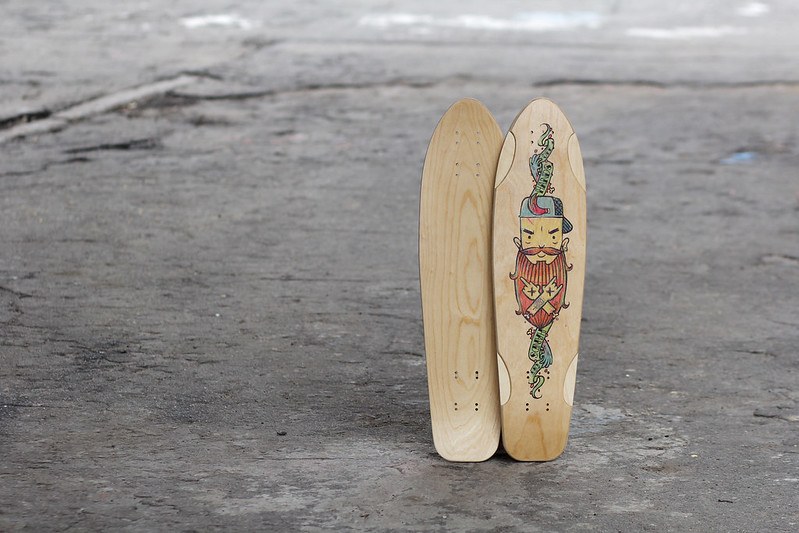
Alternate Construction for a Longboard
While the laminated plywood deck, formed on a mold, is the standard way of making a skateboard deck, there is a simpler way which can be used for making a longboard. Longboards are actually simpler than skateboards, in that they have a flat deck, without a kick at either end or curve in the middle. The wheel trucks on a longboard are attached as close to the ends as possible, while the wheels on a skateboard are attached just inboard of the kicks, where the board is the flattest.
Because longboards don’t need the flexibility or strength of skateboards, they can be made thicker, out of strips of wood, much like making a butcher block tabletop. This is a great way of using up any scraps of wood that have been trimmed off of boards to make them thinner.
To make the longboard deck, the edges of the pieces need to be planed, so that they can be laminated together. Then they are laminated together, as any other tabletop. Allow the glue to dry and then plane and sand the surface, making it smooth. The idea is to end up with a board that is somewhere between ½” and ¾” thick.
From here, it’s much like making a normal skateboard deck. The final shape needs to be cut out with a bandsaw or jigsaw, the edge routed to round the corners and the whole thing sanded and finished.
Once the laid up plywood deck has had eight hours for the adhesive to dry, it can be removed from the press or vacuum bag and taken off the mold. The resulting piece of plywood will have the right profile for the skateboard, but the outer edge will be a somewhat uneven rectangle. It will be necessary to cut out the final shape of the skateboard deck and smooth it out.
A pattern should be used for cutting out the outer perimeter of the skateboard deck. The same pattern can also be made to provide the locations of the holes for the two trucks. Transfer those hole locations to the deck and drill them out. Use a backing board to help prevent tear out on the far side.
The plywood deck can be cut out with either a band saw or a jigsaw. It is best to cut it slightly outside the line and then sand the deck to its final dimension. This helps to eliminate the possibility of places where saw marks are visible or the cut goes inside the line.
It is a good idea to use a small roundover bit in a router table to radius the edges of the deck on both sides. If a router table is unavailable, the same thing can be done with a sander. In either case, the edges need to be sanded once the edges have passed through the router.
Sand the entire board, on both sides, as well as the edges, making it as smooth as possible. In commercial operations, great effort is put into the sanding operations, using a variety of different types of sanders to get the smoothest possible finish, especially on the edges. However, most do-it-yourselfers are limited to a belt sander and a palm sander. Those are sufficient to the task.
Once sanded, the finish can be applied. As anyone who has shopped for skateboards knows, a wide range of finishes are used, including paints, varnish and printed film. Once finished, a self-adhesive anti-slip coating is applied to the top side of the board.
Related Posts:
Deck Stairs: DIY Guide to Building Safe Outdoor Steps by Admin July 30, 2025 Installing The first summer after I finished building my backyard deck, I realized something was missing—deck stairs. Every time I wanted to get to the garden…
Building Landings For Deck Stairs by Amy Reed February 28, 2023 DIY A landing is a flat pad, usually made of concrete, gravel, flagstone, bricks, or pavers, that appears at the bottom of deck stairs. It’s designed…
How to Make Barn Quilts by Admin June 3, 2025 DIY Walk through rural America and you’ll start noticing a charming trend on barns, sheds, and even garages—large, colorful quilt block patterns painted right onto the…