Most homeowners eventually find that they have inadequate storage space within their home. We westerners tend to accumulate a lot of things, all of which require someplace to store them. Our homes are not built for that. Some homes have a cellar, which provides some additional storage space, but you can’t necessarily count on that. Besides, cellars tend to be damp, which isn’t good for the things being stored there.
The other option is to go up, rather than down. Most houses have some sort of loft or attic space. This has been converted to living space in some cases, but in most, it is just sitting there as empty space, protected from the rain, but not protected from heat and cold.
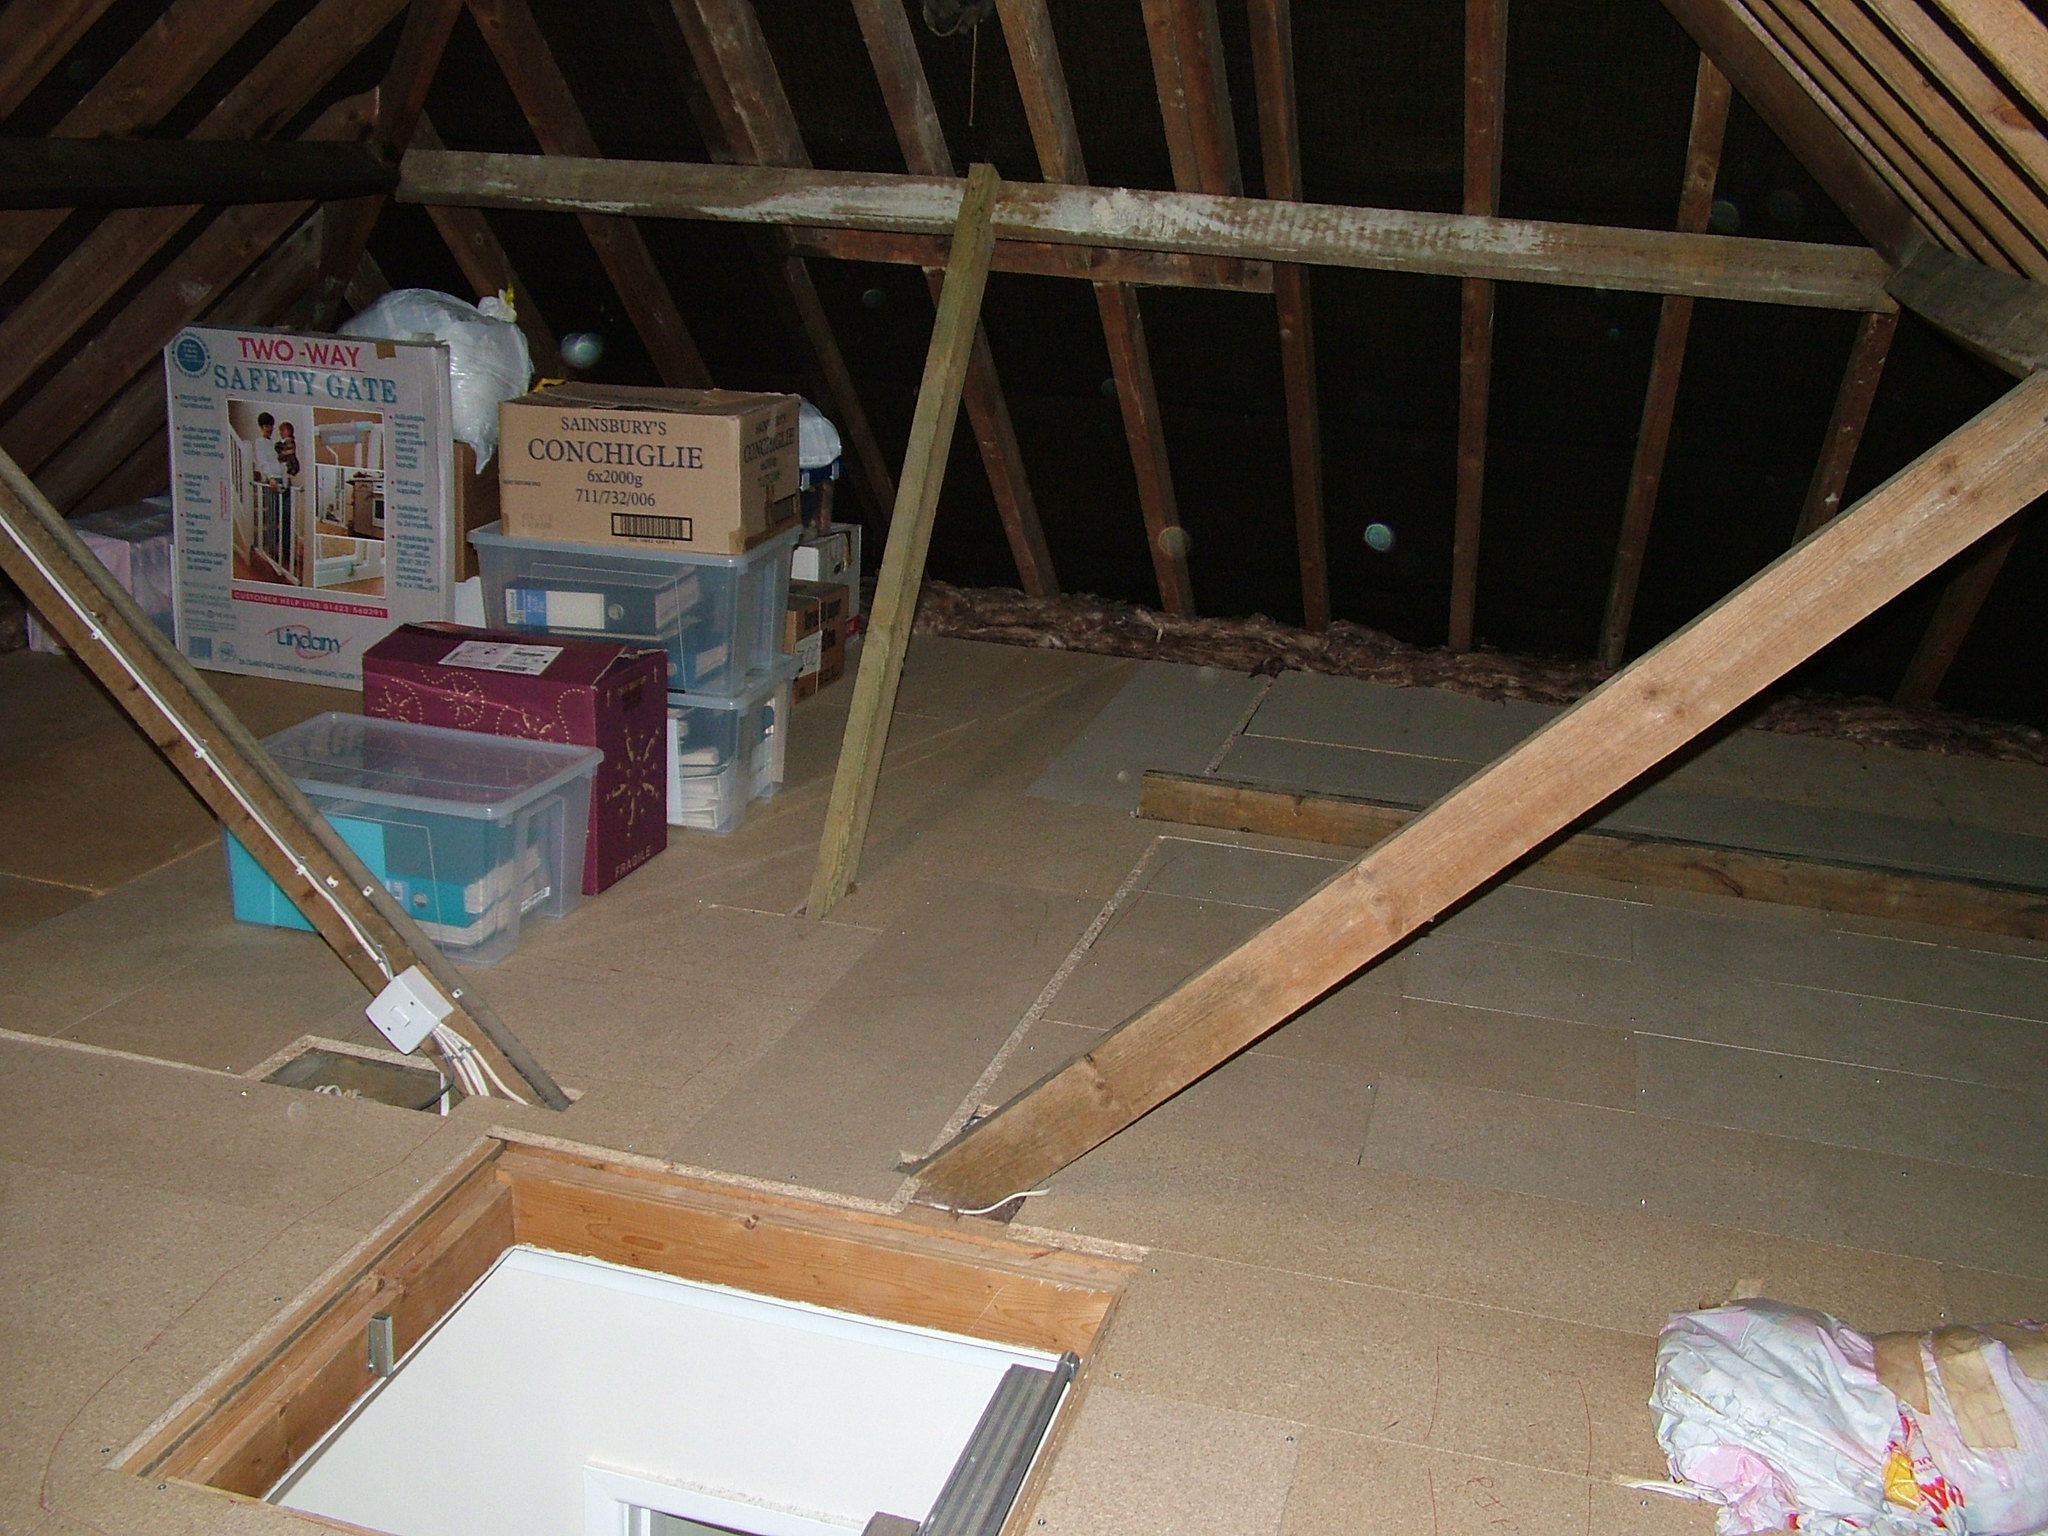
For most of us, the problem in using the loft for storage is that it’s not properly prepared for that. If you stick your head up there, you find the floor covered in two layers or more of mineral wool or quilt insulation, with one layer setting in-between the ceiling joists and the other running crosswise on top of it. Even walking in the loft area, with this insulation present, can be dangerous, as you can’t see where the ceiling joists are. The plasterboard covering the ceiling isn’t strong enough to support your weight.
Nevertheless, it is possible to add storage in your loft, by covering this insulation with loft boarding. This provides a floor that is strong enough to walk upon, while still leaving enough space for your insulation. There are actually several ways of doing this.
How much storage you add is up to you. The home I used to own had the central part of the loft boarded over, with the area around the edges left untouched. This provided considerable storage space, but over time, I ended up adding additional storage by installing loft ledges (see below) in areas that were not in use. This roughly doubled the amount of storage I had in my loft.
Before You Start
Before even planning your loft boarding project, you need to have a good idea of what you already have in your loft space. How much space do you have available, which isn’t already taken up by ductwork, air handling units and the shape of the roof itself. Was your home’s roof built with rafters or trusses?
While you can board a loft with either trusses or rafters, what you have will make a difference in how you plan out and execute your project. Rafters make it much easier, as you have a large open area to work with. Trusses break up this area, forcing you to plan out and use the space differently. But you can still find a lot of usable storage space, even if you have trusses in your loft.
No matter what you have, you don’t want to cut or remove any of the lumber pieces. Each and every truss stringer has a purpose in supporting your roof. Even removing one can cause long-term damage to your home. You may not see it immediately, but it will happen.
Protect Downlights
Modern homes use downlights extensively, with those lights being attached to the side of the joists and sticking up into the area where the insulation is installed. While they are fine there, if left alone, using your loft space for storage can subject them to damage, whether by someone kicking them or dropping a heavy box on them. To prevent this sort of damage, cover them with loft lid downlight covers. These inexpensive covers are a worthwhile investment in protecting your lighting.
To install the covers, first move the insulation aside, so that you can install the cover without capturing any insulation underneath it. Place the cover over the light and screw it to the adjacent joist. Then fill the insulation back in, cutting it if necessary to get it to fit snugly around the cover.
Install a Ladder
If you don’t already have a pull-down loft ladder installed in your home, you should consider doing so as part of the project. While it is possible to insert a normal extension ladder through the access hatch for carrying boxes up and down, that’s not as safe as a loft ladder that’s permanently installed.
Care must be taken in installing any loft ladder, securing it well to the joists. Properly installed, the loft ladder should give you easy access to the central part of the loft, giving you adequate space to stand up fully. The ladder will come with instructions for installation, which should be followed to the letter. This is a safety item, so don’t cut corners.
Check the hardware on your loft ladder periodically, looking for hardware that has loosened up. While it should not come loose, it is not unusual for that to happen, due to the expansion and contraction of the wood, due to changes in moisture. Aluminum ladders are less likely to have this problem.
Insulating Your Loft
If you’re going to be working on your loft anyway, you might want to consider upgrading the insulation that’s installed there. Unlike the insulation in the walls of your home, the insulation in the loft is constantly subject to gravity, which works to compress it. Any home more than 20 years old will probably need additional insulation.
Loft insulation is the most important insulation in a home, because heat rises. That means that you can lose more heat from your home through the roof, than what you lose through the walls.
While most people add insulating batts (without paper backing) in the attic, blown-in insulation is a wonderful option, especially while decking your loft. The blown-in insulation is much better at filling miscellaneous nooks and crannies where insulation batts don’t fit well. Just be careful to avoid covering any vents in the eaves, as those are necessary for keeping the humidity down in the attic.
Applying Loft Boarding Directly to Joists
The easiest way of adding loft boarding to create storage space within the loft is to attach the loft board directly to the tops of the joists, compressing the insulation underneath. However, this is not recommended. Were you to do this, it would mean that you would be cutting the insulating value of your loft’s insulation by one-half or more. For the insulation to have its full rated value, it has to be at its fully expanded dimension.
Using a Commercial Loft Boarding System
Most people buy commercial loft boarding systems to board their loft. There are a number of these on the market, such as LoftZone and Wickes. While each system is slightly different, they all consist of supports which are attached to the tops of the existing rafters, allowing the loft boards to be raised up above a second layer of insulation.
To install the loft boarding system, you will need to temporarily remove the top layer of insulation to give yourself access to the ceiling joists. Once the system is installed, this insulation is returned to its original position.
You will need to look at the individual systems, to see how closely the supports need to be installed and whether or not there is a top track installed onto the supports. Most of these are designed to be installed every 320mm, although they can be installed double that distance.
The companies which produce these loft boarding systems also provide the plywood decking to board your loft. These are typically made with a tongue and groove joint, allowing them to fit snugly together and eliminating gaps that things can fall through, as well as unevenness in the surface. Always be sure that your joints fall directly on top of a support, as any joints which are not properly supported will eventually break.
There are two widths of loft boards, narrow and wide. Which you choose to use will depend more on the access you have to your loft, than any other reason. The wider ones make the boarding project easier, as there are fewer pieces to install, but they require a considerably larger access hatch.
Loft Ledges
Another option offered by these manufacturers are loft ledges. These are designed for use when you have trusses and are trying to make the most of your available space. The kit for these consists of metal brackets, which can be attached to the sides of the trusses and cut pieces of loft board to rest on the brackets.
You can do the same thing on your own, using dimensional lumber for the brackets and screwing it to the sides of the truss stringers, then covering it with plywood, OSB or MDF. The advantage of doing it this way, over buying the loft ledge kits, is that you can make your ledges much deeper. Just be sure not to make them so deep, that you can’t reach the things on the back of the ledge.
You may find that it is less costly to build your own loft decking system, rather than buying one of the commercial ones. This is not as hard as it may seem. Other than plywood for the flooring itself, you’ll need something to use for the trusses.
Rather than using normal dimensional lumber for the trusses, it would be considerably less expensive to use I-Joists. These come in a variety of different sizes, designed to span different distances. However, span isn’t an issue in this case, as your I-joists will be supported frequently by the ceiling joists below. Rather, you’ll want to select the I-Joist size based upon how thick your insulation is.
Before installing your own loft boards, you’ll need to pull back the top layer of insulation, giving you access to the tops of the existing ceiling joists. Install the I-Joists perpendicular to the ceiling joists, nailing them to the tops of the joists at each crossing point. Don’t skip a joist, as that leaves an opportunity for a squeaky floor.
Before installing the flooring, you’ll want to place the top layer of insulation back where it belongs, filling the space between the I-Joints. If necessary, buy and add additional insulation, whether batts or blown-in, to fill the area fully and give your home the best possible insulation.
Related Posts:
Garage with Loft by Admin June 21, 2023 DIY Having a home with a garage provides a lot of options for a family. Besides the obvious possibility of using it to park cars, garages…