Let’s not sugarcoat it — I avoided building drawer boxes for way too long. They always seemed like a pain: too many precise cuts, too much room for error. I figured one wrong measurement and the whole drawer would end up wonky. But I was wrong — drawer boxes aren’t nearly as scary as they look.
Once I got the hang of it (and messed up a few along the way), building drawer boxes became something I enjoyed. Whether you’re tackling your first drawer or trying to streamline the process, this is the no-nonsense guide I wish I had when I started.
Why Drawer Boxes Seem Like a Big Deal (But Really Aren’t)
I get why people shy away from drawer boxes. You need precise sizing, repeatable cuts, and a clean look — and let’s be honest, most of us just want to build the cabinet and be done with it.
But drawer boxes don’t have to be a stressful part of the job. Once you understand how they go together, it’s just measuring, cutting, and gluing — like any other woodworking task. The hardest part is just building the first one.
Drawer Box vs. Drawer Front — Big Difference
Early on, I assumed the front of the drawer was part of the box. It’s not — and separating the two in your mind makes everything easier.
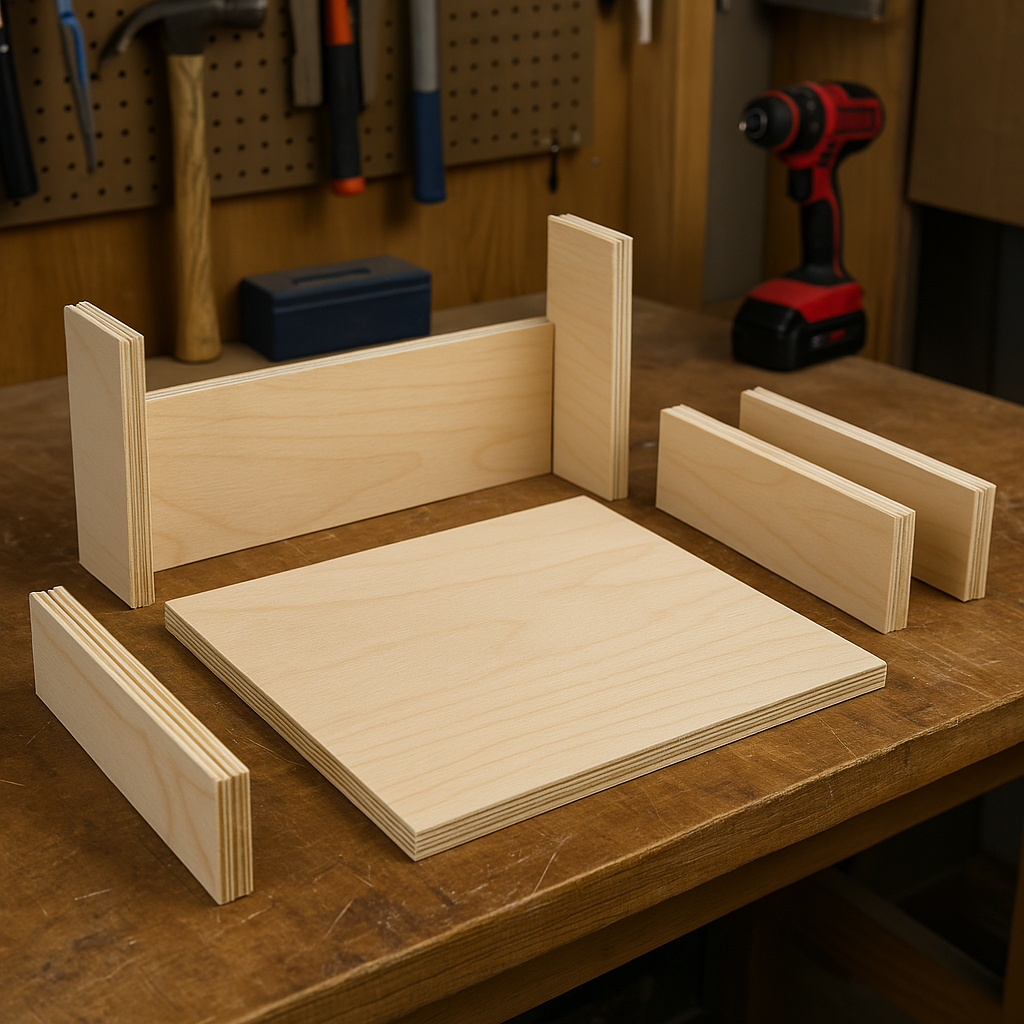
The drawer box is the guts: four sides and a bottom. The drawer front is the finished face you see. And most of the time, the front is attached after the box is installed, especially with overlay-style cabinets.
Pro tip: If you’re remodeling your kitchen, you can even order your drawer fronts to match your cabinet doors and just build the boxes yourself.
I’ve used drawer box kits when I’m short on time — and they’re honestly a great option. You get the four sides and bottom cut for you, and you just assemble it. Some even include a matching front.
The cheap kits are a no-go though — if they’ve got a flimsy masonite bottom, I skip ’em. Look for:
1/2″ plywood bottoms
Good-quality hardwood sides
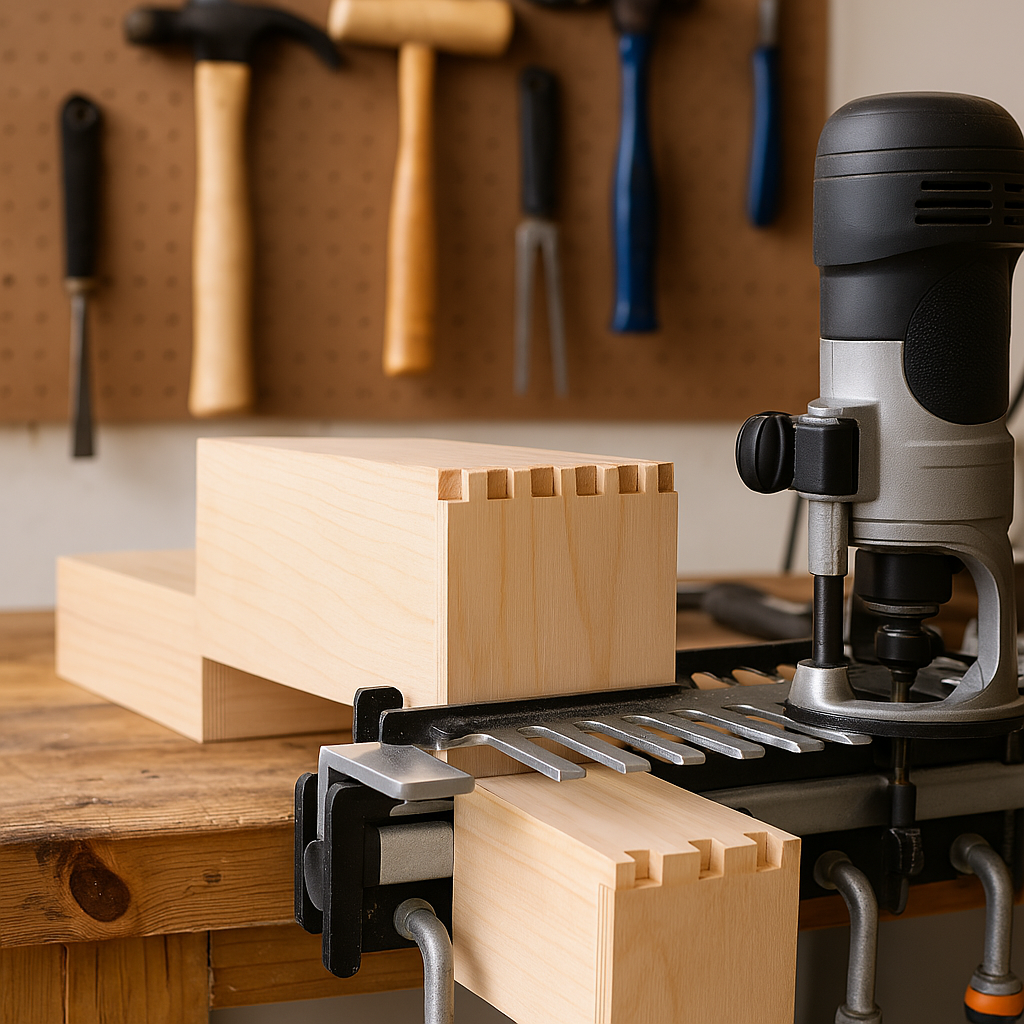
Dovetail or notched joints if you want strength and looks
If the drawer is going to hold tools, pots, or anything heavy — inset the bottom.
I cut a 1/4″ groove into each side panel using a dado blade. The groove sits about 3/8″ from the bottom edge and lets the plywood bottom slide into place before the box is glued.
You’ll need to increase the size of your bottom panel slightly — usually about 3/8″ longer and wider than usual.
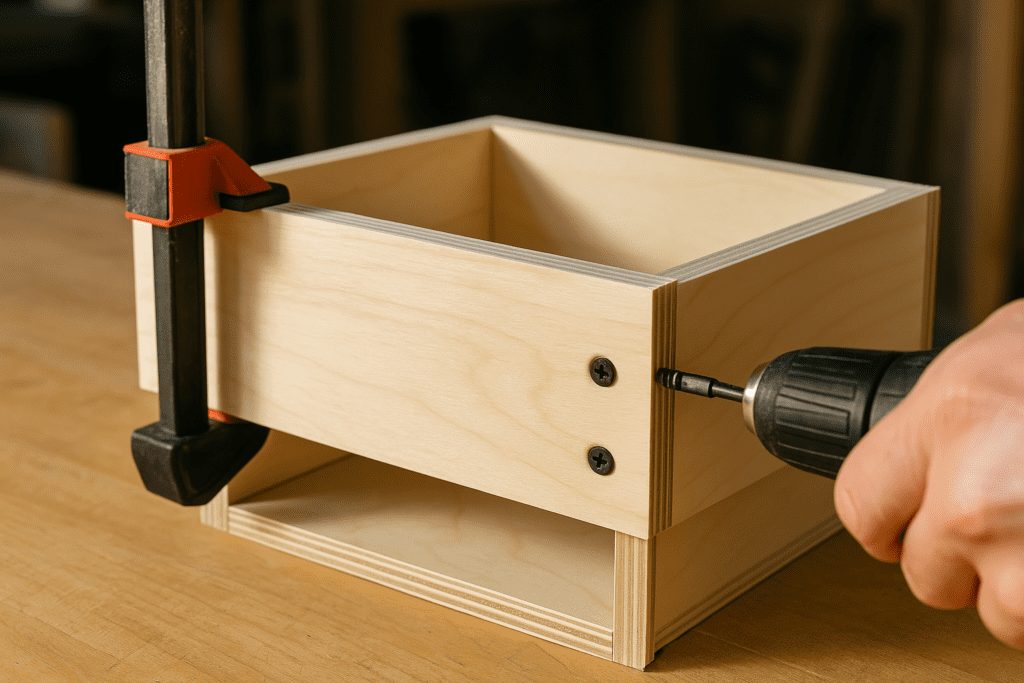
Installing the Drawer Front (Without the Guesswork)
Here’s how I do it:
Put the drawer box on a spacer (I use scrap wood about 1/2″ thick)
Set the drawer front in place and line it up
Screw it in from the inside
Install the pull to help hold it tight
Skip the glue — if you ever need to adjust or replace the front later, you’ll be glad you did.
Fancy Joinery? Optional. But Pretty Cool.
If I’m building shop cabinets, I go simple. But when I want drawers to look sharp — like for furniture or fine cabinetry — I’ll use dovetails or finger joints.


")

")

")