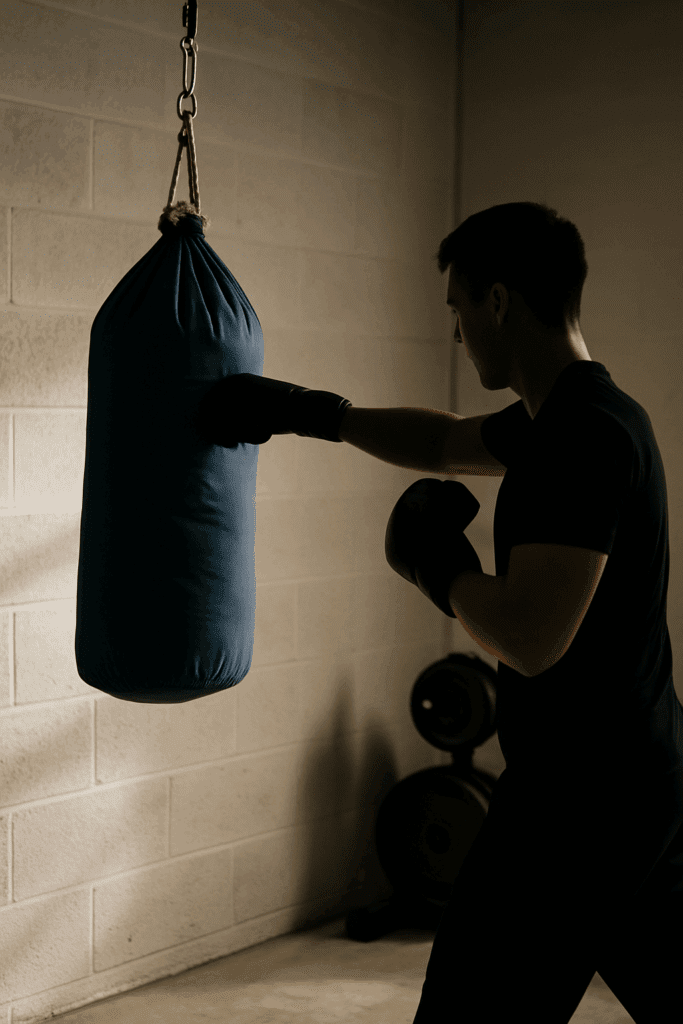
A few years ago, I started putting together a small workout corner in my garage. I didn’t have the budget for a whole home gym, but I knew I wanted a heavy bag to relieve stress and stay active. When I looked online and saw $150–$300 price tags, I figured, “How hard could it be to make one myself?”
Turns out—it’s not hard at all. With a bit of creativity, a few inexpensive materials, and a couple of tools most people already have, you can build a durable punching bag that feels surprisingly close to a store-bought one. Mine lasted nearly two years before I rebuilt it even better.
Below is the exact process I used, along with what I learned the hard way, what to avoid, and how to make the bag safe enough to hit every day.
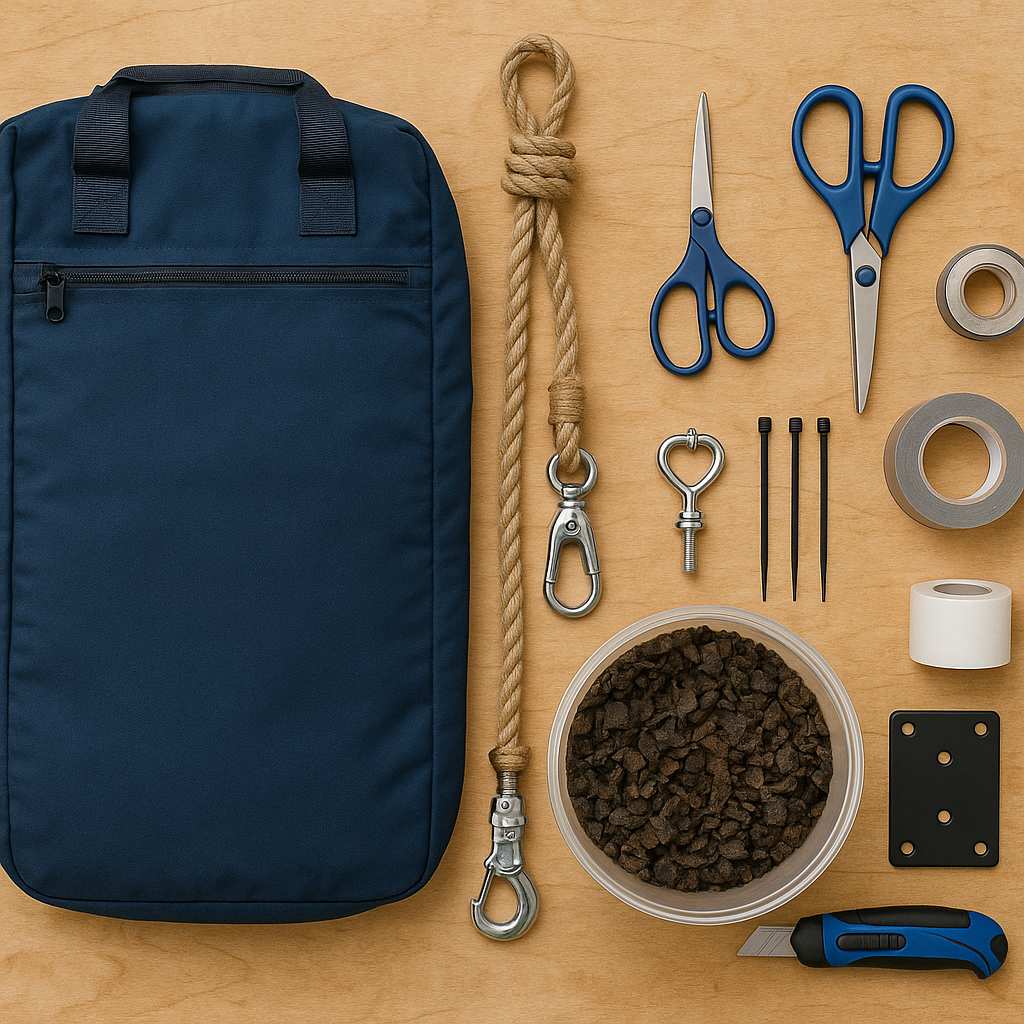
🧰 What You Need to Build a DIY Punching Bag
This version focuses on budget-friendly materials that you can find almost anywhere.
Bag Shell Options
Choose ONE:
An old duffel bag
A military-style canvas bag
A thick vinyl laundry bag
A used punching bag shell (Facebook Marketplace often has them empty)
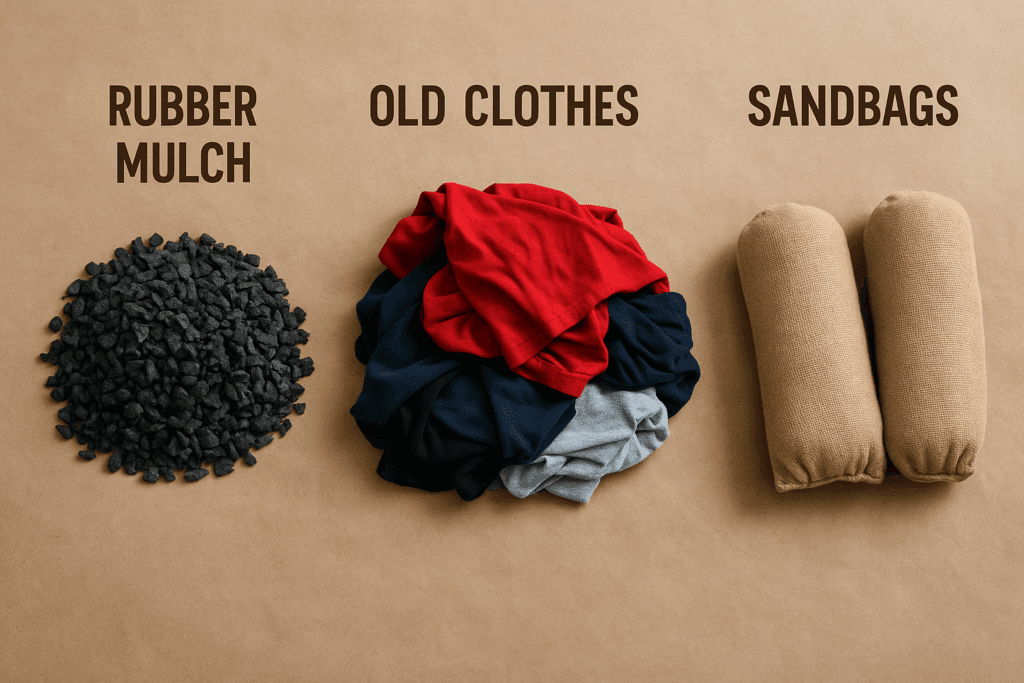
Filling Options
You can mix and match:
Old clothes or towels (free)
Rubber mulch
Sand (use sparingly!)
Fabric scraps
Sawdust (not too packed)
Hardware
Heavy-duty rope
Carabiners
Swivel hook or eye bolt
Ceiling mount plate or 2×4 wood support
Duct tape for reinforcement
Zip ties for finishing the top
Useful Tools
Box cutter or utility knife
Scissors
Drill (or Dremel tool for smoothing holes — internal link)
Measuring tape
Bucket (for sand or mulch)
Optional Tools That Help
Wood glue (internal link) is being used to reinforce a simple wooden hanger
Liquid Nails vs. Wood Glue guide (internal link) if you build a DIY support beam
Router alternatives (internal link) for shaping wooden mounting blocks
DIY pallet furniture article (internal link) if you want to develop a complete pallet workout stand
🧵 How to Prep the Bag Shell
The bag “shell” is the outer layer that holds everything inside. The stronger it is, the longer your punching bag will last.
1. Reinforce the bottom
Turn the bag upside down and reinforce the bottom seam using:
Duct tape
Extra fabric scraps
Stitching if your bag is older
You want a rounded bottom, not a flat one. A rounded bottom lets the filler settle naturally.
2. Add drainage or air holes (optional)
Punching bags get sweaty over time. Use a drill or a Dremel tool to create 4–6 small holes around the bottom for ventilation.
3. Strengthen the top closure
Most homemade punching bags fail at the top first, not the bottom.
Do this:
Fold the top inward
Add 2–3 layers of duct tape
Wrap zip ties tightly around the reinforced area
This gives the bag a rigid structure that supports the rope.
🪣 Choosing the Right Filler (This Matters More Than the Shell)
What you fill the bag with controls weight, impact feel, and safety.
Here’s what I’ve tested personally:
Clothes & Fabric Scraps — Best for Beginners
Soft
Cheap
Easy to adjust weight
Won’t hurt your hands
Great for kids, beginners, or cardio boxing.
Rubber Mulch — Best Overall
Rubber mulch feels almost identical to a real punching bag:
✔ Doesn’t clump ✔ Doesn’t get rock-hard ✔ Adds serious weight ✔ Absorbs impact well
I usually fill about 60% with rubber mulch and 40% with cloth. This gives a “dense but forgiving” feel.
Sand — Use with Caution
Sand makes bags very heavy, but:
❌ it settles to the bottom ❌ creates a rock-hard base ❌ increases wrist injury risk ❌ puts stress on ceiling mounts
If you use sand, keep it under 20% of the total filler and seal it inside small bags so it doesn’t migrate.
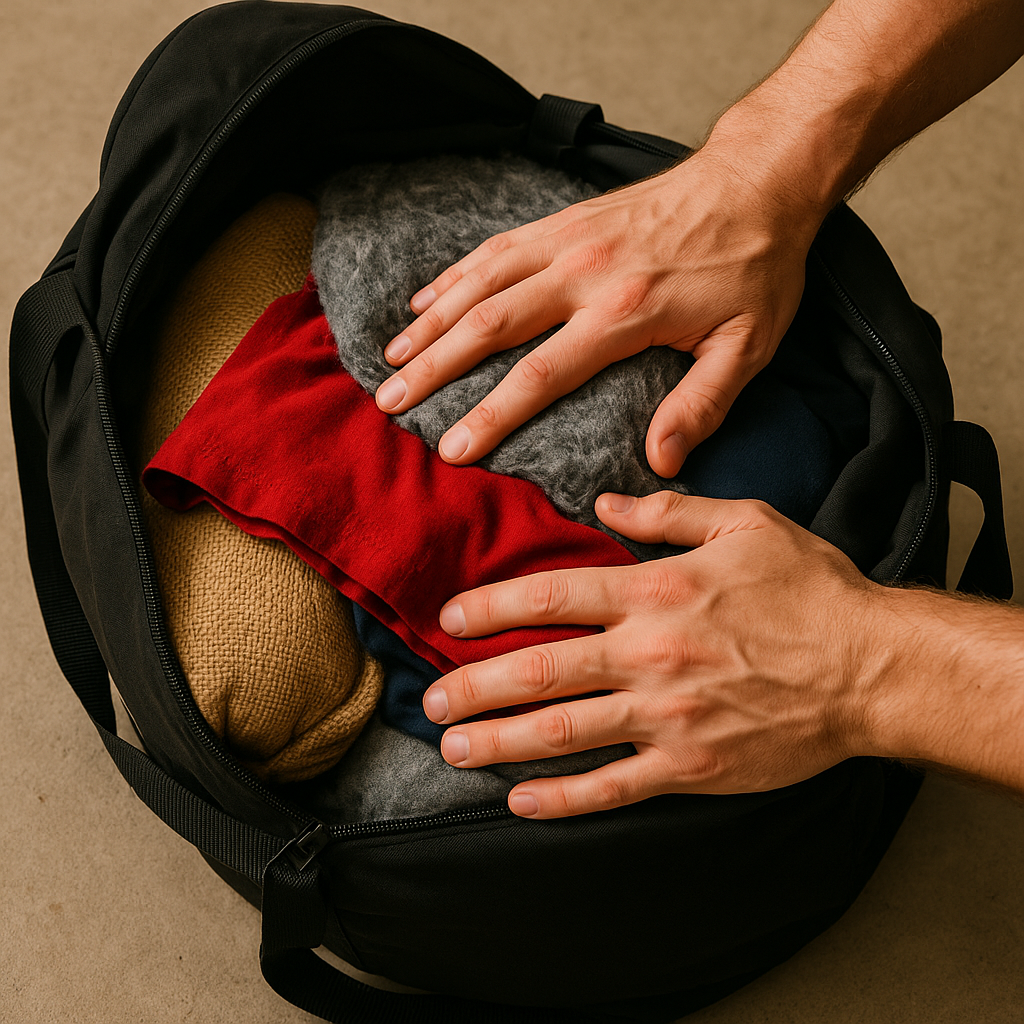
🥊 Step-by-Step: How to Make a DIY Punching Bag
This process produces a bag that weighs 40–80 lbs, depending on filler.
Step 1: Create a Base Layer
Start with something soft at the bottom:
Towels
Fabric scraps
Old T-shirts
This prevents the bottom from forming a hard lump as the filler settles.
Step 2: Fill in 4–6 Inch Layers
The trick to even weight is layering.
Add:
4–6 inches of filler
Press down with your arm
Add another layer
Repeat
Keep checking that the shape stays cylindrical rather than bulging in weird spots.
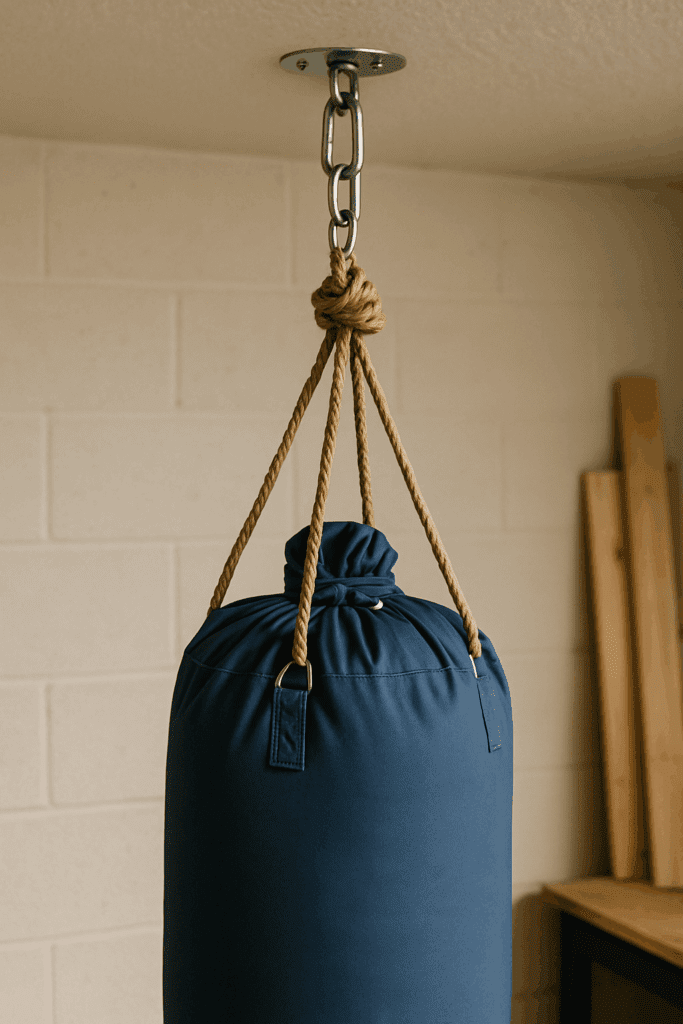
Run rope around the top of the bag and create 3–4 connection points that meet at a central knot.
Pros: Easy, cheap Cons: Can twist over time
B) Mounting Plate + Carabiner (Best Stability)
Use:
Ceiling mount plate
A swivel
One heavy carabiner
This prevents twisting and reduces stress on your ceiling or support beam.
If you’re building a wooden support block for the mount, refer to:
Router alternatives (internal link) for smoothing edges
Wood glue and Liquid Nails vs Wood Glue (internal links) for reinforcing the wooden mounting plate
How to Test Your DIY Punching Bag for Comfort, Weight & Safety
Before you start throwing full-power punches, it’s worth taking ten minutes to test your new punching bag. A store-bought bag comes pre-balanced and pressure-tested, but a DIY version needs a little fine-tuning to get the feel just right. The first time I built mine, the top felt great while the bottom turned into a concrete block because the filler settled unevenly. A quick test would’ve saved me an entire weekend of re-packing it.
Start by pressing your palm into different areas of the bag. You want consistent firmness from top to bottom with a slight give—similar to a firm couch cushion. If the bottom feels rock-hard, shake the bag or remove some sand. If the middle feels empty or soft, add more cloth or mulch until the density matches the rest of the bag.
Once the firmness looks good, put on gloves and throw ten or twenty light jabs, crosses, and hooks. This isn’t about power—it’s about checking how your knuckles, wrists, and elbows feel on impact. If punches feel sharp or uncomfortable, loosen the filler or insert a thin foam sheet near the surface to soften it.
Finally, test the mounting point. Gently tug down on the rope or carabiner, then swing the bag lightly side to side. Listen for creaks, shifting, or cracking in the ceiling joist or wooden mounting block. A stable punching bag should swing smoothly without stressing the mount. Once everything feels balanced and safe, you can gradually increase the power until the bag feels natural and secure for everyday training.
🛠 Where to Hang Your Punching Bag (And How to Keep It Safe)
This is one part you must get right.
Good Locations
✔ Ceiling joists in a garage ✔ Basement beam ✔ Outdoor patio beam ✔ Custom stand built from 2×4s or pallets
(Not joking—pallet stands are sturdy and cheap. See your DIY pallet furniture guide for sourcing and prepping pallets safely.)
The more sand you add, the heavier it becomes. Rubber mulch gives weight without the “brick bottom.”
💸 Cost Breakdown — How Much You’ll Spend
Item
Cost
Old bag or duffel
$0–$10
Rubber mulch
$5–$10
Sand
$3–$5
Rope
$4
Carabiner + swivel
$6–$10
Mounting plate
$8–$12
Duct tape / zip ties
$4
Total: $25–$40 (Compared to $150–$300 for a store-bought bag.)
🛑 Important Safety Tips
Wear gloves to protect your wrists
Don’t fill the bag with 100% sand
Check your mounting hardware monthly
Please keep it away from kids who might swing on it
Avoid hitting with bare knuckles until you test firmness
🙋 FAQ Section
How long does a homemade punching bag last?
Mine lasted about two years before I rebuilt it. A reinforced top dramatically extends lifespan.
Can I use water inside the bag?
No—water leaks, breeds mold, and damages the shell.
Is a DIY punching bag safe for daily workouts?
Yes, as long as you choose soft filler and secure mounting hardware.
Can I kick a homemade punching bag?
Yes, but reinforce the bottom and use softer fillers to prevent bruising.
Maintenance Tips to Keep Your DIY Punching Bag in Great Shape
A well-built homemade punching bag can last several years with simple maintenance. The most common issue you’ll face is filler settling over time, mainly if your bag contains sand or rubber mulch. Every couple of weeks, hold the bag by the top and give it a firm shake, or roll it on the ground to redistribute the material. If the bottom becomes too dense, unzip or open the top and loosen the filler by hand.
Your mounting hardware also needs attention. Check the swivel, carabiner, and rope monthly for signs of stress, thinning, or metal fatigue. If your bag hangs from a wooden support beam or a DIY block, inspect for cracks, loose screws, or compression marks. Tightening screws and re-knotting the rope occasionally keeps the whole setup secure.
Cleaning your bag helps extend its lifespan, too. Sweat, dust, and garage humidity slowly break down vinyl, fabric, and stitching. Wipe the exterior with mild soap and warm water, and avoid harsh chemical cleaners that can weaken the material. Let the bag dry thoroughly before the next workout so moisture doesn’t creep into the filler.
A great benefit of a DIY punching bag is that it’s completely modular—you can refresh or rebuild sections without replacing the whole thing. If the bag starts feeling too light, add more cloth or mulch. If it’s too stiff, pull out some sand or fluff the inside. These minor tune-ups, performed every few months, keep your punching bag comfortable, safe, and ready for heavy use without the cost of a commercial replacement.
🌟 Final Thoughts
Building your own punching bag is one of those DIY projects that feels incredibly satisfying because you use it every day. I’ve rebuilt mine a few times, and each version taught me something new—mostly about fillers, layering, and making the top as strong as possible.
If you’re building a small home gym, a DIY bag is the perfect starter project: cheap, customizable, and surprisingly durable when done right.
Related Posts:
How to Install Mobile Home Skirting: A Simple DIY Guide by Admin March 17, 2025 DIY Skirting is an essential feature for mobile homes, offering protection, insulation, and a polished appearance. Skirting is a valuable investment whether you're looking for an…