This post contains affiliate links. If you buy through them, we may earn a small commission at no extra cost to you.
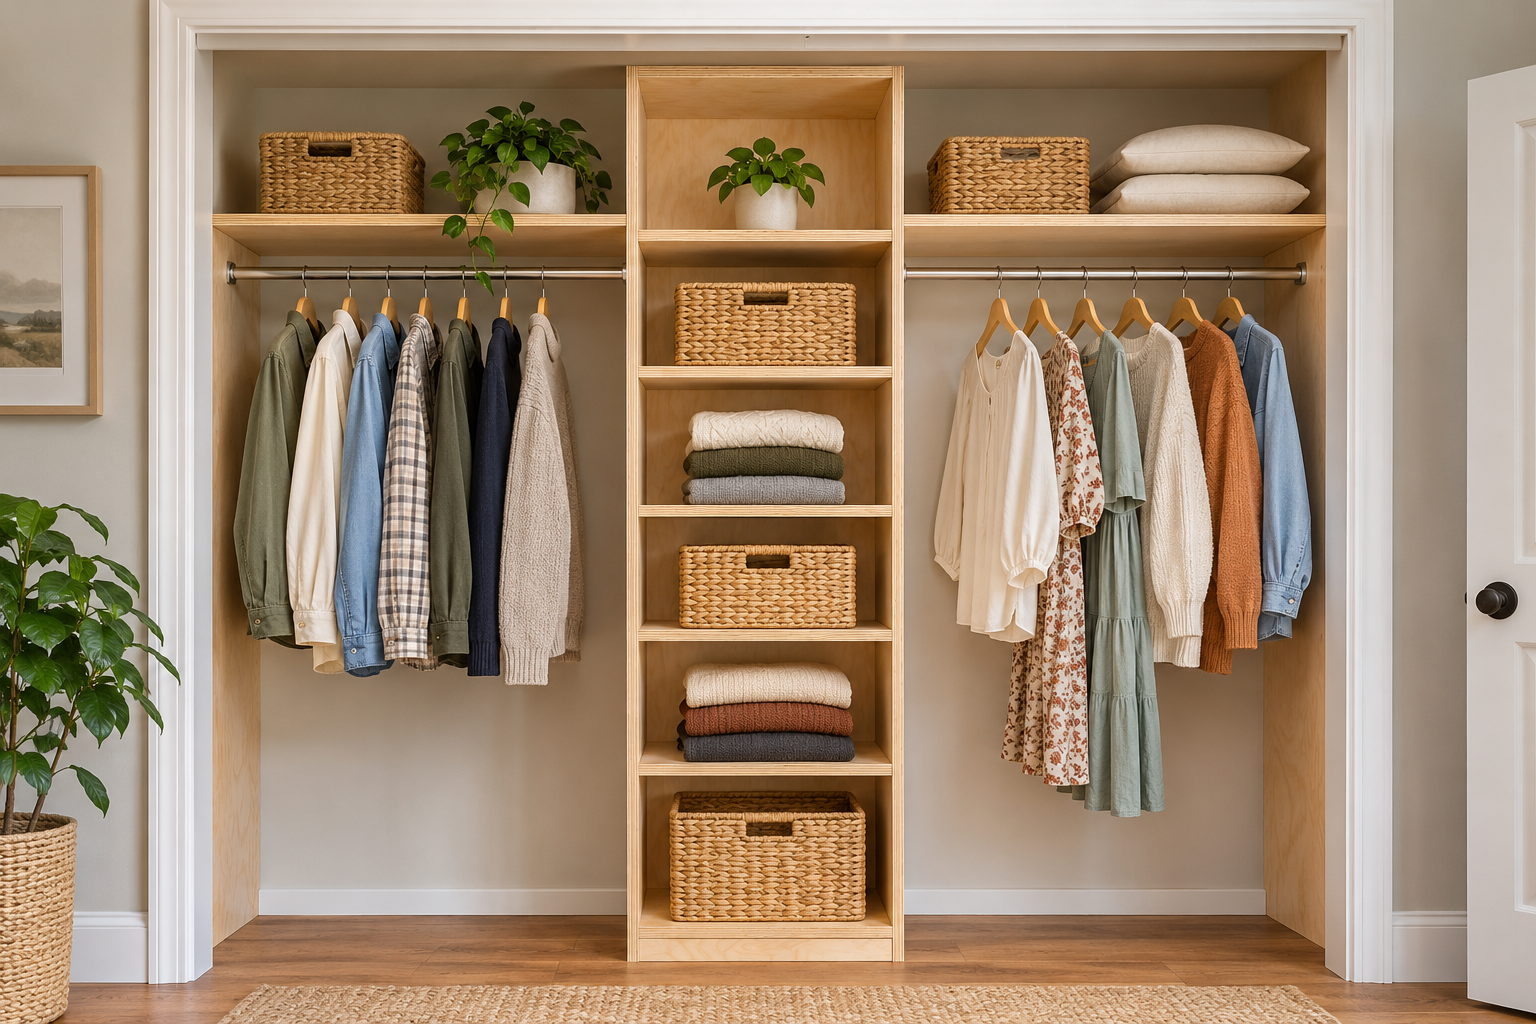
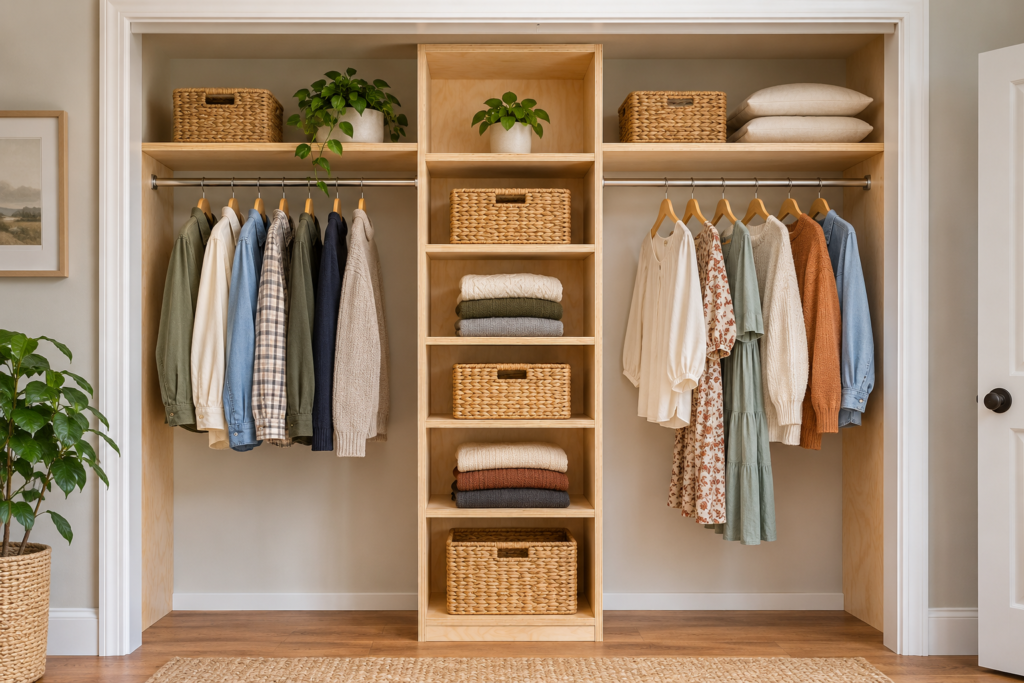
You can build a DIY plywood closet organizer from two 4×8 sheets of 3/4-inch sanded plywood: a 24-inch-wide, 84-inch-tall center tower with six shelves, plus two side bays with a top shelf and hanging rods. Sheet 1 makes most of the tower. Sheet 2 makes the last two adjustable shelves, the side shelves and all the support cleats. The plan fits a reach-in closet about 8 feet wide.
Plywood: 2 sheets of 3/4″ sanded plywood, BC sanded pine for paint or birch for a smoother finish
Tower: 24″ W × 14″ D × 84″ H, 6 shelves (3 fixed, 3 adjustable)
Side bays: two 36″ bays, each with a 12″-deep top shelf and rods
Back panel: optional. The tower must be built square and screwed into wall studs either way.
Measure your plywood before cutting shelves. It is often not a true 3/4″.
The Measurement That Changes Every Shelf
The shelves fit between the tower sides, so their length depends on how thick your plywood really is. Plywood sold as 3/4″ often measures about 23/32″, but the actual thickness varies by manufacturer and panel type. APA’s sanded plywood literature lists 23/32 as a separate thickness category from 3/4, and some sheets run thinner still: one big-box “cabinet grade” panel lists its actual thickness as 0.688″. The dimensions in this plan assume 23/32″ plywood, so measure your own sheets before you cut any shelf.
Test before you cut: Measure the sheet edge in three spots with a tape or caliper. If your sheet measures differently from 23/32″, use the right row above.
Closet Organizer Cut List (Full Parts Table)
The cut list assumes an 8-ft-wide closet, a 1/8″ saw blade and 23/32″ plywood.
Part
Qty
Size (W × L)
Sheet
Tower sides
2
14″ × 84″
1
Top, bottom, fixed middle shelf
3
14″ × 22-9/16″
1
Adjustable shelves
3
14″ × 22-7/16″
1 (1), 2 (2)
Toe kick
1
3-1/2″ × 22-9/16″
1
Back rails (top and bottom)
2
3-1/2″ × 22-9/16″
1
Bay top shelves
2
12″ × 35-3/4″
2
Wall cleats (back of bay shelves)
2
3-1/2″ × 35-3/4″
2
Shelf end cleats
4
3-1/2″ × 11-1/4″
2
Rod cleats
6
3-1/2″ × 14″
2
Different closet width? Bay shelf length = (closet width − 24″) ÷ 2 − 1/4″. Cut the wall cleats to the same length.
How to Cut Sheet 1 (Most of the Tower)
Rip three 14″ strips along the 8-ft length. You’ll have a strip about 5-1/2″ wide left over.
Strip A: cut one tower side at 84″.
Strip B: cut the second tower side at 84″.
Strip C: cut the top, bottom and fixed middle shelf at 22-9/16″ and one adjustable shelf at 22-7/16″.
Leftover strip: rip it to 3-1/2″ and cut the toe kick and both back rails at 22-9/16″.
How to Cut Sheet 2 (Shelves, Cleats and Spares)
Rip one 14″ strip. Cut two adjustable shelves at 22-7/16″. From the 50″ offcut, rip a 3-1/2″ piece and cut two end cleats at 11-1/4″.
Rip one 12″ strip and cut two bay shelves at 35-3/4″.
Rip one 3-1/2″ strip and cut two wall cleats at 35-3/4″ and two end cleats at 11-1/4″.
Rip a second 3-1/2″ strip and cut six rod cleats at 14″.
What’s left: a strip about 14-1/2″ × 8 ft, plus smaller offcuts. That’s enough for a second shelf in each bay (a shoe shelf, for example) or a stiffening strip on each bay shelf.
Sheet math: A tower 16″ deep instead of 14″ won’t fit three strips on one sheet, and you’d end up buying a third sheet. If you want a deeper tower, redo the layout before you buy.
Assembly, Step by Step
Build the Tower Box Square
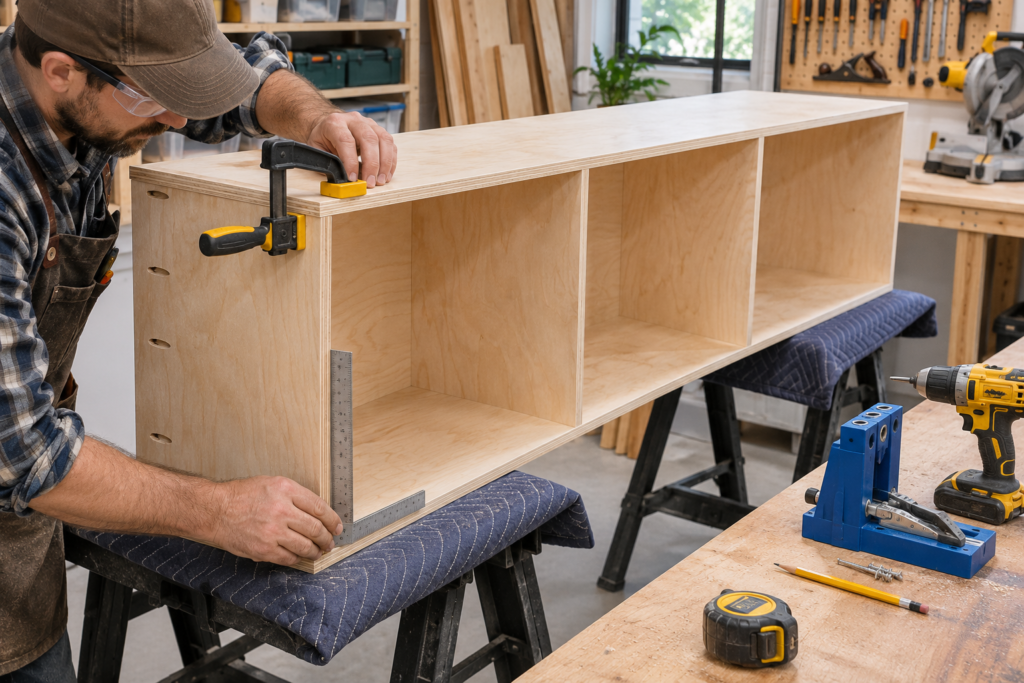
Drill pocket holes on the hidden faces of the top, bottom and middle shelf. Glue and screw them between the sides:
Bottom shelf: sits on the toe kick, with its underside 3-1/2″ off the floor
Fixed middle shelf: top face about 42″ from the floor
Top shelf: flush with the top of the sides
Glue and screw the back rails between the sides, one under the top shelf and one under the bottom shelf.
Check that it’s square before the glue sets. Measure the box corner to corner both ways across the front. If the two diagonals don’t match, push on the corner with the longer diagonal until they do, then clamp it and let the glue dry.
The three glued fixed shelves and the two rails stiffen the box, but on their own they don’t fully stop an 84″ tower from leaning sideways. A glued-and-nailed 1/4″ plywood back makes the box stiffer, but it costs another sheet. With or without a back, the tower still has to be screwed into wall studs, because a back panel stiffens the box but does nothing to stop it from tipping over.
Use a shelf pin jig to drill two rows on each side, about 2″ in from the front and back edges, in both sections of the tower. Index the jig off the same reference edge every time so the shelves sit level.
Anchor It to the Wall
Stand the tower centered on the back wall and drive screws through both back rails into the studs. With wall studs at the usual 16″ spacing, a 24″ tower will usually reach at least one stud, and often two. The CPSC’s Anchor It! campaign recommends anchoring furniture with shelves to the wall, and an 84″-tall tower loaded with clothes fits that advice.
Hang the Side Shelves and Rods
Bay shelves: screw a wall cleat into the studs along the back wall with its top at 83-1/4″, so the shelf top lines up with the tower top at 84″. Add end cleats on the tower side and the closet side wall, set the shelf on all three, and screw it down.
Rod setback: center each rod socket about 12″ from the back wall. That’s a common starting point that lets hangers swing without rubbing the wall. It’s why the rod cleats are 14″ long: the socket needs solid wood all the way around it.
Clearance under the shelf: put the upper rod about 76–78″ above the floor as a starting point. Before you install the sockets, hold a scrap of rod in place and test your own hangers under the shelf. They should lift on and off without hitting it.
Double-hang bay: set the upper rod first. Then hang your longest shirt on it, measure to the hem, and put the lower rod a few inches below that. That usually lands it somewhere around 36–40″. The lower rod also needs enough room underneath for whatever hangs on it. If the shirts don’t fit both ways, a long-hang bay is the better choice.
Long-hang bay: hang your longest dress or coat, measure from the hanger hook to the hem, and add a few inches of floor clearance.
Secure the sockets: screw the rod cleats into wall studs on the side walls, and glue and screw them to the tower sides. Fasten the sockets to the cleats, not straight into drywall. Follow the rod and socket maker’s load rating and installation instructions.
If a side wall has no stud where you need a cleat, use anchors rated for the load. A rod full of winter coats is heavy.
Which Plywood to Buy (and What to Skip)
BC sanded pine plywood: usually the cheapest panel smooth enough to paint. Check local pricing.
Birch or maple plywood: smoother face and fewer surprises under paint, but it generally costs more per sheet. Our cabinet plywood guide compares the two.
Skip sheathing (CDX): the face is rough and splintery and will snag clothes.
Exterior-rated glue isn’t needed in a dry indoor closet. It’s fine if that’s what the store has, but don’t pay extra for it.
Wood glue, 1-1/4″ pocket screws, 2-1/2″ to 3″ screws for the studs, primer and paint
6 Mistakes That Wreck a Plywood Closet Organizer
Cutting shelves to 22-1/2″ without measuring the plywood. If the sheet is 23/32″, every shelf comes out 1/16″ short and leaves gaps you’ll be caulking.
Cutting adjustable shelves the same length as fixed ones. A full-length shelf binds against the sides, scrapes the paint and won’t move once the paint dries.
Skipping the diagonal check. A tower glued up out of square stays that way. The shelves won’t sit flat, and the tower won’t sit tight to the wall.
Not anchoring the tower. A tall, narrow box with heavy shelves can tip forward or lean sideways when someone pulls on it. A back panel doesn’t change that.
Mounting the upper rod too close to the shelf. Hangers catch on the shelf every time you take a shirt down. Test with your own hangers before drilling.
Painting before drilling the shelf pin holes. The bit tears out the paint around every hole. Drill first, then prime and paint.
Baseboard warning: The tower won’t sit flat against the wall over a baseboard. Either remove the baseboard behind it, or notch the back bottom corner of both sides and move the lower rail just above the bottom shelf.
Regret check: Most people wish they’d built the tower 2″ narrower or wider after the rods were up. Tape the tower’s outline on the closet wall and hang your clothes in the bays for a day before you cut anything.
When This Plan Isn’t the Right Fit
Closets under about 6 ft wide: two 36″ bays won’t fit. Use one bay, or make the tower narrower.
Walk-in closets: an 84″ tower against an open wall still works, but you’ll want more towers rather than wider bays.
Damp spaces (an exterior wall closet with condensation, basements): fix the moisture first. Plywood shelves aren’t the problem there.
Long, heavy bay shelves: a 36″ span holding folded sweaters is fine with a full-length wall cleat. For heavy boxes, add a stiffening strip on the front edge from your leftovers, or shorten the span. See plywood thickness vs. strength for why support spacing matters more than thickness.
FAQ
How many sheets of plywood do I need for a closet organizer? Two 4×8 sheets of 3/4″ plywood cover a 24″-wide tower plus two side bays in an 8-ft closet, with enough left over for an extra shelf in each bay.
Can I use 1/2-inch plywood for closet shelves? For short spans holding light items, it can work. For the tower sides and any shelf longer than about 2 ft that holds folded clothes, 3/4″ holds up better and gives screws more to bite into.
Is birch or pine plywood better for a closet organizer? Both work. Sanded pine usually costs less. Birch has a smoother face that takes paint with less sanding.
How deep should closet organizer shelves be? This plan uses 14″ in the tower and 12″ for the shelves above the rods. That leaves room for hanging clothes in a standard 24″-deep reach-in closet.
Do I need a back panel on the tower? No, as long as the box is built square with glued joints and both back rails are screwed into wall studs. A glued-and-nailed 1/4″ plywood back makes the tower stiffer, but it doesn’t replace anchoring the tower to the wall.
What thickness is 3/4-inch plywood really? It varies. Many sheets measure about 23/32″, and some measure thinner. Always measure the sheet you buy before you cut shelves.
Bottom Line
Two sheets of 3/4″ sanded plywood make a complete closet organizer: Sheet 1 for most of the tower, Sheet 2 for the remaining shelves and cleats. Measure the actual thickness before cutting any shelf, check that the box is square before the glue sets, and screw the tower into the studs.
Related Posts:
DIY Plywood Coffee Table: Full Cost and Cut List by Admin November 2, 2026 DIY This post contains affiliate links. As an Amazon Associate, theplywood.com earns from qualifying purchases at no extra cost to you. A 48" x 24" x…
Cheap DIY Garage Storage Shelves: 2x4 Plan and Cut List by Admin November 2, 2026 DIY This post contains affiliate links. As an Amazon Associate, theplywood.com earns from qualifying purchases. A freestanding 2x4 frame with plywood decks is often the lowest-cost…