I was at a friend’s off-grid homestead a few summers back when I watched them pull a bubbling pizza from a dome of sculpted earth. That was my first real introduction to the magic of a cob oven. No buttons, no electricity—just fire, clay, and one of the best meals I’d had all year. The very next week, I started building my own.
This guide is for anyone curious about creating a cob oven at home. Whether you’re a backyard baker, a pizza aficionado, or just someone who likes building things with their hands, I’ll walk you through the full process, share the lessons I learned, and even point out a few tools I wish I had from the start.
What Is a Cob Oven?
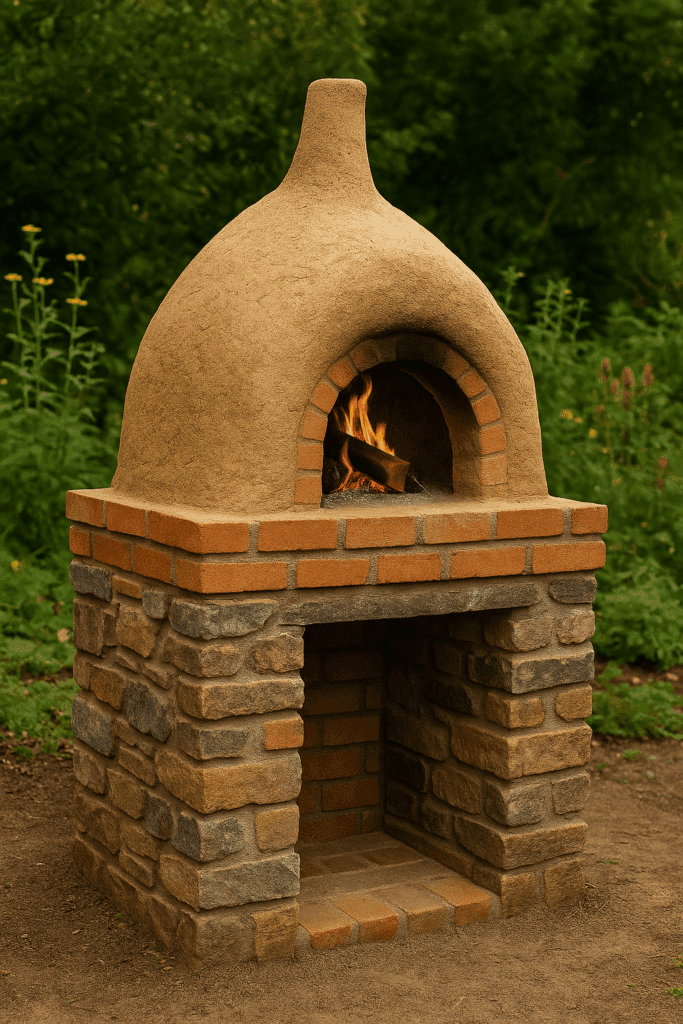
A cob oven is a traditional wood-fired oven made from a mix of clay, sand, straw, and water—a material called “cob.” This thick-walled dome traps and stores heat, making it perfect for baking bread, roasting vegetables, or cooking Neapolitan-style pizza at 700°F. Cob ovens date back centuries and are still used today in many cultures.
These ovens originated in ancient Mesopotamia and have been uncovered in archaeological digs across Europe, Asia, and North Africa. Early communities used them to bake daily bread, roast meats, and even dry fruits. Their appeal hasn’t faded—cob ovens are now prized for their rustic charm, low environmental impact, and culinary versatility.
The best part? You don’t need to be a professional mason or builder. If you can mix mud and pile it into a dome, you’re already halfway there.
Why Build a Cob Oven?
Wood-fired flavor: There’s no going back once you’ve had fire-baked bread.
Eco-friendly: Made with natural, local, and low-cost materials.
Heat efficiency: Stores heat for hours after the fire goes out.
Backyard showpiece: A great conversation starter and centerpiece for outdoor gatherings.
Satisfying DIY project: Something primal and peaceful about working with earth and fire.
Off-grid compatible: No electricity or gas required.
Great for slow cooking: Perfect for stews, slow roasts, and artisan-style meals.
Where to Find Your Materials
You’d be surprised how many of the materials you need are already in your backyard. Here’s where to look:
Clay: Dig a small hole—if it’s sticky and holds shape, it might be clay. Alternatively, purchase fire clay online or at garden centers.
Sand: Landscaping supply stores carry washed masonry sand. You’ll need this for both the structure and the dome mold.
Straw: Animal feed stores sell straw bales for cheap. Make sure it’s clean and dry.
Reclaimed materials: Check Craigslist or building reuse centers for free or discounted bricks and stone.
Materials & Tools You’ll Need
Natural Materials:
Clay (you can use fire clay or dig it from your yard)
Pick a dry, level spot away from flammable structures. Shade is a bonus, but make sure it has airflow. Later, consider building a small shelter to protect the oven from rain.
Step 2: Build the Base
Create a solid base using reclaimed brick, concrete blocks, or stone. It should be waist-high so you won’t have to bend every time you use the oven. Fill the center with gravel or broken bricks for drainage.
Step 3: Create the Hearth
Lay a layer of firebricks on top of a bed of sand. This is your baking surface. Regular bricks won’t work—they may crack from the heat.
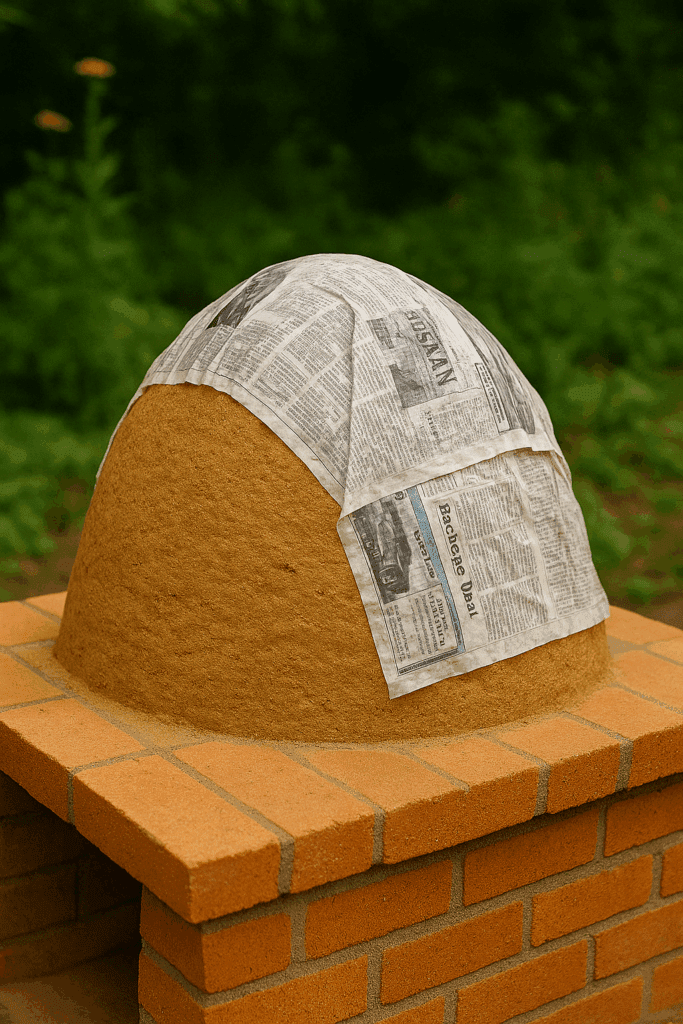
Step 4: Shape the Sand Dome
Pack damp sand into a dome roughly the size of the inner cooking chamber. Cover it with wet newspaper to prevent the cob from sticking.
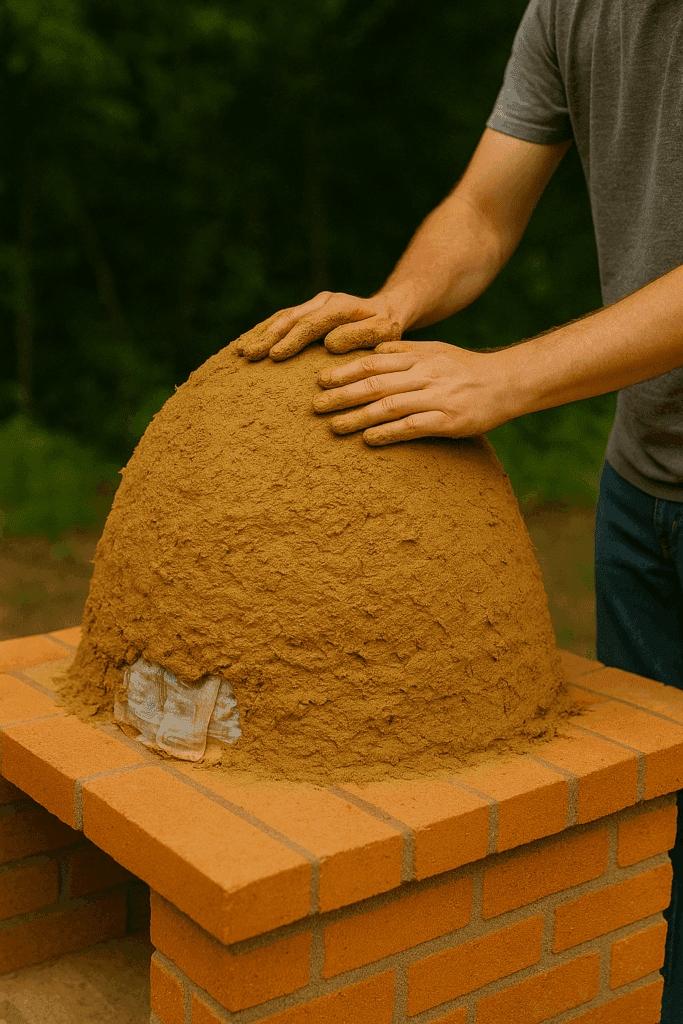
On a tarp, mix clay and sand (about 1 part clay to 2-3 parts sand) with water until it holds together when you form a ball. Add straw until it becomes fibrous and strong.
Pack the cob around the sand dome to a thickness of about 4 inches. Take your time. The tighter and smoother the surface, the better it will bake.
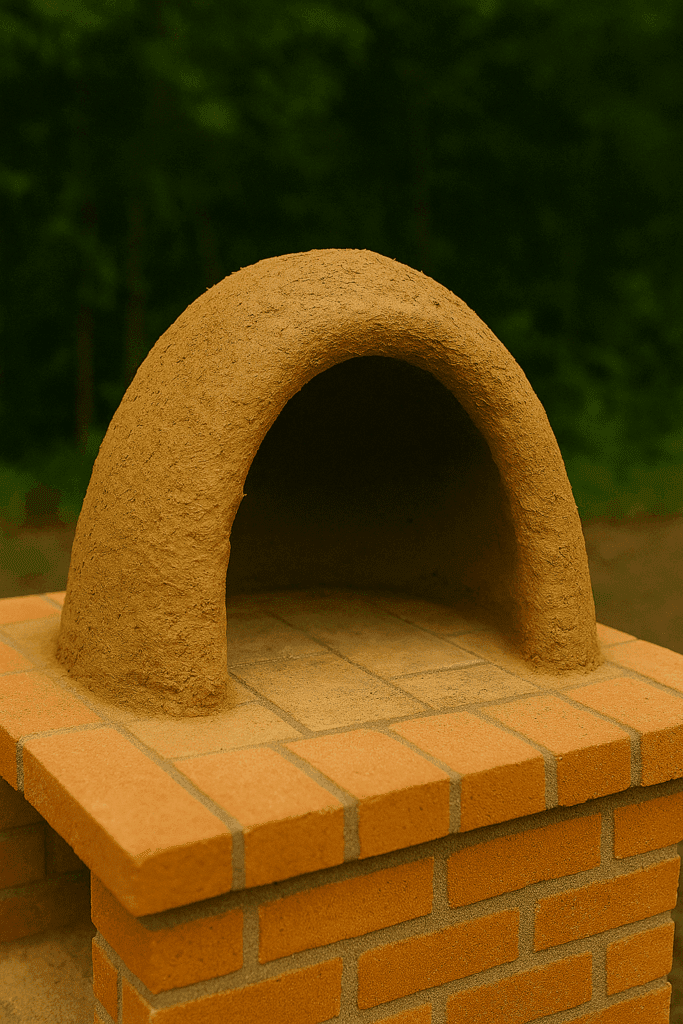
Step 6: Let It Dry & Hollow Out
Let the cob dry for 4-7 days, depending on the weather. Then gently scoop out the sand dome to reveal the hollow interior.
Step 7: Add Insulation Layer
Apply a second, looser layer made with cob, sawdust, or perlite. This keeps the heat in for longer bakes, such as bread and roasts.
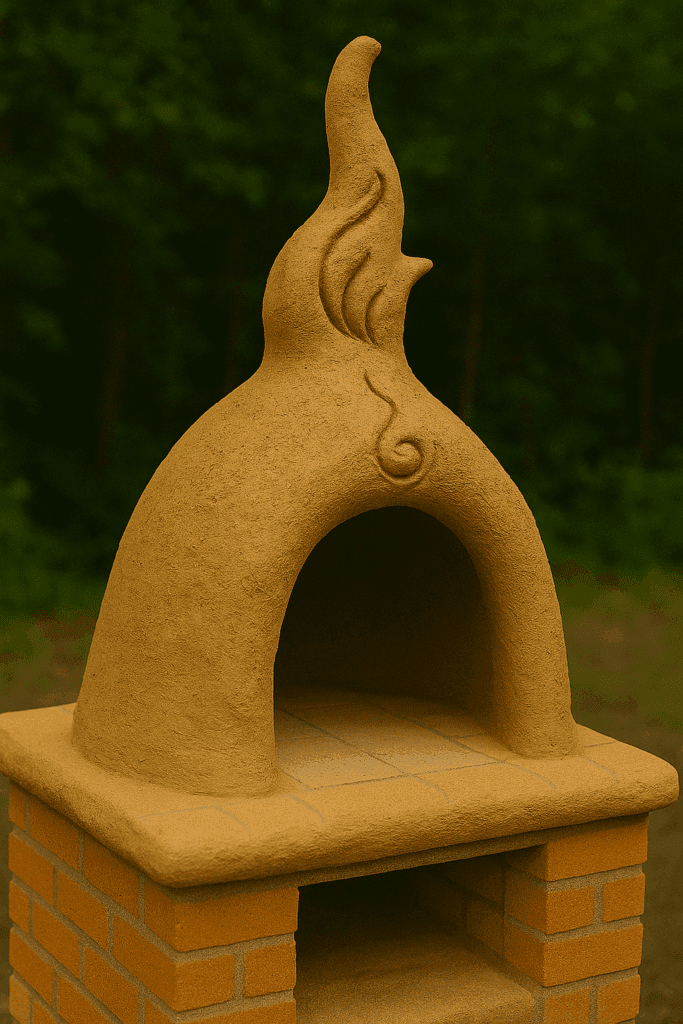
Step 8: Finishing Touches
Smooth the surface or carve designs into it. Some folks apply a final plaster coat made with lime, clay slip, or pigmented finish. Don’t forget a chimney opening or vent in the door.
Most people don’t bother making a mold for the door, but you can simplify the process by creating a mold out of thin plywood over a heavier structure. This way, once the cob has dried, you won’t have a problem cutting out the doorway.
Firing Up Your Oven
Start with small kindling and dry hardwood. Build the fire slowly over 1-2 hours. The oven is ready when the inside turns white and there’s no more black soot.
Q: What’s the best wood to burn? Dry hardwoods like oak, ash, or fruit woods. Avoid pine or treated lumber.
Final Thoughts
There’s something ancient and deeply fulfilling about cooking with fire in something you made from the earth. A cob oven isn’t just a tool—it’s a gathering place, a weekend project, and a lifestyle shift all in one. From shaping muddy walls to slicing your first fire-baked loaf, every step of this project connects you to food more meaningfully.
And when you pull that first bubbling pizza out of the oven, you’ll know the work was worth it.
Related Posts:
Drying Wood in Oven: A Complete DIY Guide by Admin September 23, 2025 More About Most people don’t give a second thought to drying wood in an oven until something goes wrong. I didn’t either. I slapped together a pine…
Oven Base Cabinet: A Real DIY & Buying Guide by Admin September 23, 2025 Installing Why I Care About Oven Base Cabinets When I first decided to redo my kitchen, I figured cabinets were just boxes with doors. Easy, right?…
How to Build a Wood Pulpit: A Complete Guide by Admin May 8, 2025 DIY Step into any church, and your eyes are often drawn to one thing—the pulpit. More than furniture, it’s the place where powerful words are shared…