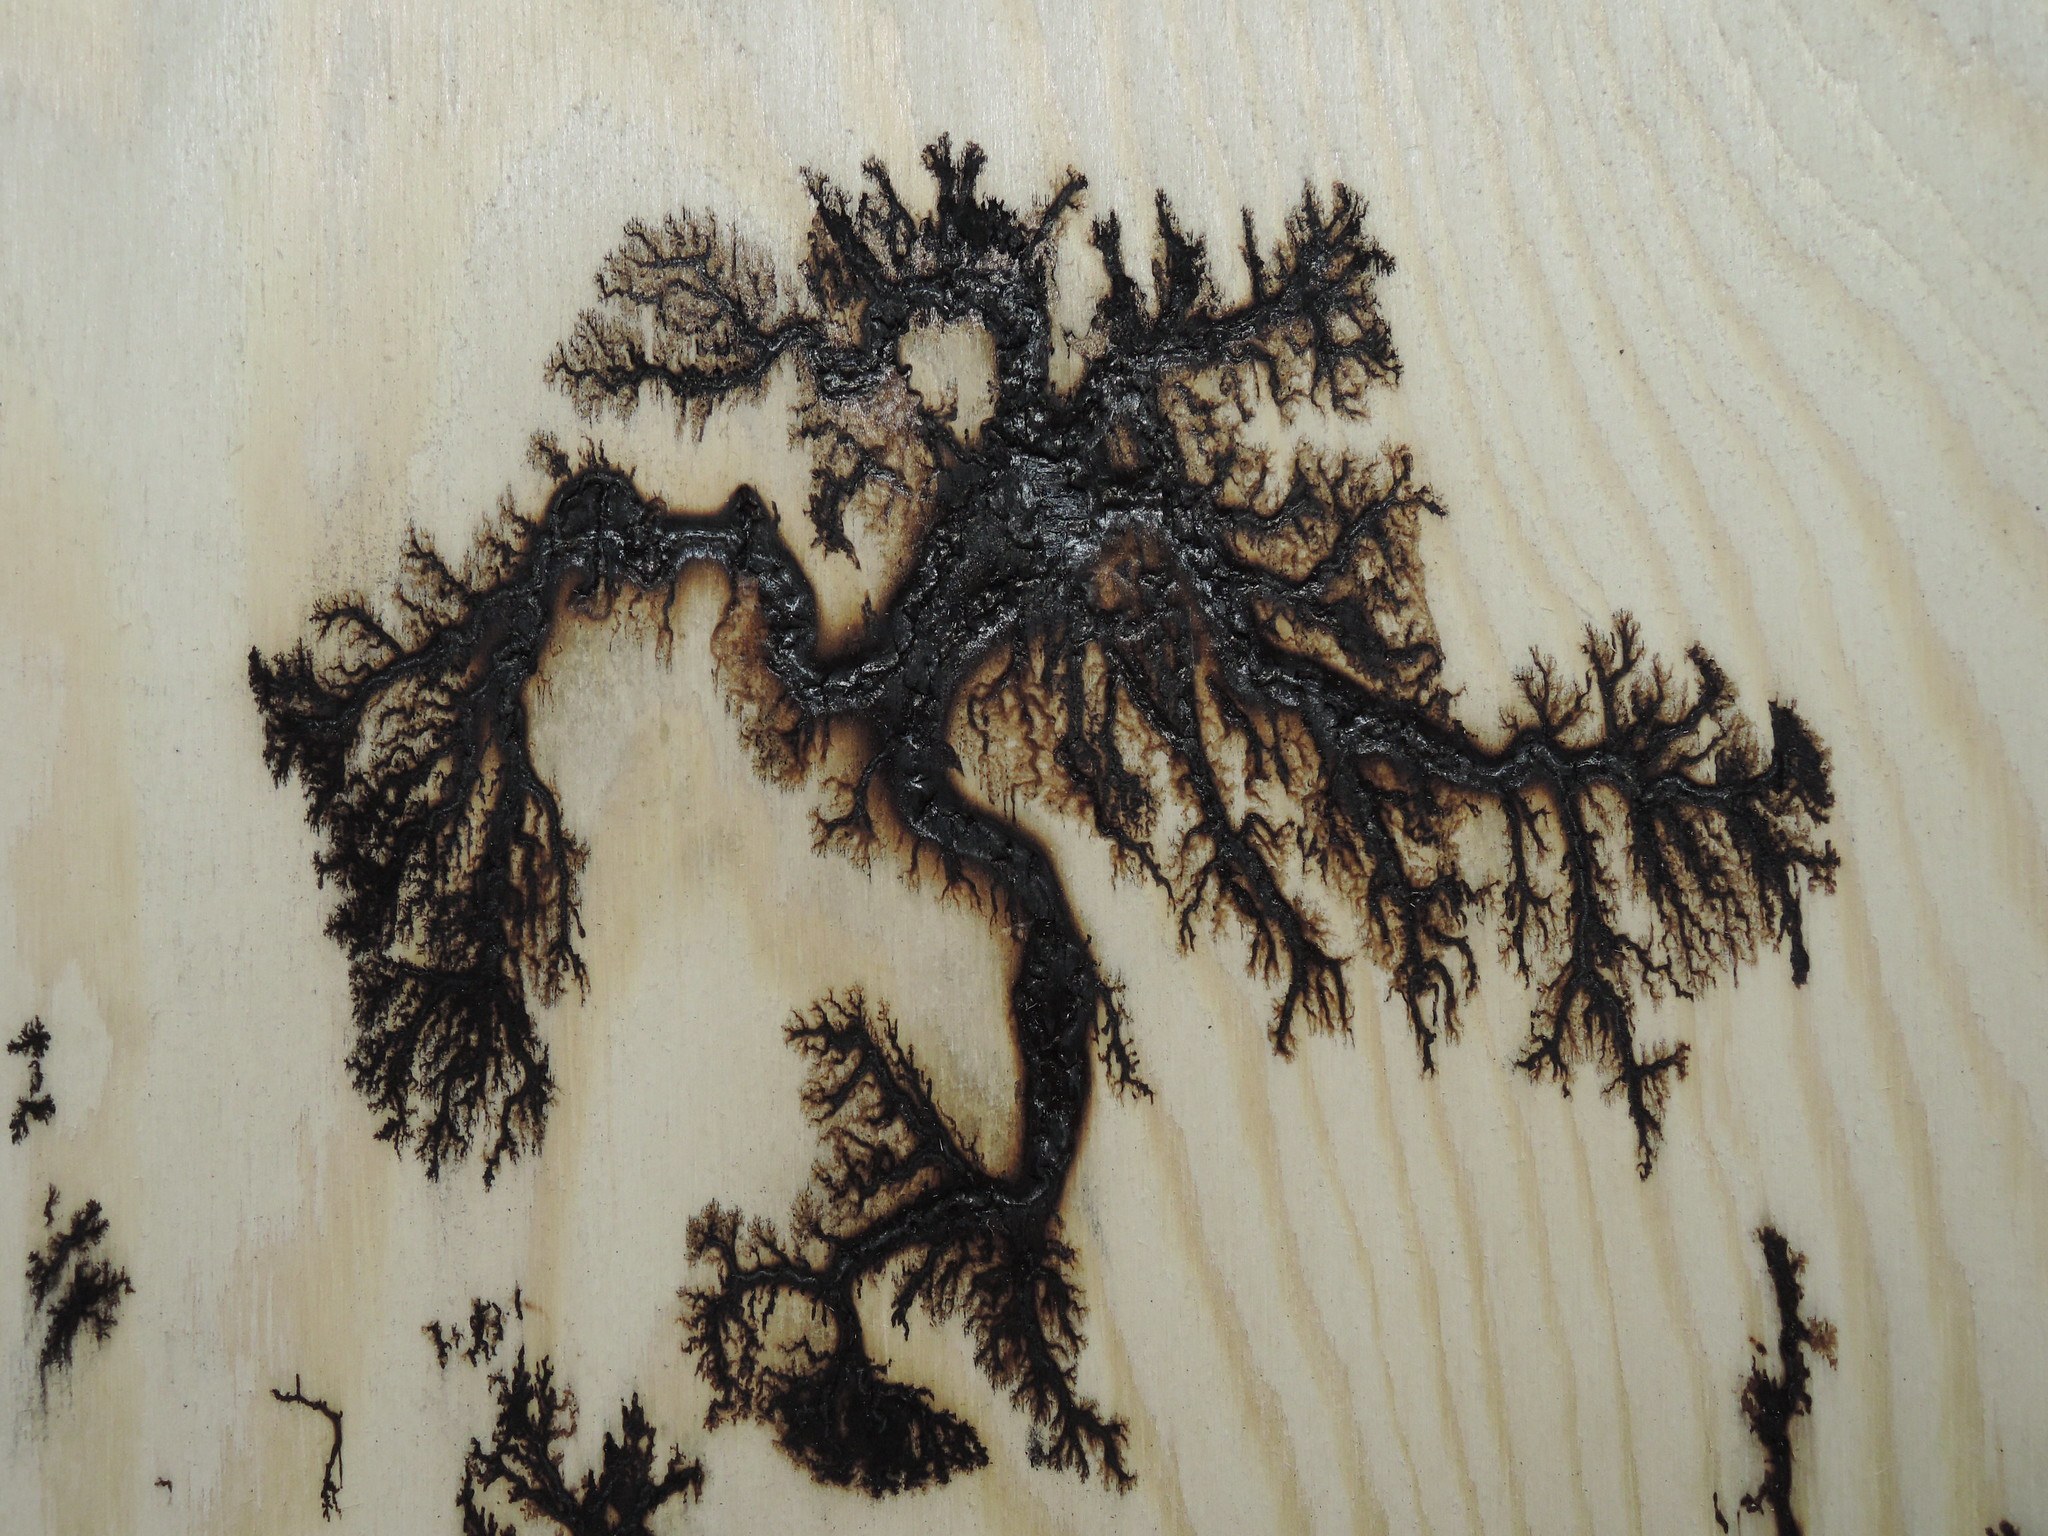
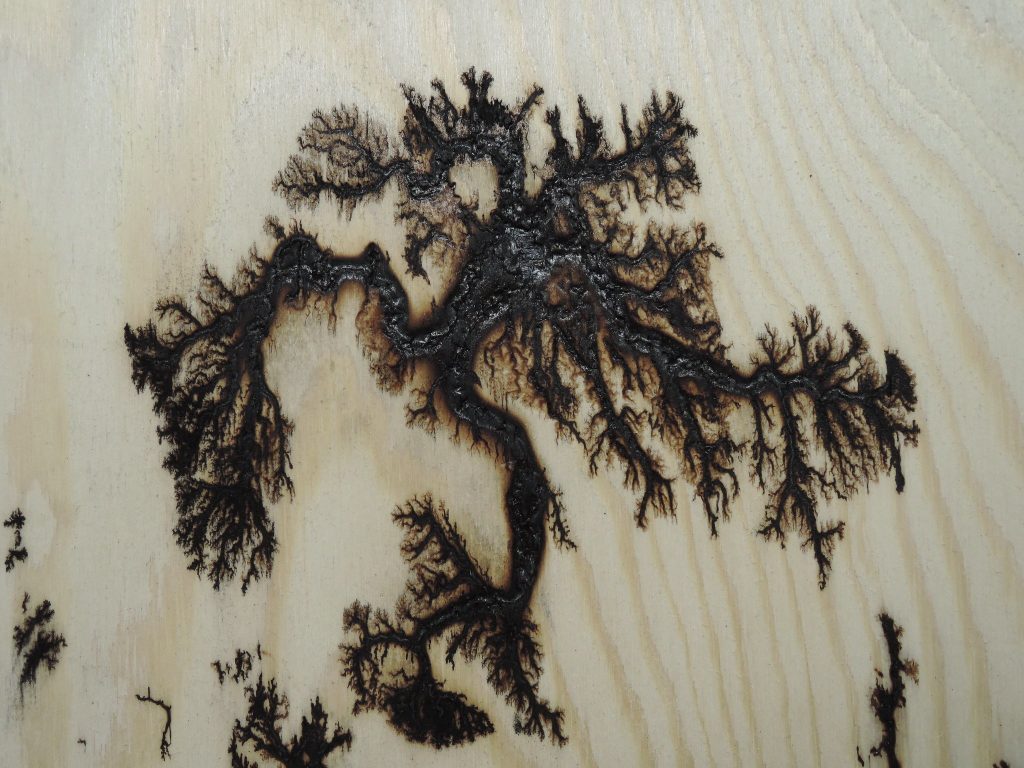
The art of burning wood with electricity produces fragmented designs burnt into the surface of the wood. These designs are called “fractiles,” after the statistical principle of the same name. Without getting into complex descriptions of the mathematics behind the fractile, the basic idea is that each succeeding section is smaller than the previous. In this, it gives much the same appearance as a tree limb, breaking down into smaller and smaller branches. It creates pretty beautiful designs, which are tree-like in their appearance.
The technical name for these branched designs is a Lichtenberg figure, and the device used to make them is referred to as a Lichtenberg device. Lichtenberg figures can appear naturally due to industrial accidents involving high voltage or lightning. Long-term breakdown of materials that have some dielectric or insulating capability will naturally result in Lichtenberg fractal images forming in the material, either on the surface or inside the structure. This can happen in solids, liquids, or gases.
Safety First
Before discussing how to make these beautiful designs, I must warn you that this can be quite dangerous. It takes a considerable amount of electrical current to burn the wood (over 2,000 volts at a high enough current to kill), enough to cause burns or even kill. For this reason, many woodworking organizations don’t allow the display of works, including Lichtenberg’s wood burning.
It is almost impossible to make it entirely safe to use a Lichtenberg device to burn wood without going to extremes in creating an insulated case with interlocks. However, a few basic safety measures will make the dangers associated with burning wood manageable:
First, keep tight control over the electric current, ensuring that the device is unplugged when not needed, and double-check that it is switched off before making any contact.
Always wear rubber gloves and only make contact with the wood or the device with one hand at a time, with the other hand held behind your back, where it cannot make accidental contact. The electric current can still burn one hand if it makes contact in two places, but the current will not pass through the heart as it would if you accidentally made contact with both hands. Current traveling through the heart would be fatal.
Be sure to have a second person with you, also wearing rubber gloves, whenever using a Lichtenberg device. As a safety measure, this person’s sole purpose in being there is to shut off power if you get electrocuted.
Please note that the amount of current (amps) kills, not the number of volts. Nevertheless, the Lichtenberg device will produce enough amps of power to kill.
The Lichtenberg Device
The device used to make these beautiful designs is rather simple, consisting of an AC transformer that will boost 120 volts of AC house current up to a minimum of 2,000 volts. The two most common sources of these transformers are those used for neon signs and scavenged from microwave ovens. Of the two, a transformer from a microwave is less costly, although it requires more work. However, the higher voltage the neon sign transformer produces will result in finer figures in the wood.
Transformers for neon signs are also easier to use, as they come prepared for use. The power cord will be attached to the transformer, with output leads on the other side. All that must be done is to attach battery clips to the output leads.
Making a Lichtenberg device from a microwave oven is a bit more complex. First, the oven must be disassembled and the transformer removed. Take the power cord as well, as it can be reattached to the input side of the transformer, saving the cost of a cord. On the output side of the transformer, there is a single lead. That’s where one wire will need to be attached. The other (ground) lead must be attached to the transformer case. Attach battery clips to the output leads as with the neon sign transformer. The two long wires from the output side of the transformer will not be used. Cut those wires short and put a wire nut on them to insulate them, taping the wire nuts in place with electrical tape.
The type of battery clips I’m referring to is not used on jumper cables, although they are of the same style. Look for something that’s a smaller version of those. Avoid alligator clips, as those aren’t heavy-duty enough. The clips usually have colored plastic tubing (red and black) over the handle end. Slip the tubing off one side of the handle and slide it over the wire. This will expose the contact portion of the clips, which is usually built into both sides. Strip off enough of the insulation from the end of the wire to fit into the handle and slide the stripped wire into the contact area, crimping the ears over onto the wire to hold it in place. If a soldering iron is available, solder the wire to the clamp handle for maximum security and current flow.
Better quality battery clips will have a screw inserted into the handle, allowing the wires to be firmly attached. In this case, loosen the screw and wrap the end of the wire clockwise around it. Then tighten the screw to grip the wire. There will still be ears for clamping the wire in place and preventing it from pulling out.
Please note that these two options are not the only options available, just the most common. A minimum of 2,000 volts AC is needed; however, the more volts, the better. A high current is not required and makes the process dangerous. So, if it is possible to find a high voltage, low current transformer, that’s ideal. For example, a transformer from an old CRT color television will produce 25,000 volts if one can be found.
Burning the Wood
Any wood can be used for Lichtenberg burning, from oak to MDF. However, the best results seem to come from fine-grained woods, especially when those woods are used as a veneer face coating on plywood. Birch plywood is ideal for this, although Luan works well too. Using plywood provides a thin veneer to burn, while the rosin adhesive used to glue the layers of the plywood together will stop the water from soaking further into the wood, keeping the burn at the surface. MDF, on the other hand, will absorb water rapidly, allowing the burn to go deeper. But MDF doesn’t have a grain, so it allows the burn pattern more freedom to go where it will rather than following the wood’s natural grain.
Wood alone is not a good conductor, so some conductive solution needs to be used with it. Many people use salt water for this, but a saturated solution of baking soda dissolved in water works better. The baking soda ionizes the water, allowing it to conduct electricity just enough for our purposes, although not as well as wire will. A ratio of one tablespoon of baking soda per cup of water is just about ideal. Ensure that all the baking soda dissolves and doesn’t settle to the bottom. heating the water can help, as hot water will naturally allow more of a substance to dissolve in it.
Working on a non-conductive surface, ideally, a rubber mat is necessary. But if that is not available, then one of those plastic folding tables is just as good. Another option is a wide, shallow plastic bin, which stores clothes under the bed. Place the wood to be burned on the insulator and wet it with baking soda and water solution, soaking the surface. A sponge, brush, or spray bottle can apply the solution.
Check that the Lichtenberg device is disconnected, and then attach the two battery clamps to opposite ends of the wood, using one hand only. You want to connect them so that the electricity can follow the grain in the wood as it goes from one to the other. Then plug in the machine and turn on the electricity.
You should immediately see the wood sparking and burning adjacent to the two clamps. It will continue this way, reaching a meeting point somewhere in the middle. Don’t be surprised if the burning starts at one end before the other or if one end seems to be burning faster. A lot will depend on the grain in the wood and how well it soaked up the solution.
It is possible to steer the burning process somewhat by spraying more solution onto the wood in areas not burning sufficiently. For example, if the burn is going off to one side of the board, leaving the rest alone, then adding more solution on the side that is not burning will most likely cause an additional trail to start in that area. Other than spraying on more solutions, little can be done to control the pattern being created. This is nature at work, and all we can do is watch and, in this case, pull the plug when we decide that it is done. When it is done, remove the clamp using only one rubber glove coated hand for safety.
Another option for making contact with the wood is to pound nails into the wood in different parts of the board. Only use uncoated nails for this. This provides the opportunity to create a more directed pattern, as the battery clamps can be attached to any two of those nails, burning only the surface of the wood between them. Let’s say the desired pattern looks like a horseshoe; 6 to 10 nails could be pounded into the wood, forming that shape. The battery clips could then be moved from one pair of nails to the next, burning the space between each pair. Once completed and the mail are removed, it will look like the desired horseshoe.
Another way of doing this is to put the nails through a couple of non-conductive rods, like dowel rods or plastic pipes. The nail points can then be set onto two different points on the wood and moved around, as desired, to control the burn pattern. With such a system, more of the surface can be burned.
Finishing the Burnt Wood
As the wood burns, a considerable amount of carbon is formed on the surface, following but also obscuring the actual design. Once the wood has been burnt to our satisfaction and we pull the plug, we must remove the excess carbon. That can be done by brushing the surface of the wood with a nylon brush, like a toothbrush, under running water. The water is needed to wash away the carbon as the brush breaks it up so it doesn’t get pressed into the wood pores.
Please note that this is a natural burning process, even though the circumstances of it are artificial. As a natural process, we have little to no control over its appearance. Sometimes the results are amazing, while others are not as interesting. It may be necessary to make more pieces than needed to select the best for use.
The resulting pattern will look like lightning burnt into the wood. Finishing is required, preferably with a urethane varnish, to protect the burnt pattern and keep the remaining charring from rubbing off. Use several coats, allowing them to soak in until there is a good finish buildup over the burnt part of the wood.
Related Posts:
Drying Wood in Oven: A Complete DIY Guide by Admin September 23, 2025 More About Most people don’t give a second thought to drying wood in an oven until something goes wrong. I didn’t either. I slapped together a pine…
Best Practices for Using Mineral Spirits on Wood by Admin May 20, 2025 Finish . Looking to clean old wood or prepare it for stain? Mineral spirits offer an easy, safe, and effective method for refreshing wood without damage.…
Sandblasting Wood: How to Clean & Restore by Admin May 17, 2025 Finish There’s something satisfying about bringing old wood back to life. Whether it's barn siding, an antique door, or a weathered cedar plank, wood has a…