
If you’re remodeling a game room or setting your family room for entertaining, one of the things you might want to include is a bar. A bar becomes a nice place to congregate and talk, instantly providing a relaxed atmosphere, while providing you with a convenient space to serve drinks and even snacks from.
Believe it or not, there’s a lot of science, or perhaps I should say a lot of experience, in building a good bar. The dimensions that bars are built to have been experimented with for years, resulting in a set of dimensions that provide a comfortable experience for the average person. This has probably been a bit of a challenge, as they have to avoid being too tall for short people or too low for tall people. At the same time, the bar height has to accommodate people who are sitting on barstools or standing.
Bars can be made in any shape and style you want, matching your décor or selecting something that will make it stand out as a focal point in the room. On the average, you need to figure on 24” of bar space for each person at the bar, either standing or sitting on bar stools. Some people like to go a bit wider than this, even as far as 30”, especially if they have a lot of friends who are a bit ample in the girth. Of course, corners are not counted in this dimension.
But what about the rest of the bar’s dimensions? That’s where the experience comes into play.
Ideally, you want to think of a bar something like a kitchen countertop with a serving or breakfast bar attached to it. This gives you two separate areas, one for preparing the drinks and another for serving the drinks. In doing this, it keeps people drinking at the bar from getting in the way of cleaning glasses and preparing more drinks. It also keeps bar supplies out of the reach of the people sitting at the bar, at least to some extent.
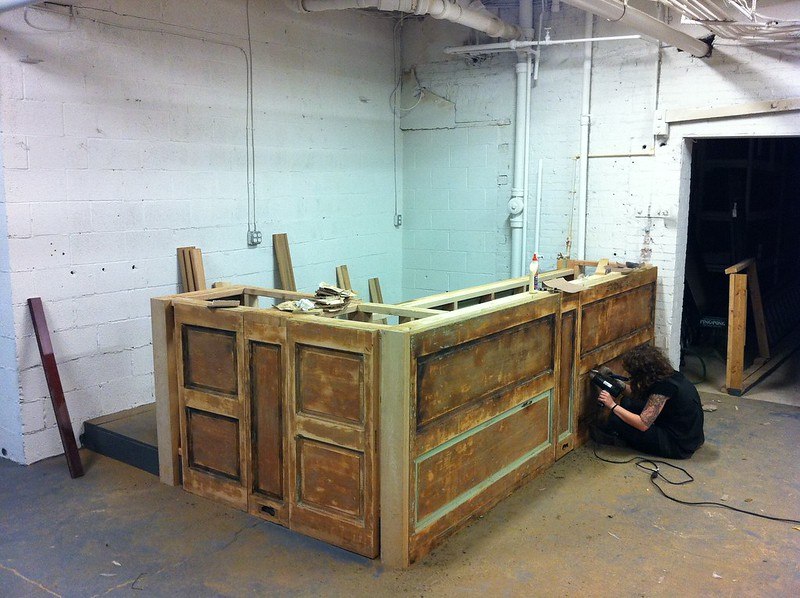
Building a bar is, in fact, much like building that kitchen countertop, although most bars are more ornately decorated than kitchen cabinets are, with more ornate woodwork, especially on the outer surface. The one major difference is that a bar doesn’t have a toe kick on the customer side. Aesthetically, how your bar looks is only limited by your imagination and bank account.
The Customer Side
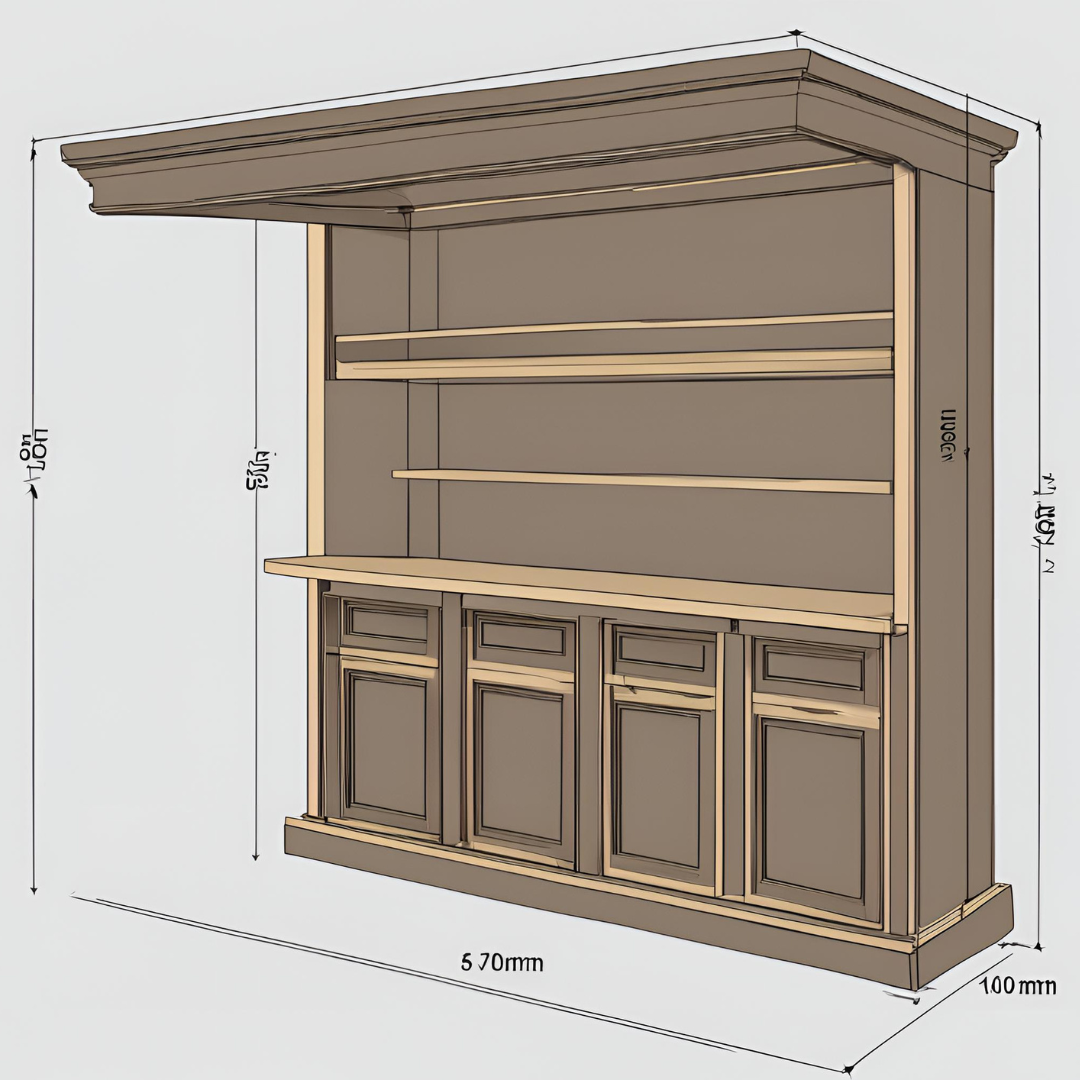
The serving part of the bar is the one that most people are interested in. This should be 42 inches off the floor. That height allows sufficient space for 30” tall bar stools to be used at the bar, and for people to stand there comfortably. The head’s of people sitting at those bar stools will be close enough to the height of the average person standing, that they can communicate with each other comfortably.
This serving area is usually 16 to 20 inches wide, to allow enough room for drinks and for people who are eating at the bar. It needs a minimum of 8 inches of overhang on the “customer” side, although 10 to 12 inches is more common.
Bar tops can be made of pretty much any material that a kitchen countertop is made of. Modern bars are often made with granite countertops, just like kitchens are. wood is also very popular, as the warmth of wood is timeless. But before you decide on any material, check to make sure you have the room to get the countertop into your home and to the room you will be installing it in, especially if you are building a bar in the basement.
On a nicely built bar, the outer edge is capped with a bar rail. Many bars use a wood rail, which is available commercially, although you won’t find it at your local building materials center. Another option is to make a padded bar rail, covered with vinyl, so that it is easy to clean. The idea, with either a wood or padded bar rail is to provide people standing at the bar someplace comfortable to lean against. The rounded surface of the bar rail eliminates sharp edges, which might dig into someone standing there.
In addition to the bar rail, you’ll want to add a foot rail for those who are standing. Your bar stools will usually have a built-in foot rest for those who are seated, but people who are standing will find a foot rail a comfortable way of getting their weight off of one foot.
Foot rails are normally mounted nine inches above the floor and can stick out from the front of the bar anywhere from four to six inches. You don’t want to go much further than this, as it could become a trip hazard if it is sticking out as far as the bar rail.
You can buy actual foot rail kits, available in a variety of finishes. These have a metal foot rail, as well as brackets that attach to both the front of the bar and the floor. But you can also make your own foot rail. Wood handrail material works well for this, being strong enough to hold the weight. Just be sure to mount it sturdily, so that the weight of people leaning on it doesn’t cause the brackets to bend or the screws to work their way loose.
Another good way of making your own foot rail, which is very popular right now, is to use black iron plumbing pipe, a material being used for anything from lamps to shelf brackets. A black iron foot rail, with matching brackets to hold up the cantilevered bar, provide a nice accent for a rustic or industrial style décor.
The Serving Side
Typically, the work side of the bar is built 12 inches below the customer side, for commercial bars. This puts it at 30” above the floor, the same height as a kitchen table. That’s workable, but not necessarily comfortable. It would be easier to work, standing at that bar, if it was 36” above the floor, the same height as a kitchen countertop.
This side of the bar can be just about any depth you want, but it is typically not all that deep. Six to 12 inches is enough room for preparing drinks. However, if you want to have enough space for olives, cherries, onions and other ingredients, you might want to go wider, as much as 16” deep. Keep in mind though, that you have to reach over this countertop, in order to serve the drinks on the customer side of the bar, so you don’t want to go too deep.
Even at 16 inches, part of that depth will be under the overhang of the customer side of the bar. This overhang gives you an ideal place to store items that you need at the bar, while keeping them hidden from view.
The other thing that this side of the bar needs is a drip rail. This is typically a piece of wood, ½” to ¾” thick, sticking up 1/2 inch above the bar’s surface. The purpose of this is to ensure that any spills stay on the bar, and don’t drop down on the floor, where they can make the floor slippery and dangerous. It’s much easier to clean up those spills on the bar surface, than on the floor.
Another Option
If you want to make a simpler bar, without having to go with a two-tiered approach, you can. In such a case, the entire bar top will be built 42” above the floor. The serving area will usually be about 16” wide and will have an 8” to 10” overhang on the customer side. The bar rail and foot rail are installed as well, so from the customer’s side of things, the bar is essentially the same.
The difference comes in how the serving side is made. Rather than building a second countertop, lower than the bar top, all that is added is a glass rail and drip edge for the bartender to use. This glass rail is a space that’s ¾” lower than the countertop and six inches wide. The same sort of drip rail is attached, as mentioned above.
This glass rail is the bartender’s working area. By insetting it, it provides a secure place to set glasses, while preparing drinks. Should anything spill, it will most likely be confined to that space, keeping it from going all over the bar and onto the floor. The bartender has the use of the serving space on the bar for setting mixing glasses and bottles of liquor.
The Finish
The finish on any bar is important, as you have to assume it will need to withstand a lot of spills. A good, thick varnish finish will work fine, if you have a wood bar. But a clear epoxy finish is even more durable, so you might want to consider that. Either way, it’s important to ensure that there are no pinholes in the finish, especially at corners, where spilled drinks can soak through and into the wood beneath. Go with a thick finish for maximum protection.