Many T1-11 repairs fail because the damaged wood was not completely removed or the newly exposed edges were not properly sealed. This guide walks the fix from the outside in: how to tell what you’re really dealing with, when a patch is honest and when you’re just hiding rot, and how to seal the repair so water stops getting back behind it.
T1-11 is a registered trade name for a specific APA 303 Rated Siding panel — an all-veneer (plywood) sheet with shiplapped edges and vertical grooves cut 1/4 inch deep and 3/8 inch wide, spaced 4 or 8 inches on center. By spec, true T1-11 is a five-ply panel with a nominal thickness of 19/32 inch (5/8 inch) or more, measured in the ungrooved areas, per APA’s 303 siding specification. That thickness matters for repairs: if a “T1-11” panel on your wall is thinner or made of compressed strands, you may be looking at an OSB lookalike, which behaves very differently once water gets in.
What kind of damage are you actually looking at?
Before you buy a single tube of anything, figure out which of these you have. The repair is completely different for each.
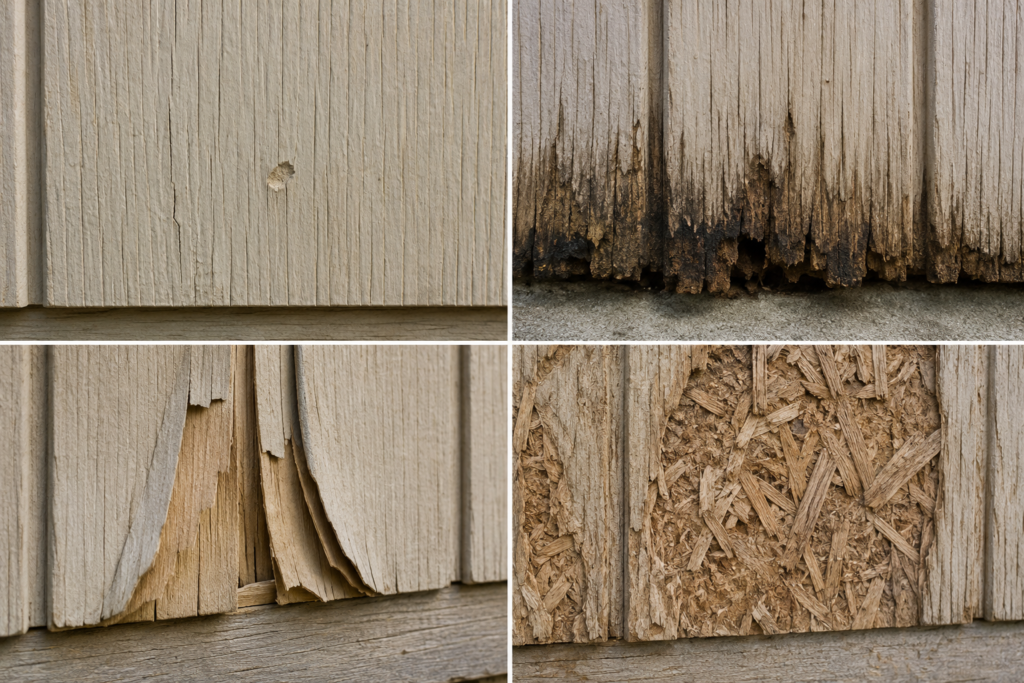
Surface cracks and dings — the face veneer is split or gouged, but the wood underneath is still hard. The most repairable case.
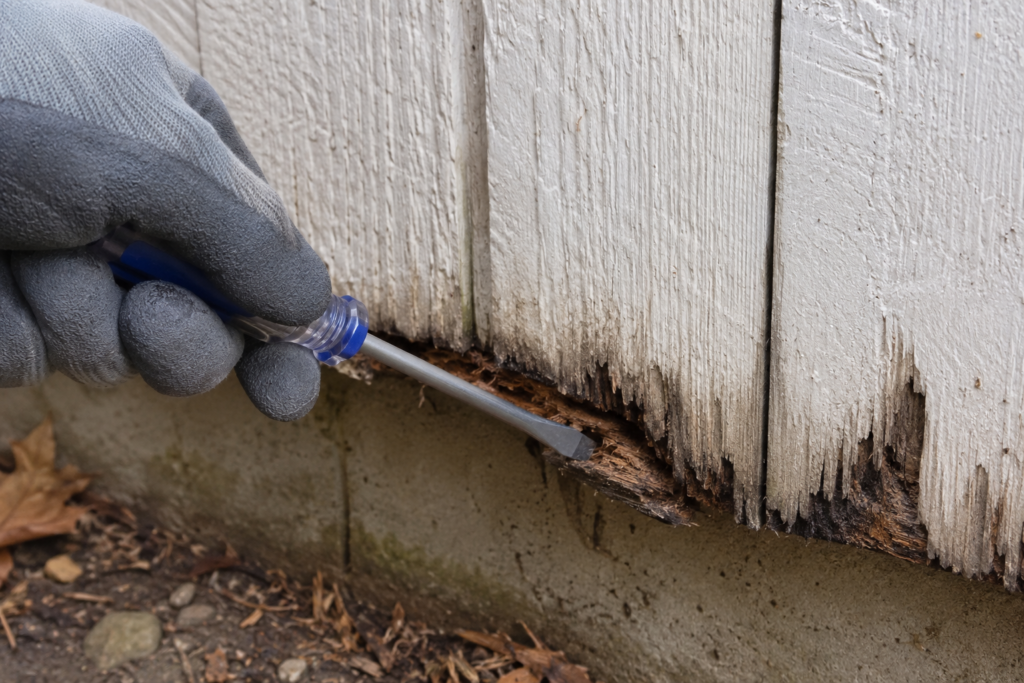
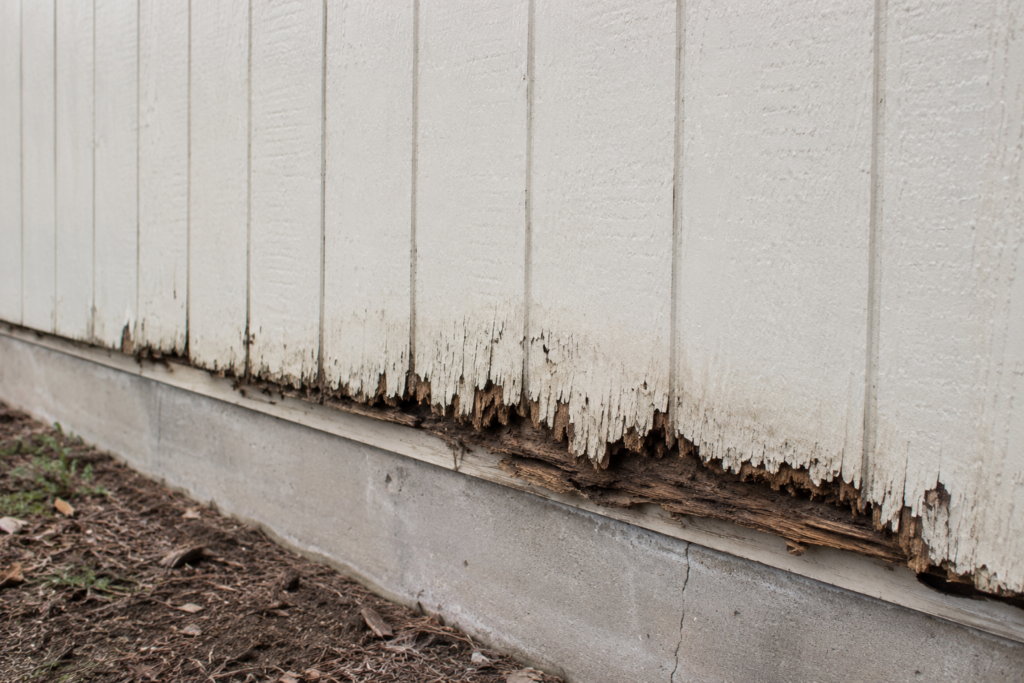
Rot (soft, punky, spongy wood) — usually starting at the bottom edge, around nail heads, or below windows. Press a screwdriver into it. If it sinks in and the fibers crush, that wood is gone, and filler will not bring it back.
Delamination — the plywood plies are separating and lifting, often bubbling near the bottom or at grooves. This is a bond failure, and it rarely stops on its own.
Swelling and flaking — often a sign of water-damaged OSB. When the paint seal breaks, an OSB-core panel can swell and flake apart, and filler won’t hold on material that’s lost its thickness and bond.
A quick word on why the bottom edge fails first: moisture enters the end grain of plywood far faster than it enters the face (APA Engineered Wood Construction Guide). That’s the whole reason edge sealing exists — more on that below.
The screwdriver test (do this before you decide anything)
Take a standard flathead and press — don’t hammer — into the suspect area. Sound wood resists and the tip barely marks it. Rotten wood gives way and the fibers stay crushed. Probe the full perimeter of the damage, because rot spreads under paint that still looks sound — often faster than people expect, as we cover in our guide to stopping wood rot before it spreads. This is the single test that tells you whether you’re patching or cutting, and it costs nothing.
The mistake that turns a small repair into a new wall
Here’s the one that gets people: filling over rot instead of removing it. Wood rot is decay caused by fungi when sufficient moisture is present. Packing wood filler on top of soft, damp, decayed fiber traps that moisture instead of removing it — and as long as the wood stays wet, the decay can continue. The face looks patched and painted for a while — then the patch pops, the wood behind it is worse than before, and the rot has often traveled deeper into the panel and sometimes into the framing behind it.
If the screwdriver sank in, that wood comes out. Full stop. You either dig back to hard wood and rebuild it with epoxy, or you cut the panel and replace the section. There is no filler strong enough to make rotten wood sound again.
Tools and materials
As an Amazon Associate, we earn from qualifying purchases.
Gather everything before you start so a half-open panel isn’t sitting in the weather waiting on a hardware run.
Stain-blocking exterior primer — also what you brush on bare cut edges before painting — Zinsser Cover-Stain
Paintable polyurethane sealant for joints — Sikaflex-1a
A 100% acrylic exterior topcoat or solid-color exterior stain, matched to your existing wall — grab this at your paint store so the color and sheen match.
For diagnosis and panel replacement:
Pin-type moisture meter, so you never paint over wet wood — General Tools MMD4E
An oscillating multi-tool for controlled cut-outs (use one you already own, or any quality brand).
Hot-dipped galvanized or stainless-steel siding nails and Z-flashing for horizontal butt joints — buy these at the hardware store in the size your wall needs.
Safety
Wear eye protection, gloves and appropriate respiratory protection when cutting or sanding siding. Paint on homes built before 1978 may contain lead. Avoid dry sanding or disturbing suspected lead paint until you understand the applicable EPA requirements. Before cutting into a wall, locate wiring, plumbing and other concealed utilities.
How to repair cracks and small holes in T1-11
For damage where the wood is still hard, this is a same-day job.
Clean and open the crack. Scrape out loose paint and debris. Widen a hairline crack slightly with a utility knife so the filler has something to grip — filler over a closed hairline just skins over and falls out.
Consolidate if the fiber is at all soft. If the edges of the crack feel even slightly punky, brush in epoxy consolidant and let it cure. It soaks into the fiber and turns spongy wood back into a hard base you can build on.
Fill proud, then sand flush. Press exterior filler in slightly higher than the surface. Once cured, sand it flush with 80 then 120 grit. Match the groove texture by dragging the corner of a scraper through wet filler if the damage runs through a groove.
Prime the bare repair — every bit of it. Bare wood and bare filler both need a stain-blocking exterior primer before topcoat, or the repair will telegraph through and wick water. Our guide to the right primer-and-topcoat system for exterior plywood breaks down which primers and topcoats actually hold on a grooved, textured face.
Caulk only the joints and manufacturer-specified locations. Seal butt joints, trim edges, and penetrations — and do not fill the decorative grooves. (That’s a regret you’ll read about below.)
How to repair rotted T1-11 (bottom edge and around windows)
Small, contained rot in an otherwise sound panel can be rebuilt with epoxy. Anything larger, or rot that reaches a panel edge or a nail line, is a cut-and-replace job.
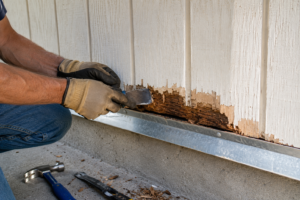
Epoxy rebuild (contained rot): Dig out all soft fiber back to hard wood with a chisel or the corner of a scraper. Brush epoxy consolidant into the surrounding wood to stabilize it, then rebuild the missing volume with two-part epoxy filler, shaping it before it fully cures. Two-part epoxy is the most durable choice for durable exterior cosmetic repairs like this because it bonds tightly to the surrounding fiber and holds up to weather and paint. It restores the surface and appearance — not load-bearing strength — so if the damaged area carries structural load, replace the panel or use a manufacturer-specified engineered repair instead. Our breakdown of when a two-part epoxy repair makes sense and when the wood is too far gone covers where that line falls. Prime and paint once cured.
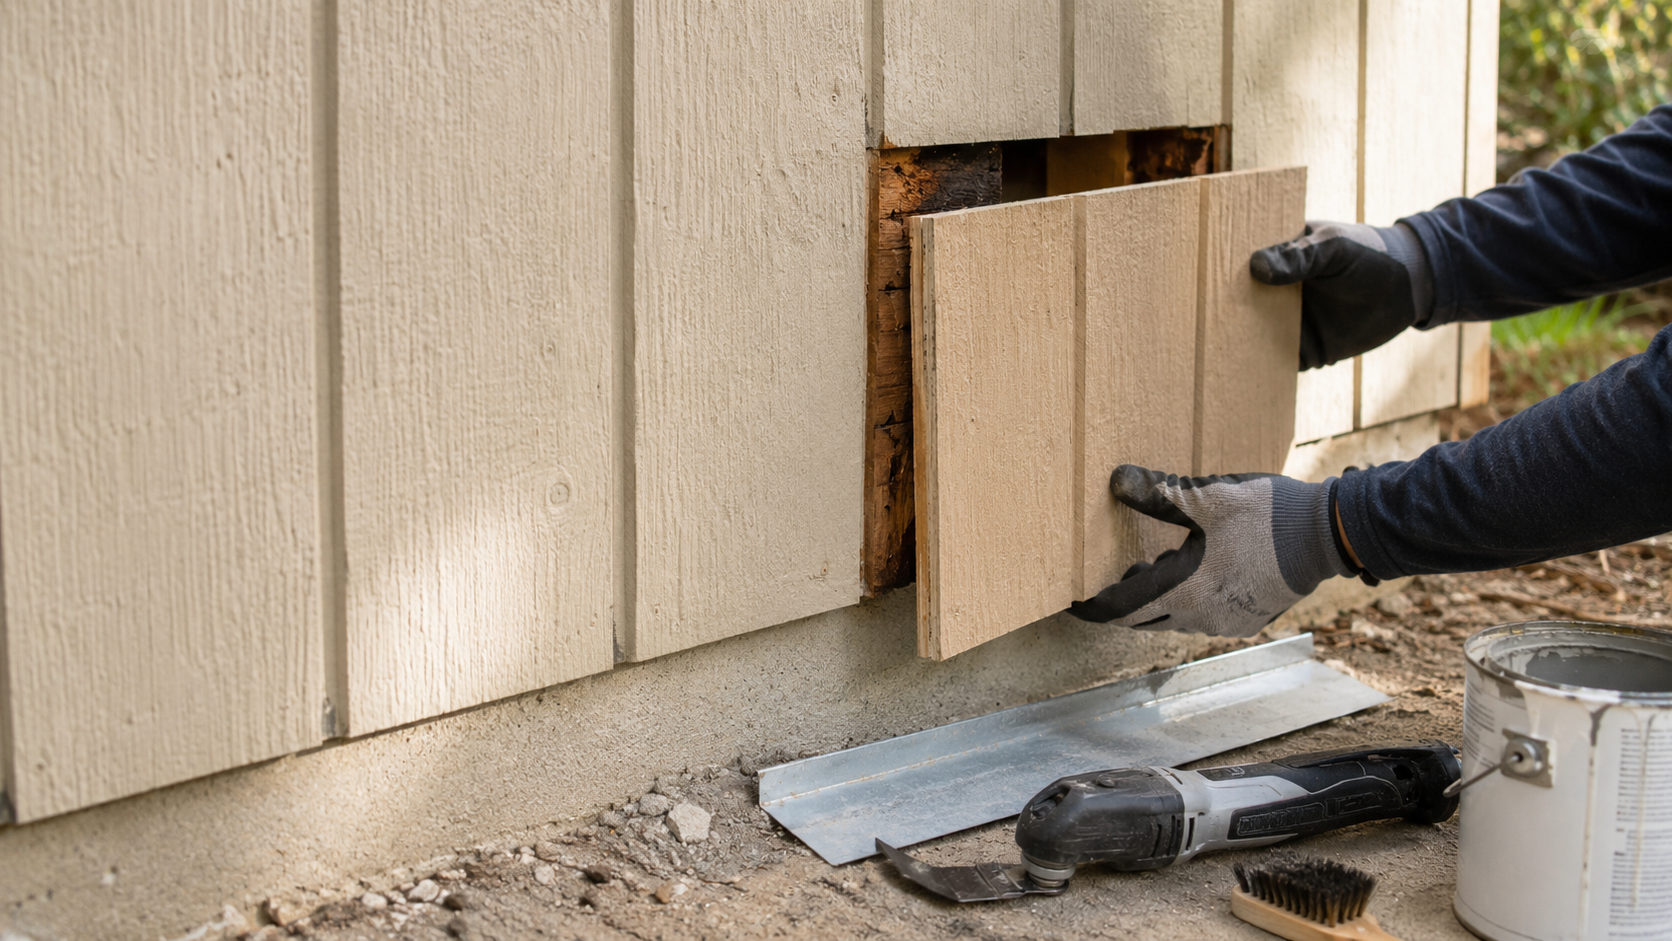
Cut-and-patch a section: First, check whether the panel is doing structural work. If the existing T1-11 provides structural wall bracing, consult the applicable installation instructions or a qualified contractor before cutting it — a small insert may not be an acceptable repair. Otherwise, snap a chalk line around the bad area, centered on framing where possible so your patch has something to fasten to. Cut with an oscillating tool for control, watching for wiring and plumbing behind the wall. Cut a matching piece of true 19/32-inch T1-11 with the same groove spacing, and seal all four cut edges with the manufacturer’s specified edge sealer — or the same exterior primer you’re using on the face — before it goes on the wall.
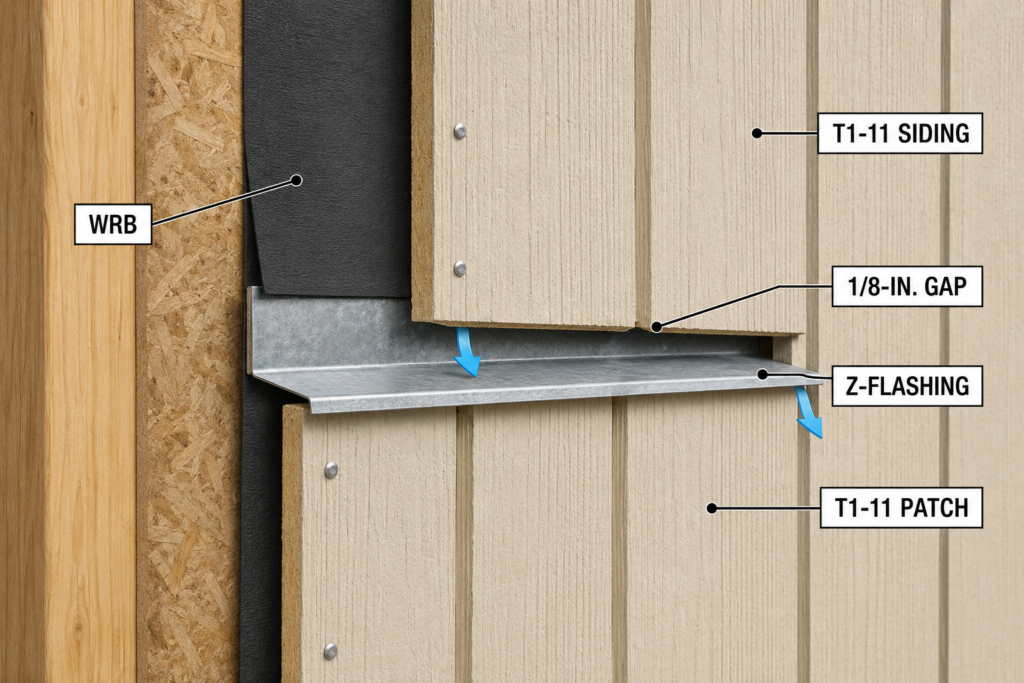
Before installing the patch, inspect and repair the water-resistive barrier behind the siding. Integrate the upper leg of the Z-flashing behind the barrier so water drains over the flashing, and maintain the manufacturer-required gap between the siding and flashing — APA’s Z-flashing detail shows the barrier overlap and the gap at the horizontal joint. Do not seal a drainage gap unless the panel manufacturer’s instructions specifically require it. Then fasten the panel following the manufacturer’s fastening instructions and your local code, and prime and paint every face and edge. If the rot has crept past the siding into the framing, stop and price the bigger job first — our breakdown of DIY-versus-contractor rot repair costs shows how fast the number climbs once framing is involved.
That “seal all four cut edges” step is not optional and not a nicety. APA is explicit that any panel edges sealed at the factory and then cut during construction should be resealed, because water attacks the freshly exposed end grain first (see APA’s Engineered Wood Construction Guide). When the siding will be painted, APA’s recommendation for those cut edges is primer. Skip it and your brand-new patch rots from the cut line outward.
When to repair vs. replace the whole panel
Damage
Repair it
Replace the panel
Surface crack, wood still hard
Yes — consolidant/filler, then prime and paint
—
Small, contained rot
Yes — epoxy rebuild
—
Rot reaching an edge or nail line
Sometimes
Often the safer call
Delaminating or lifting plies
No — the glue bond has failed
Yes
OSB swelling or flaking
No
Yes
Widespread damage that cannot be removed without leaving a securely supported, code-compliant repair
No
Yes
Cost difference: patch vs. panel vs. wall
Rough, real-world ranges to frame the decision — get local quotes before committing.
DIY epoxy/filler patch: roughly $30–$80 in materials for a contained repair.
DIY single-panel replacement: roughly $50–$120 for a 4×8 sheet plus fasteners, flashing, primer, and paint.
Contractor panel replacement: commonly a few hundred dollars per panel once labor, flashing, and finish are in.
Whole-wall re-side: thousands, and the number climbs fast once framing rot is involved.
The gap between the first line and the last is the entire argument for catching this early — and for removing rot instead of burying it under filler and hoping.
The regrets that show up a year later
These are the ones people write in about after the fact:
Filling the decorative grooves. The vertical grooves create the panel’s board-and-batten look — they’re not gaps to seal. Do not fill the decorative grooves. Caulk only the joints and the locations specified by the panel manufacturer.
Painting over wet wood. Fresh repairs, and any wood that’s been rained on, hold moisture you can’t see. Sealing that in under primer causes blistering and peeling. This is where a cheap moisture meter earns its keep — allow the wood to dry to the moisture level permitted by the primer or coating manufacturer; many professionals use approximately 15% or lower as a practical exterior-painting threshold.
Patching T1-11 with an OSB offcut. They can look identical on the shelf. Water-damaged OSB commonly swells or flakes, while plywood is more likely to check or delaminate. Either material should be replaced when it has lost thickness, bond strength, or fastener-holding ability. Match what’s on your wall.
Reusing the wrong nails. Bright or electro-galvanized nails rust and bleed rusty streaks down fresh paint — use hot-dipped galvanized or stainless-steel fasteners. For type and spacing, follow the panel manufacturer’s fastening instructions and your locally adopted building code; fastener type and spacing vary with panel thickness, framing, and structural requirements.
Bond rating is not rot resistance
Exterior-rated T1-11 uses glue bonds designed to withstand repeated wetting and drying or long-term weather exposure. But “Exterior” describes the durability of the glue bond — not resistance of the wood itself to fungal decay. It does not make untreated T1-11 rot-proof. The panel still depends on a properly maintained finish, sealed cut edges, correct flashing and adequate clearance from the ground. Exposure 1 panels are not intended for permanent outdoor weather exposure and should not be substituted for exterior-rated siding.
If a panel sits near grade or stays damp, the finish alone won’t save it — that’s a job for the right material for the exposure. Our comparison of pressure-treated vs. exterior plywood covers when you need which. And on the clearance itself: maintain the clearance required by the panel manufacturer and local code — commonly at least 6 inches above exposed soil, with different requirements possible above paved surfaces — so the end grain isn’t sitting in ground moisture.
How to keep the repair from failing again
Reseal every cut edge with the manufacturer’s specified edge sealer, or the same exterior primer you use on the face, before a patch touches the wall.
Keep the whole panel finished. Work primer and paint down into the grooves; back-roll the topcoat so it’s pushed into the texture instead of bridging over it.
Maintain the finish on a schedule. Recoat before the old finish chalks through, not after bare wood shows.
Protect the bottom edge. Keep the manufacturer- and code-required clearance above soil, keep sprinklers off the wall, and make sure downspouts aren’t draining against it.
Inspect and maintain the joints and finish regularly. A periodic walk-around to check butt joints, trim, and finish — resealing or recoating as needed, per the manufacturer’s guidance — beats a panel replacement.
Frequently asked questions
Can you repair T1-11 siding without replacing the whole panel? Yes — surface cracks and small, contained rot can be repaired in place with epoxy consolidant and exterior filler, then primed and painted. You only need to replace the panel when the wood is delaminating, swollen (OSB), or rotted across an edge, a nail line, or a large area.
What’s the best filler for T1-11 siding? For durable exterior repairs, two-part epoxy filler is the most weather-resistant choice because it bonds to the surrounding fiber and holds up to paint. Standard exterior wood filler is fine for shallow, cosmetic face repairs on hard wood. For damage that carries load, replace the panel or use a manufacturer-specified engineered repair rather than relying on filler.
Why does T1-11 rot at the bottom first? Because moisture enters the exposed end grain far faster than the face, and the bottom edge is closest to splashback and ground moisture. Sealing that edge and keeping the manufacturer- and code-required clearance above soil (commonly at least 6 inches) is the fix.
Should I caulk the grooves in T1-11? No. The vertical grooves are decorative — they create the panel’s board-and-batten profile. Do not fill them. Caulk only the joints and the locations specified by the panel manufacturer.
Is T1-11 plywood or OSB? True T1-11, by APA spec, is five-ply veneer plywood at 19/32 inch or thicker. OSB-based lookalike siding panels also exist and are cheaper; water-damaged OSB tends to swell or flake, while plywood is more likely to check or delaminate — so confirm which one is on your wall before repairing, and match it.
Related Posts:
Making Wooden Bathtubs Guide by Admin September 19, 2023 DIY Wooden bathtubs require planning, precise construction, and maintenance. However, they are an elegant and unique addition to your bathroom. Guide to Set Started Materials Needed:…
T1-11 Siding Repair: Fix Rot, Holes and Cracks by Admin August 29, 2026 DIY If your T1-11 siding is soft at the bottom, cracked along a groove, or peppered with woodpecker holes, the fix may well be within DIY…