Originally, wainscoting was developed as a way of covering up water damage to the lower parts of walls, back when homes were not moisture protected as well as they are today. The lower part of plaster walls would often become damaged or even moldy. For those who could afford it, adding wainscoting was a means of keeping a home looking well-kept and elegant.
The wainscoting was always capped by a piece of architectural molding, called a chair rail. Homes could have chair rail installed, without the wainscoting, especially in the dining room. The chair rail served a functional purpose, protecting the walls from becoming damaged, when people pushed their chairs away from the table. In some homes different colors of paint might be used above and below the chair rail, giving the appearance of having wainscoting installed.
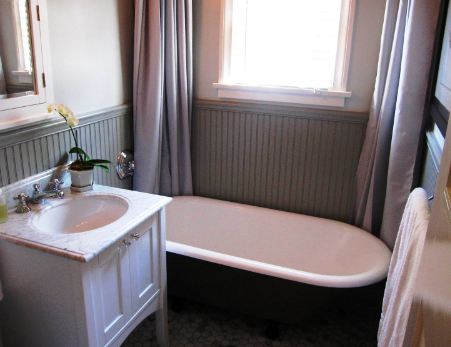
Today, wainscoting and chair rails are mostly decorative, as the wainscoting especially is not needed for its original purpose. Installing wainscoting gives a “richer” appearance to any home. It is typically installed in formal living rooms and dining rooms, however can be installed in any room you desire.
While not common, installing wainscoting in rooms which are used a lot by children, such as the kitchen and family room can protect the walls from damage. Repainting the wainscot on a wall is easier than repainting the whole wall, should children use markers or crayons on it. Large toys are less likely to damage wainscot, than they are to damage drywall. So this can be a way of keeping your home looking fresh and undamaged, even with high-energy children in the home.

Tools Needed for Installing Wainscoting
While installing wainscoting is not all that difficult, it does require a fair number of tools. You can get by with substituting in many of these cases, but will require extra care. Wainscoting is not very forgiving when it comes to mistakes, and crooked cuts; substituting may make it harder to complete straight cuts.
- Tape measure
- Chalk line (for snapping top line)
- Stud finder
- 4’ level (mostly for checking plumb)
- Table saw (if you don’t have a table saw, a circular saw can be used, if you have a straight edge to use as a guide)
- Jigsaw (for cutting out holes for electrical outlets)
- Caulk gun (for construction adhesive)
- Miter saw (for chair rail)
- Finish nailer (not absolutely required, but much easier if you have one)
- Hammer and nail set (for the nails that don’t drive in all the way)
Preparing to Install Wainscoting
The first step in any wainscoting project is deciding the design you wish to install. A quick search of the internet will reveal that there are countless styles that people have used. But on the most basic level, most wainscoting is a plywood product, such as beaded-board wainscoting.
An alternate to beaded-board wainscoting is tongue-and-groove beaded board. This provides some additional design possibilities, such as putting the boards at an angle or even creating a herringbone effect. I once did a room where I created a herringbone of tongue-and-groove beaded board, with strips of mirror interspersed in it; very effective!
Another common style, which is a little more work to install, is one of the many varieties of framed panels. Like a six-panel door, this combines raised framing, with inset panels. Typically, raised panels are not used, but rather the inset panels are a ¼” thick lauan plywood. With framed panel wainscoting, ¾” thick cabinet-grade plywood is cut into strips, rather than using dimensional lumber or hardwood. Various types of architectural moldings are used to edge the frames.
Regardless of the style of wainscoting you are going to install, you will need to remove the baseboard, any chair rail that might be installed and outlet covers, before beginning. There is no need to remove door casings, as the wainscoting typically butts up to the door casing. However, there might be a piece of door casing installed horizontally under window ledges. If there is, you’ll need to remove that, and possibly reinstall it later.
Check for any protrusions or high points on the wall surface, by going over it with a level or straightedge. These will need to be sanded down to the level of the wall, so as to not cause problems with your installation.
Check corners especially carefully, especially inside corners, as some drywall finishers use too much drywall mud, actually making the corner more obtuse than 90 degrees. This can be a problem if it is too much, as it may be difficult to get your wainscoting to lay flat against the wall. You may need to sand off some of the drywall mud, so as to have a good clean corner to work with.
Draw a line around the room, on the walls where the wainscoting is to be installed, making sure to get it level. While wainscoting can be installed any height you desire, the most common height is 32 inches, including the chair rail. So, you’ll want to subtract the width of the chair rail from the 32” and draw your line there.
You’ll also want to locate the studs in the wall, marking their location. To save yourself from having to cover or remove these markings later, it is best to mark it right above your line, in the space which will be covered by the chair rail.
Installing the Wainscoting
Never start installing wainscoting from a corner always from at least a couple of feet away. Corners in homes are notorious for not being exactly plumb, especially in tract homes. Draw a plumb line with your level and measure from it to the corner, at top and bottom, to know how to cut your first piece.
The wainscoting itself is glued to the wall, using construction adhesive. You don’t need a structural adhesive, as you are dealing with lightweight material. Use one with a high tack though, as you don’t want the pieces to shift once you’ve installed them.
You should also nail the pieces in place, with finishing nails. Most finish carpenters will try to put these in the low spots of the beading, to make them less visible. This is why you marked the locations of the studs earlier, so that you would know where to nail the pieces of wainscoting.
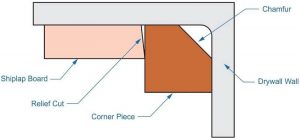
Work your way around the room, starting away from the corner on each side and working your way into the corners. You’ll want to take special care cutting the corner cuts, so that they meet up flush. If you are unsuccessful with this, you can cover up your mistakes with pieces of quarter round in the corners.
Once the wainscoting is installed all the way around the room, you need only to reinstall the baseboard or install new baseboard and install the chair rail. This will finish out the top and bottom edges, so that you don’t have any raw edges left showing. The electrical outlet plates will cover the edges there, keeping that from being a problem. You may want to install or reinstall pieces of casing under the window ledges to cover any cut edges you have there.


