Everyone appreciates wood’s natural beauty, especially woods with a pronounced grain pattern. But even the best woods can be enhanced, bringing out more of their natural beauty. That’s where stains come in. Staining wood can both change its color and accentuate the grain, making it more appealing than ever.
Wood staining can also protect wood, preventing it from becoming discolored and deteriorating from water damage. Stains are normally oil-based, so they repel water, acting as a shield for the wood they are applied to.
But stains can be tricky to work with. Unlike paint, the results are not so easy to predict. When you paint a surface, the paint covers it, so all you see is the paint. Properly applied, it doesn’t matter what the substrate looks like. The finished surface will look like the paint that has been used. Stains, on the other hand, are absorbed into the wood, combining their coloration with the natural coloration of the wood. This means that the appearance of the finished piece of stained wood can vary in as many ways as wood can.
This makes staining wood a bit tricky, as you won’t know the results you’ll get until you do it. Better than that, you won’t know the results until you run a test, something you should always do. Never expect the stain to come out looking just like it does in the sample, especially if you are applying that stain to a different type of wood than they did.
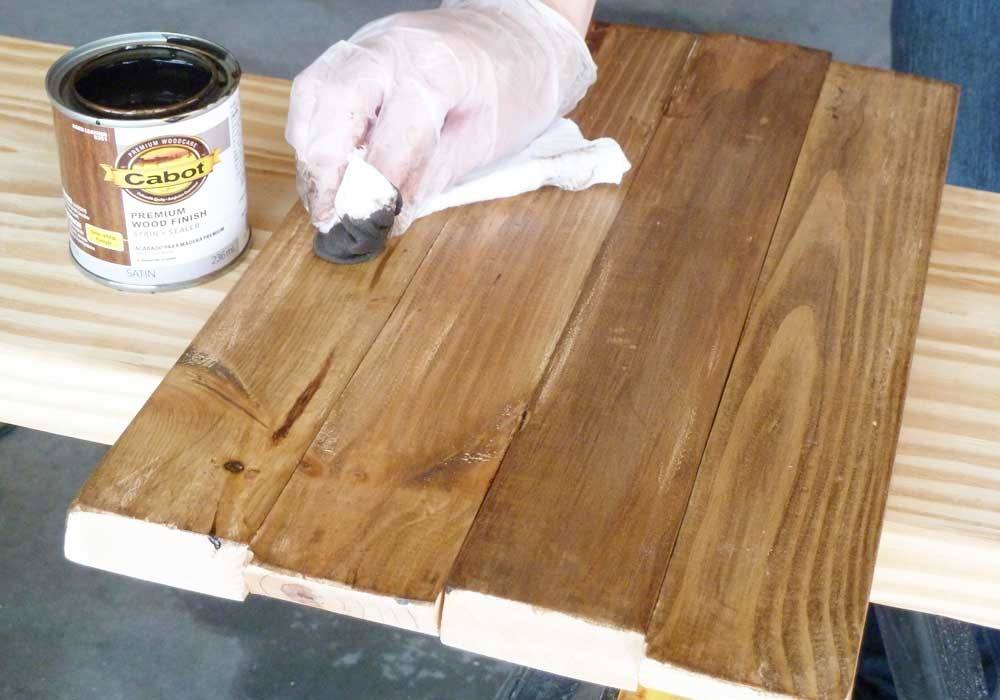
Stains will also provide a different appearance if they are wiped off after application or left to soak fully into the wood. Allowing a stain to soak fully into the wood provides a darker, richer finish, but the grain will be less visible. Wiping off the excess stain after applying it allows the stain to soak only into the more porous parts of the grain, helping to create more contrast and enhance the grain pattern.
These stains fall into three basic categories. We’ll examine how to apply each type of wood stain.
Exterior Wood Stains
Exterior wood stains are typically applied to an entire home, coloring and protecting natural wood siding. However, they can also be used for exterior furniture, decks, fences, and railings. Of all the types of stains, these are the easiest to apply, as they are never wiped after applying. Rather, they are left to soak into the wood, helping to make the wood impervious to water.
How to Stain Wood with Exterior Wood Stains
Exterior wood staining can be applied with any of the same means as paint. However, spray is most often used, as it provides for the quickest application. Spray is also easier to apply evenly, whereas rolling or brushing stains evenly is difficult.
These stains are not intended to be wiped after application. Normally, the wood they are applied to is rough-cut, not sanded. This causes the stain to soak in quickly. It also makes it virtually impossible to wipe the stain after application.
Using exterior stains with an airless paint sprayer is somewhat different from using latex paint. First, the stain is thinner than paint, requiring a smaller nozzle size to properly control the application. Second, the stain is oil-based, so you need to clean up the sprayer with mineral spirits rather than water. Be sure to have plenty of mineral spirits available, as much as the water you would use to clean the sprayer if you used latex paint.
When using exterior stain to stain decks and fences, use fabric or paper dropcloths behind or beneath what is being stained. Staining through cracks in fences and decking can kill the grass if it is not soaked up and allowed to stay on the grass.
Interior Wood Stains
Interior wood stains are used to stain architectural wood trim and newly fabricated furniture. They are considerably different from exterior stains in that they are intended to provide natural wood colors, not to tint wood in unnatural colors.
Interior wood stains exist for many familiar wood tones, such as oak, walnut, and mahogany. However, there are also some sorts of wood, like cherry, which are typically stained to a color different from the wood. Natural cherry wood is almost the color of pine or pecan, while stained cherry has a distinct red tone. There are also interior wood stains in colors like “espresso,” mimicking coffee, rather than natural wood.
Because of the variety of woods and how the stains interact with the wood grain, it is essential to do a test piece with interior stains before applying the stain to the entire project. This test must include the same method of application and the same amount of time before wiping off the excess stain.
How to Apply Wood Stain
These stains are applied differently than exterior wood ones. They are almost always used with a natural bristle brush and should always be applied in the direction of the grain. While it is possible to apply these stains with an airless paint sprayer, it is not generally done due to variances that would affect the coloration of the finished project.
Interior stains are usually applied, then wiped off with a rag, limiting the amount of pigmentation that can soak into the wood. Wiping is also done in the direction of the grain. Timing between application and wiping is essential, as the longer the stain is left on the wood, the more it can soak in. That is not the standard way to darken a stained finish. Instead, the wood is allowed to dry after the first application of stain, and then another application of paint is added over the first.
Humidity is a factor in this sort of staining, as the higher the moisture content of the wood, the less stain it can absorb. Staining during high humidity, such as during a rainstorm, is typically avoided.
Finishing Interior Wood Stains
Stained interior woodwork and furniture are normally varnished after the stain has had time to dry. The more coats of varnish applied, the more varnish buildup, creating a finer finish.
Varnish should be applied with a soft, natural bristle brush. Always use long strokes and keep the brushstrokes in the direction of the grain. Keep the bristles wet so that you are applying an even coat. A dry brush will only lay a thin layer of varnish, which will end up splotchy-looking. Before applying any varnish, wipe the surface down with a tacky cloth to remove dust.
Each layer of varnish should be allowed to dry thoroughly before applying another coat. Lightly sand all surfaces with very fine sandpaper (240 or higher grit) to remove any lumps caused by dust particles trapped in the varnish. This will help ensure a smooth final coat. The final coat should not be sanded.
In recent years, interior stain and varnish makers have developed stain and varnish mixtures, allowing for a “one-coat” finish of interior woodwork. These tinted varnishes (which is what they really are) are easy to apply, providing a good-looking finish with much less work.
The trick to applying these finishes is that they must be applied evenly. Otherwise, you get a splotchy finish, with some parts darker than others. That’s because the stain isn’t actually soaking into the wood grain but suspended in the varnish.
How to Properly Stain with Tinted Varnish
When using tinted varnish to create a stained and varnished look, you want to plan out your work carefully, working from the top of the piece downwards. If your brush drips or creates a run, you can rectify it. Drips and runs that are not removed become evident because the finish is thicker there.
Finish one surface at a time, starting by applying finish to the edges with a soft, natural bristle brush. Then fill in the rest of the surface, capturing the edges while wet. You don’t want places where the finish starts to dry before you finish the adjoining surface. That will also cause a darkened area, which is obvious.
Always allow the finish to dry fully before applying any additional coats. As with applying normal varnish, it is useful to sand lightly between coats with extra-fine sandpaper to eliminate any lumps caused by dust particles trapped in the finish.
Related Posts:
How to Fix Wood Stain Mistakes: 4 Easy Methods by Amy Reed December 6, 2022 DIY Mistakes happen all the time, especially when applying wood stains. Some of the most common wood stain mistakes include blotchiness, unwanted streaks, or simply the…
Grey Wood Stain: Guide on How to Choose it by Admin May 10, 2024 Finish Selecting a grey wood stain need not be daunting. Dive into our straightforward guide highlighting five stellar grey stains – from the trendy Driftwood Grey…
Best Stain for Pine by Admin April 29, 2022 Finish Pine is the most common wood used by the home woodworker, partially due to its ready availability and partially due to its low cost. Many…