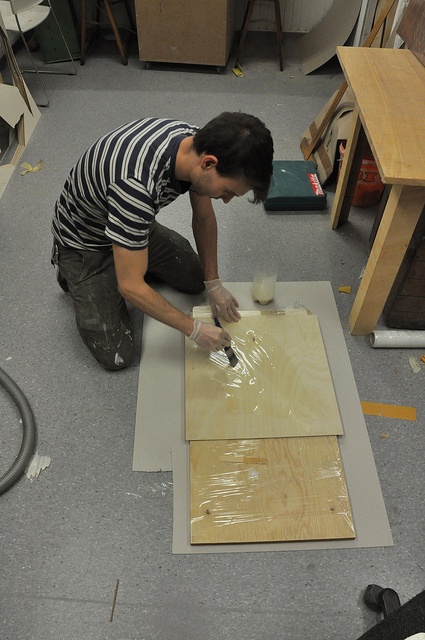
Unless a project you make out of plywood is something temporary or it is just going to spend its life in the garage, you’re probably going to want to apply some sort of finish to it. Finishes enhance the appearance of the original wood, as well as helping to protect it. There are many ways of finishing plywood, from painting it to applying laminate. Which you choose will depend on what you’re making, how you intend to use it and how much you have budgeted for the project.
There are a few exceptions. Phenolic plywood comes pre-finished, eliminating the need for any sort of finishing. There are also some newer plywood products, which come with a laminated finish layer attached. But most plywood doesn’t already come finished, leaving that for you to do.
Of all the possibilities, painting is generally the simplest and least expensive finish you can apply. Painting also gives you the opportunity to add color, which is great for kid’s bedrooms, play rooms or accents throughout the rest of the house. It’s also a great finish for things that you intend to use outdoors, as it will protect from the rain, as long as you have the wood totally sealed. But you want to give whatever you make a good paint job, because poorly painted plywood looks like nothing more than… poorly painted plywood, whereas well painted plywood can look great.
Filling holes and sanding
Any good paint job starts with preparing the wood. That starts before the project even begins. I say that, because proper material selection, looking over the material to ensure that it is undamaged, will make a difference in how easy it is to do your surface preparation. Damage can also happen to the various project parts, in the process of building it, so you always want to make sure that you always take care with all your parts.
Once the project is built, it’s time to prep it for finishing. That means filling holes and sanding. Again, how you do that will make a difference, as you must pick prepping techniques and materials which are compatible with the finish you are going to use. Since we’re talking about painting, that material selection is much simpler than if we were staining and varnishing, as the color of the filler doesn’t need to match the color of the wood.
If you’re making furniture for use in your home out of plywood, you’re probably going to want to use high-grade plywood, such as a cabinet grade hardwood plywood or a sanded softwood plywood. But for the sake of discussion, let’s assume that you aren’t using that and have instead made your project out of construction grade plywood. Can you still get a good finish? Yes; but it takes more work. Even low cost construction plywood can be made to look great, with the right sort of surface prep and paint.
Making construction plywood smooth
The first step in prepping the surface is filling nail holes, splits and knotholes, trying to make the surface as smooth as possible. Typically, nail holes, knotholes, cracks and other irregularities are filled with wood putty, but that’s not the only material you can use. Both drywall mud and spackling can be used to fill and surface plywood and provide a smooth finish. However, neither of these filler products are as strong as wood putty, so they should not be used where they are likely to be bumped or rubbed up against.
Drywall mud is an especially good surface filler if you are using C-D grade construction plywood and want a smooth surface. Skim over the entire surface with a thin layer of drywall mud, using a broad drywall knife, 10” or 12”, just as if you were trying to finish drywall. Allow the mud to dry fully and then sand it smooth, using 120 grit sandpaper. If it needs another coat, due to some especially bad areas, apply it, allow it to dry and sand again. This is the best way to fill in the grain, providing a smooth, even surface.
Keep in mind that any wood filler you use, whether wood putty or drywall mud is going to shrink some when it dries. So don’t be surprised if you have to apply more than one coat. In that case, you’ll want to sand between coats, with 120 grit sandpaper, so that you are applying the second coat over a smooth, level surface.
Be sure to sand and fill the ends of the boards too, as they will often be rough and most plywood will have some voids. Filling also allows you to fill in end grain, providing a smooth surface for painting. You may find it easier to apply the filler here with your fingers, rather than a putty knife. Using your fingers allows you to press the filler into the end grain, as well as any voids that are visible.
If your project is going to be used outdoors, you might want to fill the edge with painter’s caulk, rather than wood putty, again rubbing it in with your fingers. This will allow you to seal the end grain and keep moisture from wicking into the plywood. Moisture is always much more likely to wick into the end grain of wood, than it is into the surface. Since plywood has end grain in all the edges, they all need to be well sealed and paint isn’t enough.
Finish sanding of plywood should be done with 220 grit sandpaper. If you have a lot of filler, you may want to start with something coarser, like 120 or 150 grit, and then move to 220 grit. It is not necessary to use anything finer, as the paint will smooth the surface.
Always wipe off the dust created by sanding the surface of the plywood, before applying the primer coat. Use a soft dry cloth for this, shaking the cloth out, away from the project, so as to not be putting the same sawdust back down on the project in a different area.
Plywood primer
You may choose to prime your plywood project or not prime it. However, priming is usually recommended. Primers are used to seal the surface of the wood. Unlike paint, they won’t soak into the wood as much, but will dry quicker than they soak in, sealing the grain. By using a primer, you’ll actually use less overall material, as you won’t have all your paint soaking into the plywood.
At the same time, primers promote bonding between paint and the project you are painting. Some of the newer high-quality acrylic-latex paints are a paint-primer combination, eliminating the need for a primer.
If you paint a project made out of plywood with latex paint, not paint & primer in one, and don’t use a primer, you’ll find that you use twice as much paint for the first coat, as you will for the second coat. That’s because that first coat is soaking into the wood, sealing the pores. The primer would have done that, without using so much material.
The visible difference that priming will make is remarkable. Since the primer seals the pores, preventing the paint from soaking in, the paint will build up on the surface. That means you’ll actually have a thicker paint finish, after applying two coats of paint. The surface will appear smoother and the grain in low-cost construction grade plywood won’t be so visible.
If you are going to paint your project with latex enamel or an oil-based paint, rather than interior or exterior latex paint, you definitely want to prime it first. Enamel paints do not dry well when applied directly to wood. In this case, the primer acts as a barrier, allowing the paint to dry properly.
Applying any primer coat is as important as applying the finish coat. You want to apply the primer smooth and evenly, so that you don’t leave any drips, puddles or streaks. The texture of those irregularities will show through the finish coat of paint. One thing that helps is to always brush in the direction of the surface grain, using long, smooth strokes.
After your primer dries, always check your project, before painting. It is not uncommon for flaws in the wood or lack of putty in holes to show up after the primer dries, that you couldn’t see before. If these problems occur, merely add more putty, sand the affected area again and touch up your primer.
Light hand sanding of the primer, with 150 or 180 grit sandpaper, will help your project to come out smooth. Often, the primer coat will cause a “fuzz” to “lift” off the surface. This is made of wood fibers, which are not fully attached to the surface of the plywood. These will knock off easily, with the light sanding, helping you to get a smooth finish.
How to choose paint for plywood
There are a large variety of paints which can be applied to plywood. For most projects, water-based acrylic-latex paints are the easiest to work with. However, if you want a semi-gloss finish on your project, you will need to use an acrylic enamel and if you want to have a high-gloss finish, you will need to switch to an oil-based enamel paint. Both enamel and oil-based paints require a primer coat, before painting.
Enamel paints are popular for places where they will receive a lot of wear or where they need to resist dirt. The enamel provides a harder coating than latex paint, which resists wear well, such as wear on a tabletop or the arms of a chair. Likewise, enamel paints hold up well under situations where they are washed often, usually due to surfaces getting dirty.
When kitchen and bathroom cabinets are painted, enamel paints are preferred. Not only do they provide a smoother, glossier finish, which stains won’t seep into; but they can be washed repeatedly, without damaging the paint itself. Using semi-gloss or high gloss enamel finishes for furniture and shelves used in children’s rooms, works well, allowing you to keep things looking clean. Flat or eggshell finishes, which don’t contain enamel, don’t clean anywhere near as easily and might stain permanently.
For extreme durability, epoxy paints are excellent, although they are expensive. This is actually a low-viscosity two-part epoxy compound, tinted for use as paint. Once mixed, you have a limited work time. But you will end up with a much more durable coating than you can get with any other type of paint.
Always use quality paint to get the best finish. Higher quality paints have a higher percentage of solids in them, which results in a thicker, more durable finish. They also tend to cover with less coats. While you will always need to use at least two coats of paint on a new project, with high quality paints that is all you should need. Two coats of a high quality latex paint will totally cover the wood and should hide the texture of the grain; a low cost paint will not do so as well.
Spray painting plywood
Spray painting plywood is not practical in most cases, because there really isn’t all that much paint in the can and it is applied in a very thin coat. Because of that, the paint will not have any wear protection. Rather, the paint will end up being almost like a wood stain, if it is spread over a large area.
However, spray paint works well for small projects and small areas, especially if the surface is extremely smooth. A spray primer should be used first, to seal the wood and allow you to get the most out of your spray paint. Then apply the spray paint in several thin coats, always painting past the end of the piece in each stroke. That will help prevent paint puddling at the ends of the strokes. Applied in this way, spray paint can provide a very glossy finish to plywood projects.
Emulsion for plywood
Emulsion is a plastic paint, basically designed for use on drywall. Yet some people try to use it for plywood as well. That doesn’t work out real well, because the emulsion isn’t designed to stick to wood. If you want to use emulsion with wood, you should first prime the wood thoroughly, using two coats of primer, and then apply an emulsion topcoat.
How to get a really good paint finish
As I already mentioned, the first step to getting a good paint finish is how well you putty and sand the project, before you start painting. Every imperfection in your surface will show up as an imperfection in the paint. Don’t think that your paint can fill in those imperfections, because it can’t. If anything, it will magnify them, especially if everything around the imperfection is nice and smooth.
Using the right type of brush is important to getting the best possible finish. Only use quality brushes, if you want a good finish. For latex based paints, a nylon brush is the best and for oil-based paints, china bristle is best. China bristle is available in black or white bristle, allowing you to pick a brush with a contrasting bristle color to your paint. This makes it easier to see if you have properly cleaned your brush when you are done.
Quality brushes make a difference. To start with, they hold more paint, so you won’t have to make as many trips back to the paint can for more. The bristles on these brushes are carefully trimmed as well, making sure they are of the same length. That affects the finish, as different length bristles can result in more streaks in the paint. A quality brush is an investment and will last for years, if cleaned properly after each use. I have quality brushes that I’ve owned for over 30 years and I’m still using them.
Always plan out the pattern of your painting, before beginning. Many projects work out so that you have some parts which are harder to reach than others. Those are the ones you want to paint first, leaving the easier to paint surfaces until last. You want to try and avoid reaching over a freshly painted surface, in order to reach something you missed.
With plywood, it works best to paint edges first, and then paint the larger flat areas. That way, if you end up with a drip or sag, it is more likely to be on the edge, where it is less visible. Those drips and sags are extremely visible on the large flat areas that plywood projects typically have.
Use a wet brush to paint, not a dry one. The idea isn’t to see how far you can stretch the paint, but rather, to see how much paint you can get on the surface, without getting to the point of having the paint sag or drip. Keeping a wet brush will ensure that you are putting a thicker coat of paint on the surface. Always paint only in the direction of the wood’s surface grain. If you need to go across the grain for some reason, brush over that spot in the direction of the grain afterwards, to minimize brush marks.
Always figure on having to apply two coats of paint, taking the time to do each of them carefully, with ample drying time between coats. Check the project, between coats, for any drips and sags. If there are any, they can be removed by sanding or by scraping them with a razor blade, allowing you to have a smooth surface for the final coat.
Painting plywood for outdoor use
When painting plywood projects which will be left outdoors, it is important to apply a minimum of three heavy coats, which seal the wood entirely. As an alternative, you could apply two coats of paint, over two coats of primer. Either way, the idea is to fully seal the plywood.
I already mentioned using caulking on the edges of panels, but caulking should also be used wherever two pieces of plywood are joined together, so as to keep moisture from becoming trapped in those joints and soaking through some pinhole in the paint to attack the wood.
Don’t forget that installing hardware will break the seal the paint has created around the wood, making a place where moisture can seep in. This problem can be eliminated, by removing the screws again and either dripping a heavy-bodied latex paint or a touch of painters caulk into the screw hole. Then, when the screw is reinserted, the paint or caulking can form a seal between the hardware and the plywood.
Tips and warnings
One great trick to save paint on large projects is to have your paint store tint your primer. With a high quality, high solids paint and a primer that is tinted to be close to the color of your paint, you can usually get away with only one coat of paint over the primer. However, this should not be done for work that will be exposed to the weather, it should only be used for work which will remain indoors.
Adding Floetrol for water-based paints or Penetrol for oil-based paints helps the paint to “flow,” smoothing out the “grain” that the brush produces and making a more uniform finish. Proper use of these additives can make the brush strokes totally disappear in the finish.
When painting to the edge of a piece of plywood, always paint past the edge, rather than stopping your brushstroke at the edge. Stopping at the edge will cause paint to puddle there. Check after painting, to ensure that you didn’t leave a drip around the corner.
Only dip your brush a maximum of halfway into the paint. I often limit it to 1/2 inch for plywood projects, although I’ll go halfway into the paint for home painting. You want to avoid getting paint up into the ferrule; that’s the metal part that holds the bristles in place. Paint in the ferrule will harden, causing the bristles to break off.
Proper cleaning of brushes is extremely important. If you clean your brushes thoroughly after each use, there is no reason why a brush can’t last you 10 years or more. As I said above, I have some brushes that I have owned for more than 30 years, and am still using. After cleaning, comb out the bristles to straighten them, then wrap the brush back up in the original packaging, or in newspaper, to hold the bristles in position and prevent damage to them.
Related Posts:
Can Plywood Get Wet? How to Dry Wet Plywood by Amy Reed March 30, 2023 Repairs Plywood is one of the most universal building materials on the market. It can be used for all kinds of construction – from roof building…
Plywood Stairs Makeover by Admin September 17, 2021 Repairs Contractors are always on the lookout for ways to reduce the cost of building homes. This is especially apparent in tract homes, which by definition…
Beech Plywood by Admin November 5, 2021 Hardwood Birch plywood is one of the more popular hardwood plywood varieties, being commonly used in cabinetmaking, furniture making and even in making jigs in the…