How to Remove a Stripped Screw from Wood: Proven Methods for DIY Success
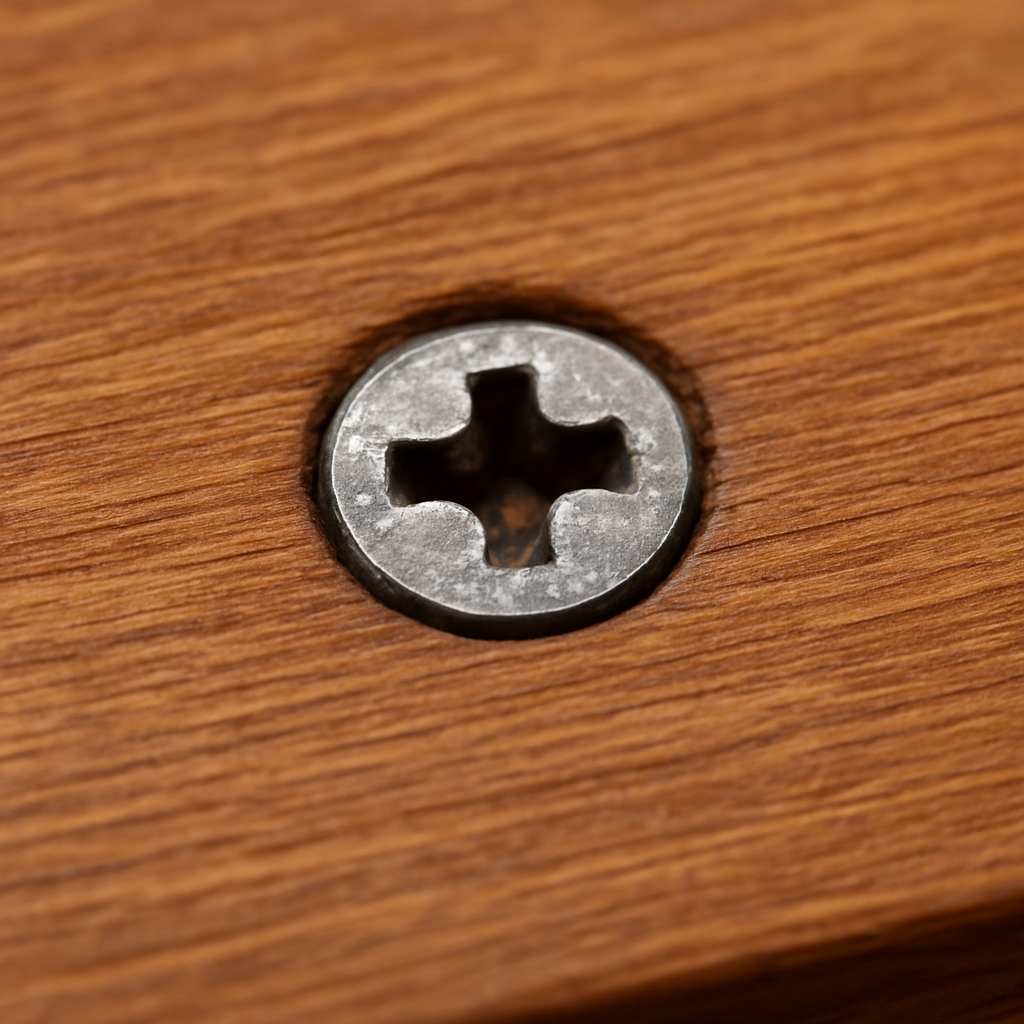
A stripped screw is every woodworker’s nemesis. It usually happens when the head of a flathead or Phillips screw becomes too worn or damaged to grip with a tool. Whether from rust, the wrong drill bit, or overzealous torque, it turns a simple task into a frustrating headache, especially if you’re dealing with fine plywood or furniture.
But don’t worry. You’re not stuck. In this comprehensive DIY guide, we’ll walk through how to remove a stripped screw from wood using real-world methods that minimize damage to your wood, even if the screw is deeply embedded. We’ve also included essential tools and Amazon product links, images with alt text, and pro tips to help you finish the job cleanly and confidently
đź§° Tools You May Need
Before jumping in, here are some must-have tools that can make the process easier:
Tool | Purpose | Amazon Affiliate Link |
---|---|---|
đź”§ Screw Extractor Kit | Best for completely stripped or embedded screws | https://amzn.to/4jjwReV |
🔩 Dremel Rotary Tool | Cuts a new slot in damaged screw heads | https://amzn.to/4kycJ9Y |
🪛 Precision Screwdriver Set | For gripping worn heads with accuracy | https://amzn.to/3Zw7HlY |
🧲 Magnetic Bit Holder for Drill | Helps align and control your bit under pressure | https://amzn.to/43FU2vc |
🧼 Elmer’s Carpenter’s Wood Filler | Fills damaged wood after screw removal | https://amzn.to/3ZsQ6vk |
These affiliate links help support our blog at no extra cost to you.
🪵 Why Screws Get Stripped in Wood
Stripped screws can result from several common issues:
- Using the wrong screwdriver head
- Applying too much torque
- Driving in at an angle
- Rust or aging
- Poor-quality hardware
Understanding why a screw stripped in the first place can help you prevent future frustration.
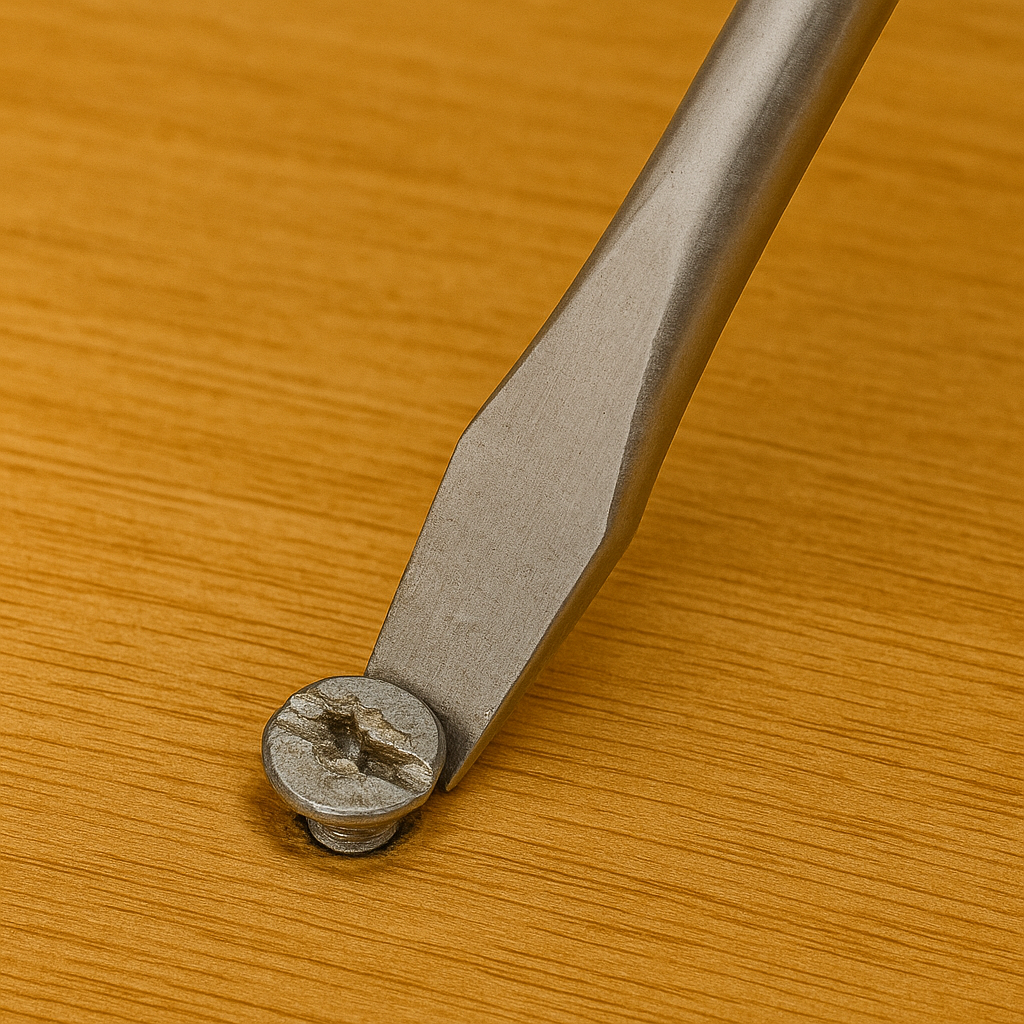
🛠️ Method 1: Use a Flathead Screwdriver
This is the simplest and least invasive method—but it only works if the screw head is not completely destroyed.
What You’ll Need:
- A flathead screwdriver
- Pliers (optional)
Steps:
- Insert the flathead firmly into the stripped screw head.
- Apply downward pressure and twist counterclockwise.
- If it starts to rise, continue slowly.
- If stuck midway, use pliers to pull it out.

⚠️ Tip:
If the screwdriver slips easily or you can’t get a bite, stop before damaging the screw further. Move on to another method.
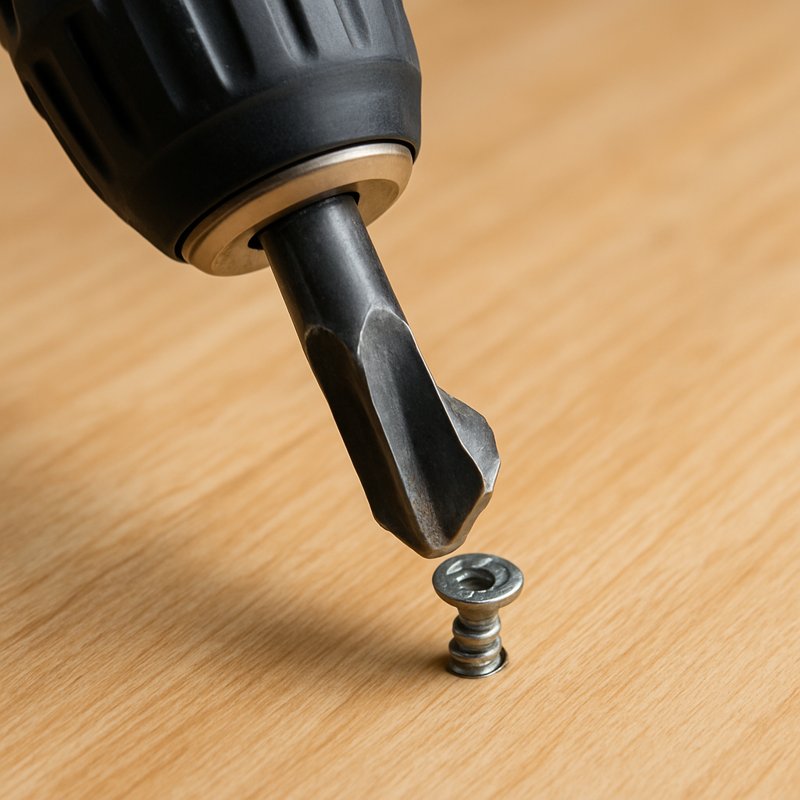
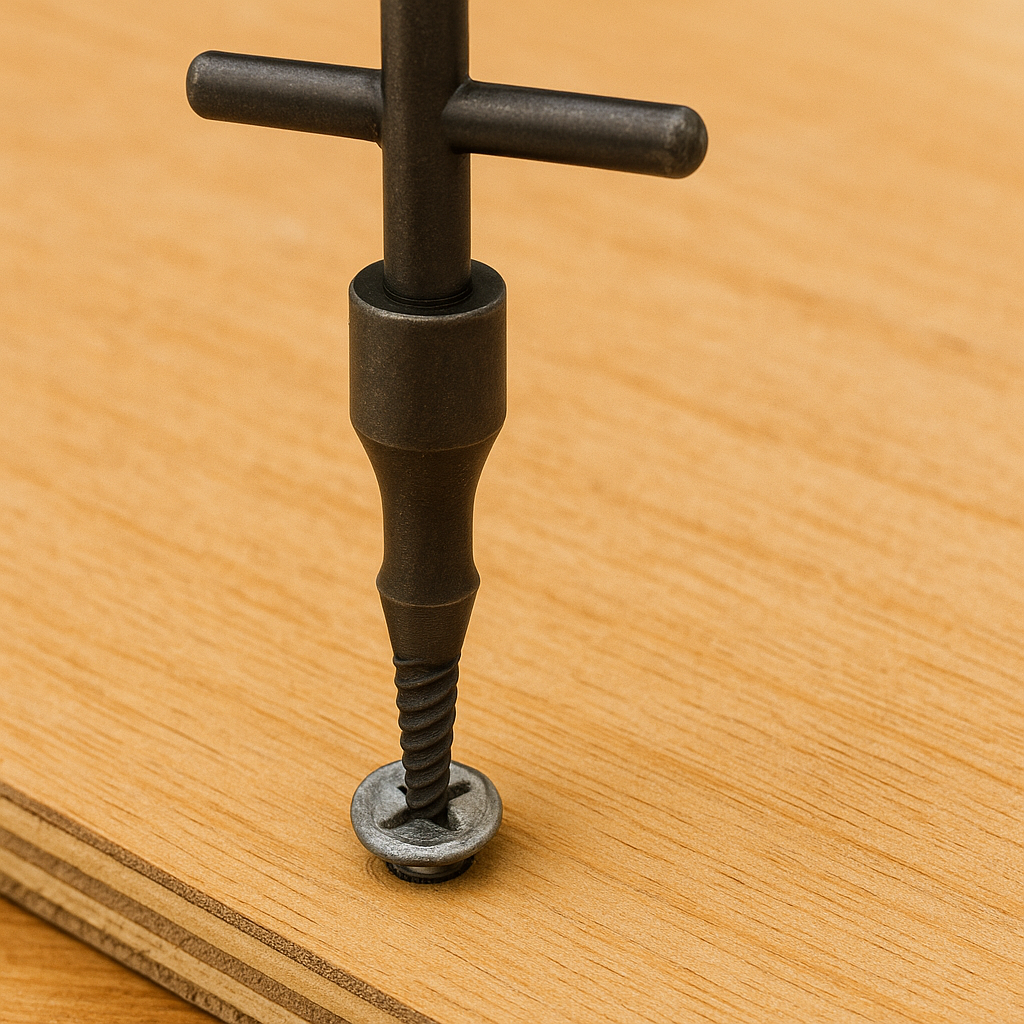
🪚 Method 2: Use a Larger Drill Bit
Sometimes, using a larger drill bit attached to an electric drill can remove a stripped head screw from wood. A drill bit the correct size for the screw won’t fit firmly, but a more significant drill bit will fill the entire groove, allowing you to remove it from the wood slowly. Using this method shouldn’t damage plywood severely, provided you work slowly.
If a normal bit can’t grip, try a slightly larger drill bit to create friction with the stripped screw head.
What You’ll Need:
- A power drill
- Drill bits (slightly larger than the screw)
- Pliers
Steps:
- Choose a drill bit that just fills the screw head.
- Drill slowly in reverse (counterclockwise).
- Once the screw loosens, use pliers to pull it out.

đź§· Method 3: Steel Wool Hack
If your screwdriver slips and you don’t want to damage the wood further, try this gentler trick.
What You’ll Need:
- Steel wool or abrasive sponge
- Screwdriver
- Pliers (optional)
Steps:
- Place a small bit of steel wool over the screw head.
- Press the screwdriver into the wool and twist.
- The added friction may be enough to remove it.

Alternative Materials: Sand, abrasive cleanser powder, or even a thin piece of a rubber glove.
🔨 Method 4: Hammer-In the Screwdriver
Force the screwdriver to bite into the damaged screw by lightly tapping it with a hammer.
What You’ll Need:
- Hammer
- Screwdriver
- Pliers (optional)
Steps:
- Insert the screwdriver into the damaged head.
- Tap it gently with the hammer to seat it.
- Twist slowly to extract.
⚠️ Caution:
This method can crack wood if you’re working on veneer or thin plywood. Use this only if you’re not worried about minor surface damage.
đź”§ Method 5: Cut a New Slot with a Dremel
When the head is destroyed, create a new groove with a rotary tool.
What You’ll Need:
- Dremel with a metal cutting disc
- Flathead screwdriver
- Eye protection
Steps:
- Put on eye protection.
- Cut a single horizontal slot across the screw.
- Use a flathead screwdriver to twist it out.

Pro Tip:
Cut just deep enough to create a slot—don’t gouge the surrounding wood. You can fill in any scratches later with wood filler.
🧲 Method 6: Use a Screw Extractor Kit
If all else fails, it’s time for the big guns: a screw extractor.
What You’ll Need:
- Screw extractor kit
- Drill
- Hammer
- Locking pliers
Steps:
- Drill a pilot hole in the center of the screw.
- Insert the extractor and tap it in with a hammer.
- Twist the extractor counterclockwise until the screw loosens.

Pro Tip:
Apply a drop of WD-40 or oil to the screw before using the extractor for better performance.
đź§° Method 7: Locking Pliers (If Screw is Raised)
If any part of the screw sticks out, locking pliers may be all you need.
Steps:
- Clamp the pliers around the screw shank.
- Turn slowly and firmly until loose.
- Pull the screw out once it’s free.

đź§Ľ After Removal: Repair the Damage
Removing the screw is only half the battle. If you’ve damaged the wood or surrounding finish, here’s how to fix it:
Steps:
- Clean the hole with a small chisel or utility knife.
- Fill with Elmer’s wood filler.
- Let it dry completely.
- Sand flush and touch up with stain or paint.

đź§ Recap: Which Method Is Best?
Situation | Best Method |
---|---|
Screw barely stripped | Flathead or rubber band |
Screw deeply embedded | Screw extractor |
Screw totally destroyed | Screw destroyed |
Screw slightly raised | Locking pliers |
Soft wood surface | Dremel cut a slot |
âś… Final Thoughts: What to Remember
- Don’t panic. Stripped screws are common and fixable.
- Start with the least invasive method and work your way up.
- Stop and switch methods if one isn’t working to avoid further damage.
- Invest in quality tools—they make all the difference.