When I first bought my home, the basement felt like wasted potential. It was dark, cool, and mostly used for storing boxes I didn’t want to deal with. Over time, though, I started to realize how much value that space could add if I treated it right. That’s when I learned what a walkout basement really is — and it completely changed how I looked at my house.
A walkout basement isn’t just a way to make a lower level feel less like a cave. It can transform your home’s layout, make everyday life more convenient, and even increase resale value. After spending months researching, planning, and working on my own project, I can confidently say it’s one of the most rewarding upgrades a homeowner can take on.
In this guide, I’ll walk you through what a walkout basement is, its benefits and challenges, and how to build one safely and effectively. Whether you’re looking to finish your basement or just understand what’s possible, this step-by-step overview will help you plan every part of the process.
What Is a Walkout Basement? (Definition and Basics)
A walkout basement is a lower-level space with direct outdoor access through a full-sized door. In most homes, it’s built into a slope, allowing one side of the basement to be at ground level. This setup allows for standard-sized doors, larger windows, and even patios — giving your lower level the same livable feeling as any main-floor room.
If your property has a natural slope, you may already have the perfect setup for converting to a walkout basement without major excavation. For more about choosing the right materials, see our guide to plywood sheathing.
Why Homeowners Love Walkout Basements
When I first started planning my walkout basement, I was surprised by how many homeowners were doing the same thing. According to housing data, out of roughly 133 million houses in the U.S., about 37 million have basements — but only a fraction are walkouts. That means there’s massive untapped potential for extra living space.
Here are some of the reasons homeowners — myself included — love this setup:
1. Added Living Space for Less Money
Finishing a walkout basement gives you hundreds of extra square feet of usable area without the high cost of a full addition. Since the foundation and walls are already in place, you’re essentially converting existing space instead of building new. For families that need a guest suite, office, or home gym, it’s one of the most cost-effective ways to expand.
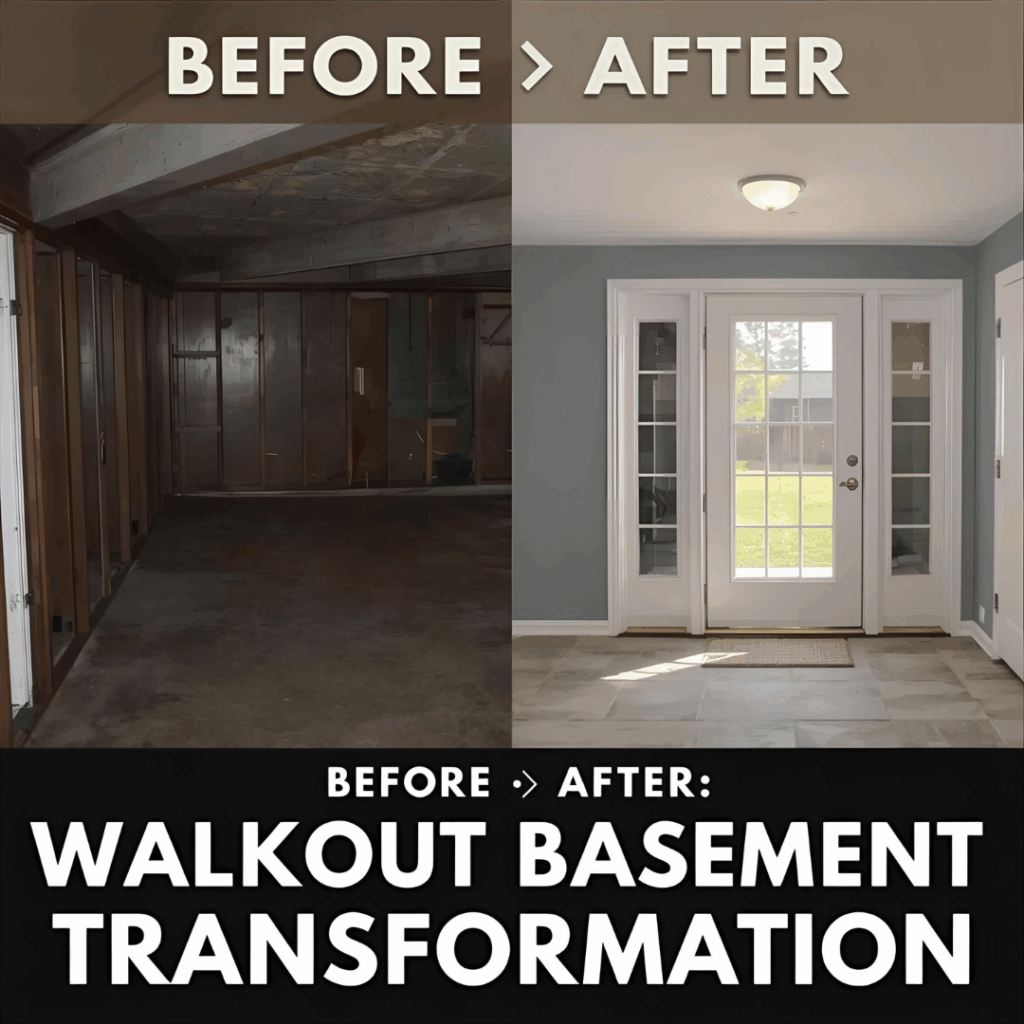
2. More Natural Light and Fresh Air
One of the biggest drawbacks of most basements is how dim and stale they feel. A walkout basement completely changes that. By adding windows, patio doors, or even French doors, you bring in natural light and ventilation — making it feel like part of the main home instead of an afterthought.
3. Easier Outdoor Access
If you love spending time outside, a walkout basement can be a game-changer. I use mine as a transition space between the yard and house — especially during summer when we’re constantly moving between the patio and the lower family room. It’s also convenient for carrying tools, bikes, or garden supplies in and out without going through the main floor.
4. Higher Resale Value
A properly designed walkout basement can significantly increase a home’s value. Real estate agents often list it as a premium feature because buyers see it as bonus square footage. It’s not uncommon for homes with walkout basements to sell faster and for more money than similar models without one.
Challenges of Building a Walkout Basement
Like any home improvement project, a walkout basement isn’t all sunshine and savings. There are a few obstacles you’ll likely face — but most can be overcome with smart design and proper preparation.
1. Moisture and Drainage Issues
Basements naturally collect moisture, and when you start cutting openings into walls, the risk of water intrusion increases. If your yard slopes toward your house, you’ll need to address drainage before construction. I’ll share how to handle that in a moment, but it’s something you want to think about early.
2. Excavation and Structural Work
If your basement isn’t already partially exposed, you’ll need to dig. Excavation isn’t just about removing dirt; it also requires engineering support, retaining walls, and proper grading. The cost depends on your lot’s slope and soil type, but it’s one of the bigger line items in most projects.
3. Permits and Building Codes
Every area has different rules regarding egress doors, ceiling height, and structural modifications. Check with your local building department before touching a wall. In my case, I needed a structural engineer to sign off on the door opening and the placement of the lintel beam.
How to Plan a Walkout Basement Entryway
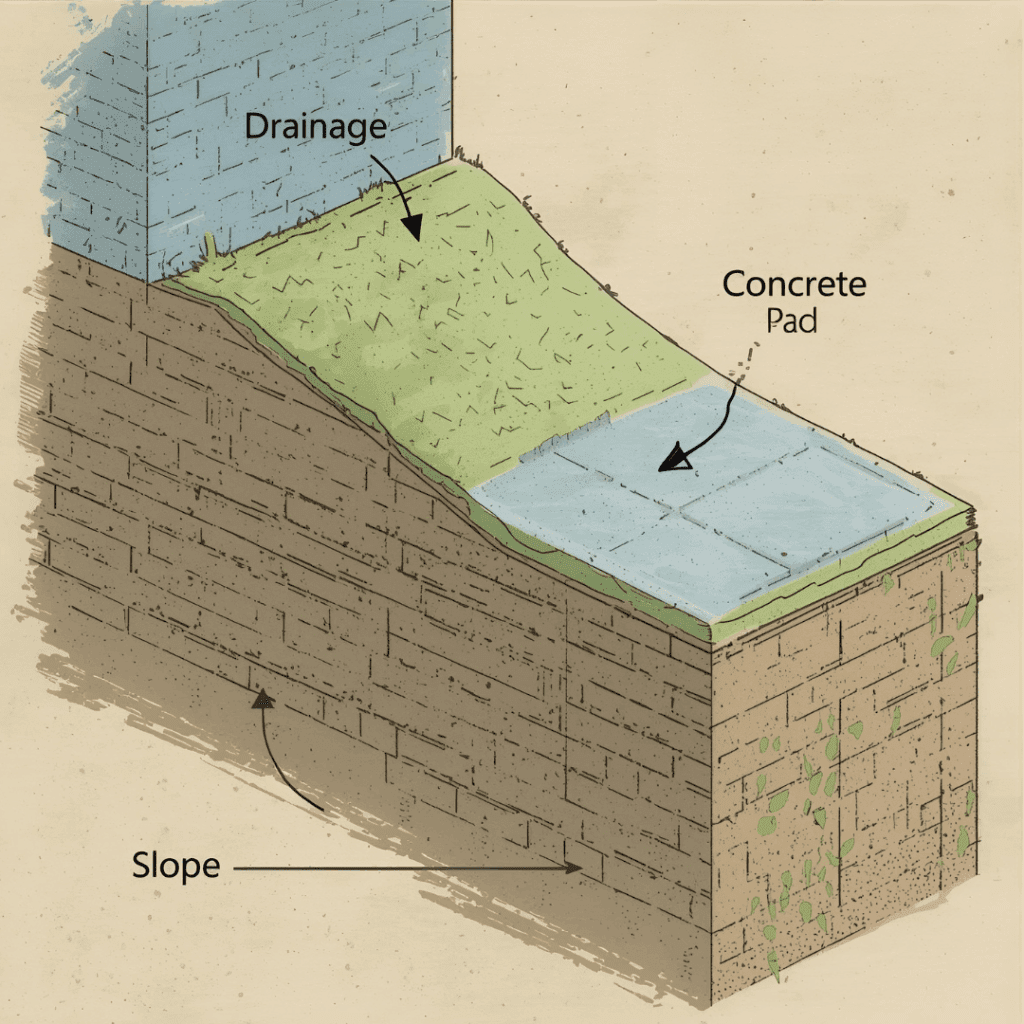
The easiest homes to convert are those where one basement wall is already above ground level. In this scenario, you can cut an opening, add a doorway, and pour a small concrete pad, and you’re halfway there. For homes on flat lots, excavation is necessary to expose part of the foundation.
Step 1: Designing the Layout
Before you start digging, spend time sketching out your entryway. Think about traffic flow, safety, and how you’ll use the space. A straight stairwell works well if you have room, but a 90-degree turn along the foundation can save space and blend into your landscape.
Step 2: Handling Drainage
This step is absolutely critical. When you dig out the earth to form your stairwell, you’re essentially creating a bowl that can collect rainwater. Without proper drainage, your new basement entrance could flood the first time it rains.
French Drain System: Installed at the base of the stairwell to channel water away.
Sump Pump: A reliable backup for heavy rainfall or snowmelt.
Gravel Fill: Added under the concrete pad to improve drainage and prevent settling.
Proper Slope: The ground around the stairwell slopes away from the door to guide water out.
Even if you think you won’t need it, install a drain. Preventing water damage is far more cost-effective than fixing it after the fact.
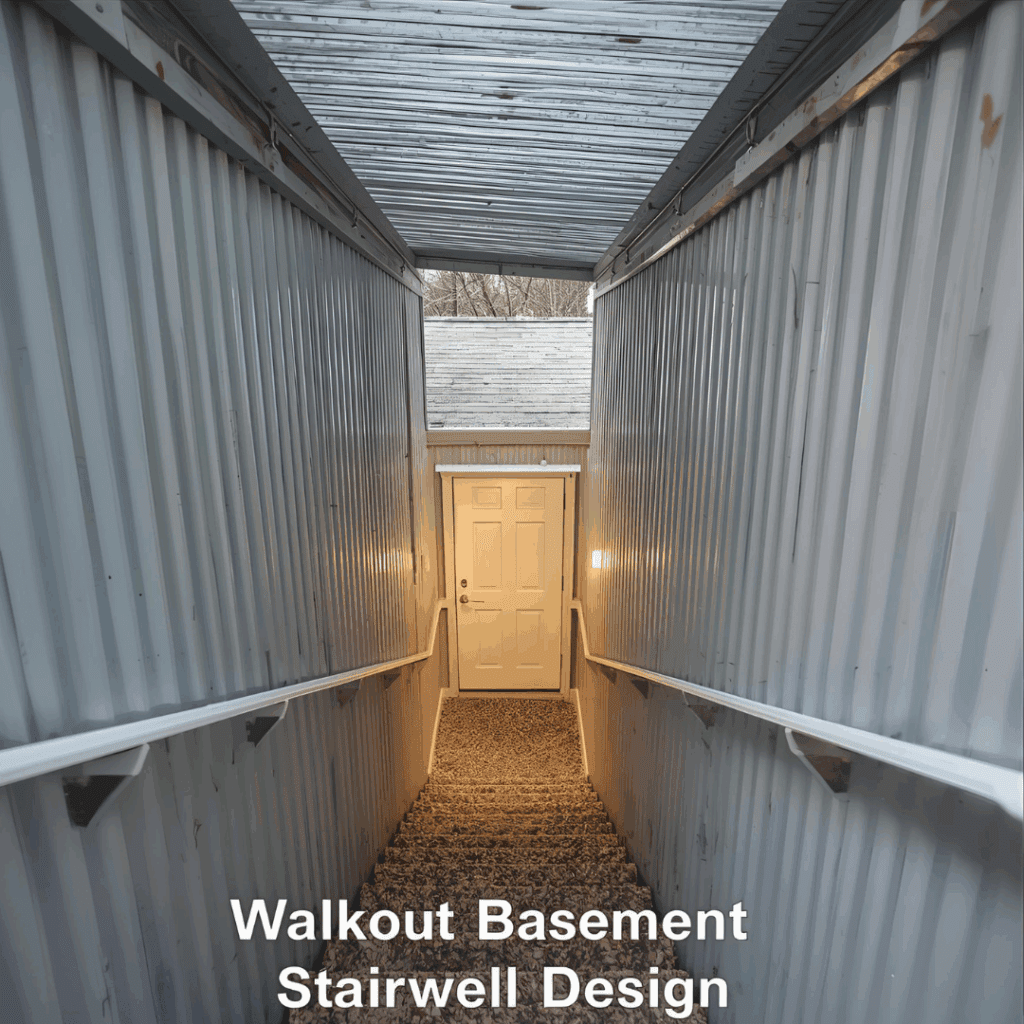
Step 3: Building a Roof Over the Stairwell
If your basement entrance is exposed to the elements, a small roof makes a big difference. I built a simple lean-to roof using treated lumber and corrugated metal sheets. It’s not fancy, but it keeps snow and rain from pooling near the door. Polycarbonate panels work too if you want more light to come through.
Building the Walkout Basement Doorway
Once drainage and excavation are sorted out, it’s time to cut into the wall — the most technical part of the project.
Cutting the Opening
Use a diamond-bladed saw for precision when cutting concrete or masonry. Take your time and measure twice before making any cuts. Once the section is removed, clean the edges and check for loose mortar.
If your basement walls are concrete block, fill any gaps around the cutout with construction adhesive and short 2×4 sections to keep everything tight.
Installing the Lintel Beam
Above the door opening, you’ll need a steel lintel to support the wall above. The lintel carries the load that used to sit on the section you removed. Without it, the wall could crack or sag over time. Once in place, secure it with masonry anchors and verify that it’s perfectly level before framing the doorway.
Framing and Hanging the Door
A steel door with a pre-hung frame is ideal for basements — strong, weather-resistant, and easy to install. Align it carefully in the cutout, shim it plumb, and fasten it with anchors rated for concrete. Add weatherstripping and a solid threshold to keep out drafts and moisture.
Choosing Stairwell Materials
You have two main choices for the stairwell walls: poured concrete or cinder blocks.
Poured Concrete: Best for long-term durability and a seamless look. It’s more expensive and typically requires professional help, but offers the cleanest finish.
Cinder Block Walls: Great for DIYers. Easier to work with, less expensive, and still strong enough when properly reinforced with rebar and mortar.
For the stairs themselves, you can pour concrete directly into forms or use precast concrete steps. I went the poured route — it took longer but felt more permanent.
Finishing Touches That Make a Difference
Once the major construction is done, the fun part begins. Here are a few details that make a walkout basement not just functional, but inviting:
Lighting: Add wall sconces or step lights along the stairwell. It’s both safer and more attractive at night.
Landscaping: Blend the new entryway into your yard with shrubs or stone borders.
Security: A motion sensor light and sturdy lock go a long way in protecting your investment.
Insulation: Make sure the door is properly insulated to maintain basement temperature and energy efficiency.
Finishes: If your basement will serve as a living space, consider flooring, drywall, and moisture-resistant paint for a comfortable feel.
Tools and Materials You’ll Likely Need
Based on my own project, here’s a list of what helped me most (all available online or at most home improvement stores):
These materials aren’t just convenient — they’re essential for ensuring your walkout basement stays dry and solid for years.
Safety and Professional Help
Even if you’re a confident DIYer, cutting into a basement wall or altering the foundation is serious work. I handled some parts myself, but brought in professionals for structural cutting and waterproofing. If your soil is unstable or the project feels overwhelming, hiring a contractor can actually save you money in the long run by avoiding mistakes.
Always follow local codes and inspection requirements. A walkout basement done right will serve your family for decades; one done hastily can lead to constant maintenance headaches.
Final Thoughts
Turning my unfinished lower level into a walkout basement completely changed how I use my home. What was once a cold storage space is now a bright, accessible area where I can work, relax, and walk straight out to the backyard. The process took planning and patience — especially with drainage and concrete work — but the result was worth every hour.
If you’re considering doing the same, remember this: proper grading and waterproofing are everything. Once those are under control, the rest is straightforward carpentry and creativity. With good planning, even an average basement can become a highlight of your home — one that adds both comfort and real market value.
Attic Insulation Removal: Complete Guide for Homeowners by Admin August 6, 2025 Repairs Rising energy bills and drafty rooms often mean the attic isn’t doing its job. Attic insulation removal can help. Warm air naturally travels upward, and…


")
")

