When I first started messing with plywood, I honestly didn’t care what I was buying. Pine was cheap, easy to find, and I figured all plywood was basically the same anyway. Every time I cut it, the edges chipped. Sanding didn’t help much. I just assumed plywood was meant to look rough.
Then one afternoon at the lumberyard, I noticed a stack of maple plywood. The price nearly knocked me back—I actually muttered “no way” under my breath. I walked past it twice before finally giving in and tossing a sheet on the cart.
The difference showed up the second I cut it. No tear-out, no bend when I slid it onto the sawhorses. It felt heavy, solid, more like hardwood than sheet goods. Running my hand over the surface, I caught myself grinning. The cabinet I built out of that panel looked far better than I thought I was capable of.
Since then, I keep maple around for the projects that matter. I’ve still screwed a few sheets up—bad stain, sloppy cuts, even dropped one out of the truck once—but that’s woodworking. Every mistake teaches you something you won’t forget.
What is Maple Plywood?
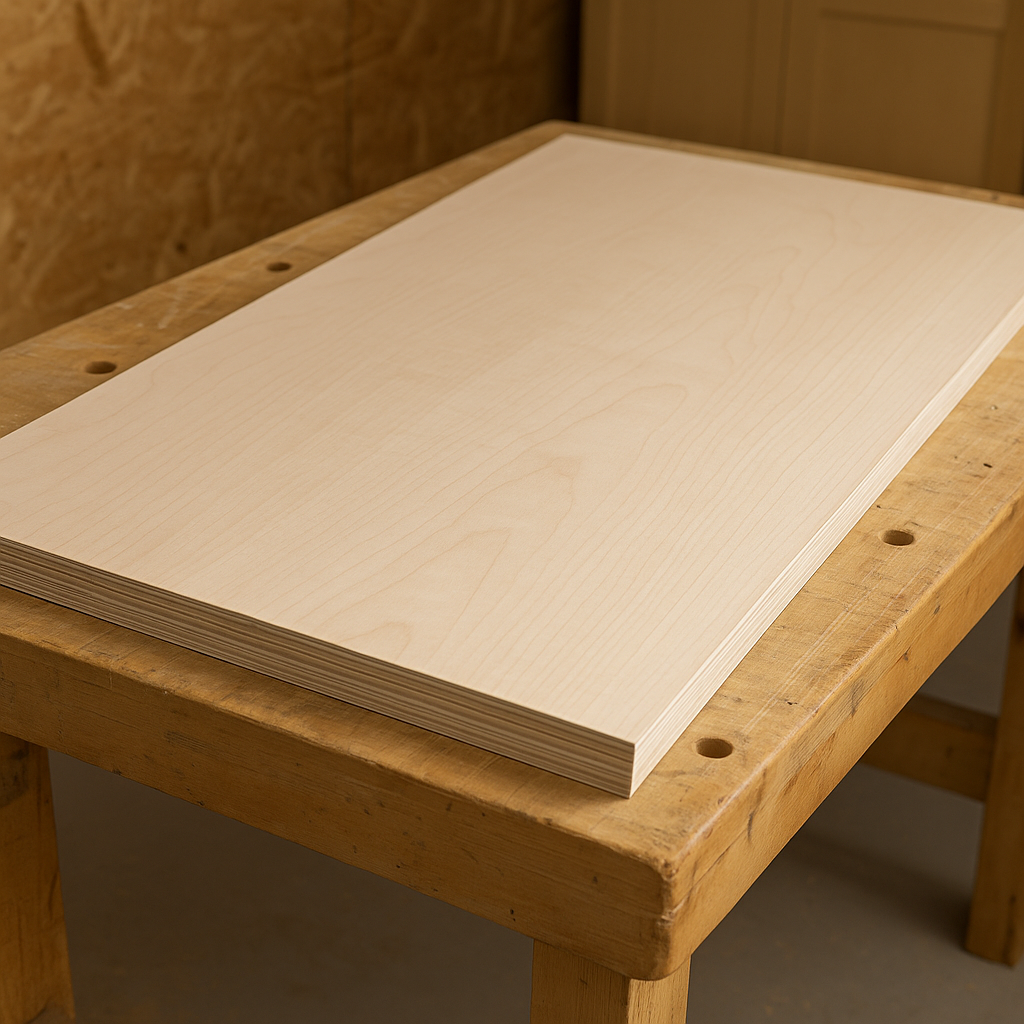
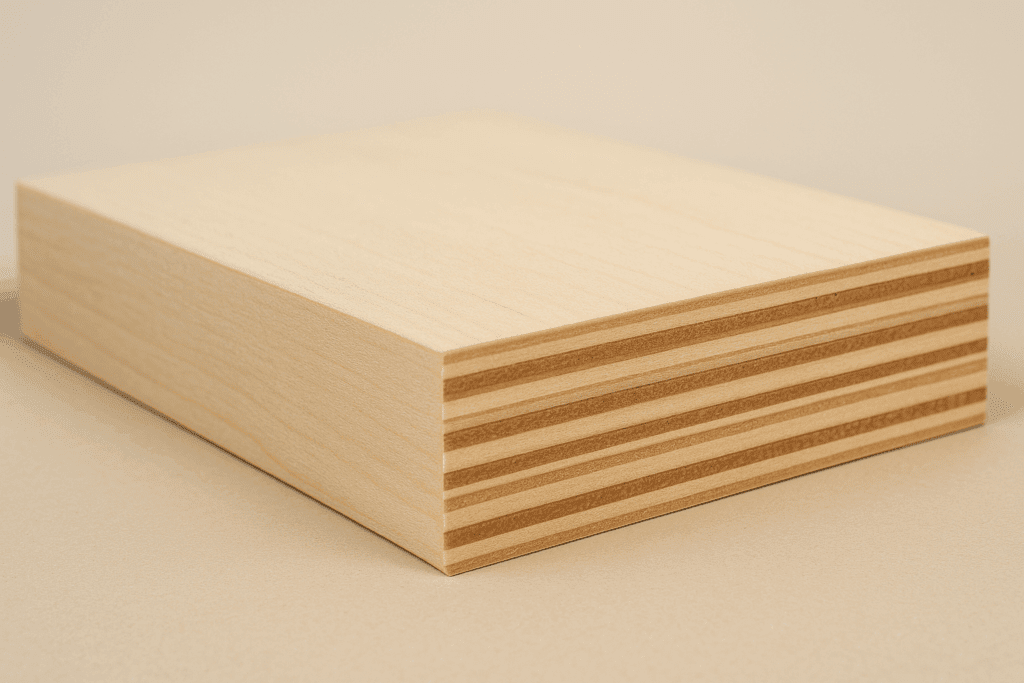
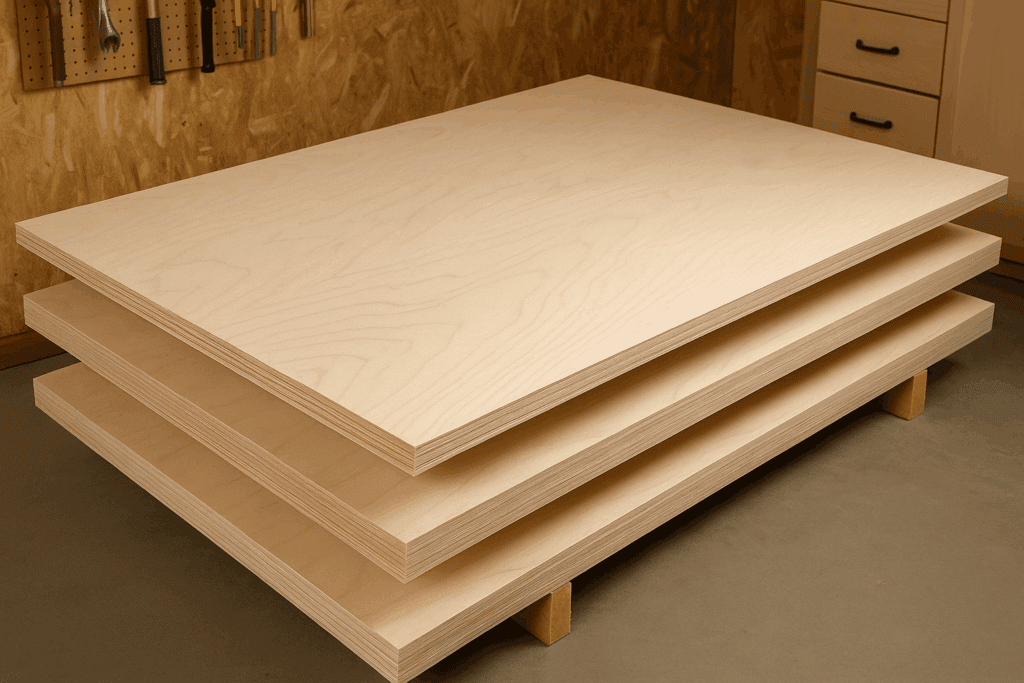
At its core, plywood is just thin layers of wood veneer glued together, stacked so the grain runs in different directions for strength. Maple plywood stands out because the top layer—the one you actually see—is real maple hardwood. That face veneer gives it a smooth, attractive look, while the inner plies do the heavy lifting and keep the sheet stable.
You’ll usually find it in common thicknesses like 1/4”, 1/2”, and 3/4”, which cover most DIY needs. Thinner panels are handy for drawer bottoms or cabinet backs, while the thick stuff is perfect for shelving, workbenches, or anything that takes a beating.
Grading matters too. A1 is cabinet-grade—super clean, no patches, ready for stain or clear coat. B2 is cheaper and might have a few filled knots or color variation, but it still works great if you’re painting or building shop furniture.
Visually, maple plywood has a pale, creamy tone with a subtle grain that looks sharp in both modern and traditional projects. It’s one of those materials that instantly makes a DIY build feel more “finished.”
Why DIYers Love Maple Plywood (and When to Avoid It)
Pros
✔ Strong, durable, and less prone to warping than softwood plywood. ✔ Smooth maple veneer makes for an excellent painting or staining surface. ✔ Light grain works for both modern and rustic DIY projects. ✔ Widely available at lumberyards and home improvement stores.
Cons
✘ Heavier than pine or birch plywood—tough to move around solo. ✘ Pricier than budget plywood. ✘ Maple veneer stains unevenly if not prepped correctly.
If you want a project that looks professional but don’t want to spend solid-maple prices, maple plywood is a fantastic middle ground.
DIY Projects with Maple Plywood
1. Cabinets and Built-Ins
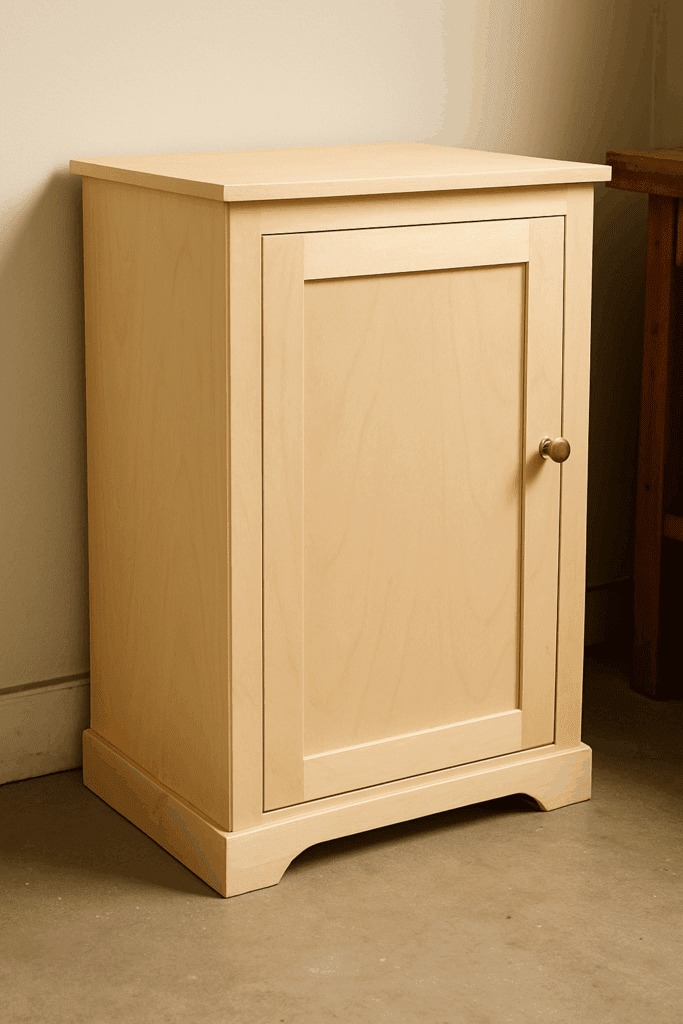
The first time I used Maple was for garage cabinets. Cheap grade, quick paint job, didn’t expect much. They’re still loaded with junk—paint cans, screws, old rags—and somehow fine. Later, I used the good A1 sheets for a pantry cabinet. Took forever to sand, add trim, and get it looking sharp. My wife thought it was bought. I didn’t bother explaining.
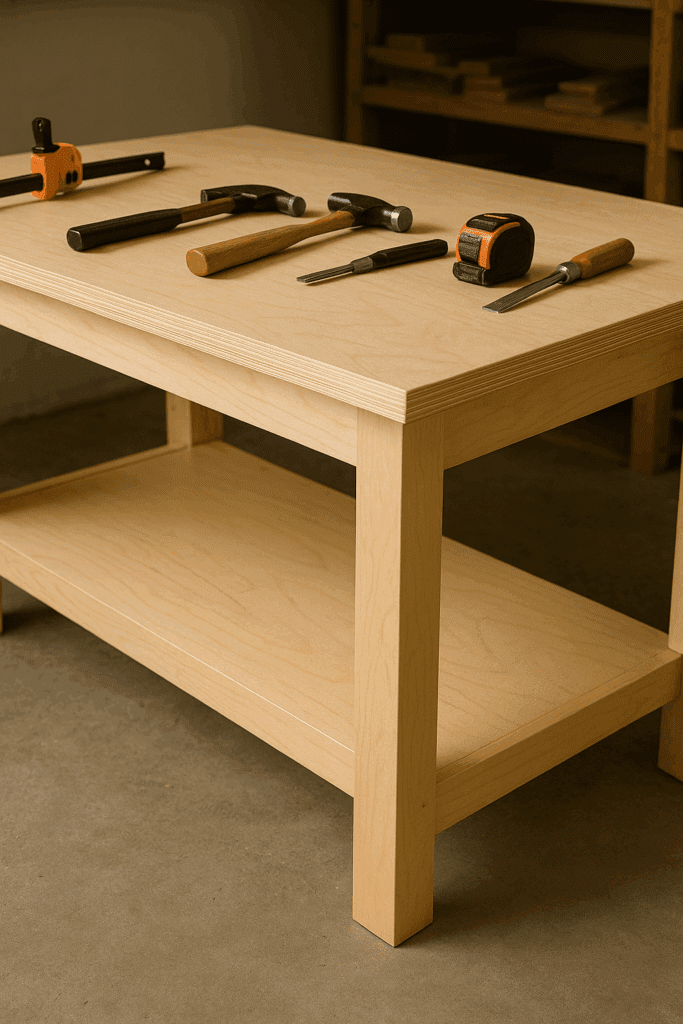
2. Workbench Tops
My bench? Two thick sheets glued and screwed. Heavy as a truck hood. Nearly threw my back hauling it in. Doesn’t move, though. I’ve drilled right into it by mistake, spilled stain, and hammered on the same spot a hundred times. Still flat. Still ugly. Still the best surface I’ve got.
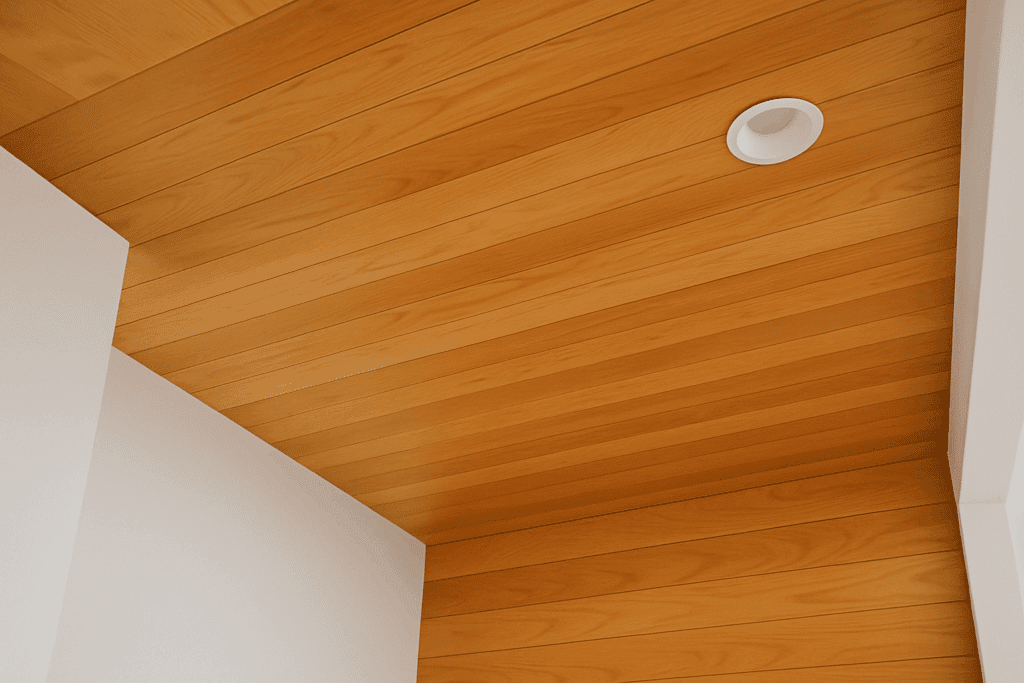
3. Accent Walls and Ceilings
Tried ripping maple into strips for a ceiling. Bad call. Nails dropping in my hair, arms shaking, ladder wobbling. I cursed through most of it. Stained it honey color at the end and… yeah, worth it. People walk in and ask who did it. I just laugh.
4. Furniture
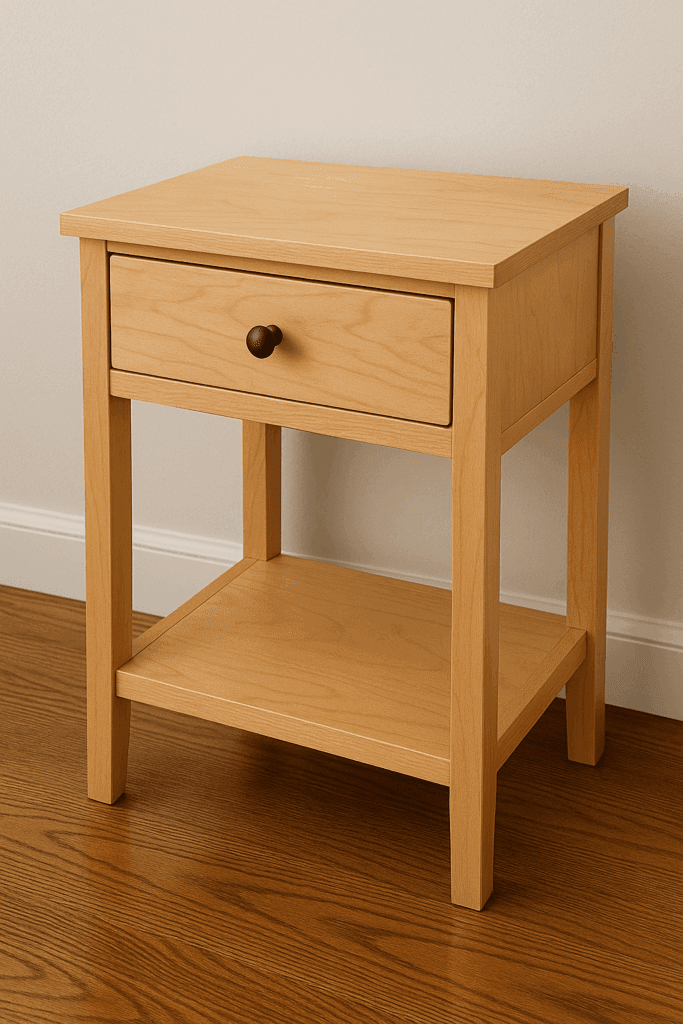
Built my daughter a nightstand out of one sheet. Nothing fancy—box, trim, quick clear coat. Stronger than the one we bought. She brags it’s “custom.” Makes me grin every time. I’ve made shelves, a desk, and even a headboard since. Simple builds, but maple tricks people into thinking you worked harder than you did.
How to Cut Maple Plywood Without Tear-Out
Cutting maple plywood cleanly can be frustrating because the thin veneer on the surface tends to splinter easily. With the right blade, setup, and a few pro tricks, you can make smooth, crisp cuts that look like they came straight from a cabinet shop.
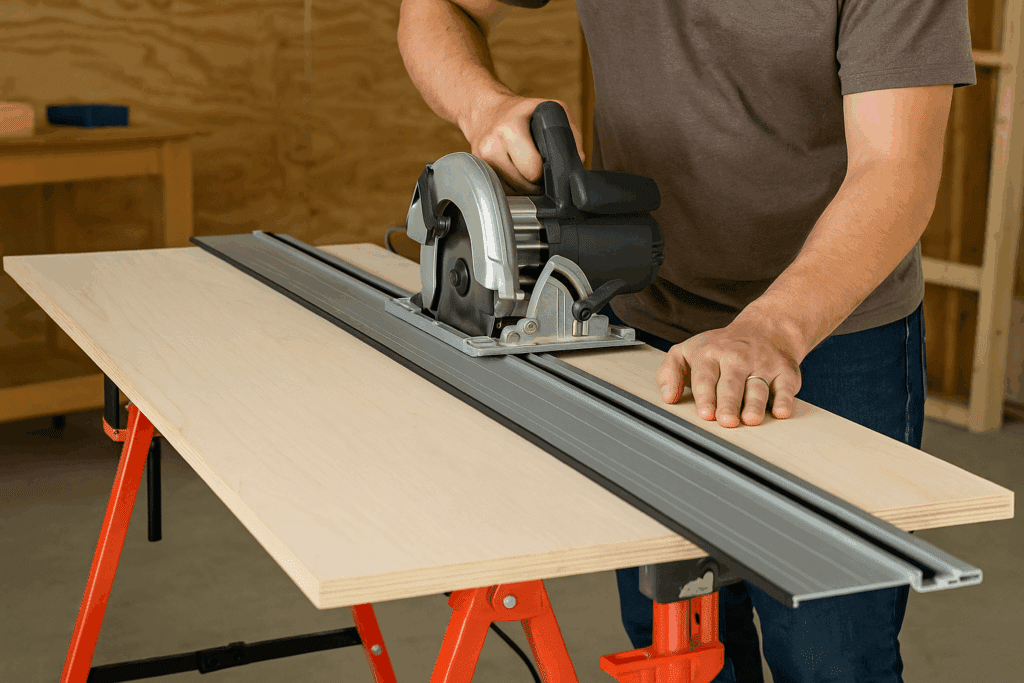
Start with the blade. A carbide-tipped blade with at least 60 teeth is the minimum, but an 80-tooth plywood blade is even better if you’re using a table saw. Dull or coarse blades are the biggest reason plywood tears out. Before cutting, mark your line clearly and run painter’s tape over it. The tape keeps the top fibers pressed down, which helps prevent chipping. If you want an extra-sharp edge, lightly score the line with a utility knife before you bring the saw to it.
Make sure the entire sheet is fully supported on sawhorses, foam insulation, or a cutting table. Unsupported plywood tends to sag, and that movement causes splinters at the cut. Always cut with the good side down when using a circular saw, or face up when working on a table saw. Move slowly and steadily with a straightedge guide, and you’ll get factory-smooth results every time.
How to Finish Maple Plywood the Right Way
Finishing maple plywood can be surprisingly tricky. On the surface, it looks like a straightforward job—sand it, stain it, seal it—but maple has a habit of blotching if you don’t prep it correctly. I learned that the hard way the first time I tried to stain a cabinet side panel. The surface looked smooth when I brushed on the color, but within a few minutes, the stain had sunk in unevenly, leaving dark patches that ruined the look. Since then, I’ve changed my approach.
Sand Lightly, Don’t Rush
Maple veneer is thin, so you can’t be aggressive with sanding. I usually start with 120 grit, then step up to 180, and finally 220. That’s plenty. If you go any further, you risk sanding right through the veneer or polishing the surface so smooth that it won’t accept stain. An orbital sander works fine—just keep it moving. I also like to wipe the surface with a damp rag after the first pass; it raises the grain slightly so the final sanding leaves a crisp, smooth surface.
Conditioner Is Not Optional
Here’s where most people go wrong: they skip the wood conditioner. Don’t. Maple absorbs stain unevenly, and a pre-stain conditioner evens things out. It doesn’t take long—wipe it on with a brush or rag, wait a few minutes, then wipe off the extra. Without it, you’ll almost certainly end up with blotches.
Now comes the fun part. If you love maple’s natural pale look, you can skip the stain and just seal with polyurethane or Danish oil. That keeps the wood light and modern-looking. But if you want color, always test first on a scrap or hidden section. Maple can trick you—sometimes it goes darker than expected, sometimes lighter. Gel stains are easier to control than liquid ones. Work in thin coats, wipe quickly, and don’t try to “force” color into the wood.
Maple Plywood Prices
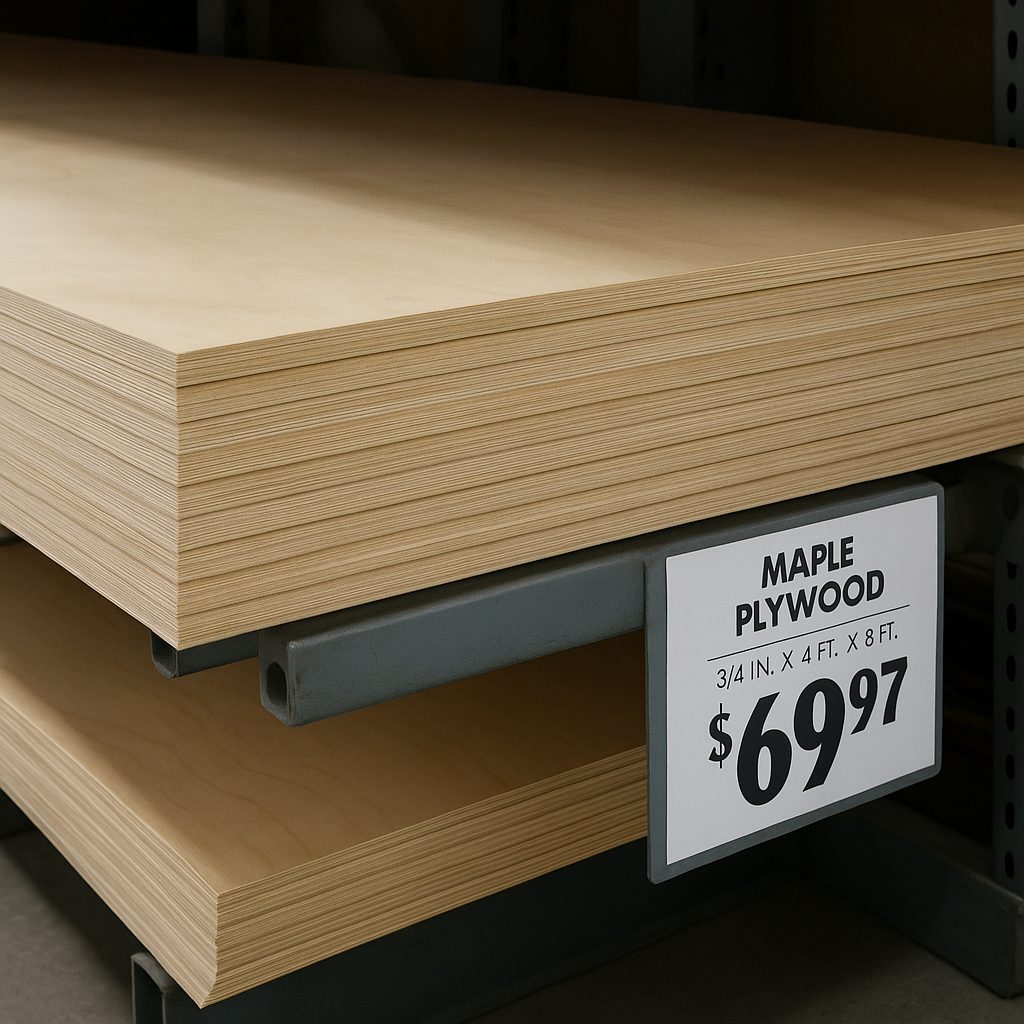
Lumber prices fluctuate, but here’s a general guide for 4×8 sheets (3/4” thick):
Home Depot / Lowe’s: $55–$75.
Cabinet-grade A1 Maple: $85–$120 at lumberyards.
Pro Tips I’ve Learned Along the Way
One lesson I picked up early was to always seal the raw edges of maple plywood. A strip of edge banding or a small piece of trim makes the project look finished and keeps moisture from sneaking in. I also make a point of storing sheets flat, supported on a few sticks or a flat surface. Lean them against the wall for too long, and they’ll bow, which can make cutting and assembly a headache.
Don’t throw away those offcuts either—they’re perfect for drawer dividers, small jigs, or practice pieces when you’re testing stains and finishes. And here’s my golden rule: when in doubt, test on scrap first. Maple has a mind of its own, and you’ll save yourself plenty of frustration by working out the kinks on a leftover piece instead of your final project.
FAQs About Maple Plywood
Q: Is maple plywood good for outdoor projects? A: No—maple is best indoors. For outdoor projects, choose marine plywood or treated lumber.
Q: Can I paint maple plywood? A: Absolutely. Sand well, prime first, and use a high-quality paint for smooth coverage.
Q: What’s the difference between birch and maple plywood? A: Birch tends to be slightly cheaper, while maple has a tighter, cleaner grain that looks higher-end.
Conclusion: Why Maple Plywood Belongs in Your Next DIY Project
At the end of the day, maple plywood offers the best of both worlds: the strength of plywood with the beauty of maple hardwood. It’s not the cheapest option, but it’s worth every penny if you want furniture, cabinets, or projects that last.
For me, it turned from a “splurge” into a staple. Nearly every big DIY project in my home now involves maple plywood somewhere—whether it’s a bookshelf in the kids’ room, a sturdy garage bench, or a crisp modern accent wall.
Related Posts:
🍒 Cherry Wood: Finishing Tips & Furniture Ideas by Admin November 5, 2025 DIY The first time I used cherry wood, I honestly thought I’d grabbed the wrong board. It looked pale, almost washed out. I remember staring at…
Mastering the Art of Finishing Plywood for Stunning Results by Admin March 18, 2025 Finish Applying a finish to a woodworking project can be intimidating. A well-executed finish enhances the wood’s natural beauty, highlights craftsmanship, and gives the piece a…