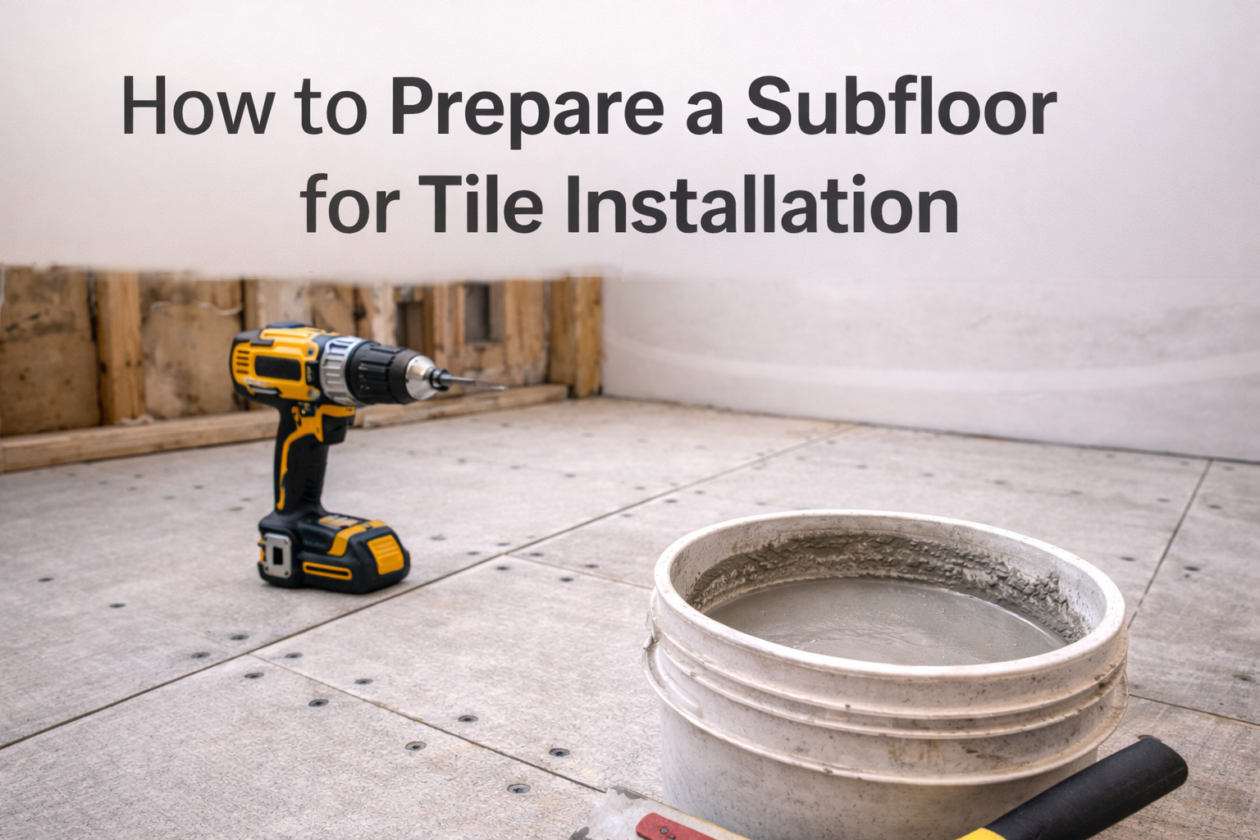
To prepare a subfloor for tile installation, inspect the surface for damage, secure loose panels, test for moisture, level uneven areas, install cement board or an uncoupling membrane, and clean thoroughly before applying thinset.
It’s easy to underestimate the importance of subfloor prep when you’re excited to start laying tile. I’ve been there.
On one bathroom project, I rushed through the prep because everything looked “good enough.” The floor seemed flat. The surface felt solid. I figured I’d save a day and move on.
That decision cost me.
Within a year, the grout started cracking. A couple of tiles loosened. One spot near the fridge felt slightly soft when you stepped on it. Eventually, I tore the whole thing out and started over.
That’s when it finally clicked — the problem wasn’t the tile. It was what I skipped underneath it.
Now I treat subfloor preparation as the real foundation of the job. If the base isn’t solid, flat, dry, and reinforced, nothing above it will hold up in the long term.
In this guide, I’ll walk you through exactly how I prepare a subfloor today — what I check, what I reinforce, and what I never ignore anymore.
📍What Is a Subfloor and Why You Must Prepare the Subfloor for Tile First
Before getting into the steps, it helps to understand what we’re actually working with.
The subfloor is the structural layer beneath your finished flooring. It’s what everything depends on — mortar, underlayment, and tile.
Depending on the home, that layer might be:
• Plywood or OSB in a wood-framed structure • A concrete slab in a basement or ground floor • An older surface in a remodel
Tile doesn’t bond directly to raw plywood or concrete. It bonds to thinset over cement board or a membrane. And those layers perform well only if the surface beneath them is stable.
That’s why prep matters more than people think.
Step-by-Step: Prepare Subfloor for Tile
What Is the Most Important Step in Subfloor Prepare for Tile?
The most important step is ensuring the subfloor is flat, dry, and fully secured to the framing. Movement and moisture are the two biggest causes of tile failure, and both must be addressed before installing underlayment.
🔍 Step 1: Inspect the Surface Before You Prepare the Subfloor for Tile
Can You Install Tile Directly on a Subfloor?
No, tile should not be installed directly on a raw subfloor. Most installations require a layer of cement board or an uncoupling membrane between the subfloor and the tile. This layer stabilizes the surface and prevents movement that can crack grout or loosen tiles.
Before doing anything, take a good look at the subfloor you’re working with. Skipping this step is usually what causes problems later, even if everything looks “fine” at first glance.
If it’s a wood subfloor, check for:
Soft spots
Water damage
Loose panels
Screws or nails sticking up
If it’s concrete, look for:
Cracks
Dips and high spots
Moisture signs
Surface dusting
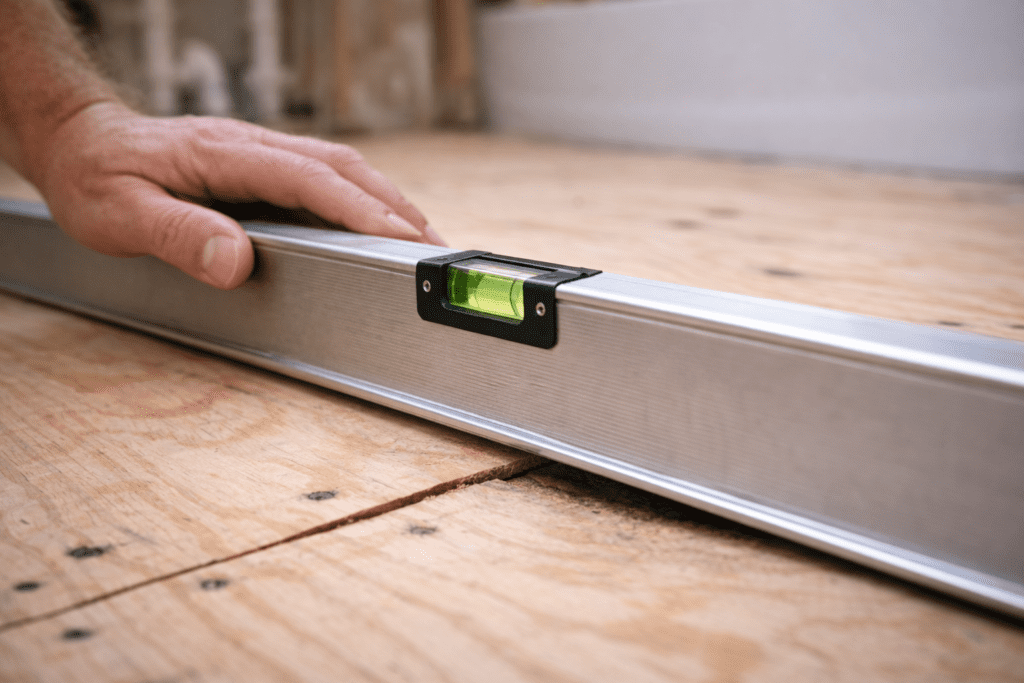
I usually run a long level across the room in multiple directions. If it rocks or you see gaps underneath, the floor isn’t flat enough for tile yet. Tile doesn’t require a perfectly level floor, but it does require a flat, stable surface.
A 6-foot level (Amazon: Heavy Duty Aluminum Level) makes this process far more accurate than a small handheld level.
If you notice floor flex, it may also be worth reinforcing the framing by sistering the joistsbefore installing tile. Strengthening the framing underneath helps prevent subtle movement that can eventually crack grout or loosen tiles.
🧱 Step 2: Remove Old Flooring During Subfloor Prep for Tile
In most cases, it’s better to remove the old flooring completely rather than tile over it. I know it’s tempting to save time, but hidden movement or old adhesive can ruin the bond.
Vinyl and linoleum usually come up with a floor scraper (Amazon: Heavy-Duty Floor Scraper). Old tile takes more effort — hammer, chisel, or a demolition tool works best.
After removal, scrape off any remaining thinset or glue to ensure the surface is clean and solid.
Then vacuum everything thoroughly. Dust left behind is one of those small things that causes big adhesion problems later. A shop vacuum (Amazon: Wet/Dry Shop Vac) works much better than a standard household vacuum for subfloor prep.
🔧 Step 3: Secure and Strengthen the Subfloor Before Tile Installation
Tile is unforgiving. It doesn’t bend. It doesn’t flex. So if the floor underneath it moves — even a little — the tile will eventually show it.
I’ve learned not to trust a floor just because it “feels solid” under my feet. You can’t always feel minor movement between joists, but tile definitely can. So before I move on, I go back over the entire subfloor and add more screws. Not just a few — I mean across the whole surface.
It takes extra time, but it tightens everything up and eliminates the subtle flex that can cause problems later.
If I step on a panel and it feels soft, spongy, or even slightly swollen from moisture, I don’t try to convince myself it’ll be fine. I replace it. Pulling up one sheet of plywood now is nothing compared to tearing out tile later.
For screws, I stick with:
#8 or #9 subfloor screws
Deck screws, if I want even more bite into the joists
And I stay far away from drywall screws.
I used them early on because they were sitting in my toolbox. Bad idea. They’re brittle, they don’t hold long-term, and mine eventually loosened just enough to cause grout cracks. That was a frustrating lesson.
When replacing panels, it also helps to understand which types of plywood work best for flooring systems. This guide explains plywood grades and where each type should be used so you can choose the right material for structural subfloors.
💧Step 4: Check for Moisture Before Tiling Over Concrete
Concrete is tricky. It can look bone-dry on the surface yet still hold moisture underneath. That hidden moisture is what causes tile jobs to fail months later — not right away, but slowly.
I don’t guess anymore.
One simple test I use is to tape a square of clear plastic directly to the slab and leave it there for a day or two. If I peel it back and see condensation underneath, or if the concrete looks darker in that spot, that tells me moisture is still coming through.
If that happens, I don’t move forward with the tile.
That’s when a moisture barrier or an uncoupling membrane becomes worth every dollar. It’s not an upsell — it’s protection.
A common option many installers use is Schluter DITRA. It helps isolate the tile from minor movement and moisture that can rise through the slab.
If you’re installing over plywood instead of concrete, it helps to understand how membranes are installed. This guide explains how to install DITRA over plywood and why it helps isolate tile from movement in wood-framed floors.
Moisture protection matters even more in basements, bathrooms, and any slab-on-grade space. Those are the areas where skipping this step almost always comes back to haunt you.
🧰 Step 5: Level the Surface During Subfloor Preparation for Tile
This is the step many DIYers underestimate. The floor doesn’t need to be perfectly level, but it does need to be flat.
I skipped primer once, and months later, the leveler started chipping. Lesson learned. Proper leveling is a huge part of preparing a subfloor for tile installation.
🔨 Step 6: Install Tile Underlayment
I never install tile directly over wood anymore. I know some people try to get away with it, but wood moves. It expands, contracts, and flexes just enough to create problems later.
There has to be a stable layer between the wood subfloor and the tile.
Most of the time, that middle layer is one of these:
Some installers also add adhesive between layers of subfloor for extra rigidity. If you’re unsure which products work best in construction projects, this comparison of wood glue vs construction adhesive explains when each type should be used.
Cement Board vs DITRA Membrane: Which Should You Use?
Feature
Cement Board
DITRA Membrane
Cost
Lower
Higher
Crack Isolation
Moderate
Excellent
Moisture Control
Basic
Strong
Installation Time
Slower
Faster
Best For
Budget builds
Long-term durability
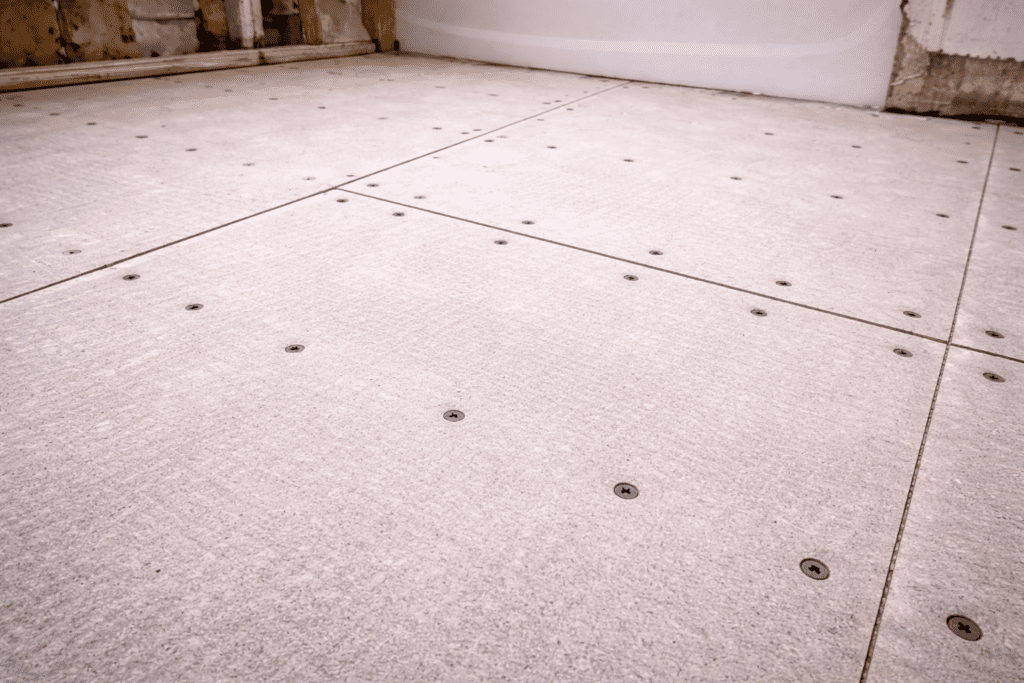
When I install backer board, I dry-fit everything first and cut the panels so they sit flat without forcing them into place. I leave small gaps between sheets — usually just a few millimeters. It doesn’t look important, but it is.
Those gaps give the panels room to expand slightly. If they’re butted tightly together, pressure can build up and transfer stress to the tile above.
After that, I fasten them down using proper cement board screws. They’re designed to sit flush and hold tight without snapping. I don’t substitute regular screws here — it’s not worth it.
It’s one of those steps that doesn’t look impressive when you’re done, but it’s doing a lot of work underneath.
Not every tile job starts with the same challenges.
In a basement over concrete, moisture is the biggest concern. I never skip testing, and I strongly consider crack isolation or a membrane layer.
In a bathroom with wood framing, stiffness is the priority. I check joist spacing, confirm plywood thickness, and ensure everything is reinforced before moving forward.
Different surfaces. Different risks.
COST BREAKDOWN
Average DIY prep costs:
Cement board: $10–$15 per sheet
Self-leveling compound: $35–$50 per bag
Screws + thinset: $75–$150
DITRA membrane: $1.50–$2.50 per sq ft
Small bathroom: $250–$600
Redoing failed tile: $2,000–$5,000+
Prep is cheap insurance.
🧽 Step 7: Clean the Subfloor Before Tiling
By the time you reach this stage, the floor might look clean — but it almost never actually is. After sanding, leveling, and removing old materials, there’s usually a thin layer of dust and debris left behind that you can’t fully see.
I always start with a thorough vacuum, especially along edges, seams, and corners where fine dust collects the most. A shop vac works much better than a regular household vacuum for this.
After vacuuming, I wipe the entire surface with a lightly damp cloth to pick up the remaining powder. It seems like overkill, but thinset bonds directly to the surface, and dust is one of the biggest reasons tiles end up sounding hollow later.
I learned this the hard way on an early project where the floor looked spotless, but I skipped the wipe-down. The tiles held for a while, but months later, a few spots started to loosen because the bond wasn’t as strong as it should have been.
Also, make sure the subfloor is completely dry before proceeding with mortar or underlayment. A clean, dry surface provides the best adhesion and helps ensure the tile installation lasts for years.
🧱 What I Did Wrong (So You Don’t Have To): Subfloor Prep Mistakes to Avoid
Let me be honest — the first time I prepped a subfloor for tile, I thought I could wing it. I’d installed a few floors before, and in my head, flat and clean meant good enough.
It wasn’t.
That floor didn’t even last two years. The grout started cracking first. Then a couple of tiles lifted. Eventually, one area near the fridge felt slightly soft when you stepped on it. Not dramatic — just enough to know something wasn’t right.
I ended up ripping the whole thing out and starting over. That’s when I realized most tile failures don’t happen because of the tile itself. They happen because of what’s underneath.
Looking back, here’s what I either rushed or skipped.
I didn’t properly check the floor for flatness. Even a small dip — something you barely notice with a level — can create problems, especially with larger tiles. They don’t forgive uneven spots.
I skipped a proper moisture test, assuming the slab looked dry enough. Moisture doesn’t always show itself immediately. It weakens the bond slowly, and by the time you see hollow spots, it’s too late.
I used the wrong screws in one section. Drywall screws were sitting in my toolbox, so I grabbed them. They held at first. Over time, they loosened, allowing just enough movement to cause cracking.
I also poured self-leveling compound once without using primer. It looked perfect the day it dried. Months later, sections started chipping. Lesson learned.
And I forgot to leave proper expansion gaps along the walls. Tile needs a little room to move with seasonal changes. Without that space, pressure builds — and something has to give.
None of these mistakes felt huge in the moment. But together, they added up.
That’s why I don’t rush subfloor prep anymore.
🧼 Optional: Apply Primer or Crack Prevention Membrane
Especially helpful over concrete:
Primer helps thinset grip smooth surfaces
Crack isolation membrane prevents slab cracks from telegraphing into tile
A crack-isolation membrane (Amazon: Crack Isolation Membrane Roll) can significantly extend the lifespan of tile installations on older slabs.
Why Proper Subfloor Preparation Matters
Tile does not tolerate movement or moisture. If the surface underneath shifts, flexes, or traps water, grout will crack and tiles will loosen over time.
A properly prepared subfloor provides:
Structural stability
Strong thinset adhesion
Moisture control
Long-term durability
From experience, the difference between a floor that lasts two years and one that lasts fifteen almost always comes down to how well the subfloor was prepared.
🪚 Subfloor FAQs (Real-World Questions I Had)
Do I really need to prepare the subfloor for tile before installation?
Yes. If you don’t properly prepare the subfloor for tile, even high-quality materials will eventually fail due to movement, dust, or moisture issues.
Can you tile directly over plywood?
Technically, tile can be installed over plywood, but it is not recommended without proper preparation. Wood expands and contracts with changes in humidity, which can cause tile cracking. Installing cement board or an uncoupling membrane significantly improves durability.
How flat should a subfloor be for tile installation?
Industry standards recommend no more than 1/8 inch variation over 10 feet, especially for large-format tile.
Cost of Doing It Right vs Redoing Tile
Cost of Proper Subfloor Prep vs Repairing Failed Tile Item Typical Cost Cement board $10–$15 per sheet Self-leveling compound $35–$50 per bag Screws + thinset $75–$150 total Small bathroom prep $250–$600


")

")
")

")