Ceramic tile provides a lower-cost, extremely durable alternative to hardwood flooring and is much easier to keep clean than carpeting. While not all that hard to install, tile and stone do pose some specific challenges that don’t exist with other types of flooring. To counter these challenges, it is typical to install a vapor barrier/uncoupling membrane between the tile and the substrate. This is especially important when installing tile over a plywood subfloor.
One of the key concerns about installing tile over plywood is that plywood is a somewhat flexible substrate, which also grows and shrinks with moisture content. Tile, on the other hand, is a very rigid, stable material, which does not change size. The potential of plywood flexing and changing shape, be it ever so slightly, can cause grout to crack and thin-set to break loose from the substrate. Adding a decoupling membrane provides several benefits, all of which can help ensure that the floor lasts longer. In this particular case, we’re looking at Ditra as the membrane.
Decoupling – Ditra provides a decoupling action between the ceramic and the floor so that if the floor moves, the tile, mastic, and grout don’t have to
Moisture barrier – Stone and ceramics tend to attract moisture, which can pass through the ceramic and grout. Ditra provides a barrier so that this moisture isn’t absorbed into the plywood
Helps Wood Dry – By providing a moisture barrier between the plywood and the thin-set, Ditra provides an escape route for moisture evaporating out of the plywood
Support – While the underlayment might flex, Ditra doesn’t compress. Therefore, it helps balance the load on the tile, providing a more even load distribution
For Ditra to provide these benefits, it must be installed properly. While not difficult, there are many potential pitfalls for those who try to take shortcuts or don’t properly follow directions. A poor installation can still look good but not turn out well over time; eventually, the tile will come loose. But if installed properly, Ditra will help guarantee a long-lasting installation.
Proper Floor Preparation
Plywood flooring needs proper preparation before Ditra is installed. The same requirements exist for either construction-grade plywood or OSB. It is unnecessary to use plywood with a high-grade finish, as the thin-set can easily level out any inconsistencies in the surface of the plywood. However, the plywood subfloor must be thick enough to support the tile floor. This means:
A minimum of 5/8” nominal plywood or OSB thickness installed over joists on 16” centers
A minimum of ¾” nominal plywood or OSB thickness installed over joists on 20” centers
A minimum of ¾” nominal plywood or OSB, with a nominal 3/8” underlayment over joists on 24” centers
If the floor is already covered in vinyl flooring or vinyl floor tiles, Ditra can be installed over the existing floor covering. The only consideration is that the floor covering be firmly bonded to the subfloor so that it does not come loose. Any wax and dirt should be cleaned off the vinyl, before application of the membrane.
The plywood flooring must be clean and smooth, with sheets sanded to level them at the joints, if necessary. Sweep, vacuum, and mop the floor to remove all debris. Plywood subfloors should be installed with a 1/8” expansion gap between sheets, to allow for wood swelling as moisture is absorbed.
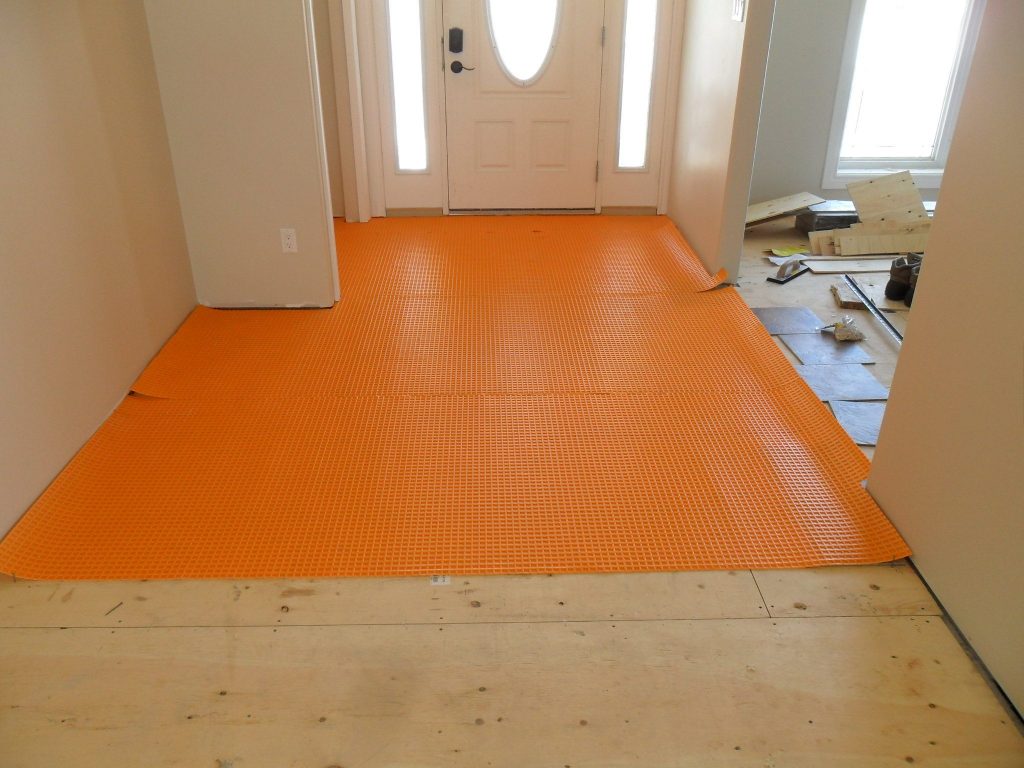
Installing Ditra on Plywood
It is helpful to cut the Ditra into strips to fit the floor, before mixing thin set mortar. While it can be cut at any time, it is more difficult to do so, without getting it into the mortar and making a mess, if it is cut as needed. By cutting it first, each piece can be laid out, in place, and doubled over, making it easy to spread the mortar and press the Ditra into it.
Ditra should be installed on plywood subfloors using modified thinset mortar, not unmodified. The difference between the two is that the unmodified is a mixture of Portland cement, sand and water retention agents. Modified thinset mortar adds latex polymers to increase its adhesion and strength. This makes it work better with plywood. Unmodified is adequate for use on concrete floors.
While any modified thin-set mortar can be used, Schluter, the manufacturer of Ditra, have their own. Using it, under their instructions, is a requirement for their lifetime warranty. This warranty is not valid if other products are used.
To mix the thinset, always put the water in the bucket first, then add the mortar mix to it. Never add the water to the thinset, especially after you have finished mixing it and allowed it to sit. If the mortar starts hardening up before you finish using it, it can be remixed; but adding water to it can damage the chemical makeup of the thinset, resulting in a product which breaks apart easily. As with other products using Portland cement, the water acts as a catalyst for a chemical reaction. The thinset cures from this chemical reaction, rather than drying from evaporation of the water.
Check the thinset package, but in most cases, the proper ratio is one part water to four parts powder. This should be done outdoors, wearing a dust mask, as the thinset will put a lot of dust into the air. Mix the water and thinset together with a mixing paddle on a drill for three to five minutes. Then allow the mixture to sit for 10 minutes before using.
While that is sitting to slake (the chemical reaction needed to prepare the mortar), wet the plywood’s surface with a sponge and clean water. This will prevent all the water in the thinset from soaking into the plywood’s surface when applied. At the end of the 10 minutes, mix the mortar again for three to five minutes. It will then be ready for use.
An 11/64” square notched trowel is used for spreading the thinset mortar. To start, use the back side of the trowel to spread mortar out onto the desired area of the floor, covering the entire area and paying particular attention to edges and corners. This helps ensure smooth, consistent coverage, helping to ensure adhesion of the Ditra to the plywood. Working approximately one-half of one strip of Ditra at a time is ideal with most rooms, but it may be necessary to work in smaller sections for larger-sized rooms. Ideally, no larger an area should be worked at once, than what can be reached, kneeling on the floor.
With the thinset spread across the floor, trowel it with the toothed side of the trowel, holding the trowel at a 45-degree angle to the floor. If it is held at too shallow an angle, there will not be enough mortar to guarantee good adhesion. Too high an angle will provide too much mortar. Don’t use a circular motion, but rather work in parallel lines for the most consistent spreading of the mortar.
Fold the Ditra back over the mortar, nappy side down, and adjust the position to ensure that the edges meet up with the walls and/or any previous sheets of Ditra already installed. Then press it down with either a wood or metal trowel, without teeth. Continue applying the Ditra to the plywood in this manner, until the entire floor is covered.
One major consideration in this process is that the thin-set can skin over, if too much time is taken to spread the mortar and lay the Ditra. If this begins to happen, it can prevent good adhesion. To rectify the problem, scrape up the thinset and return it to the bucket, mixing it again; then reapply the thin-set to the same area of the floor.
The tile can either be installed to the Ditra as soon as it is laid or the floor can be allowed to set overnight. If there is extra mortar left over from sticking the Ditra down, it can be spread out and troweled into the Ditra, filling the square hole in the surface and troweling smooth with the surface.
With the Ditra down, the floor is ready for the installation of the tile. More modified thinset mortar needs to be mixed, to the same ratio as before. Once again, the work will be done in sections that can be reached from one position. However, the size of the tile also needs to be considered. If larger tiles are being used, such as 16” ceramic floor tile, then it usually makes sense to work one row at a time, as working two is quite a reach.
Before applying the thinset for sticking the tile down, the thinset needs to be troweled into the Ditra membrane, filling the square cavities in it. Troweling should be done from all four directions, as the square holes are dovetailed, with the bottom of the holes being wider than the surface. It is necessary to ensure that the thin-set mortar gets into all the holes to ensure adhesion.
With the hole filled, thinset can be troweled onto the surface of the Ditra with a notched trowel, to act as an adhesive for the tile. In the case of larger tiles, a thin coating of mortar should also be spread across the back of the tile, as tiles aren’t always flat. Failure to spread the mortar on the back of the tile can leave a void in the middle of the tile, where it is not bonded to the mortar.
As this article is not a guide to installing tile, but rather about how to use Ditra over plywood, we will not discuss spacing, cutting, or grouting of the tiles at this time.
Precast Concrete Steps: Costs, Benefits & Installation Guide by Amy Reed March 21, 2025 More About Precast concrete steps are ready-made cement stairs, staircases, or hollow cement steps that can be installed outside existing staircases on a property or business premise.…