
Guitars and the use of guitars have changed through the years. What once started out as an acoustic folk instrument eventually led to the refinement of classical guitar music. In more recent times, guitars have become a mainstream instrument, not only in playing folk music, but a whole gambit of different genres.
Today, guitars are most often used to produce electronic waveforms, rather than acoustic ones. Those are then run through a variety of different electronic “filters” which fold, spindle and mutilate the waveform, turning it into a variety of different sounds, as the musician chooses.
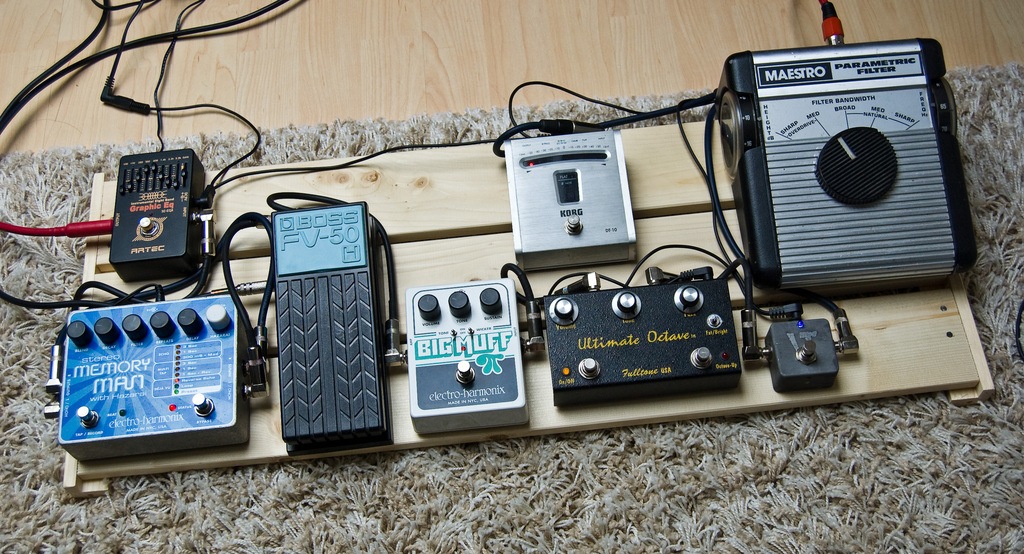
For convenience sake, these electronic filters are usually housed in small boxes with a pedal on them, so that they can be operated by stepping on them with a foot; hence the name “foot pedal.” Guitarists using these pedals tend to collect them, hooking them together and having them on stage before them while they are playing. But just having a bunch of pedals sitting on the floor, connected together by cables can be a bit disorganized, difficult to carry to the next place they’re playing and can cause a trip hazard. Preventing this is where we get the idea of mounting them together on a pedalboard.
I have to admit, I am at least somewhat familiar with pedalboards as my son is a guitarist and has built himself the most complex pedalboard I have ever personally seen, with multi-pedal consoles and built-in rack space. That’s probably more than most people need, but it looks impressive when he wheels it in someplace to play.
Most guitarists don’t go to the extreme my son has, making a Gorm Pedalboard an ideal way of mounting all their pedals together. It’s inexpensive, easy to make and make it possible to keep pedals organized, mounted together and easy to work with.
So What is a Gorm Pedalboard?
The Gorm Pedalboard is a pedalboard made of shelf from IKEA. This isn’t actually an IKEA product; but rather something that guitarists have come up with, doing their own thing with one of IKEA’s DIY furniture kits. The name “Gorm” comes from the line of IKEA furniture used, which for some reason shows up under the name “Hejne” on their website. Apparently this style has two names.
The nice thing about this project is that it really doesn’t take much skill or a lot of tools to make it. That makes it great for the novice woodworker or perhaps the child of a woodworker who plays the guitar. It could be used by a woodworking parent as a means of getting that child interested in woodworking or at least giving them an introduction to what they can do in the workshop.
The specific kit used for making a Gorm Pedalboard is the Hejne 2 pack of 30 3/8” x 11” shelves, which can be found on the IKEA website. These are slatted shelves, which are ideal, as they provide an easy way for interconnecting cables to be passed through the board and bundled underneath, where they aren’t in the way.
Building the Gorm Pedalboard
To build the Gorm Pedalboard, start out by buying the IKEA kit mentioned in the link above. The two boards come already assembled, something rather surprising for IKEA. They are not packaged in a cardboard box, so there is a chance that they might be scratched. If that’s the case, pick the better looking one to be the surface of the pedalboard.
The other one needs to be disassembled, have the nails removed and be cut, to make the riser portion, angling the pedalboard, as well as a tray underneath to hold the cables. But in order to be used for this, the slats will need to be shortened and the end supports will need to be cut.
Measure the inside distance between the end supports on the shelf that hasn’t been taken apart. The other shelf will have to be cut down to fit in this space. So what’s needed is the difference between the overall outside length and the inner. This amount must be cut from the three shelf slats. When reassembled, that should make the shorter shelf fit right inside the longer. But don’t reassemble it yet.
In addition to cutting the shelf slats, the end supports need to be cut as well. Using one of the slats, measure off the amount of material that is needed to go under that slat and cut the material off of both supports. Then attach those cut off pieces back onto the ends of one of the slats with screws. Please note that it will probably be necessary to drill a pilot hole for the screws, to keep the end of the slat from splitting.
Take this support and fit it under one edge of the other shelf, setting it at a 90 degree angle to the surface of the shelf. Drill pilot hole and screw the two pieces together, first wing through the slat on the intact shelf, into the end of the short piece of shelf support attached to the cut-off slat. With those screws (both ends) holding the pieces together, drill through the shelf support into the short piece of shelf support and screw the pieces together, giving the assembly more rigidity.
Reassemble the other two slats to the end supports. This will be flipped upside-down, then screwed in place, between the end supports of the pedalboard top, creating a “pan” to hold the cables. It should be located so that when one looks down through the slots in the top of the pedalboard, they see the slats on the lower part, not so that they see the spaces between those slats.
Finally, paint the entire assembly, if so desired. Actually, it would be easier to paint it before adding the lower pan piece, as it is hard to paint inside a closed object, once it is put together. Two coats of paint should suffice, as the wood is pfinished. Allow to dry thoroughly, before assembly. Failure to allow the paint to dry fully will cause adhesion problems for the Velcro.
The final step is to put Velcro on the slats of the pedalboard, allowing the pedals to be attached and moved around. There are different ways to do this, including using a single strip of 2” wide Velcro. But most guitarists seem to prefer using two strips of 1” wide self-adhesive Velcro per slat, one along the top edge and the other along the bottom. Press down the Velcro well, to help ensure there are no bubbles and that the Velcro adheres well to the board.
Can it be Built without Buying the IKEA Shelves?
The design of the IKEA shelves used in this project is simple enough, that it can be easily built without buying the shelf kit from IKEA. The slats on the original shelves are about 3” wide, but standard 1”x 4”s could be used, making the pedal board ½” deeper. That’s not enough to be an issue. For the end supports, 1”x 2”s could be attached to the bottom of the slats at the ends. However, this would leave the end grain of the slats exposed.
A better way to do this is to use a 2”x 2” and cut a rabbet into it, allowing it to cover up the end grain of the slats. The rabbet can be cut on a table saw or with a router bit. In either case, it should be ¾” deep by 1” wide, so that it will fit well with the slats.