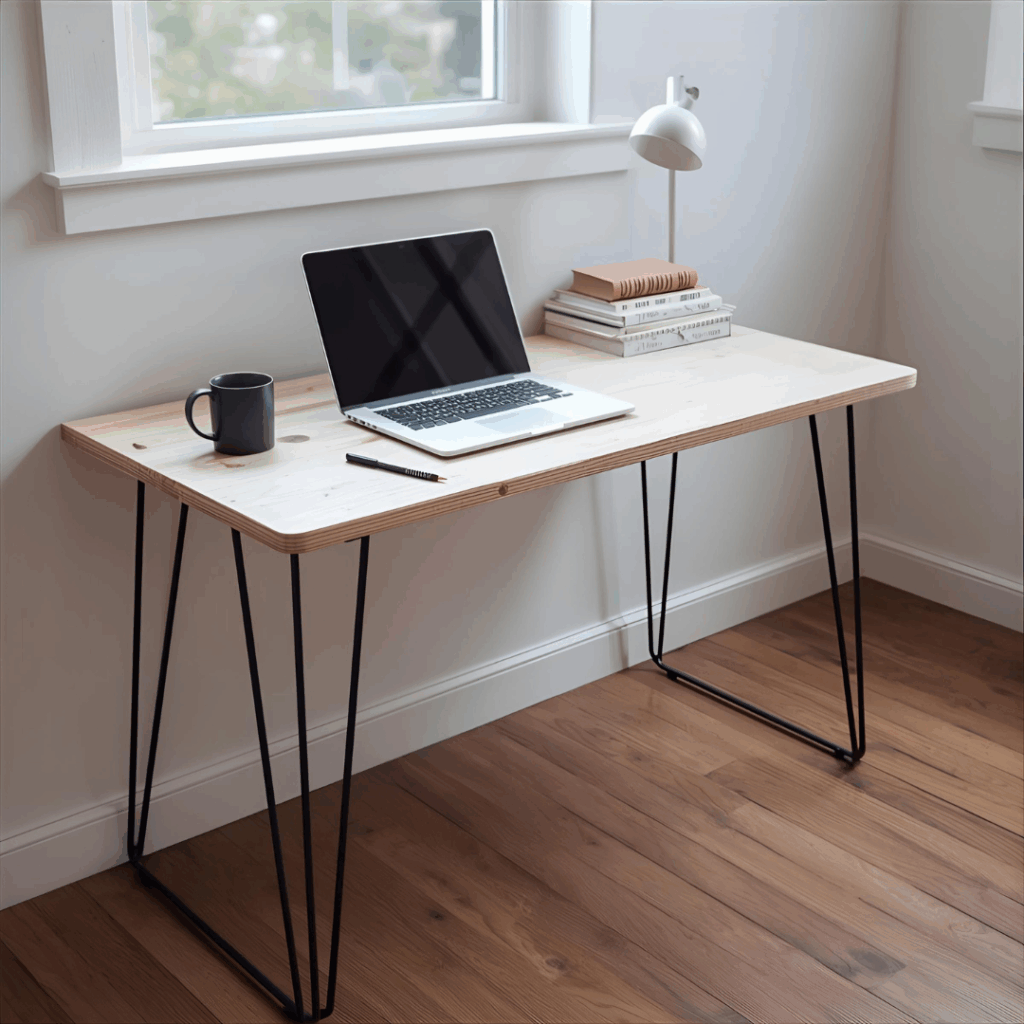
I built my first plywood desk because I was tired of working hunched over the kitchen counter. It wasn’t some grand plan — I just had a free Saturday, an old sheet of plywood, and a cup of cold coffee. By Sunday night, that piece of scrap wood had turned into a desk that actually fit my space and felt right to sit at.
Since then, I’ve made a few more — one in my office, one for my kid’s room, and another for the garage. Each one’s a little different, but they all share the same thing: solid, affordable, and simple to make. Plywood’s great that way — it forgives your mistakes and still ends up looking sharp with a bit of sanding and finish.
Why I Chose Plywood for Desks
Solid wood looks amazing, no doubt. But it costs a small fortune, and unless you love fiddly joinery, it’s a pain to work with. Plywood hits that sweet spot: real wood on the surface, solid layers underneath that won’t twist or split when the seasons change.
For something like a desk — wide, flat, and used every day — plywood’s hard to beat. It stays straight, holds screws well, and if you buy a nice sheet of birch, maple, or walnut veneer, it’ll look like fine furniture after a little sanding.
If money’s tight, sanded pine plywood works fine too. It’s lighter, takes stain beautifully, and with edge banding, most people won’t even notice it’s not solid hardwood.
Materials, Tools I Used,and Why
You don’t need a shop full of tools. For a standard 60″ × 30″ desk, here’s what I grabbed:
Materials:
1 sheet of ¾” birch plywood (maple or walnut look great too) – This thickness gives your desk strength and stability without being too heavy to handle.
4 metal hairpin or wooden desk legs – These provide the support and style; choose metal for a modern look or wood for a warmer, classic feel.
Circular saw (or table saw if you’ve got one) – This is your main cutting tool for breaking down the plywood cleanly and getting accurate, straight edges.
Jigsaw for cord cutouts – Perfect for cutting curves, rounded corners, or cable holes where the circular saw can’t reach.
Drill and driver bits – You’ll use these for pre-drilling screw holes and securely fastening the legs or brackets to your plywood desk.
Random orbital sander– Essential for smoothing surfaces and edges evenly without leaving swirl marks before you apply the finish.
Iron for edge banding– The heat activates the adhesive on edge banding, helping it stick firmly and giving your desk a professional look.
Tape measure, square, pencil, clamps – These keep your project accurate and safe; measure twice, mark clean lines, and clamp everything before cutting or drilling.
Affiliate Tip: If you’re new to plywood, a Kreg Accu-Cut guide on Amazon is a lifesaver for straight cuts, and Bora Portamate sawhorses will keep your sheet stable while cutting.
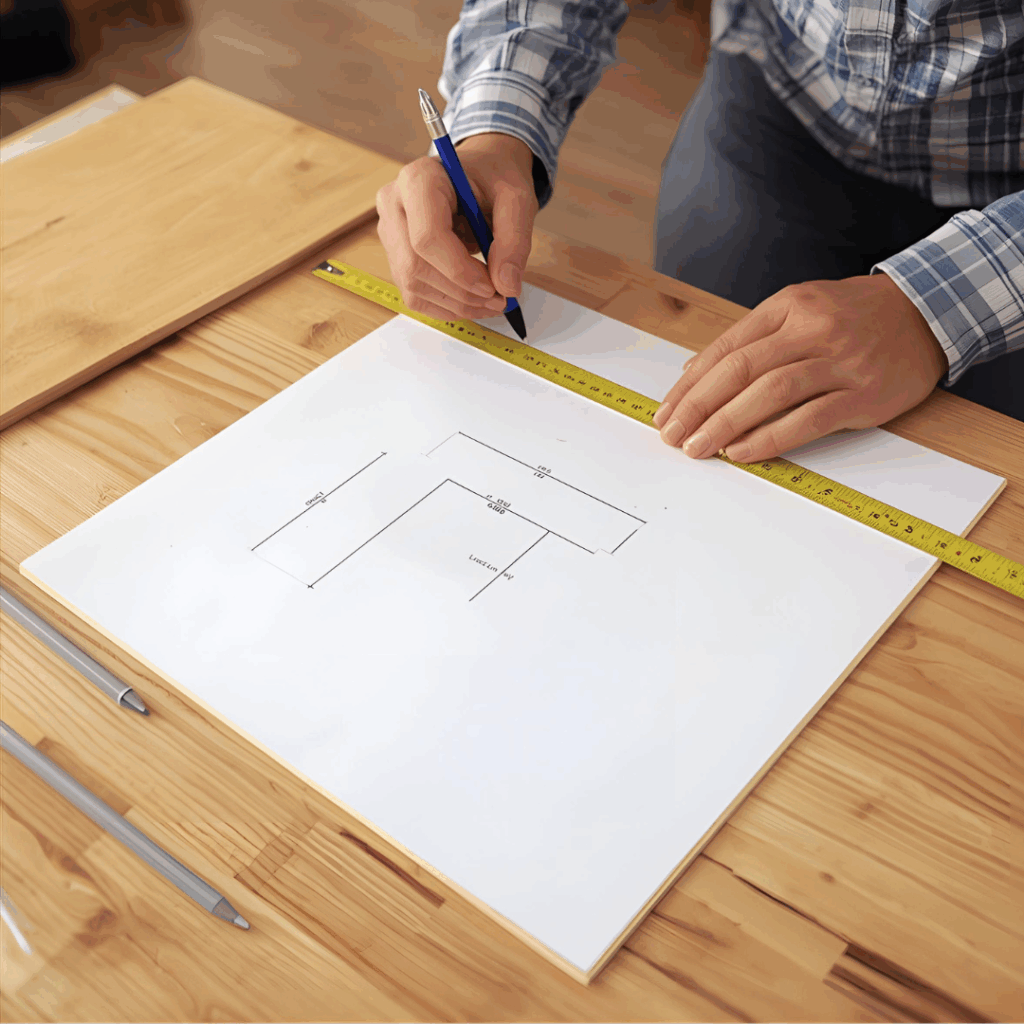
Step 1: Sketch Out Your Plywood Desk
Before you start cutting, look around your space. Where’s it going? Under a window? Against a wall? Measure carefully — 24 to 30 inches deep and around 29 inches tall works for most people.
Sketch it out on paper. It doesn’t need to be fancy. Decide early if you want:
A floating wall desk (great for small rooms)
A freestanding desk with legs
Or a version with drawers or shelves underneath
I’ve done all three, and honestly, the basic freestanding one is still my favorite — simple, sturdy, and easy to move if I change my setup. Taking ten minutes to plan saves hours later when every cut lines up perfectly.
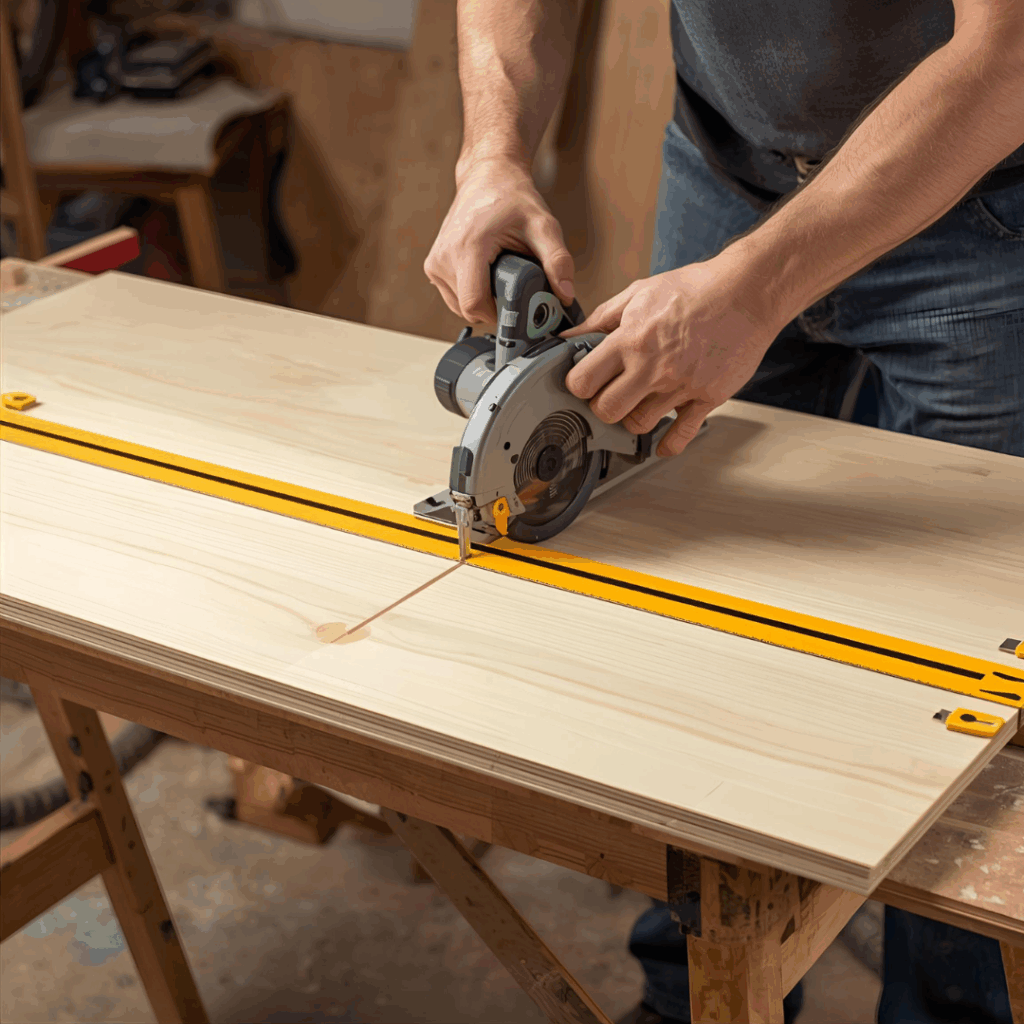
Step 2: Cut the Plywood
When you’re ready to cut, mark your lines and double-check your measurements. I always set my circular saw on a guide rail for clean, straight edges. Cut your top piece — usually around 60″ × 30″. If you want a shelf, rip a smaller piece about 10″ deep.
Here’s one thing I learned the hard way: support both sides of the plywood when cutting. I once let the offcut fall mid-cut, and it tore a nice chip right out of the veneer. Lesson learned.
If you want to add cord holes or rounded corners, now’s the time. A jigsaw handles those just fine. Take your time with this step — clean cuts are what separate a polished desk from one that looks rushed.
Step 3: Sand and Edge-Band It
Grab your sander and start with 120 grit to smooth out saw marks. Move to 180 and finish with 220 for that soft-to-the-touch feel. Wipe it clean before moving on.
Now, the secret that makes plywood look like a store-bought desk: edge banding. Heat your iron, press the banding along every exposed edge, and trim it flush with a utility knife. Sand it lightly. That little strip hides the layers and makes it look professional — worth every minute. You’ll notice right away how much more “finished” your plywood desk feels once those raw edges are sealed up.
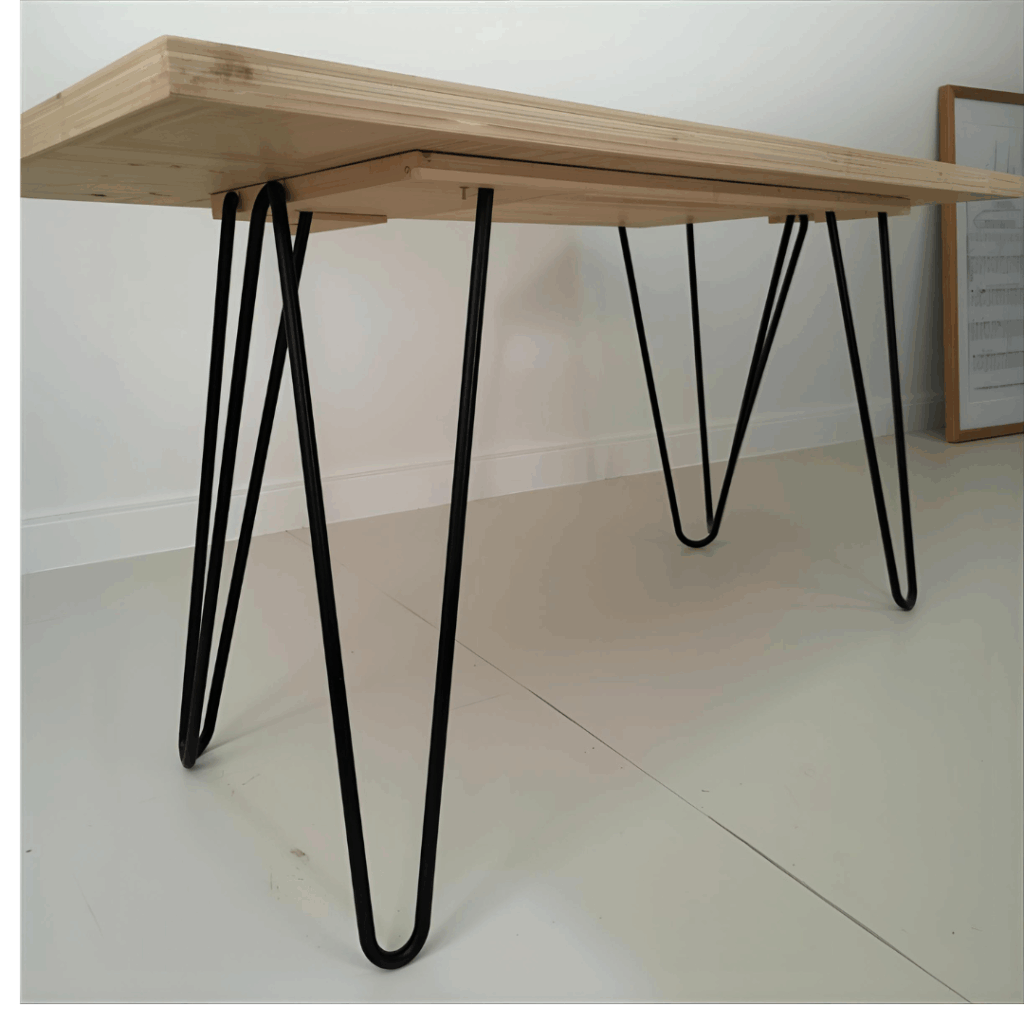
Step 4: Attach the Legs to the Plywood Desk
Flip the top over on a flat surface. Measure about 1½ inches from each corner and mark where the legs will go.
If you’re using metal hairpin legs, pre-drill and screw them in. If you prefer wooden legs, use corner brackets or plates for stability.
For a little extra strength, I sometimes add a 1×2 cleat under the back edge — it helps stop any flex if you lean on it hard. Double-check that all legs sit flush before tightening screws; a wobbly desk is no fun to work on.
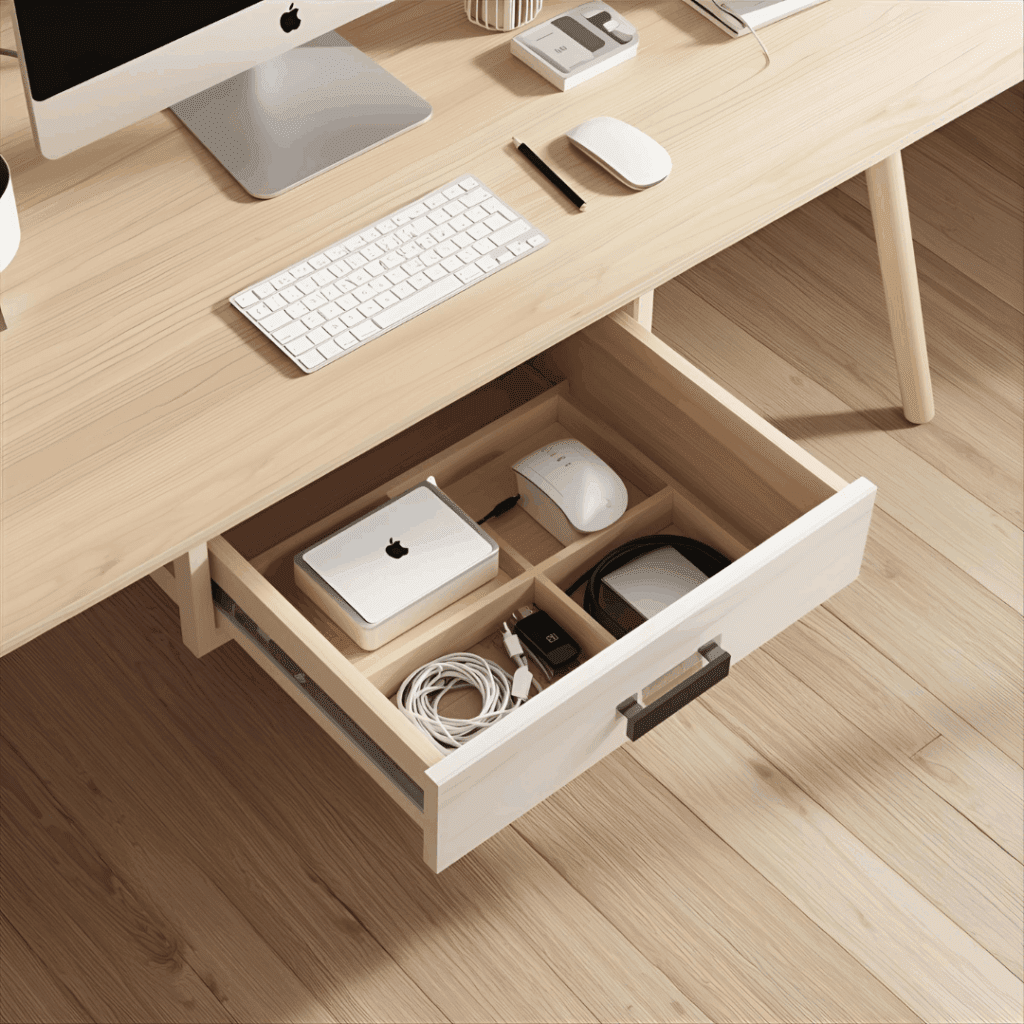
Step 5: Add Storage or a Shelf (Optional)
I’m a sucker for a clean desk, so I added a small floating drawer under mine. You can also screw in a shelf along the back for notebooks or cables.
A 10″ plywood strip, supported by cleats or pocket screws, does the trick. If you want something fancier, Amazon sells slim “under desk drawers” that slide right under the top without changing your look. Even one small drawer or shelf can make your workspace feel calmer and more organized.
Step 6: Sand Once More and Finish
Before finishing, fill any screw holes or seams with wood filler, then sand again lightly.
Pick your finish:
Polyurethane – glossy and tough (great for offices)
Danish oil – subtle sheen and easy to touch up
Dark walnut stain – adds warmth and hides small marks
I used Danish oil on mine. The smell lingered for a day, but the grain popped beautifully. Let each coat dry fully before adding another. Don’t rush this step — fingerprints love a fresh finish. Good lighting helps here — you’ll spot uneven spots before the finish sets.
Step 7: The Small Details That Make It Yours
Once the finish dries, flip it upright and admire it for a second — it’s a good moment.
Then add the little things that make it practical:
Cable raceways or trays underneath
A clamp-on power strip
Felt pads under each leg
A small grommet hole for cords
I even mounted a magnetic strip on the back edge for spare screws and paperclips. Small touch, but surprisingly useful. This is where your desk goes from just functional to something that truly fits how you work every da
Design Variations Worth Trying
This is the part I enjoy most. Once the main build’s done, plywood lets you play with the look any way you want.
Minimalist Modern: Birch top, black metal legs, clear finish. It’s the kind of desk that disappears into a clean room — just smooth wood, light bouncing off the grain, nothing extra.
Rustic Farmhouse: Pine plywood with a dark walnut stain and a soft matte seal. It looks like something you’d find in an old barn or cabin, a bit rough around the edges but warm and familiar.
Industrial Look: Birch top sitting on black pipe legs. I like this one for the garage or studio — it feels solid, like you could spill paint on it and it wouldn’t care.
Floating Wall Desk: Mounted with L-brackets right into the studs. This works great in tight rooms; it almost looks like it’s hovering, which makes the whole space feel bigger.
And if you’re in the mood to experiment, try mixing wood types — maybe a walnut top with maple edges. The contrast jumps out just enough to make it look like something you custom-ordered instead of built yourself.
Keeping It in Shape
A quick wipe-down once a week with a damp cloth is enough. Avoid soaking the edges — moisture is plywood’s only real enemy.
Every year or so, rub in a little wax or oil. If you scratch it, no big deal — a quick sand and recoat brings it back. Over time, the finish actually gets smoother, especially where your arms rest or where the sunlight hits. A little maintenance goes a long way, and the best part is, every mark and scuff starts to tell its own story.
What It Costs and How Long It Takes
Item
Cost (approx.)
¾” Birch plywood (4×8 sheet)
$60–$80
Legs (metal or wood)
$40–$70
Edge banding
$15
Screws, glue, sandpaper
$15
Finish or stain
$25
Total
$150–$200
🕒 Time: Around 4–6 hours, split across a weekend. Not bad for something that’ll last decades.
Conclusion: A Desk That Grows With You
When I built this plywood desk, I wasn’t thinking about perfection. I just wanted something solid I could sit at without hunching over the counter again. A few cuts, a bit of sanding, and before I knew it, I had a desk that fit exactly where I needed it to.
It’s funny how a project like this starts small and then becomes part of your routine. Mine’s got a coffee ring that never came out, a scratch from when I dropped a screwdriver, and a smooth patch where my arm rests when I write. Those little marks tell me I use it — and that it’s doing its job.
That’s what I like about plywood: it’s forgiving. If something chips, you sand it down. If you want a new look, you throw on a different stain. It’s the kind of project that reminds you that not everything has to come from a store to feel right.
If you’ve got a spare sheet of plywood and a free weekend, give it a shot. You’ll end up with more than just a desk — you’ll have something built by your own hands, and that feeling never really fades.
DIY Floating Desk by Admin July 26, 2023 DIY Building a floating, wall-mounted desk for modern office furniture requires a different style and special techniques. You can’t make a “floating” desk like any other…