Ceramic tile provides a lower-cost, extremely durable alternative to hardwood flooring and is much easier to keep clean than carpeting. While not all that hard to install, tile and stone do pose some specific challenges that don’t exist with other types of flooring. To counter these challenges, it is typical to install a vapor barrier/uncoupling membrane between the tile and the substrate. This is especially important when installing tile over a plywood subfloor.
One of the key concerns about installing tile over plywood is that plywood is a somewhat flexible substrate, which also grows and shrinks with moisture content. Tile, on the other hand, is a very rigid, stable material, which does not change size. The potential of plywood flexing and changing shape, be it ever so slightly, can cause grout to crack and thin-set to break loose from the substrate. Adding a decoupling membrane provides several benefits, all of which can help ensure that the floor lasts longer. In this particular case, we’re looking at Ditra as the membrane.
Decoupling – Ditra provides a decoupling action between the ceramic and the floor so that if the floor moves, the tile, mastic, and grout don’t have to
Moisture barrier – Stone and ceramics tend to attract moisture, which can pass through the ceramic and grout. Ditra provides a barrier so that this moisture isn’t absorbed into the plywood
Helps Wood Dry – By providing a moisture barrier between the plywood and the thin-set, Ditra provides an escape route for moisture evaporating out of the plywood
Support – While the underlayment might flex, Ditra doesn’t compress. Therefore, it helps balance the load on the tile, providing a more even load distribution
For Ditra to provide these benefits, it must be installed properly. While not difficult, there are many potential pitfalls for those who try to take shortcuts or don’t properly follow directions. A poor installation can still look good but not turn out well over time; eventually, the tile will come loose. But if installed properly, Ditra will help guarantee a long-lasting installation.
Proper Floor Preparation
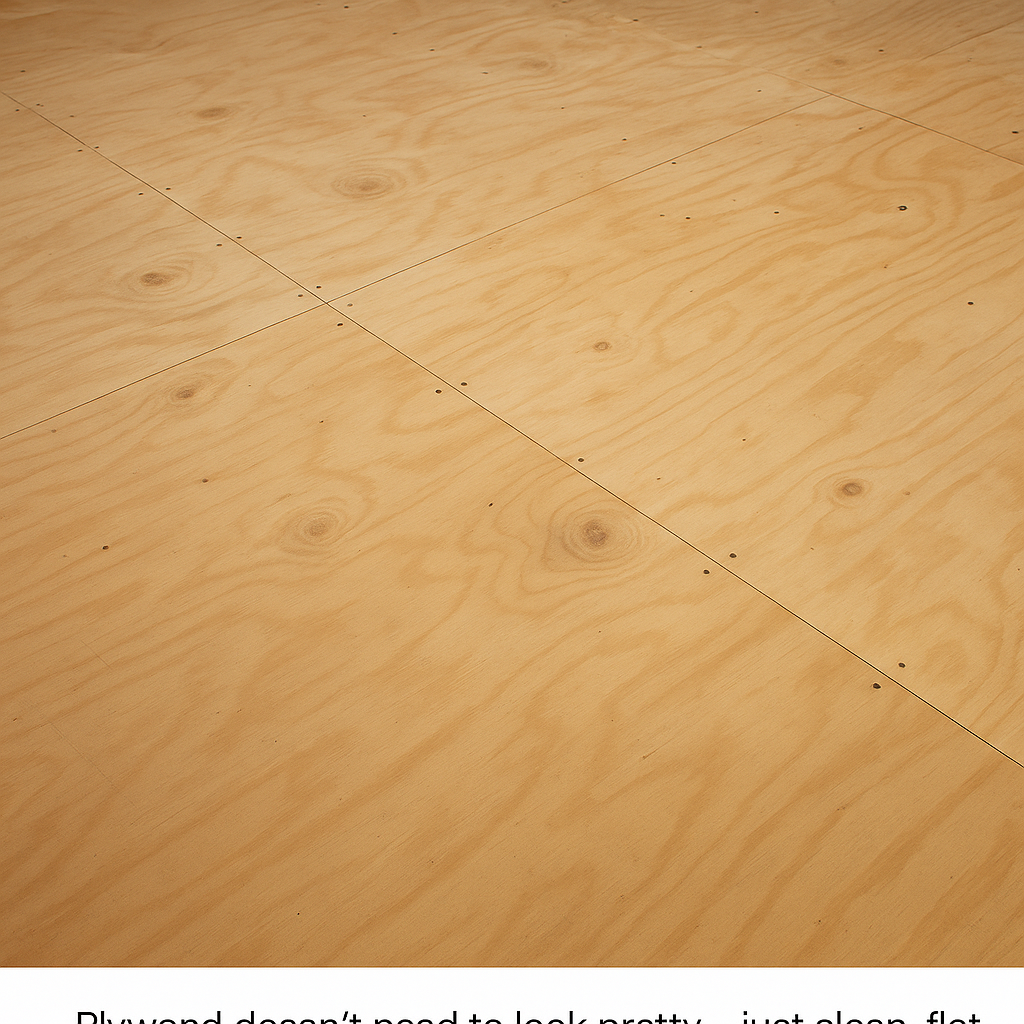
Plywood flooring needs proper preparation before Ditra is installed. The same requirements exist for either construction-grade plywood or OSB. It is unnecessary to use plywood with a high-grade finish, as the thin-set can easily level out any inconsistencies in the surface of the plywood. However, the plywood subfloor must be thick enough to support the tile floor. This means:
A minimum of 5/8” nominal plywood or OSB thickness installed over joists on 16” centers
A minimum of ¾” nominal plywood or OSB thickness installed over joists on 20” centers
A minimum of ¾” nominal plywood or OSB, with a nominal 3/8” underlayment over joists on 24” centers
If the floor is already covered in vinyl flooring or vinyl floor tiles, Ditra can be installed over the existing floor covering. The only consideration is that the floor covering be firmly bonded to the subfloor so that it does not come loose. Any wax and dirt should be cleaned off the vinyl before application of the membrane.
The plywood flooring must be clean and smooth, with sheets sanded to level them at the joints, if necessary. Sweep, vacuum, and mop the floor to remove all debris. Plywood subfloors should be installed with a 1/8” expansion gap between sheets to allow for wood swelling as moisture is absorbed.
Installing Ditra on Plywood
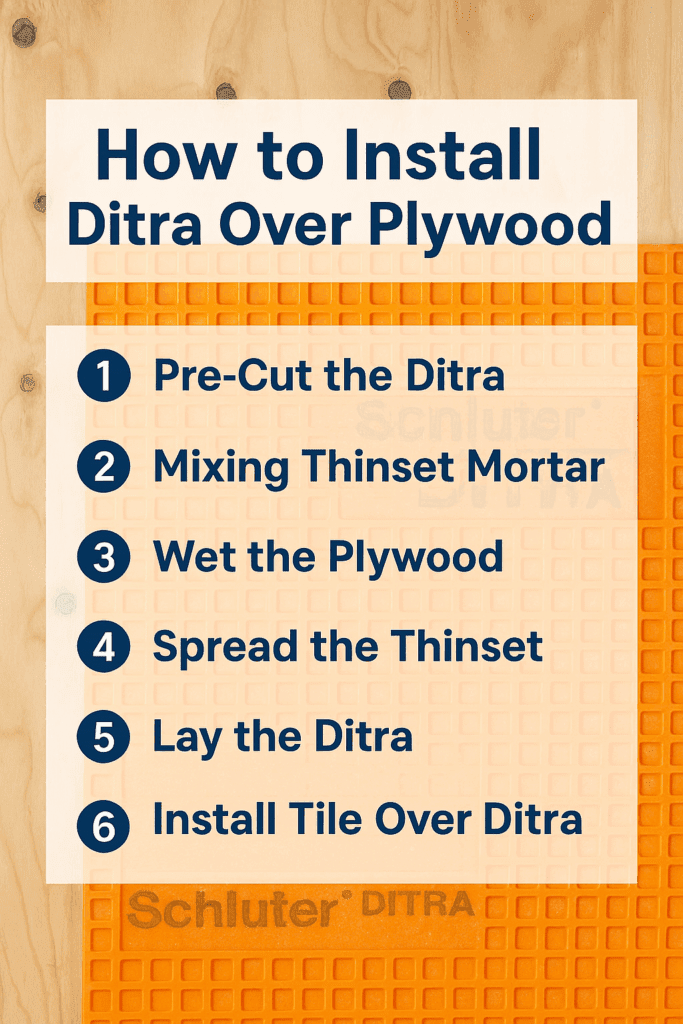
Installing Ditra over a plywood subfloor can greatly improve the longevity of your tile floor—if it’s done right. Here’s a step-by-step breakdown for a clean, long-lasting install using Schluter Ditra and modified thinset mortar.
Why You Need to Take Your Time with Ditra Installation on Plywood
There’s something that catches a lot of people off guard when they start laying tile over plywood: the fact that wood and tile just don’t play nice together without some help. I learned that the hard way on my second tiling job—beautiful tile, expensive grout, perfect layout… and within six months, a few hairline cracks had crept into the grout lines. The culprit? Subfloor movement. That’s where Ditra comes into the picture. It’s a lightweight, waffle-patterned membrane that acts like a shock absorber between your tile and the plywood underneath. Wood subfloors shift with changes in humidity and temperature. They flex, expand, and shrink. Tile doesn’t. So if you don’t separate the two, the tile will lose every time.
Ditra not only cushions that movement, but it also provides a critical moisture barrier. Plywood and OSB love to absorb moisture from thinset and the environment, and that can lead to warping, swelling, and eventual tile failure. When Ditra is installed properly, it keeps moisture from soaking into the wood and lets any trapped moisture escape upward instead. That’s one of the reasons it has those square cavities underneath—it’s not just for grip, it’s for airflow. But here’s the thing: Ditra only does its job if you do yours right. That means using the right mortar (modified for plywood), prepping the subfloor (clean, smooth, dry), and laying each sheet without rushing. If you skip steps, it might look fine at first, but problems will creep in. So take your time. I’ve learned to treat Ditra like an insurance policy for my tile—it protects the investment, and it’s worth doing right.
Mistakes I’ve Seen (and Made) When Installing Ditra
One mistake I see again and again is someone using unmodified thinset over plywood. It might look like it’s holding at first, but give it a little time, and you’ll hear tiles popping like bubble wrap. Modified thinset has polymers in it that help it grip wood, and it flexes a bit as the subfloor moves. Without that, your tile installation is built on a bad foundation. I also see people rushing to cut Ditra as they install. Big mistake. Once the thinset is on the floor, the clock is ticking. If you’re fiddling with scissors or trimming edges while the mortar is setting, it’s easy to make a mess. The better approach is to dry-fit and cut all your Ditra pieces beforehand. Lay them out like a puzzle, fold them in half, and then work section by section.
Another tip I wish someone had told me early on: always dampen the plywood before you apply thinset. Not soaking wet—just a wipe-down with a clean sponge. If the wood is too dry, it’ll pull moisture out of the mortar and weaken the bond before it cures. And while we’re on technique, how you hold your trowel matters more than you think. Too flat and the ridges are too low. Too steep and you’ll use way too much mortar. Stick with a 45-degree angle and work in straight lines—no circles. When you set the Ditra down, use a flat trowel or float to press it in firmly. Don’t just pat it with your hands and hope for the best. And if the thinset starts to skin over, stop. Scrape it up and remix. These aren’t fancy tricks—just things I learned by fixing my own mistakes. If you respect the process, you won’t have to redo it later.
Before mixing any thinset mortar, cut your Ditra sheets to size. Cutting them in advance prevents a messy process later when the mortar is already on the floor. Once cut, lay the sheets loosely in position, then fold them halfway back—this lets you spread thinset on the exposed subfloor and quickly fold the membrane into place.
🔄 Modified vs. Unmodified Thinset
For plywood subfloors, always use modified thinset mortar. This type contains latex polymers for stronger adhesion and flexibility, essential for bonding to wood.
Unmodified thinset (just cement, sand, and water retainers) is only suitable for concrete and lacks the flexibility plywood needs.
🛠 Pro Tip: To qualify for Schluter’s warranty, you must use their own brand of thinset with Ditra.
🧪 Step 2: Mixing Thinset Mortar Properly
Add water to the bucket first, then add powder. Never the other way around.
Mix at a 4:1 ratio (powder to water) using a paddle mixer and drill for 3–5 minutes.
Let it slake (rest) for 10 minutes—this activates the chemical bonding process.
Remix for another 3 minutes. Don’t add more water! If it starts to harden, remix only.
Always mix outdoors and wear a dust mask—the fine particles are hazardous to inhale.
💧 Step 3: Wet the Plywood
Before spreading mortar, lightly dampen the plywood with a sponge and clean water. This helps prevent the plywood from absorbing moisture from the thinset too quickly, which can weaken the bond.
🔨 Step 4: Spread the Thinset
Use an 11/64” square-notched trowel for consistent mortar depth.
Start with the flat edge of the trowel to burn in (spread) thinset across a small section—no bigger than you can reach while kneeling.
Switch to the notched side and trowel in straight, parallel lines at a 45-degree angle.
Avoid circular motions; they create uneven thickness and weak bonding.
📏 Step 5: Lay the Ditra
Fold the Ditra membrane over the wet mortar (nubby side down).
Adjust it so the edges line up cleanly.
Use a flat trowel or float (not toothed) to firmly press it into the mortar.
Work in sections until the entire floor is covered.
⚠️ If the thinset skins over (dries on top), scrape it off, remix, and reapply—it won’t adhere properly otherwise.
🧱 Step 6: Install Tile Over Ditra
You can tile over Ditra immediately or wait until the next day.
Use fresh, modified thinset mortar.
Fill the dovetailed squares of the Ditra membrane by troweling thinset in all four directions to ensure full coverage.
Apply more thinset over the filled surface using a notched trowel.
For larger tiles (like 16”), back-butter each tile with a thin layer of mortar to eliminate hollow spots.
Do not skip filling the Ditra grid or back-buttering large tiles—both are critical for full bonding and long-term durability.
🚫 What This Guide Doesn’t Cover
This guide focuses on using Ditra over plywood, not general tile installation. For best results, consult additional resources for:
The Ultimate Guide to Attic Flooring: Expert Tips and Advice by Admin June 27, 2024 Installing Transforming your attic into a functional space begins with strategic flooring choices that balance practicality and safety. Whether you're aiming to create additional storage, a…