I’ll be honest—when I first tried staining pine, I thought it would be one of those easy wins. Grab a stain, swipe it on, wipe it off, and stand back to admire the grain. But what I actually ended up with looked like I dragged a wet sock through motor oil.
That’s when I learned the hard way: pine doesn’t play nice.
It’s everywhere—cheap, light, easy to work with—but when it comes to stain, pine is unpredictable at best. One board absorbs stain like a paper towel, the next one acts like it’s coated in plastic wrap. I figured there had to be a better way than just guessing every time.
So I ran a full side-by-side stain test. Same sanding, same brushes, same lighting. I wanted to know: which stains actually work on pine, and which ones are just hype?
How I Tested (Nothing Fancy)
I grabbed a pile of knotty pine boards from the home center—just the stuff most DIYers would use—and sanded them all to 180 grit. Half the boards got a coat of pre-stain conditioner. The other half went rogue just to see what would happen.
No sprayers, no exotic finishes. I used essential foam brushes, rags, and gloves. The kind of tools you’d use on your garage floor with a podcast playing and a soda nearby. Actual setup, real results.
My Favorite Stains for Pine (After Way Too Much Testing)
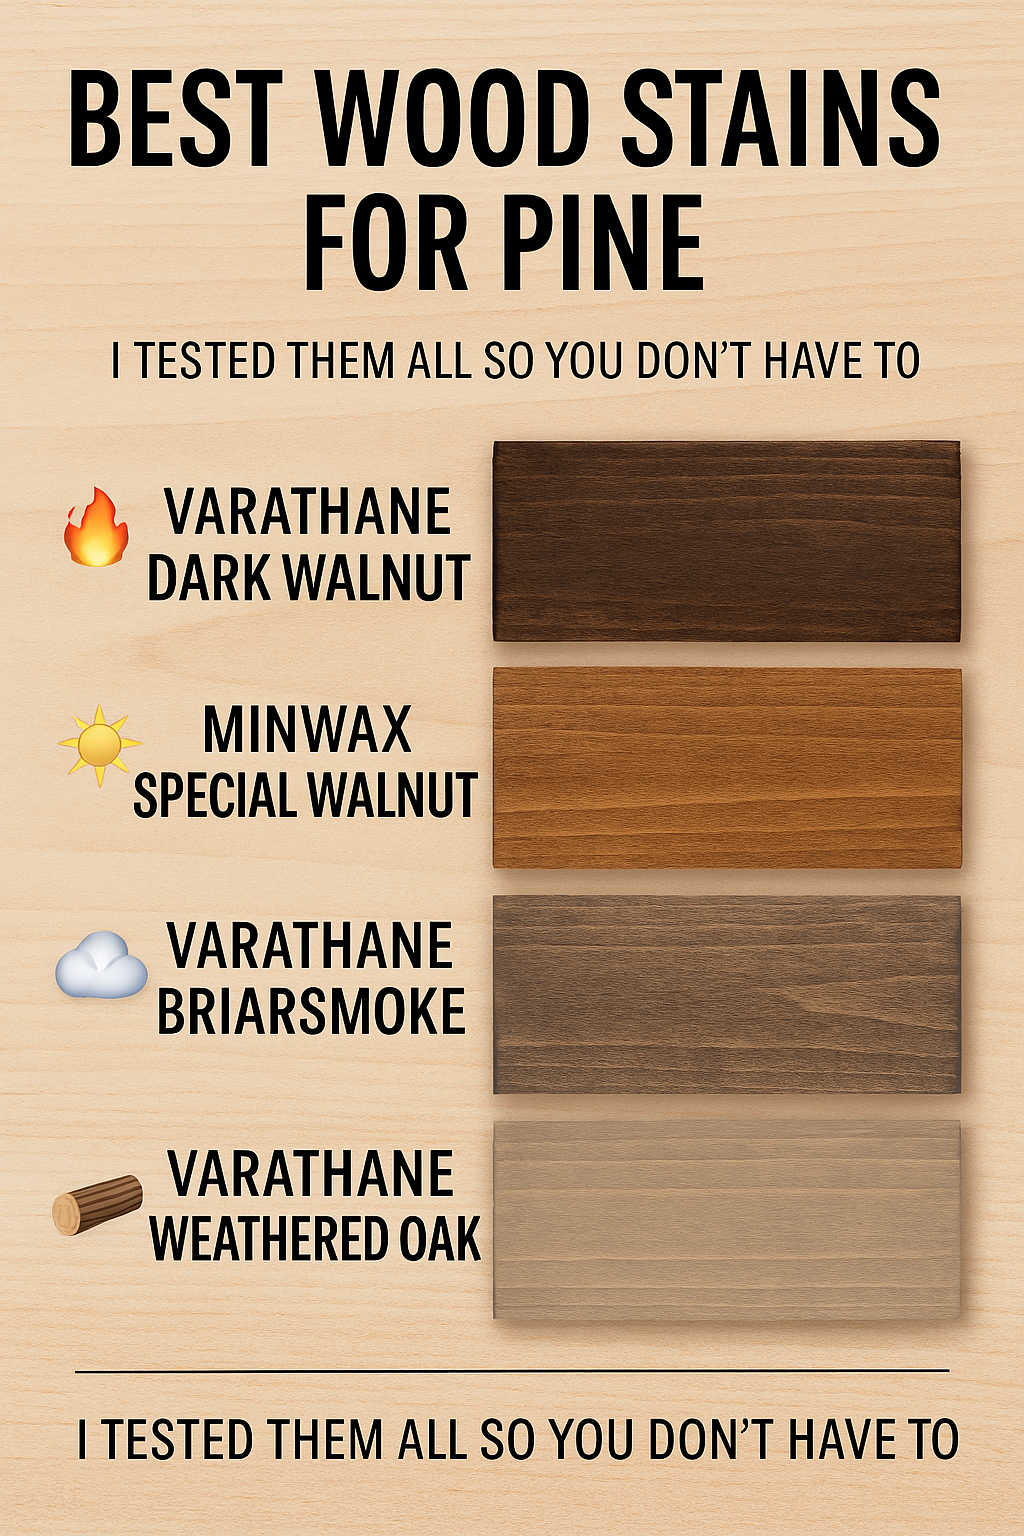
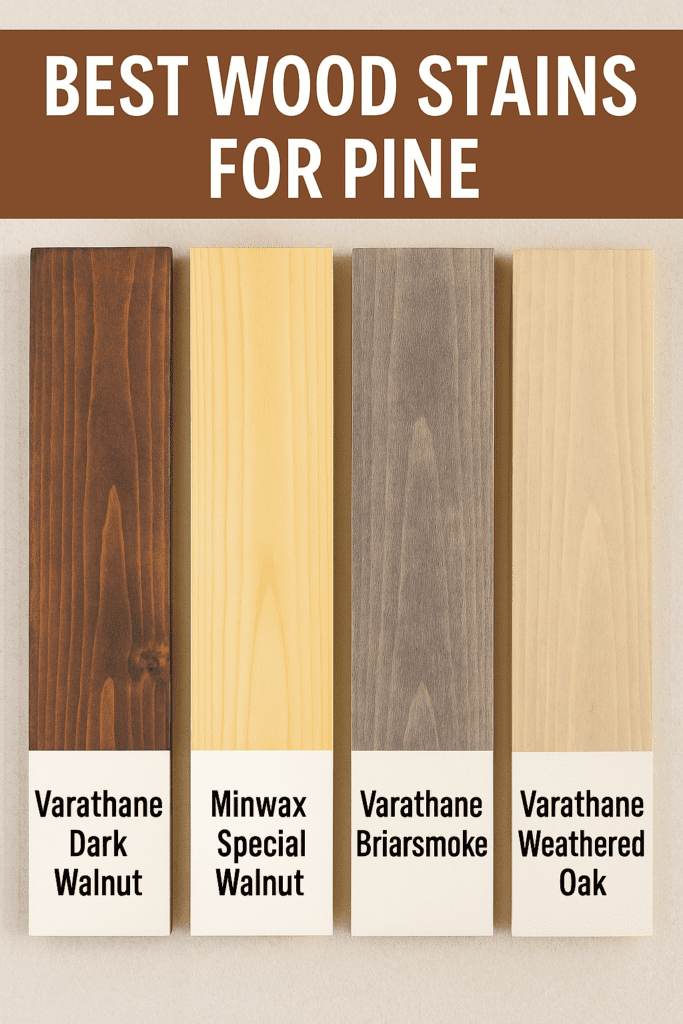
I stained board after board, cursed a few times, and narrowed it down to four stains I’d use again without hesitation.
🔥 Varathane Dark Walnut
This one’s my go-to now. It glides on smooth, dries even, and doesn’t get blotchy—even when I skip the conditioner (which I shouldn’t, but hey, we all get lazy). The color is deep and warm, and it made my cheap pine bench look like it belonged in a high-end furniture store.
☀️ Minwax Special Walnut
This is the one I reach for when I want something classic and safe. It’s warm and balanced—not too dark, not too light—and it makes pine look like something you’d find in a cozy cabin. Just solid, dependable color.
🌫 Varathane Briarsmoke
Total surprise hit. I didn’t expect much from this one, but it gave me that smoky, weathered look without needing any distressing. It made my pine side table look like I pulled it from an old barn—and I mean that in the best way.
If you’re going for that soft, sun-faded “modern farmhouse” look, this one’s perfect. It’s subtle, not too warm, and works especially well on shelves, accent walls, and anything you don’t want to overpower.
Other Pine-Friendly Wood Stains I Tried
A few others almost made the cut:
Minwax Golden Oak – Nice color but too yellow for my taste on pine.
Rust-Oleum Kona – Super dark, but blotchy unless you pre-condition like a maniac.
Minwax Classic Gray – Looks great on hardwood but turned pine a weird blue-green.
If you’re ever unsure, just test a small area. Trust me—your future self will thank you.
Tools That Actually Helped (Not Just Hype)
You can stain with whatever’s lying around in your shop, but if you want clean results and fewer regrets, these helped a ton:
🖌️ Foam Brushes – Cheap, disposable, and good for getting into corners.
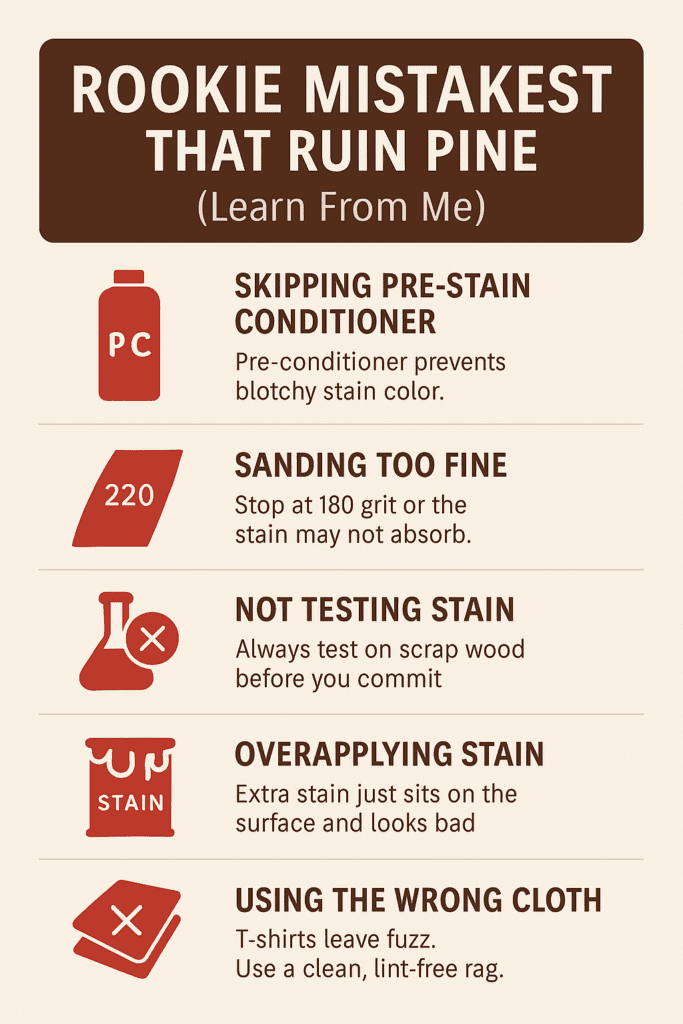
I’ve stained more pine than I care to admit, and I’ve made just about every mistake possible:
Skipping the conditioner – Huge mistake. My board came out blotchier than a giraffe.
Not testing stain color – One time, I skipped the test swatch and stained a bookshelf bright orange. No saving it.
Sanding too fine – Pine’s already tricky. If you sand past 220 grit, it won’t absorb stain well at all.
Applying too much stain – More isn’t better. It’ll just sit on the surface and dry unevenly. Light coats win every time.
Using the wrong cloth to wipe – Old T-shirts leave fuzz. Lint-free rags are a game-changer.
FAQ: Staining Pine the Right Way
Q: Should I always use a wood conditioner on pine? Yes. Unless you want surprise blotches or uneven color, it’s the one step you should never skip.
Q: What grit should I sand pine before staining? 180 grit is the sweet spot. It’s smooth enough for a clean application but still open enough for the wood to absorb stain.
Q: Can I use gel stain on pine? Absolutely. Gel stains sit on the surface more than penetrating deep, which helps control blotchiness. They’re great for beginners.
Q: What’s the best clear finish for pine after staining? I like water-based polycrylic for indoor projects—fast-drying and non-yellowing. For furniture, an oil-based polyurethane gives more durability.
If you want to make pine look premium, stay away from orange or yellow tones unless you’re aiming for a rustic vibe. Cool neutrals, rich browns, and weathered grays work best. And remember—it’s not just the stain; it’s the prep and technique that make or break your final result.


")


")

