Finishing plywood can transform budget-friendly, rough sheets into professional-looking furniture, cabinets, and home improvement projects. This ultimate guide walks you through every step—sanding, sealing, staining, painting, and topcoating—while also giving you advanced techniques, troubleshooting tips, and project ideas. The strategies in this guide are tailored for top performance on Bing, using long-tail keywords, clear structure, image suggestions with alt text, and actionable advice.
Why Proper Plywood Finishing Matters
Plywood is versatile and affordable, but raw plywood has vulnerabilities that can ruin your hard work if left unprotected. Exposed edges soak up moisture like a sponge, thin veneers chip easily, and an uneven surface can make even the best paint or stain look amateur. Proper finishing doesn’t just enhance the plywood’s appearance—it extends the life of your project, makes cleaning easier, and prevents damage.
Benefits of Finishing Plywood
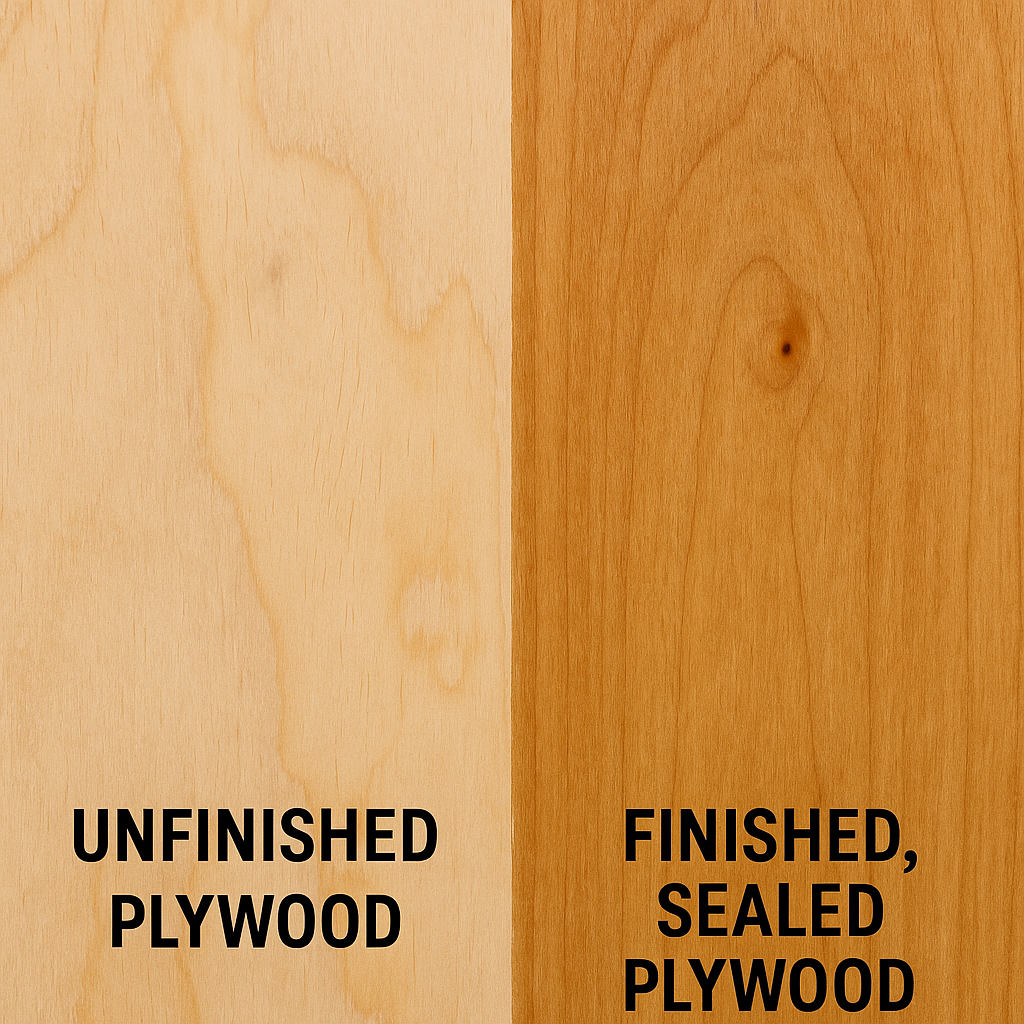
Moisture Resistance: A sealed plywood surface keeps the layers from swelling, warping, or delaminating over time, especially in humid or damp conditions.
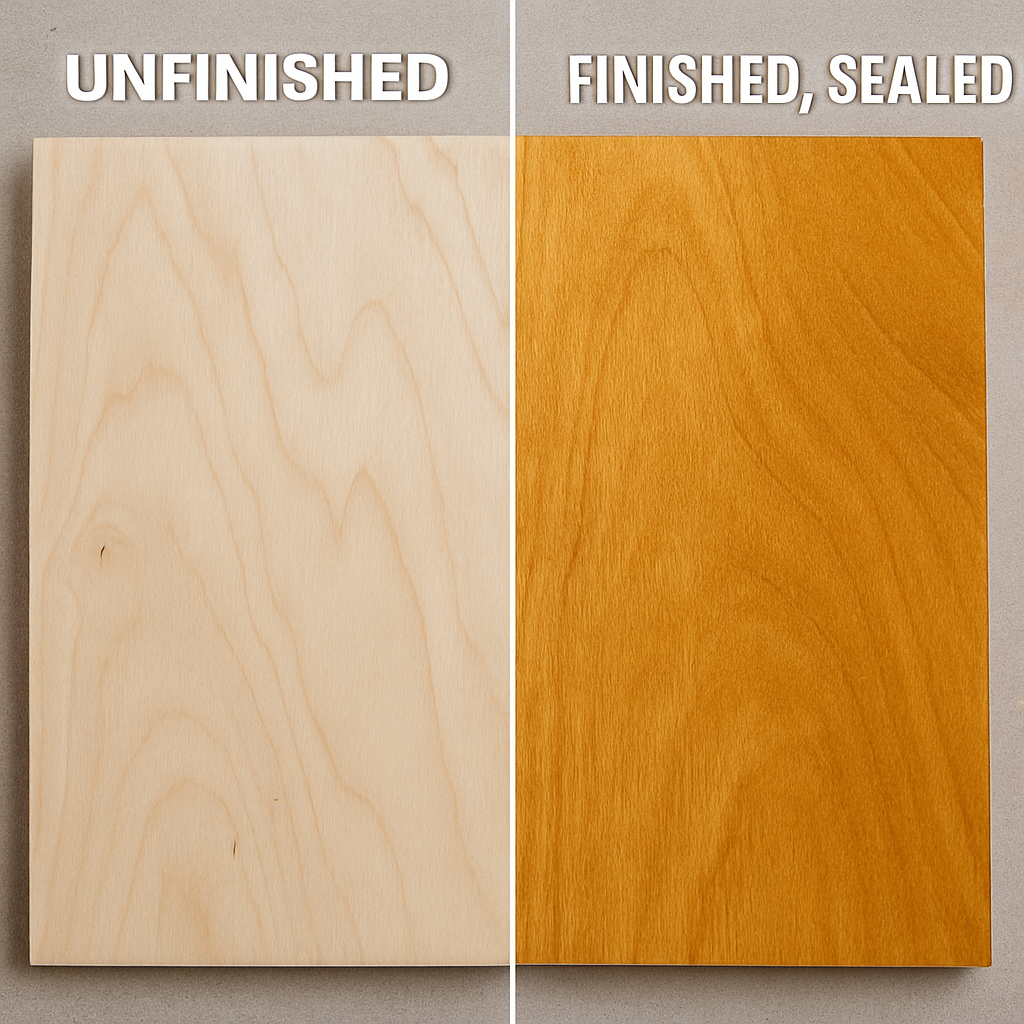
Improved Appearance: A well-applied stain or paint can highlight the wood grain beautifully or completely disguise imperfections for a sleek, modern look.
Long-Term Durability: Protective coatings guard against scratches, scuffs, and sunlight damage, making your furniture or project last for years.
Easy Cleaning: Finished plywood doesn’t trap dirt or grease. A sealed surface can be wiped clean effortlessly, perfect for kitchens, workshops, or garage storage.
I learned the hard way with my first DIY shelving project. I built garage shelves out of raw plywood, thinking it didn’t matter for utility furniture. Within a few months, water stains, warping, and splintered edges destroyed their appearance and weakened the boards. After that, I made finishing a mandatory step in every project. I always start by carefully sanding, then apply a sealer, and finally add a durable topcoat for long-term protection.
Proper sanding is critical. Start with 150- or 180-grit sandpaper and always follow the grain to avoid cross scratches. Once the surface is smooth, wipe off the dust with a damp microfiber cloth and let it dry completely before applying any sealer or finish. Remember, no finish can make up for poor prep work—smooth plywood is the foundation of a beautiful, long-lasting finish.
When sealing and finishing, focus on the edges first. Plywood edges are porous and will absorb any finish unevenly if not properly prepared. Filling gaps with wood filler or epoxy, then sealing with shellac, polyurethane, or PVA glue ensures they stay smooth and moisture-resistant.
A proper finish transforms ordinary plywood into something that looks professionally built. Whether you choose a clear poly, a colorful paint, or a deep wood stain, the results will be cleaner, sharper, and more resilient. Take the time to do it right, and your project will reward you with years of use and beauty.
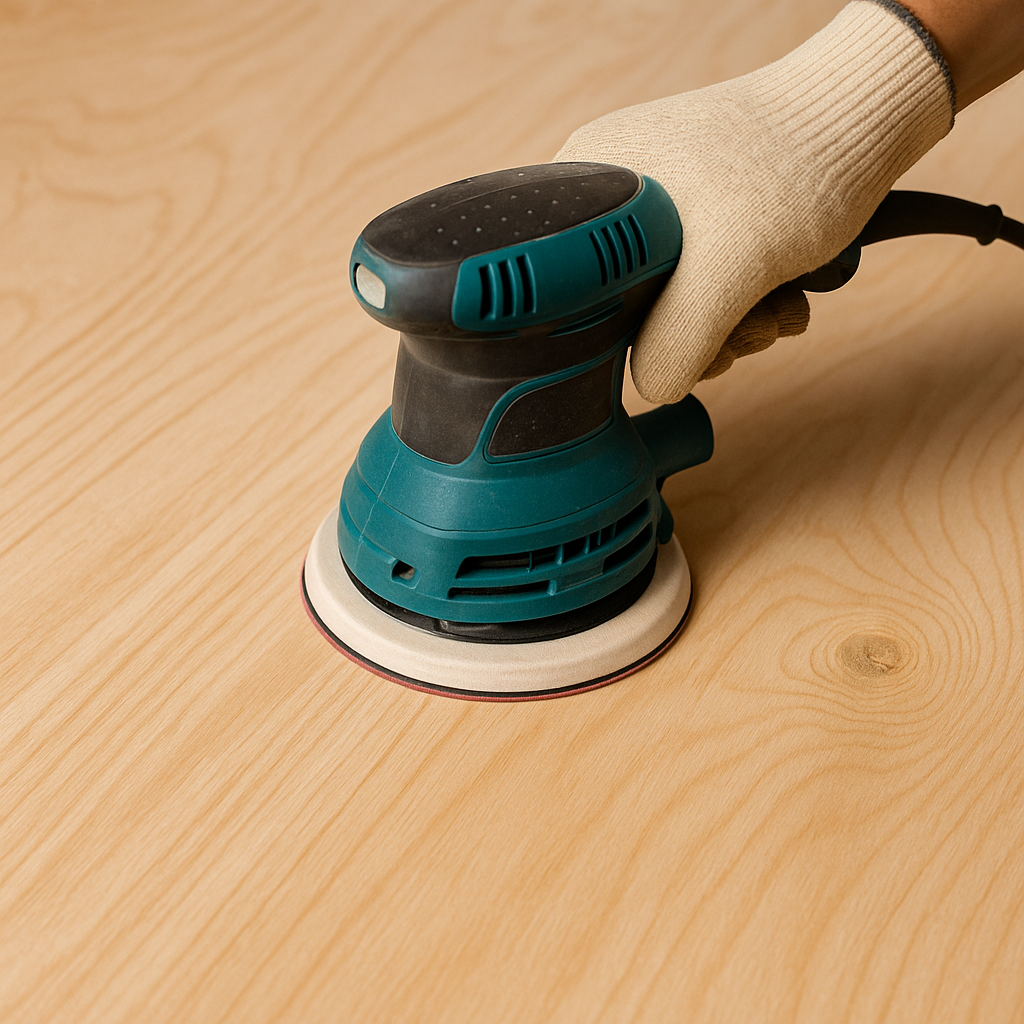
Step 1: Sanding – The Foundation of a Perfect Finish
Sanding Process
Start with 120-grit sandpaper: Removes rough spots and mill marks.
Move to 150–180 grit: Creates a smooth finish for staining or painting.
Always sand with the grain: Prevents visible scratches across the thin veneer.
Mist the surface lightly: Raising the grain before the final sanding ensures a silky finish.
Pro Sanding Tips
Avoid using a belt sander—it removes material too quickly and can ruin the top veneer.
Use a quarter-sheet or detail sander for control, or sand by hand for delicate projects.
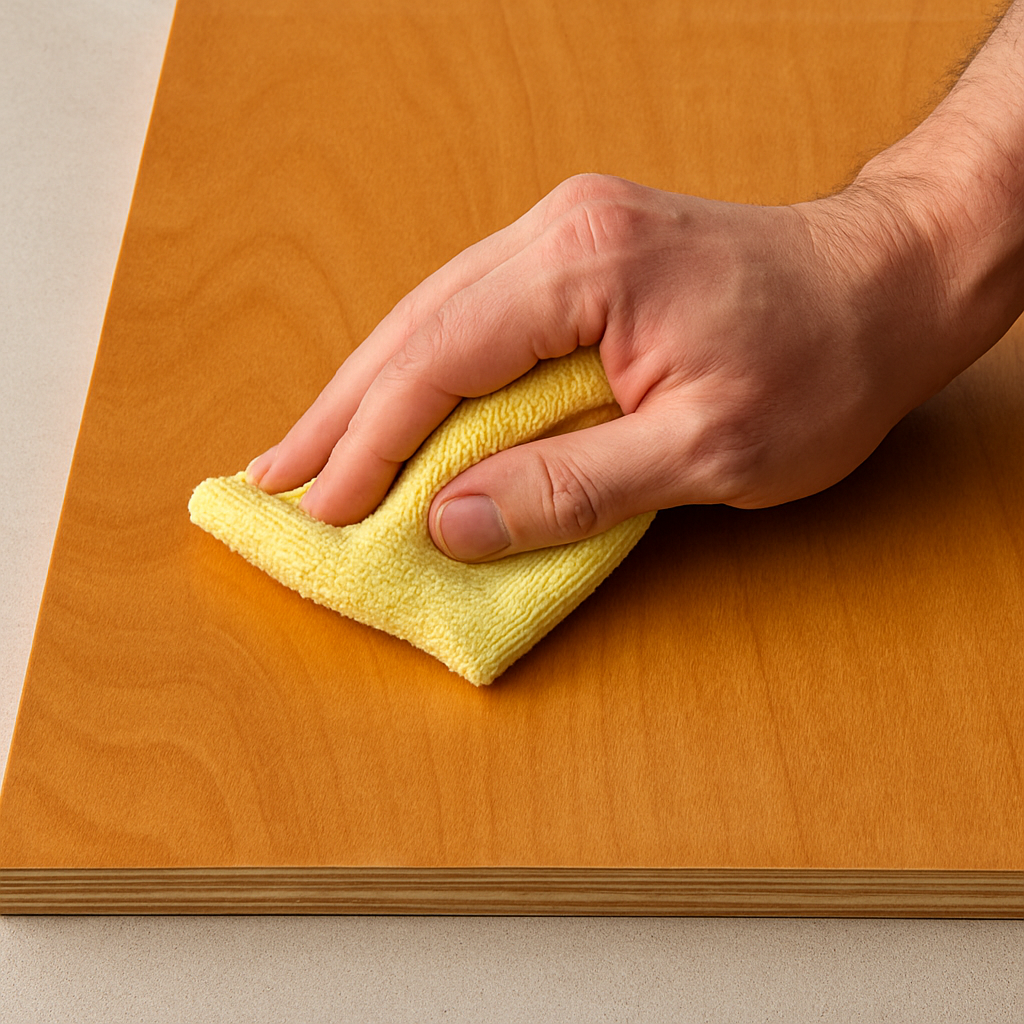
Wipe dust away with a damp cloth or tack cloth before moving on.
Step 2: Sealing Plywood Edges for a Professional Look
If you’ve ever worked with plywood, you know that the edges are the first part to give away whether a project is DIY or professional. Those layers are like tiny straws—open and ready to suck in moisture. Years ago, I built a storage bench for my mudroom and skipped sealing the edges, thinking a coat of paint would be enough. Within a month, the corners had swelled, the paint looked blotchy, and the project just felt cheap. I’ve never made that mistake again.
Why You Should Seal Plywood Edges
Moisture is the enemy of plywood. The thin veneers along the edges soak it up fast, which causes swelling, warping, and even separation over time. Unsealed edges also make finishes uneven—paint and stain sink in differently, leaving dark patches or a rough texture that stands out against the smooth faces of the panel. Taking ten extra minutes to seal the edges pays off in a project that looks sharper and lasts longer.
My Go-To Methods for Edge Sealing
Diluted Wood Glue – I mix regular wood glue with a splash of water and brush it along the edges. It dries almost invisibly, and after a light sanding, it feels smooth under any clear coat or stain.
Wood Filler or Spackle – If the plywood will be painted, I like to push wood filler into the edges with a putty knife. Once it dries, I sand it flush. The paint goes on like glass afterward.
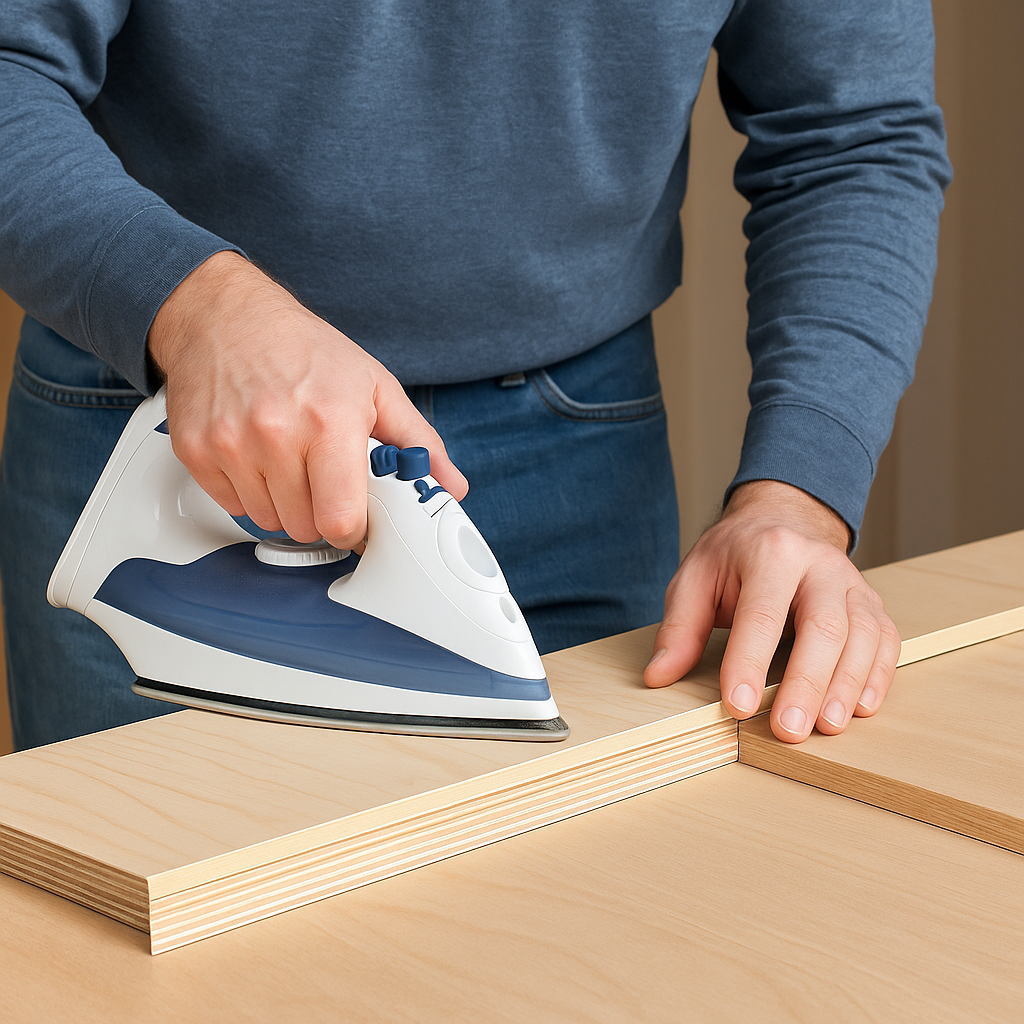
Iron-On Edge Banding – For furniture projects, edge banding is my favorite. I line it up, run a household iron over it to melt the adhesive, and press it down with a scrap block. A quick trim and sanding, and the edges look like solid wood.
Final Touches
No matter which method I use, I always finish with a gentle pass of 220-grit sandpaper to knock down any bumps. A tack cloth or damp rag wipes away the dust, and the panel is ready for stain, paint, or sealer. Properly sealed edges not only look professional but also add years to the life of your project.
Step 3: Priming and Pre-Staining
When I first started staining plywood, I thought I could just slap it on and call it a day. Big mistake. The stain soaked into the edges like a sponge and turned the corners almost black, while the middle stayed light. These days, I always grab a little can of pre‑stain wood conditioner first. I brush it on, making sure to work it into the edges. I usually let it sit around ten minutes—sometimes a little longer if I get distracted. Then I wipe the extra off with an old cotton rag. I’ve found that if I skip this step, I end up sanding and re‑staining to fix blotches, which is a pain I don’t want to repeat.
For Painting: Painting plywood is easier if you give it a fighting chance. I like to roll on a coat of primer first, usually Zinsser B‑I‑N or whatever I have on hand. It doesn’t have to be fancy, but it makes the paint stick way better. I let that dry all the way—sometimes I even leave it overnight if I’m busy—then I take some 220‑grit sandpaper and lightly go over the surface. Just a couple of passes are enough to knock down the rough grain that pops up after priming. Skip that, and your final coat will feel like sandpaper. I learned that lesson the first time I rushed through a bookshelf project, and now I never skip the light sanding step.
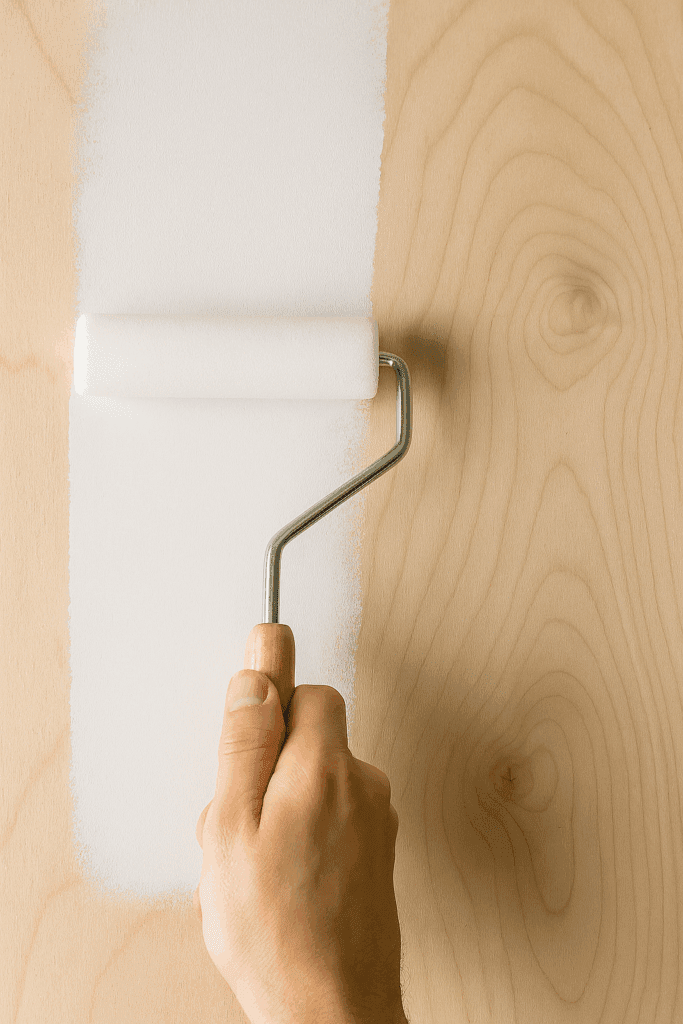
Step 4: Staining or Painting Plywood
Once the surface is prepped, you can bring your plywood to life with color.
Apply with a cloth, let it penetrate for several minutes, then wipe away excess.
Multiple thin coats add depth and richness.
Painting Tips:
Apply 2–3 thin coats for durability.
Use a foam roller to avoid brush marks.
Lightly sand between coats to achieve a smooth, furniture-quality finish.
Step 5: Topcoating for Maximum Protection
The last step in protecting plywood is the topcoat, and honestly, it’s the part that makes me breathe easier. Once the topcoat goes on, I know my project won’t get ruined the first time someone drips water on it or slides a heavy box across it.
Here’s what I’ve learned about topcoats over the years:
Polyurethane – My default choice for furniture and tabletops. It’s tough, it brings out the grain, and it holds up to daily abuse.
Polycrylic – If I’m working with lighter woods like birch or maple and I don’t want that slight amber color, I use polycrylic. It’s water‑based, dries quickly, and doesn’t have a strong smell, which is great when I’m working in my garage in the winter.
Spar Urethane – For anything that will live outside or in a sunny window, spar urethane is worth it. I built a small patio table last year and used two coats of spar urethane, and rain just beads up on it like glass.
I always apply two or three thin coats instead of trying to do one heavy coat. After each coat dries, I give it a light pass with 320‑grit sandpaper to smooth out any tiny bumps. Wipe off the dust, and only then do I add the next coat. Letting each coat fully cure makes a huge difference—I learned that the hard way on an early project where I rushed, and the finish stayed sticky for a week. Take your time, and your plywood will look professional and last for years.
Distressed or Rustic Effects for farmhouse projects.
Spray Applications using an HVLP sprayer for ultra-smooth results.
Common Mistakes to Avoid
Skipping sanding or edge sealing.
Rushing drying times.
Applying coats too thickly.
Forgetting to remove sanding dust.
Avoiding these mistakes guarantees a longer-lasting, more beautiful finish.
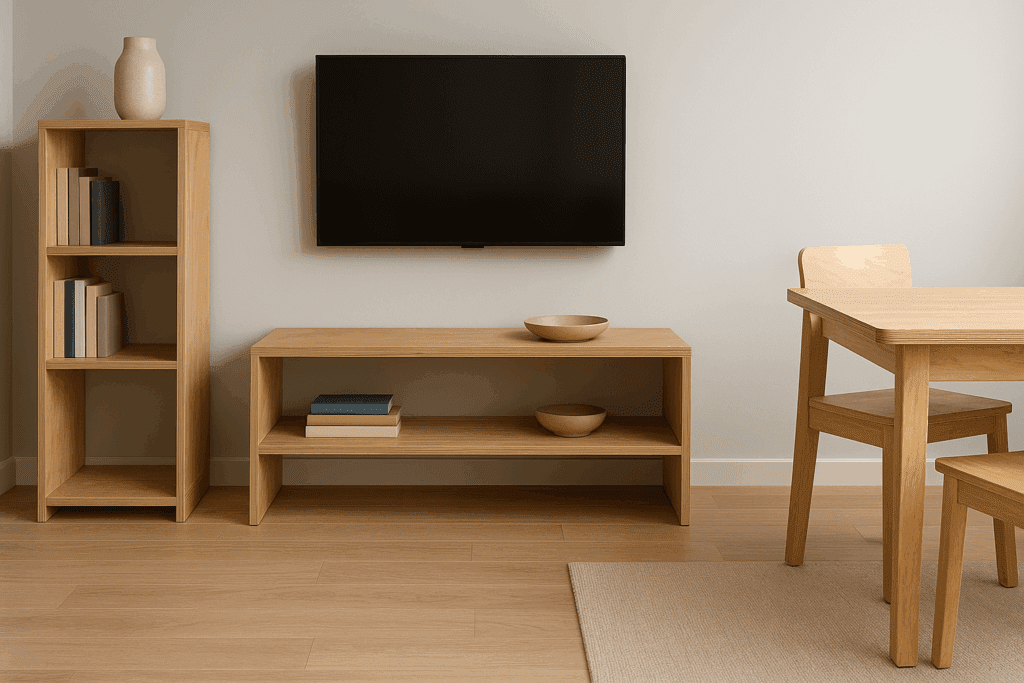
Real-World DIY Project Ideas
Floating Shelves – Edge-banded and stained for modern spaces.
Garage Cabinets – Painted and sealed against moisture.
Coffee Tables & Desks – Protected with durable polyurethane.
Kids’ Furniture – Finished with smooth, non-toxic coatings.
Wall Panels or Backsplashes – Rustic or modern looks with clear sealing.
Related Posts:
How to Apply a Shellac Finish to Plywood by Amy Reed September 16, 2025 DIY Applying shellac to plywood is a traditional way to finish a woodworking project. Made from insect-secreted resin flakes dissolved in alcohol, it’s a non-toxic finish…
Wood Coasters: How to Make and Finish Them Right by Admin May 16, 2025 Finish Protecting your handmade wood furniture is just as important as crafting it. A single hot dish or a cold drink can leave behind lasting damage…
Finish Carpentry Trim: 14 Easy DIY Projects by Admin August 1, 2025 DIY Finish carpentry trim is one of the most impactful and affordable DIY upgrades you can make to your home. Whether you’re finishing a newly built…