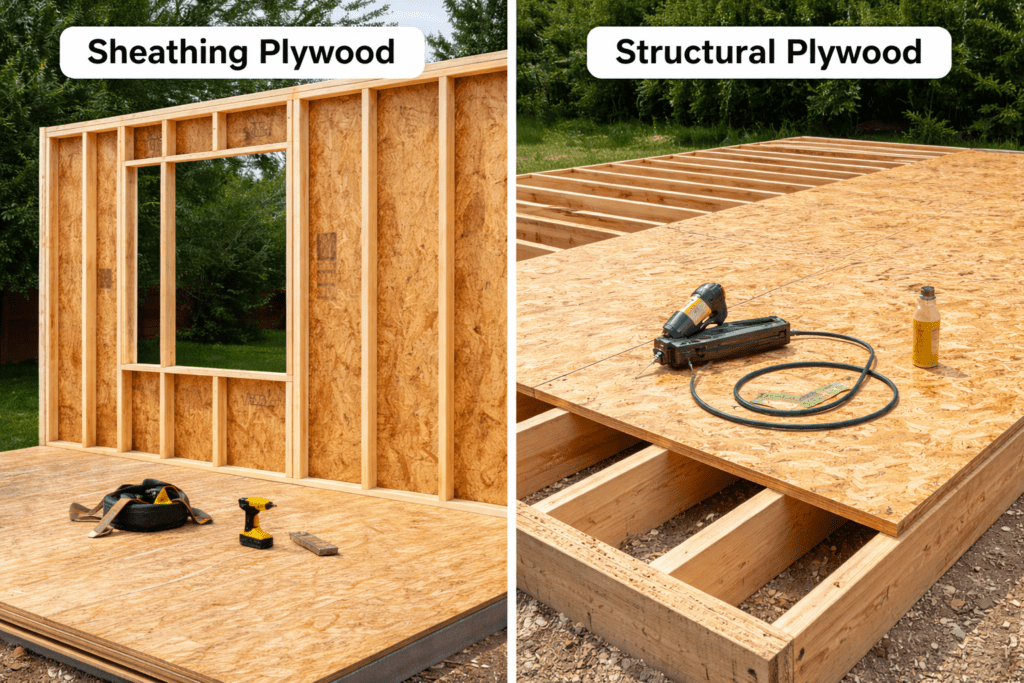
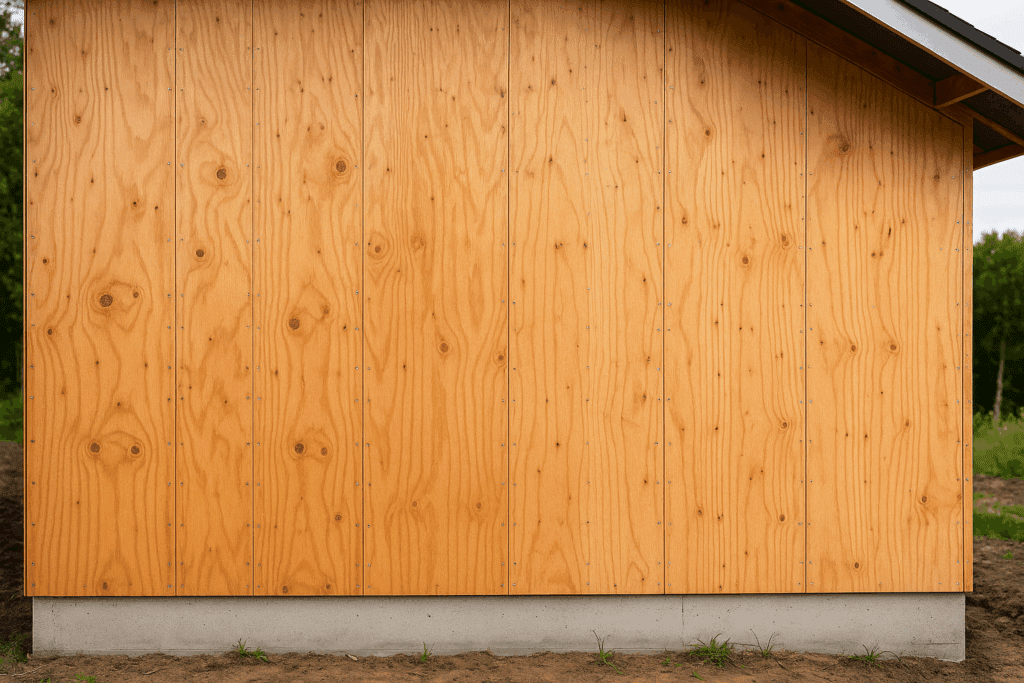
Sheathing plywood is a structural wood panel used for wall and roof framing. It strengthens the framing system, distributes loads, and provides a base for siding or roofing materials. It is commonly made from CDX-grade plywood and typically ranges from 3/8-inch to 3/4-inch thickness.
If you’ve ever built a house, shed, or garage, you’ve probably heard the term “sheathing plywood.” But what is sheathing plywood, and why is it so important in construction? In simple terms, it’s the layer of plywood that strengthens exterior walls, roofs, and floors before the finish materials go on.
Without sheathing, walls sway if you lean on them, roofs feel soft underfoot, and floors can creak or dip like an old front porch.
I learned that the hard way years ago on a windy afternoon while helping my uncle with a small hunting cabin. We had the walls up — no sheathing yet — and I swear the whole frame wiggled like a card table when the breeze kicked in.
We both laughed at first, but then he gave me that “we should probably fix this before it falls” look. As soon as we nailed the panels in place, it was like flipping a switch. The frame went from a loose skeleton to a rock-solid wall you could push on without it moving a hair.
Since then, I’ve used sheathing on everything from garden sheds to full house remodels, and I’ve learned when to save a few bucks, when to spend extra, and which mistakes can turn a quick job into a weekend headache. This guide covers the different types of sheathing I’ve worked with, how to install it without fighting every nail, and a few tricks to make your build stronger without blowing the budget.
What Exactly Is Sheathing?
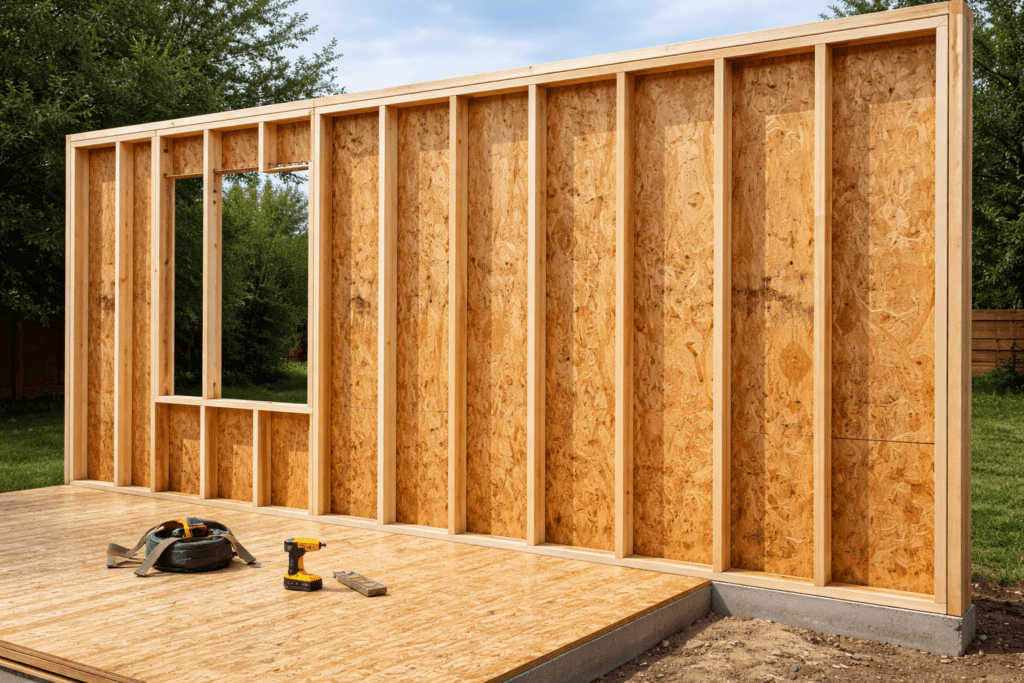
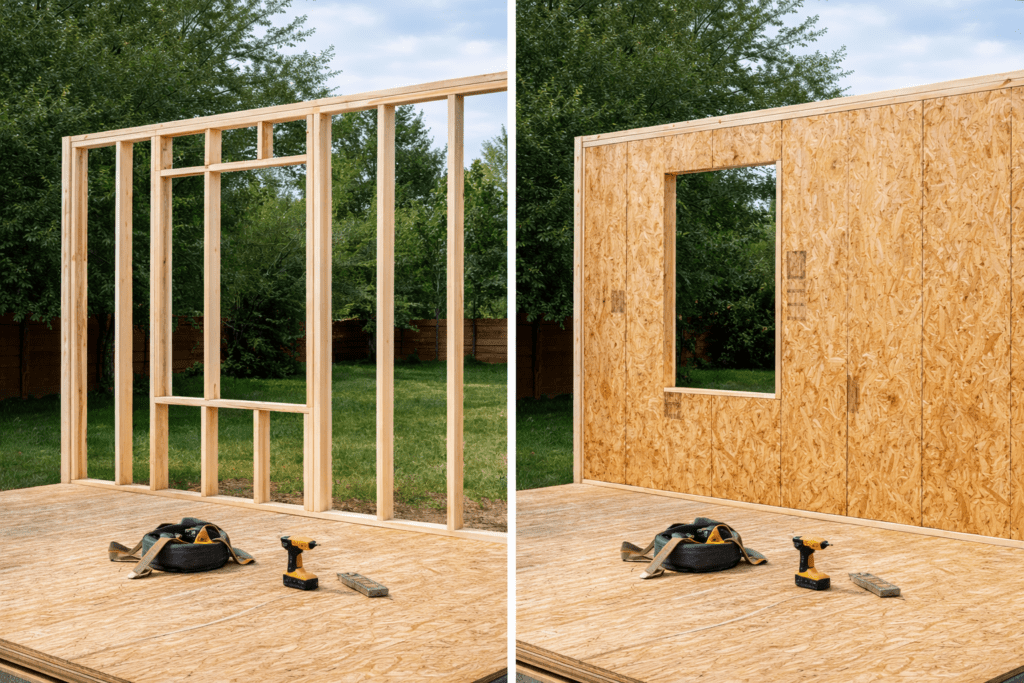
When you’re framing a building, there’s a moment when the skeleton suddenly starts to look like a real structure — and that’s when the sheathing goes on. These are the panels or boards you fasten directly to the framing to cover walls, floors, or roofs. From the outside, it might not look like much more than plywood or OSB sheets, but that layer is doing far more than people realize.
Sheathing ties everything together. It stiffens the frame so the building doesn’t twist in high winds, gives you a flat surface for siding or shingles, and adds an extra barrier against moisture sneaking inside. If you’ve ever been on a job site when a sudden gust of wind hits, you can hear and feel how the sheathing braces the frame — it’s like locking the whole structure in place.
Sheathing Plywood vs Structural Plywood
Feature
Sheathing Plywood
Structural Plywood
Typical Thickness
3/8″ – 3/4″
1/2″ – 3/4″ (sometimes thicker)
Primary Use
Wall & roof sheathing
Load-bearing floors & framing
Strength Rating
Rated for shear resistance
Rated for load & span strength
Surface Grade
Rough (often CDX)
Structural-grade face/back
Appearance
Not finish-grade
Not finish-grade
Installed Over
Studs & rafters
Joists & beams
In my projects, I’ve matched the sheathing to the job at hand. For a roof, I’ll use panels that can handle years of sun, rain, and snow without warping. For interior walls, I might choose something lighter but still strong enough to hold drywall securely. On one small workshop build, I even used high-grade plywood as both the sheathing and the finished inside wall — no drywall needed. It cut down on labor, saved a few bucks, and still looked sharp.
The big takeaway? Sheathing isn’t just a background layer. It’s the muscle and shield of your building, quietly doing the heavy lifting for decades.
Types of Sheathing
When I’m framing a house or shed, I treat sheathing as the unsung hero of the build. It doesn’t get much attention once the siding or roofing goes on, but it quietly keeps everything square, stable, and ready for the long haul.
Sheathing does three main jobs:
It braces the framed walls so they don’t rack or twist in high winds.
It provides a solid surface to nail siding or roofing to.
When paired with a weather-resistant barrier, it serves as the first line of defense against moisture.
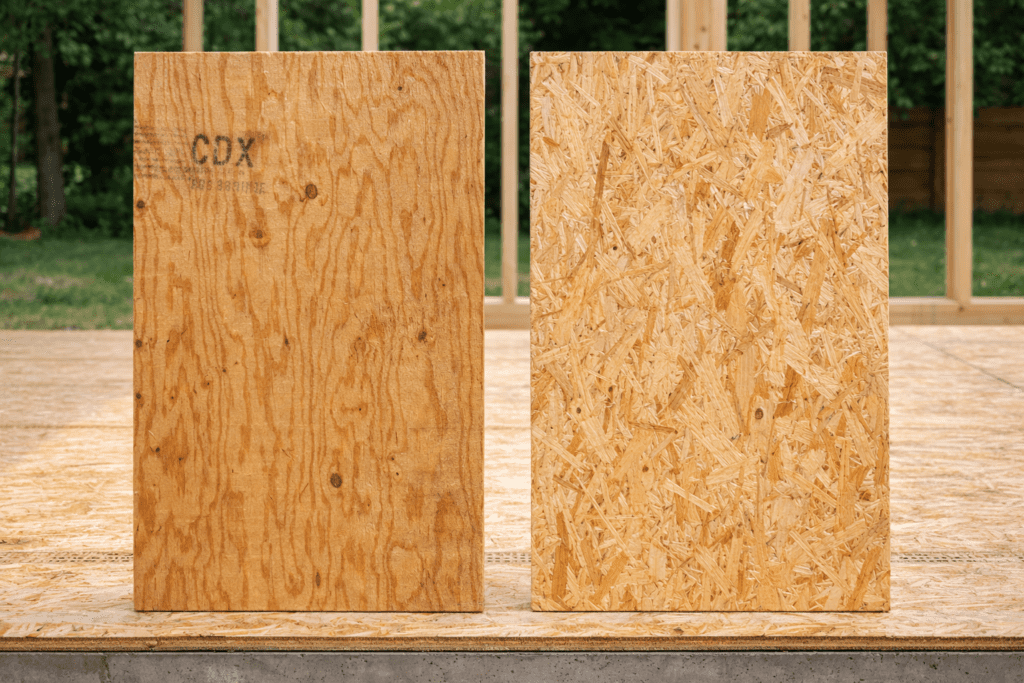
Plywood – My go-to when I want strength and longevity. If you’re unsure how CDX compares to other grades and panel constructions, I break that down in my full guide to plywood types.
OSB (Oriented Strand Board) – A more affordable alternative that still offers plenty of strength for most homes. Just make sure edges and cuts are sealed so moisture can’t creep in.
Structural Fiberboard – Lightweight, easy to cut, and adds a bit of insulation value. I only use it in low-load situations, since it’s not as stiff as plywood or OSB.
Roof Sheathing
Roof decks have a tough job—they’re the base that shingles, metal panels, or tiles depend on. They need to hold firm under heavy snow, rain, or wind.
Plywood handles repeated wet/dry cycles better than OSB, which is why I use it on exposed overhangs. OSB is popular for its cost savings and works well if you protect it from prolonged exposure to moisture.
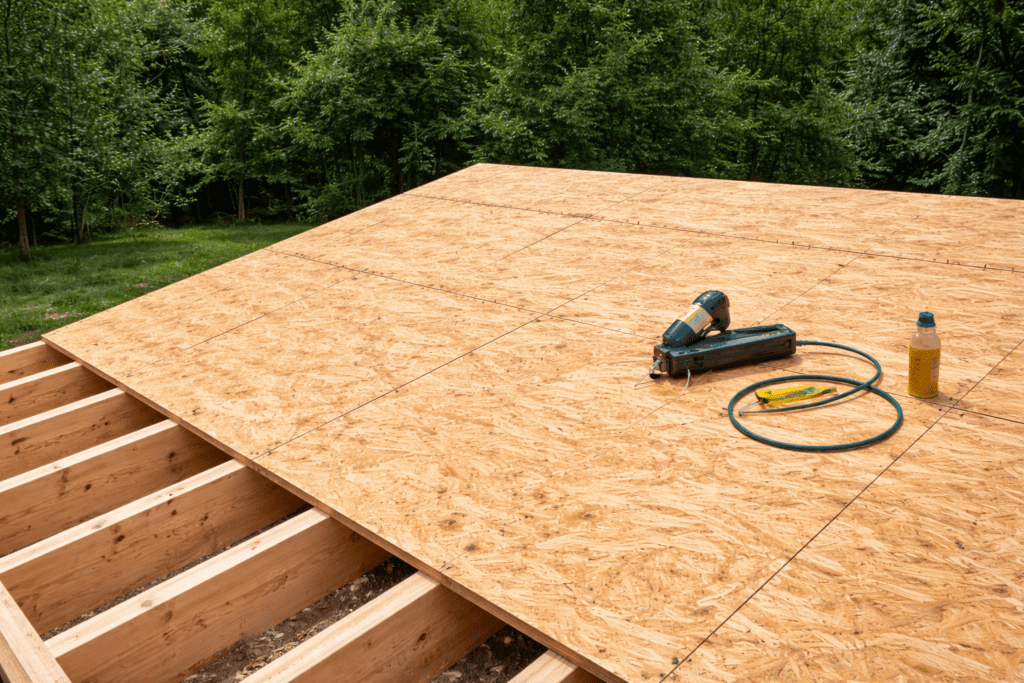
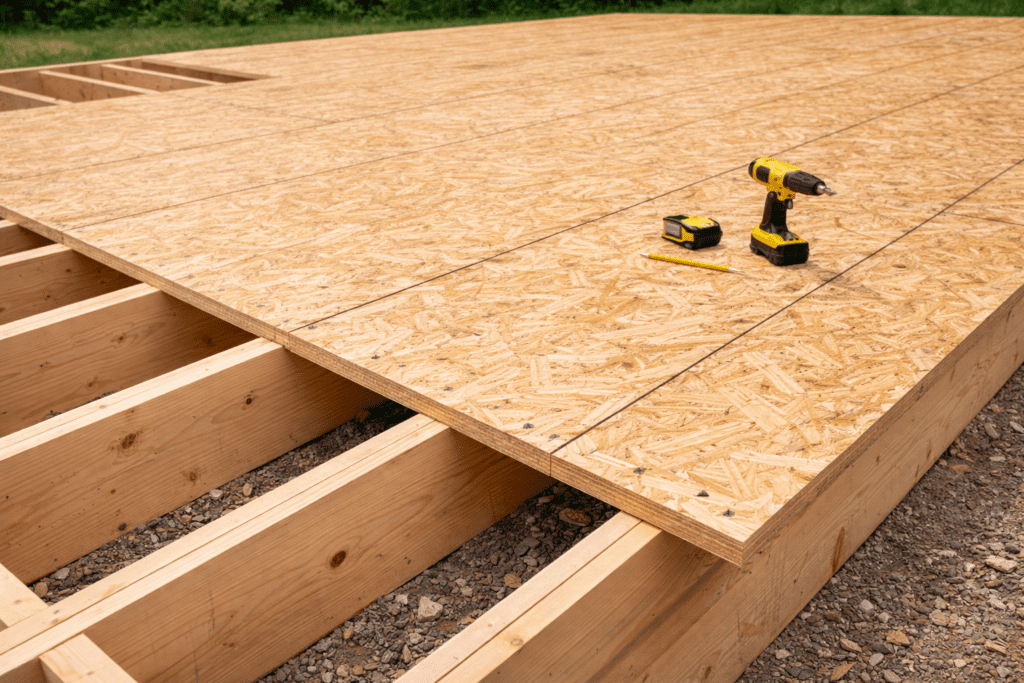
Floor Sheathing
A solid subfloor means fewer squeaks and a smoother finish. I prefer tongue-and-groove plywood for its rigidity, but OSB T&G is a reliable, budget-friendly pick for standard loads.
Pro tip: glue and screw your subfloor to joists—it makes a world of difference in how solid the floor feels.
Materials Comparison Table
Material
Cost per sheet (approx.)
Strength
Moisture Resistance
Best Use
Plywood
$35–$55
High
High
Roofs, floors, exterior walls
OSB
$20–$35
Medium
Medium
Walls, roofs (sealed)
Fiberboard
$10–$20
Low
Low
Interior walls, insulation layer
(Prices based on current U.S. averages — check Lowe’s or Home Depot for updates.)
If you’re trying to understand whether your project requires a load-rated panel or just basic wall bracing, here’s my breakdown ofstructural vs. non-structural plywood and when each is appropriate.
Sheathing vs. Siding — Not the Same Thing
One of the most common misunderstandings in construction is the belief that sheathing and siding are essentially the same thing. They’re not. While both are attached to the outside of a building, they serve very different purposes.
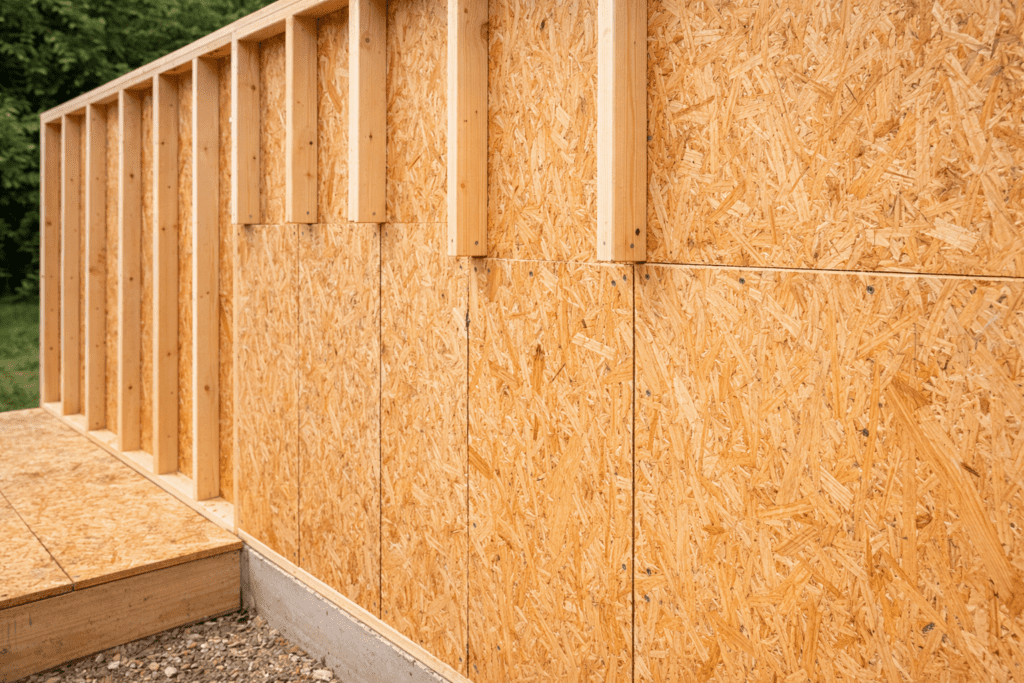
Sheathing is the structural layer. It’s usually made from plywood, OSB (oriented strand board), or another rigid panel material, and it is installed directly onto the wall framing, roof trusses, or floor joists. Its primary job is to strengthen the frame, resist racking (side-to-side movement), and create a flat surface for whatever comes next.
Siding, on the other hand, is the protective and decorative skin of the building. Vinyl, fiber cement, wood clapboard, or metal panels fall into this category. Siding shields the sheathing from weather, blocks UV rays, and gives your home its finished appearance.
Think of it like wearing clothes over armor—sheathing is the armor that provides strength, and siding is the coat that protects it and makes it look good. For example, you might install ½-inch exterior-grade plywood sheathing beneath vinyl siding. The plywood ensures the wall stays straight, square, and rigid, while the vinyl keeps out rain, snow, and pests and enhances curb appeal.
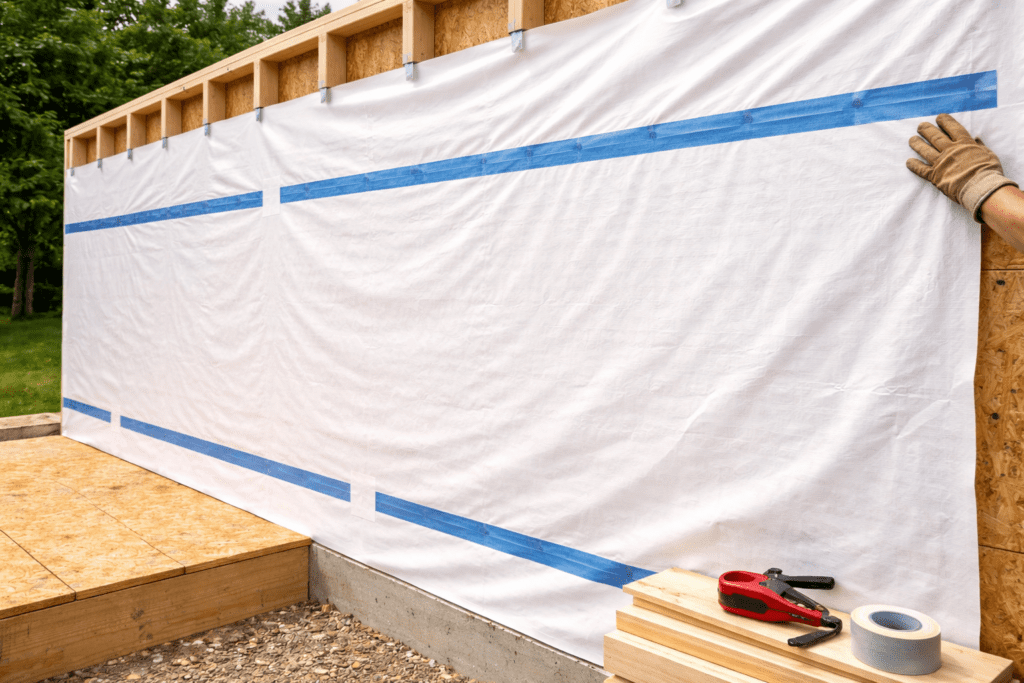
In some climates, builders also install a weather-resistant barrier (like house wrap) between the sheathing and siding. This extra layer allows moisture vapor to escape from inside while preventing wind-driven rain from getting in. Choosing the right combination of sheathing and siding—and installing them correctly—can mean decades of better performance and fewer repairs
Installation Tips From Experience
After installing sheathing on dozens of sheds, homes, and decks, here’s what I’ve learned:
Stagger Your Joints – When installing sheathing, never align panel seams directly over one another in consecutive rows. Instead, stagger them so that the seams in one row fall between the panels in the row above or below. This overlapping pattern increases structural rigidity, prevents weak points, and distributes loads more evenly. It’s a small detail that can make a big difference in how your walls perform under stress—whether from wind, settling, or daily use.
Use the Right Fasteners – Choose galvanized nails or exterior-rated screws to resist corrosion over time. Rusting fasteners will weaken the connection between the sheathing and framing, especially in damp or coastal climates. For best results, drive nails flush—not overdriven—and space them according to local building codes, usually every 6 inches along panel edges and 12 inches in the field.
Leave Expansion Gaps – Wood-based panels like plywood and OSB naturally expand and contract as humidity and temperature change. Leaving a consistent 1/8-inch gap between sheets allows them to move freely without pushing against each other, preventing warping or buckling. A simple way to keep gaps uniform is by using an 8d nail as a spacer.
Seal Edges on OSB – Oriented strand board is especially vulnerable to moisture along its cut edges. Applying a quick coat of waterproof sealer, paint, or even construction adhesive to those edges can dramatically extend its life. This extra step reduces swelling, delamination, and the chance of edges crumbling over time, especially before siding is installed.
Sheathing Thickness Guidelines
Walls: 7/16″ OSB or ½” plywood
Roofs: ½”–5/8″ plywood or OSB, depending on rafter spacing
Floors: ¾” tongue-and-groove plywood or OSB
Pro tip: Always check local building codes — they might require thicker panels in high-wind or snow-load areas. Choosing the proper plywood thickness depends on span, framing spacing, and load requirements — I go into this in more detail in my guide on choosing the right plywood thickness.
Weatherproofing Sheathing
Sheathing doesn’t forgive neglect. I’ve seen good panels swell, warp, and go soft just because they sat in the weather too long. As soon as mine goes up, I cover it—house wrap on the walls, underlayment on the roof. I pull it snug, overlap the seams, and run tape so water can’t sneak in. If it’s windy, I tack it extra tight so it doesn’t peel back overnight. It’s not fancy work, but it buys time until the siding or shingles go on, and it’s saved me from having to replace whole sections more than once.
I once left OSB roof sheathing exposed for two weeks during a rainy spring. By the time we got shingles on, edges had swollen enough to require sanding — a costly mistake.
Sheathing may not be the star of a building project like polished stone countertops or freshly painted siding, but it quietly does some of the most important work. It’s the layer that keeps everything square, adds wind resistance, and provides a solid base for any chosen finish. If the sheathing is solid and well-installed, the rest of the structure benefits for decades.
I’ve learned that cutting corners here is a mistake you feel years down the road—walls start to bow, moisture finds its way in, and repairs get expensive fast. Spending a little extra time and money on the right materials, fastening them correctly, and sealing them against the elements can be the difference between a building that feels sturdy for generations and one that needs constant patchwork.
Whether you’re putting up a backyard shed, framing an addition, or working on a full-scale home build, think of sheathing as your structure’s armor and skeleton combined. Get it right, and you may never have to think about it again—except to appreciate how it kept your project standing strong through every storm.
Related Posts:
Hardwood vs Softwood: Strength, Cost and Uses by Admin February 27, 2026 Hardwood Hardwood vs softwood refers to the type of tree the lumber comes from. Hardwood comes from deciduous trees (broadleaf species), while softwood comes from coniferous…