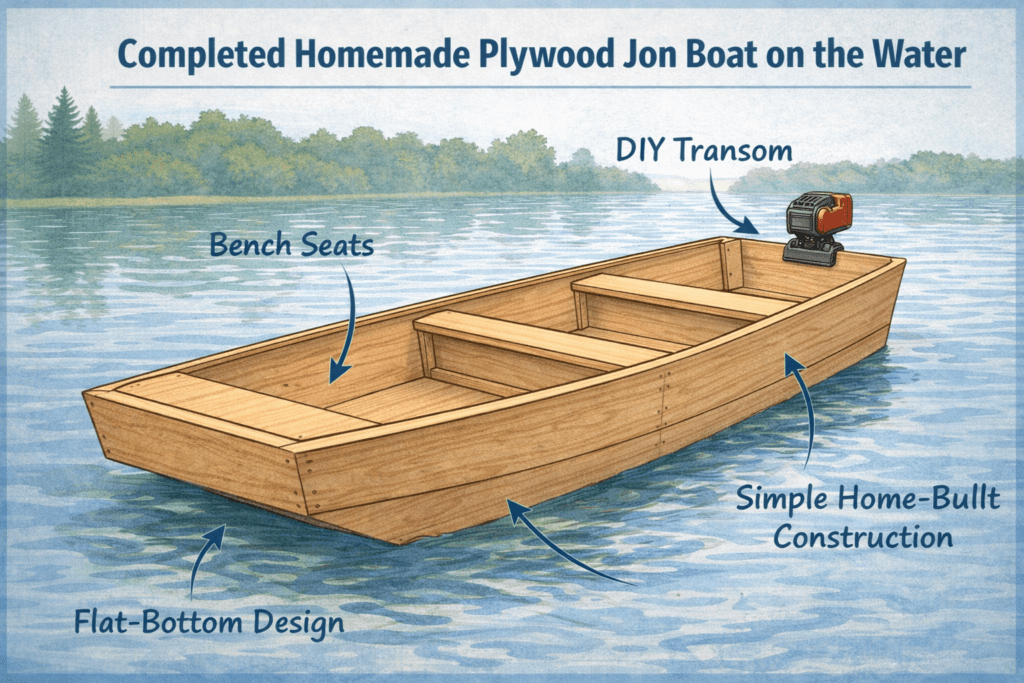
A jon boat is one of the few boats that actually makes sense to build at home. It’s simple by design—flat bottom. Straight sides. Mostly plywood. No curves you have to fight with and no special boat tools you’ll never use again.
When people hear the word boatbuilding, they usually imagine something complicated—steam bending. Fancy ribs. Stuff that belongs in a shipyard. A plywood jon boat isn’t like that at all. It’s closer to building a shed or a utility trailer than building anything you’d see tied up at a marina.
For fishing ponds, calm lakes, and slow-moving water, a homemade jon boat does exactly what it needs to do. It floats. It carries gear. It doesn’t complain when it gets bumped or scraped. And you’re not afraid of it, because you built it.
Most people think they can’t build a boat. That’s usually not true. A jon boat isn’t about talent. It’s about paying attention. Measure carefully. Use glue that’s actually waterproof. Seal everything as if you don’t want to fix it later. Do that, and the boat will last a long time.
Why Jon Boats Are So Easy to Build
The reason jon boats are beginner-friendly is the hull shape. The bottom is flat. The sides are straight or only slightly angled. There are no compound curves and no overlapping planks.
Standard plywood will flex just enough at the bow to form the shape without soaking it or cutting kerfs. You’re not forcing the wood to do anything extreme. You’re just easing it into place.
That’s why these boats work best in calm water. Ponds. Small lakes. Marshes. Slow rivers. They’re not meant for chop or rough conditions.
Most jon boats are used with oars, a small outboard, or an electric trolling motor. The hull doesn’t really track on its own. The motor does most of the steering. That’s normal for this style of boat.
A flat bottom helps when the boat is sitting still. Standing up feels fine. Moving gear around feels fine.
Not fast. Never meant to be.
Stability matters more here. Fishing. Stopping. Drifting.
Marine epoxy kits, such as TotalBoat’s, are widely recommended for boatbuilding because they’re formulated for wood and fiberglass applications rather than generic glue.
Fiberglass mesh tape is thin, strong, and accepted well by epoxy — ideal for reinforcing seams without adding bulk.
UHMW wear material is optional but highly recommended for builders who plan to drag the boat ashore often.
What a Jon Boat Hull Actually Is
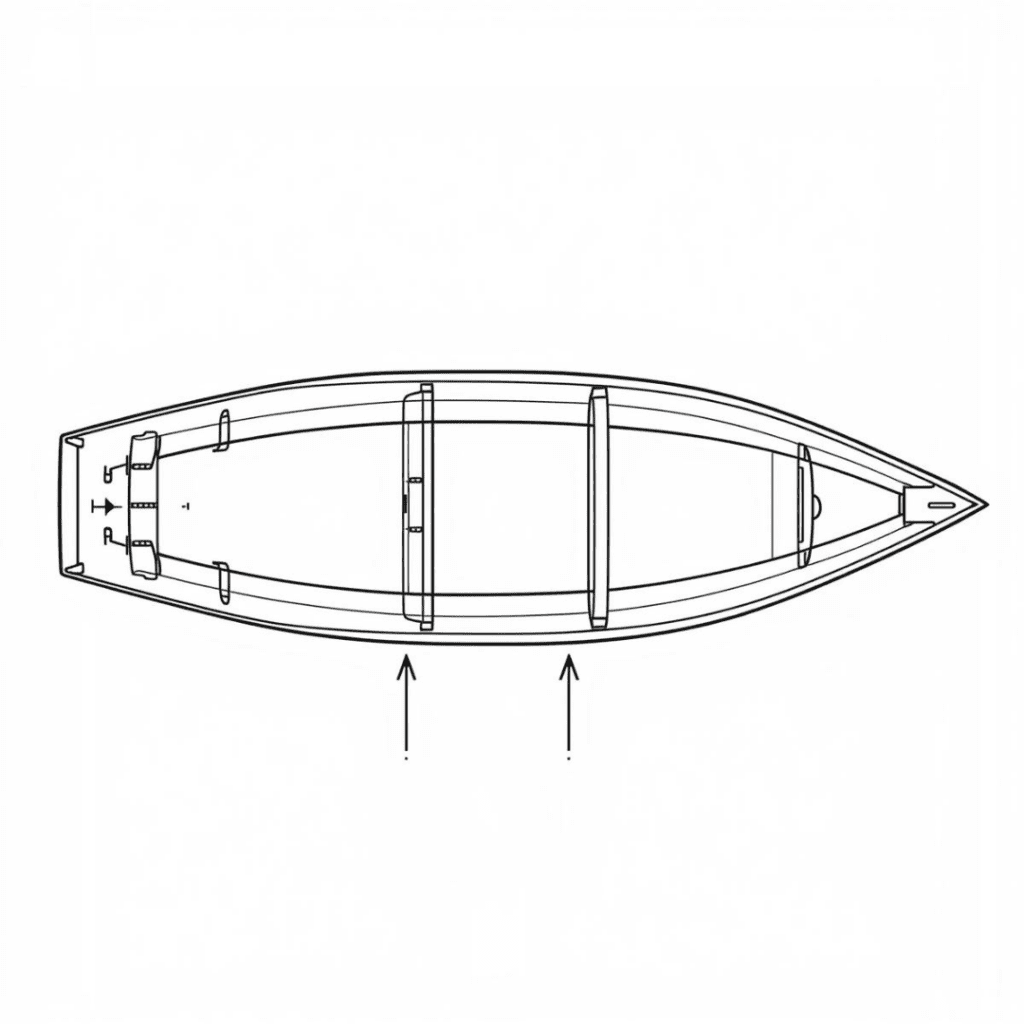
Structurally, a jon boat is a flat-bottom skiff. The sides usually angle outward a little, somewhere around ten to fifteen degrees. That provides greater stability and more space inside.
Some designs taper from the bow all the way back. Others taper only at the front and remain square toward the stern. Both work, but tapering only the front is easier if you’ve never built a boat before.
Square designs are forgiving. That’s part of the appeal.
Straight sides help
Easier to mark
Easier to cut
If something is a little off, it usually still works
Nothing twists.
Nothing fights you
For a first build, that matters
Especially with plywood.
Especially with basic tools
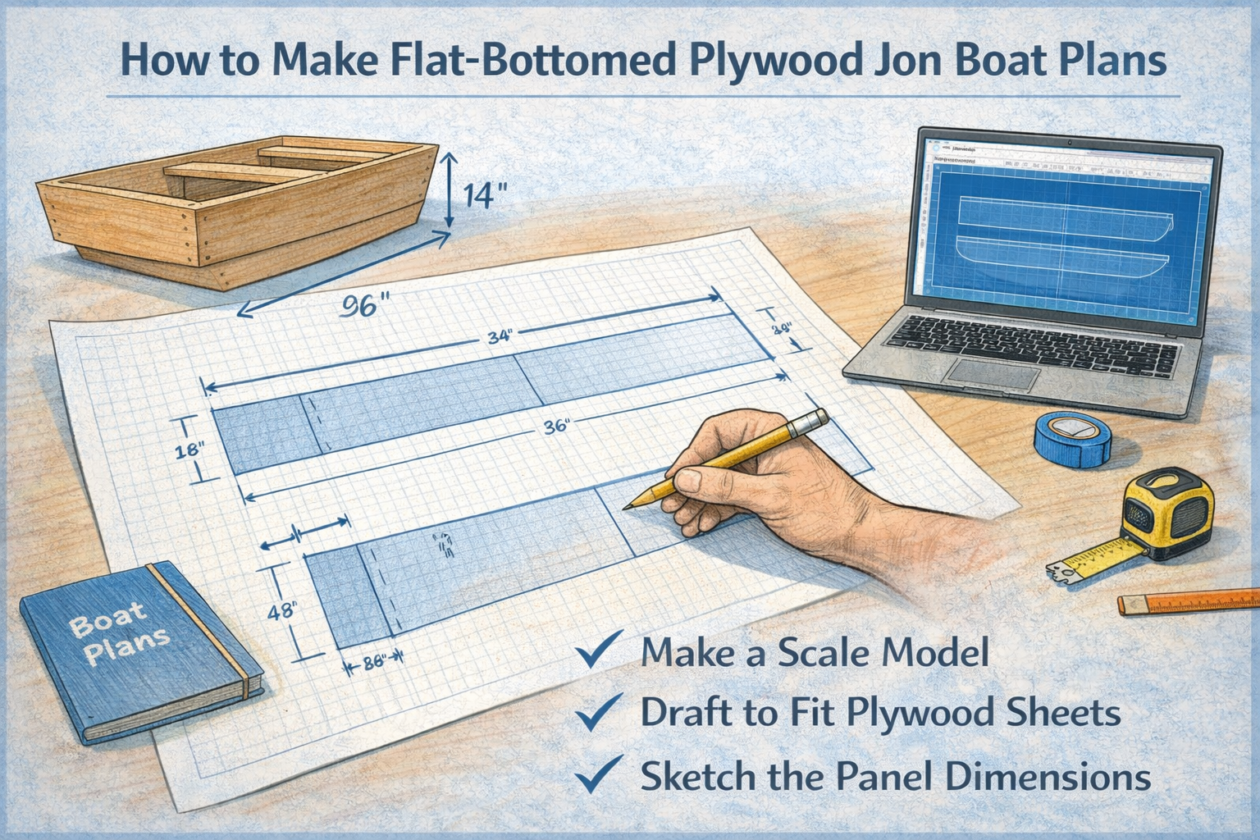
Plywood Size and Layout
Most jon boats don’t use much plywood. Usually three sheets, sometimes four. It comes down to how tall you make the sides and how you arrange the contents inside.
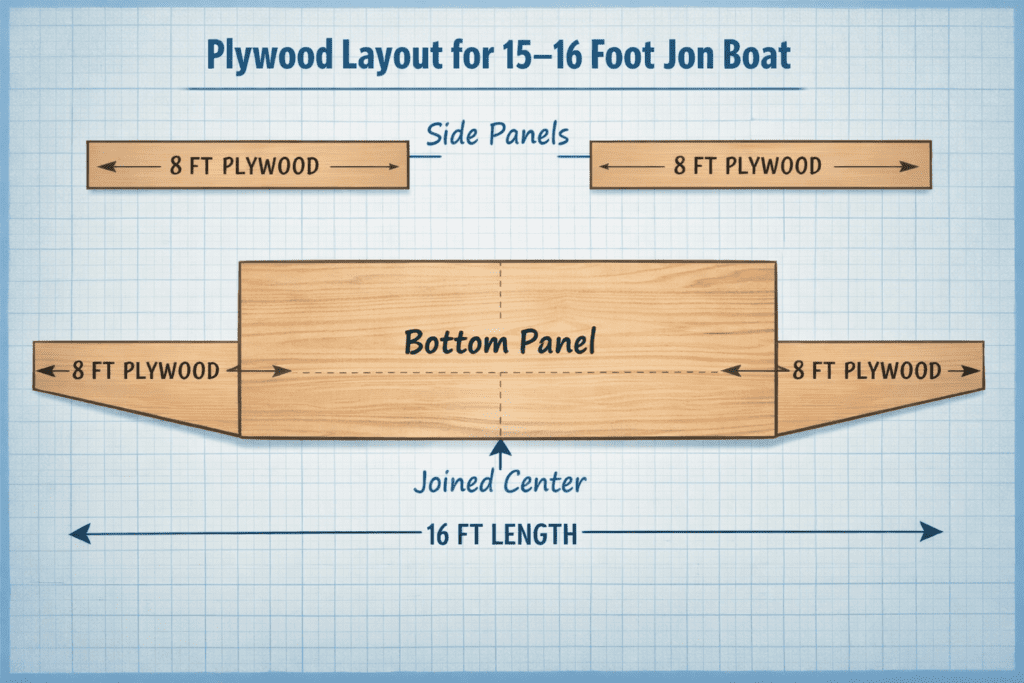
Since plywood comes in eight-foot sheets, building a boat just under sixteen feet is the obvious move. It lines up clean. Less waste. Fewer joints to deal with.
Most builds land somewhere around fifteen or sixteen feet long. The bottom ends up about four feet wide. Side height is usually close to a foot, give or take. Two benches are common. Some people add a third.
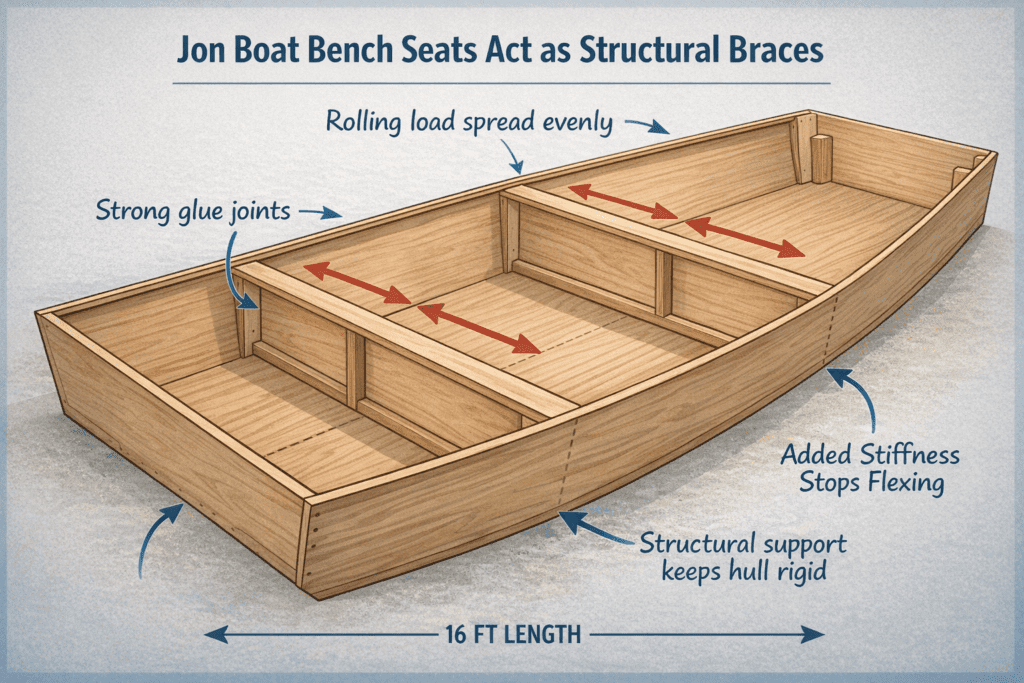
Those benches aren’t just there to sit on. Once they go in, the entire boat stiffens. The sides stop flexing. Everything feels more solid right away.
After the benches go in, things change.
Less movement.
Less noise.
Weight feels spread out better.
Standing feels easier.
Shifting gear doesn’t twist the hull.
You notice it right away, especially once the boat is in the water.
Choosing Plywood
Most builders use three-eighths-inch plywood for the sides. Some go thicker on the bottom for durability.
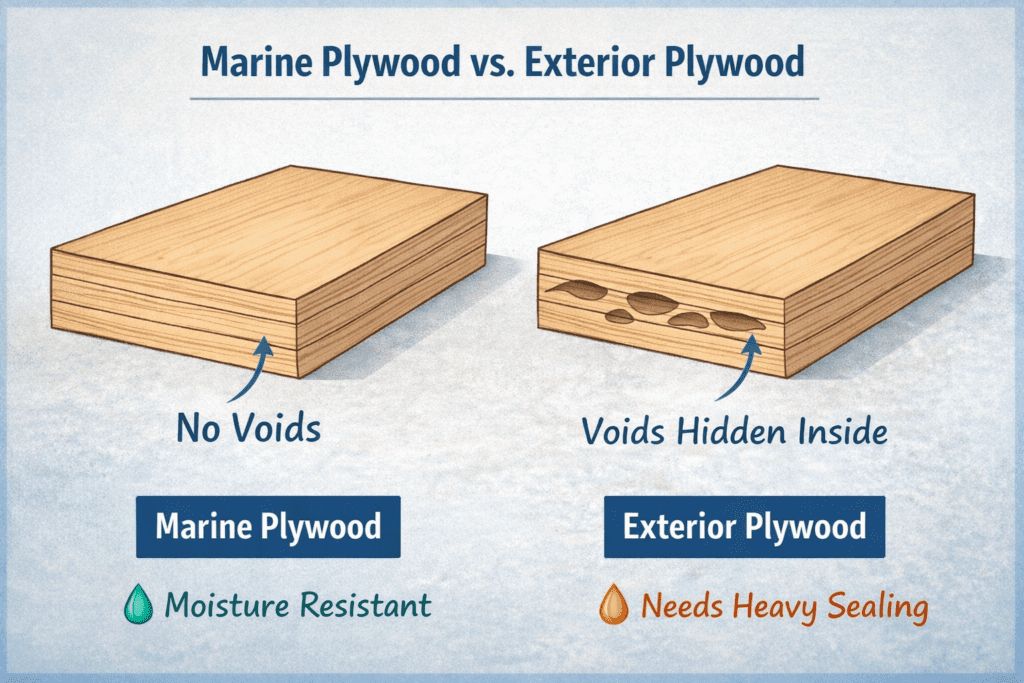
Marine plywood is the best option if the budget allows. No voids. Better moisture resistance. Fewer surprises later.
Exterior-grade plywood can work as well, but sealing is much more important. Water sitting in hidden voids will eventually cause problems if you’re not careful.
With exterior plywood, sealing matters more.
Edges first.
Holes too.
Water finds gaps you didn’t think about.
It sits.
It swells things slowly.
Looks fine at first.
Problems show up later.
That’s usually how it goes.
Joining the Panels
Since the boat is longer than a single sheet of plywood, the panels have to be joined. These joints matter.
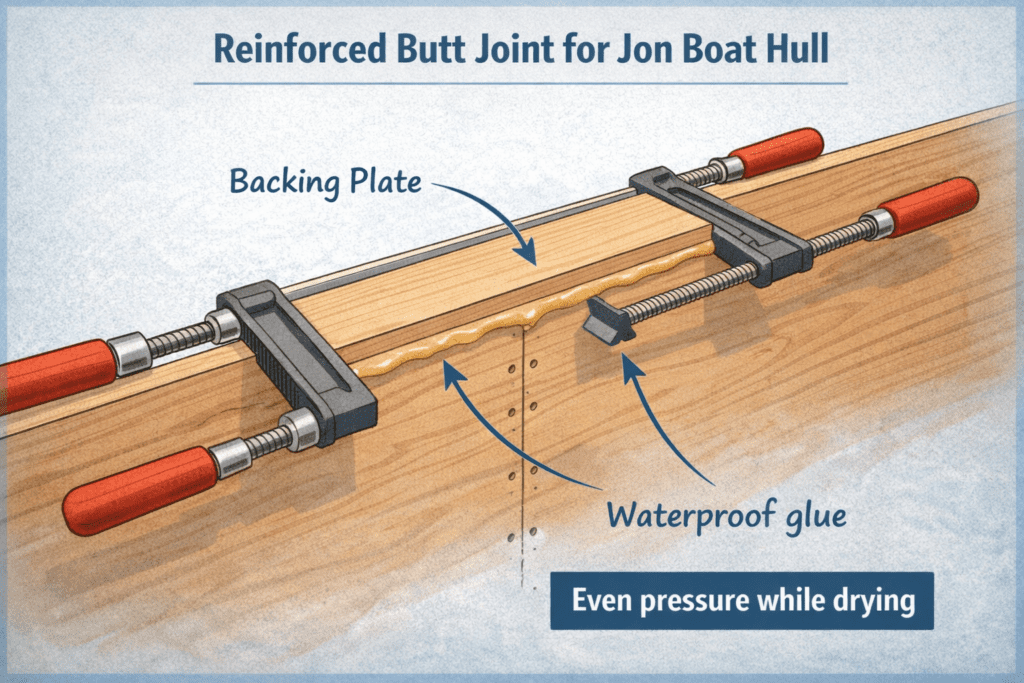
The most common approach is a reinforced butt joint. It’s simple and strong if done right.
Glue is spread across the joint. A backing plate overlaps both sides. Everything is clamped and left alone until it’s fully cured. Wider backing plates make stronger joints, but you still have to think about how the hull will bend.
This isn’t the place to rush.
Fit matters here.
Dry fit first.
If the panels don’t line up cleanly, fix them before gluing.
At this thickness, screws don’t do much on their own. The glue is what holds the boat together.
Waterproof wood glue or marine epoxy both work. Just don’t mix them in the same joint. Once the glue cures, the epoxy won’t bond to it properly.
Clamp things tight. Let them cure fully. Moving too fast here causes most problems later.
Screws are just helpers. They hold things still.
Glue does the real job. Every time.
Good pressure matters. Even pressure.
If something slips, stop. Fix it.
Rushing here always shows up later.
Assembling the Hull
Jon boats are built upside down. It’s easier to keep things aligned that way.
The side panels are cut together to match exactly. A gentle curve is drawn at the bow. Nothing sharp. Nothing aggressive.
Everything in the boat references those side panels, so this part matters more than it looks.
Temporary braces hold the sides upright while you work. They’re scrap pieces and will be removed later, once the structure stiffens.
Take time here. Check both sides against each other.
Minor errors carry forward. They stack up.
If the sides match now, everything else goes more easily. If they don’t, you fight it the rest of the build.
Internal Framing
Instead of heavy ribs, jon boats use small blocks and simple framing.
Corner blocks along the bottom and stern do most of the work. Clear lumber is best here. Glue and screws together, but again, the glue is doing the real job.
Blocks go where stress shows up. Corners. Ends.
Nothing fancy. Just solid contact.
Tight fit matters more than size. Gaps weaken everything.
Glue first. Screws keep it from moving.
That’s how these boats stay together.
Transom and Seats
The transom doesn’t need to be overly thick, but it does require solid support if you’re mounting a motor.
Seats are framed from simple lumber and skinned with plywood. When they’re built tight and square, they add a surprising amount of stiffness to the hull.
Some builders box them in for storage. Others leave them open—both work.
What matters most is fit.
Square corners.
No wobble.
Loose seats don’t help anything.
Tight ones change the whole feel.
Once they’re in, the hull settles down.
Less flex.
More solid underfoot.
Building the Bow
The bow is pulled together using a solid cross brace. This is one of the few spots where nails actually make sense. Screws don’t always hold well when the plywood is being forced inward.
Glue everything. Take your time here.
Adding a small foredeck or grab rail makes launching and pulling the boat easier. It’s worth doing.
This area takes stress. More than it looks.
Everything wants to spring back. That’s normal.
Let the glue do its thing. Don’t fight it.
Once it sets, it remains in place. That’s when the bow finally feels right.
Installing the Bottom
The bottom goes on last, starting at the stern and working forward.
The plywood bends naturally if left unstrained. Forcing it usually causes trouble.
Once the bottom is on, wear strips are added. These take the abuse when the boat is dragged or loaded.
Work slowly from back to front. Let the sheet settle as you go.
If it fights you, stop. Something’s off.
Wear strips save the bottom.
They get scraped.
The hull doesn’t.
Sealing and Finishing
Every seam needs to be sealed. Paintable caulk or epoxy thickened with sawdust both work. Silicone does not. Don’t use it.
Fiberglass tape along the seams adds durability. Epoxy coating inside and out protects the wood. Paint protects the epoxy from sunlight.
Let everything cure fully before putting the boat in the water.
Miss a seam and water finds it.
Always does.
Corners first.
Then edges.
If you can see wood, it hasn’t been sealed yet.
Let coats cure.
Really cure.
Launching too early ruins good work.
Final Thoughts
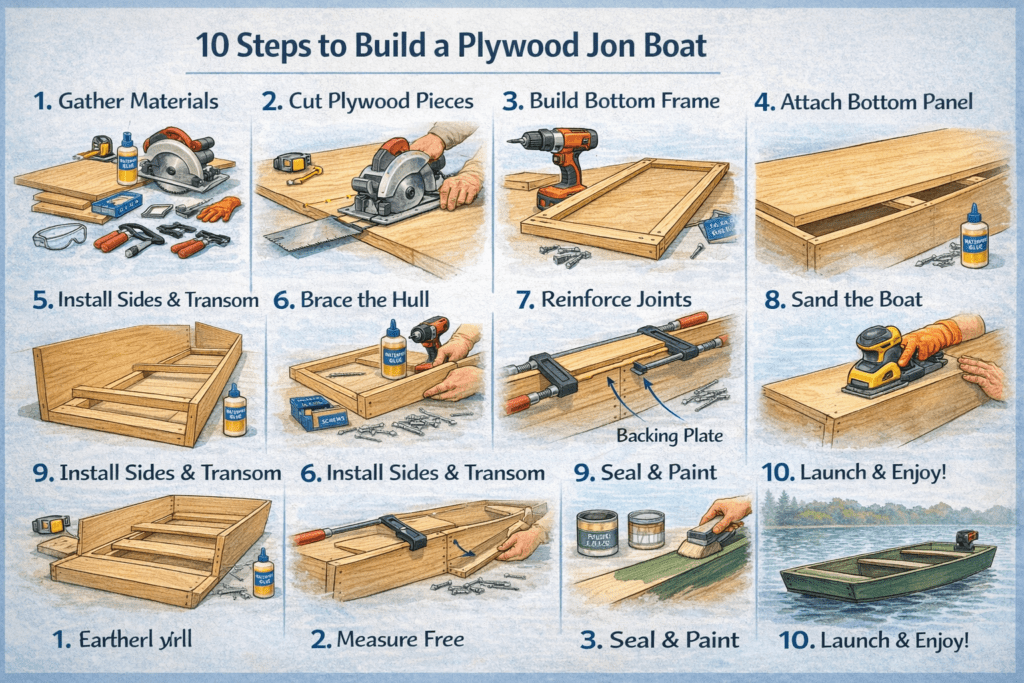
Building a plywood jon boat isn’t ashard as it sounds. Once you’re in it, it’s mostly just doing one step at a time.
Measure
Cut
Glue
Seal
If you slow yourself down and don’t rush the sealing, the boat ends up solid. It holds together. It lasts. It does what you built it to do on calm water.
It’s not fancy. That’s the point. You’re not trying to impress anyone. You want something that floats and works.
Related Posts:
How to Build a DIY Plywood Truck Cap by Admin May 7, 2025 DIY If you've ever hauled plywood in the back of your truck, you've probably thought about how handy a cap would be—especially one you built yourself.…
DIY Plywood Desk: How to Build One at Home by Admin October 8, 2025 DIY I built my first plywood desk because I was tired of working hunched over the kitchen counter. It wasn’t some grand plan — I just…