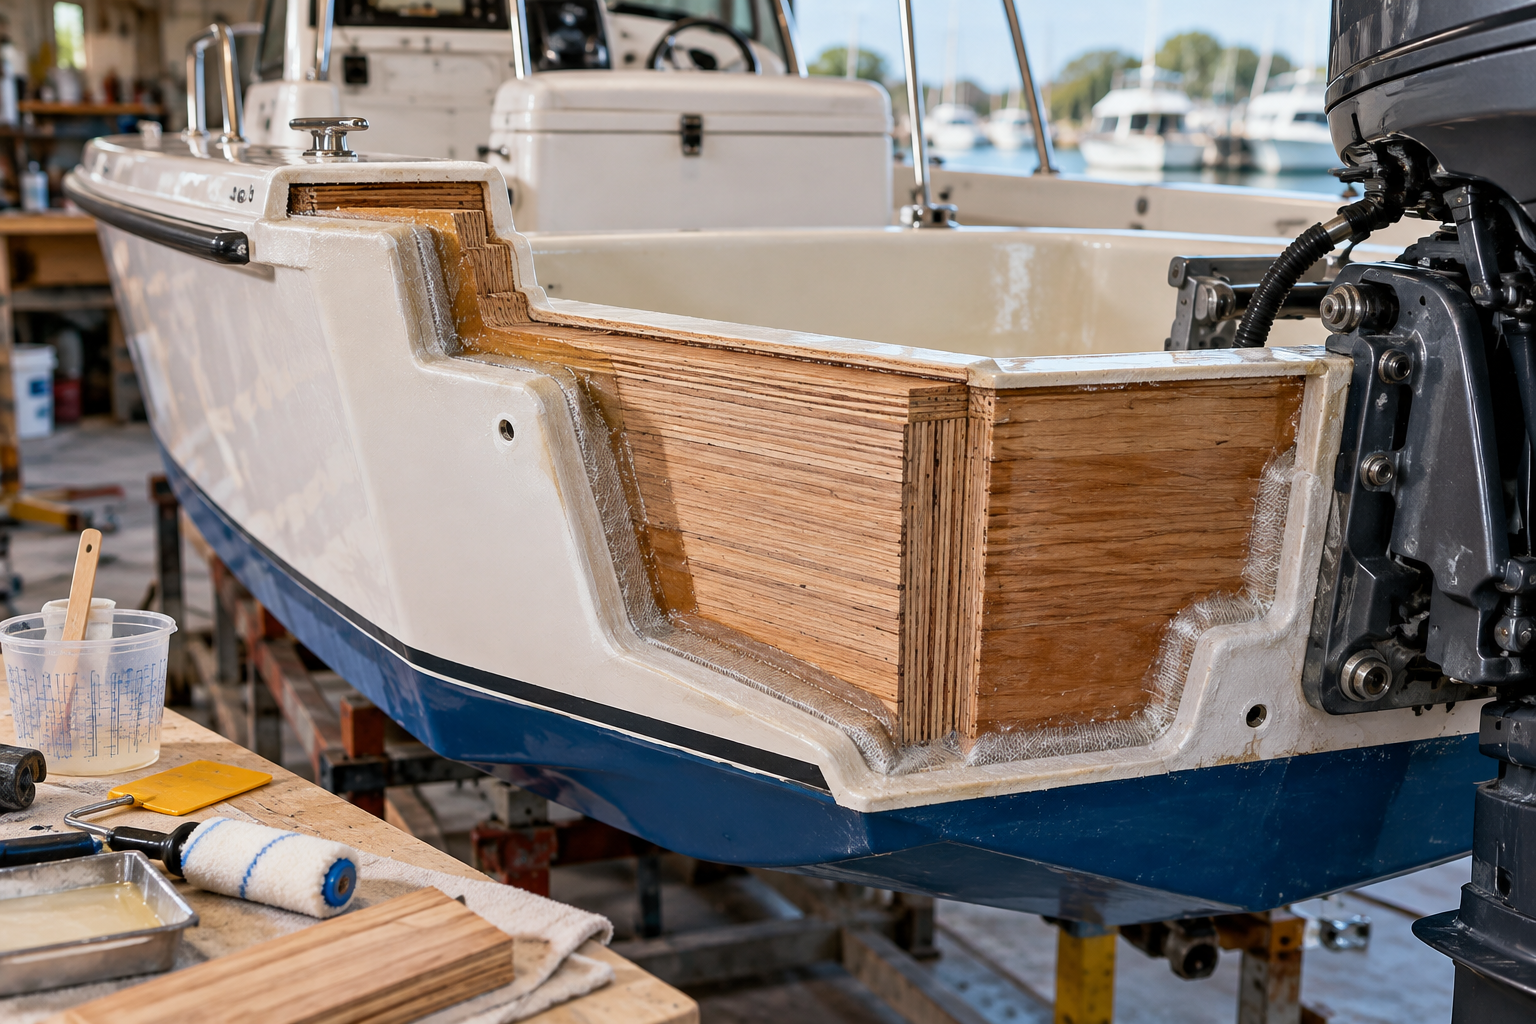
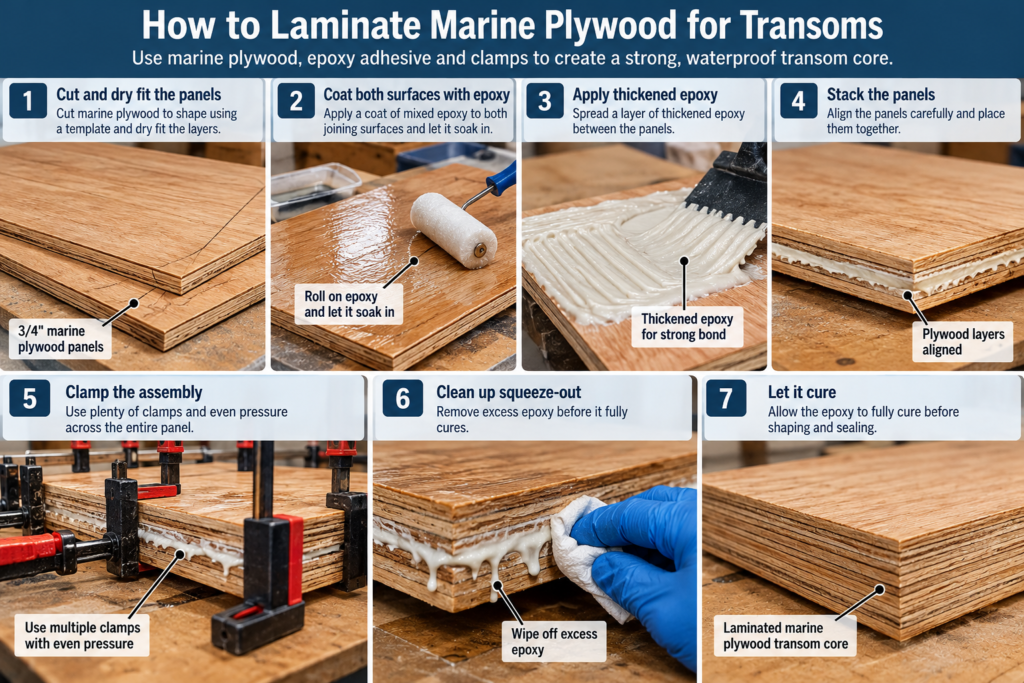
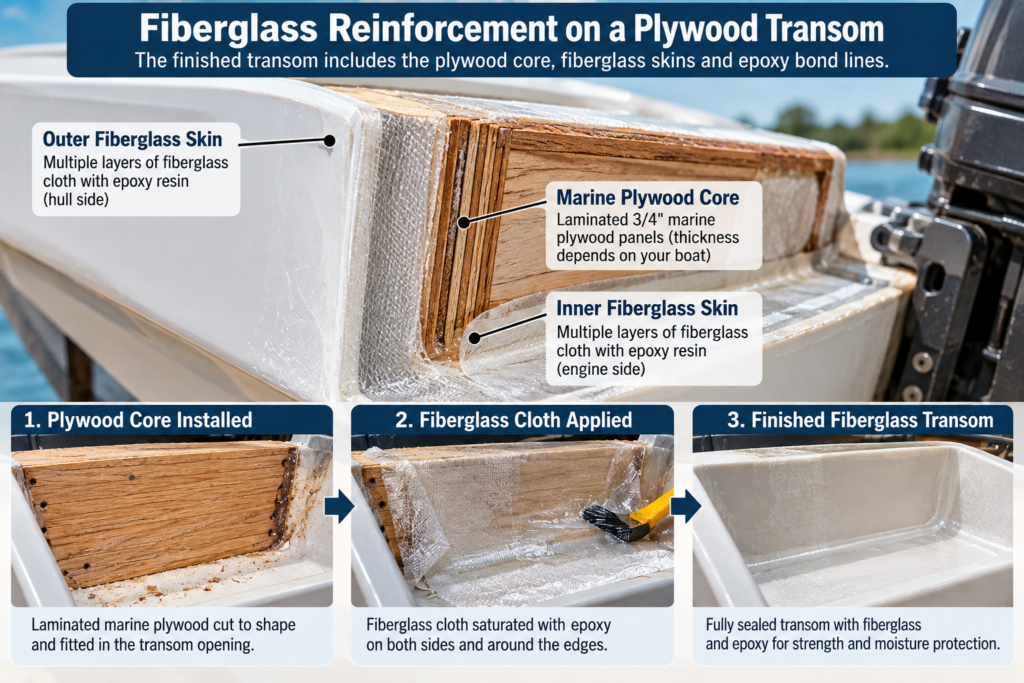
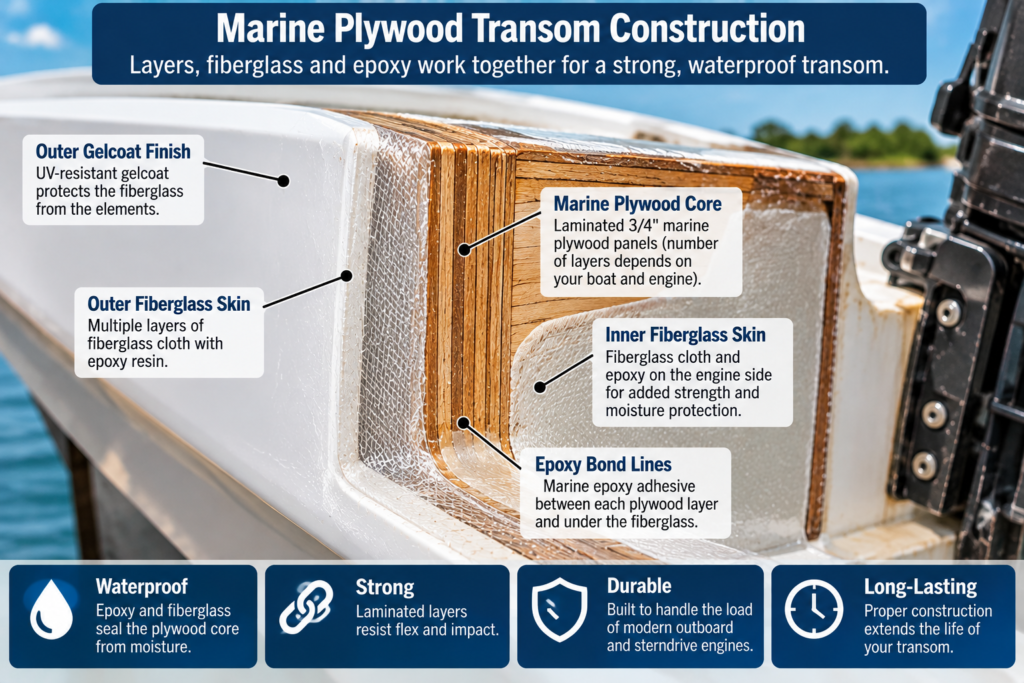
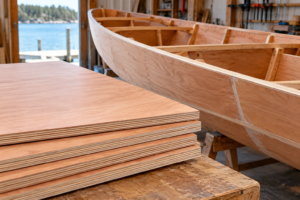
Marine plywood for transoms is laminated in layers and often starts with two 3/4-inch panels (about 1-1/2 inches of core). The correct finished thickness depends on the boat’s original construction, the engine mounting system and the manufacturer’s specifications. This guide covers choosing the plywood, estimating a layup, laminating the core and sealing it against moisture.
A transom carries the engine, so replacing one is structural work. If the original laminate schedule or the load requirements are unknown, have a marine professional evaluate the boat before you rebuild.
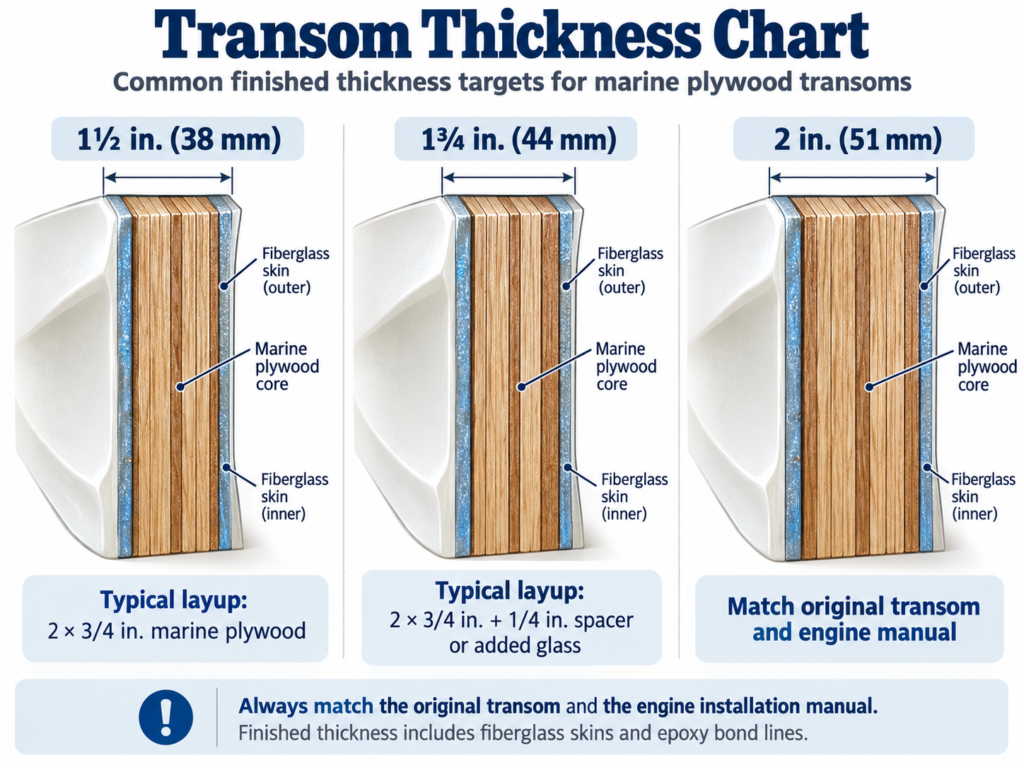
Thickness: Match the original transom and your engine’s installation manual. Two 3/4-inch layers is a common starting point, not a universal spec.
Plywood: APA Marine (PS 1) or BS 1088. Exterior plywood is possible but riskier.
Sealing: At least two to three coats of epoxy on all surfaces, and every bolt hole sealed with epoxy.
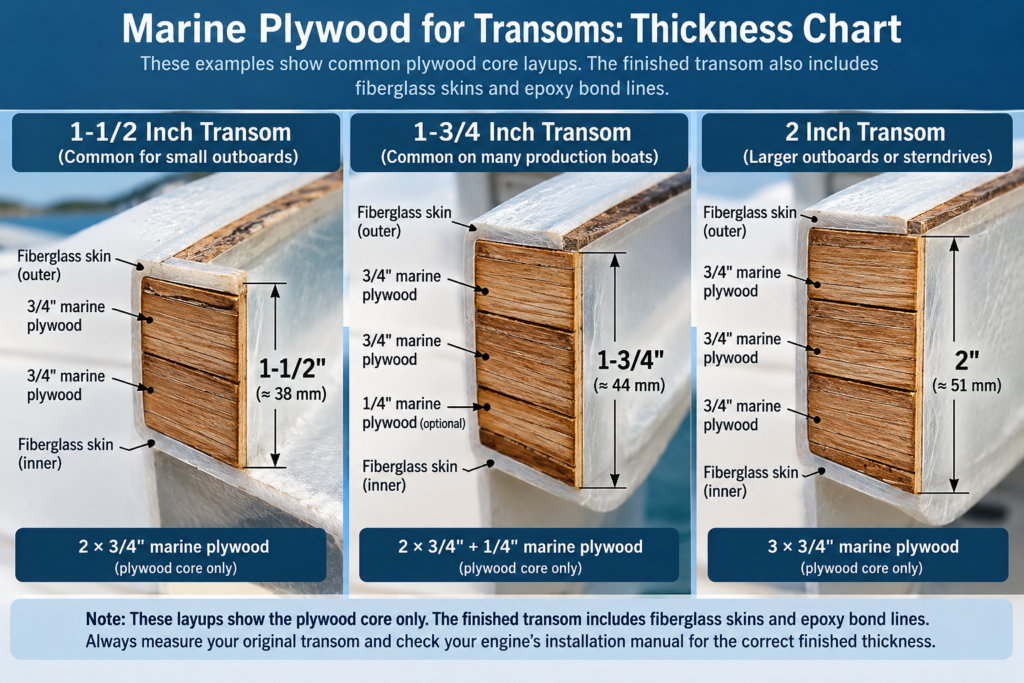
Marine Plywood for Transoms: Thickness Chart
What you’re rebuilding
Typical plywood layup
Where the number comes from
Small outboard boat, original core about 1-1/2 in.
2 × 3/4 in. marine ply
Measure the old core; check the motor’s clamp range
Original core about 1-3/4 in.
2 × 3/4 in. + 1/4 in., or 2 × 3/4 in. + fiberglass
Original build; see the Chris-Craft example below
Sterndrive transom
Measure the complete finished transom, including fiberglass skins and bond lines
The installation manual for your exact engine and drive model
Portable outboard or tender
Whatever fits the clamp bracket’s range
The motor’s owner’s manual
How to read the chart: These layups estimate the plywood core only. The finished transom also includes fiberglass skins and epoxy bond lines. Sanded panels often measure a little under nominal, so dry-stack the layers and measure with a caliper before you mix epoxy. For sterndrives, don’t choose a layup from a general chart; work back from the finished thickness your manual requires.
How Thick Should Marine Plywood for Transoms Be?
When you size marine plywood for transoms, match the original thickness and stay inside the range in your engine’s installation manual. A thicker transom is not automatically stronger or safer.
Three things set the number:
The engine manual. Outboard clamp brackets have a maximum throat width. Sterndrives need a controlled finished thickness and flatness where the drive mounts.
The original transom. Measure the old core and the complete transom at the cutout edges before you remove anything.
The capacity plate. Mercury advises owners to check the boat’s certification plate so the engine doesn’t exceed the maximum horsepower listed. A thicker rebuild does not raise that rating.
For a real-world reference, a WEST SYSTEM repair write-up describes a Chris-Craft whose 1-3/4-inch plywood transom was rotted and damp in many areas and had to be removed entirely. The replacement went in as 3/4-inch layers.
⚠️ Warning: Building too thick can stop a clamp bracket from seating, leave bolts too short, or throw off drive alignment. If your measurement lands outside the manual’s range, fix the layup before bonding anything.
Choosing Marine Plywood for Transoms: Decision Chart
Your situation
Pick
Why
Standard transom rebuild, want the lowest risk
APA Marine (PS 1) or BS 1088
Small core gaps, waterproof bond
Lightweight build, imported panel
BS 1088 okoume or meranti
Covered by a marine standard; check the stamp
Tight budget, small low-horsepower boat
Exterior A-C, fully encapsulated
Possible, but hidden voids raise the risk
Any transom
Not CDX
Exposure 1 bond, not made for permanent wetting
APA Marine Plywood (PS 1)
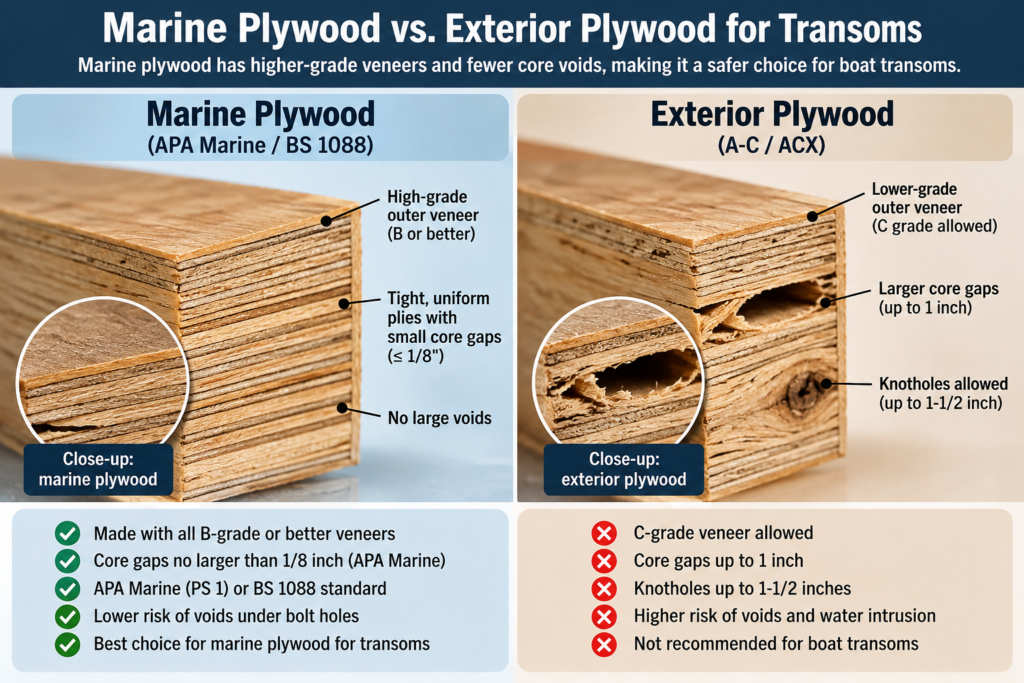
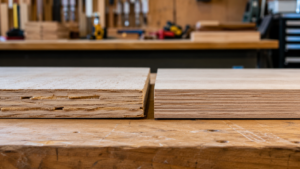
APA Marine is the US-made option when choosing marine plywood for transoms. APA describes marine-grade plywood as made entirely of Douglas-fir or western larch, with every ply graded B or better and core gaps no larger than 1/8 inch. That makes it low-void, not void-free.
APA also notes that marine-grade plywood gets no chemical treatment to improve decay resistance. The wood can still rot if it stays wet, which is why sealing matters as much as the panel grade.
BS 1088 Marine Plywood
BSI says BS 1088 covers two classes of marine plywood, standard and lightweight. It addresses resistance to bio-deterioration and loss of bond strength over time. Look for the stamp, not just a “marine” label on the rack. Our okoume plywood guide covers the most common BS 1088 species.
Exterior Plywood (A-C, ACX)
According to Glen-L’s summary of PS 1, Exterior grades that aren’t marine can use C-grade veneer, which allows knotholes up to about 1-1/2 inches and inner-ply gaps up to 1 inch wide. If a void sits under a bolt hole, it can trap water and crush under clamp load, and you can’t see it from outside the panel.
Bond Rating Is Not Rot Resistance
These are two separate properties:
Bond classification (Exposure 1, Exterior, WBP, BS 1088) tells you whether the glue line survives moisture.
Decay resistance tells you whether the wood rots. Neither marine nor Exterior plywood is preservative-treated.
A perfect glue line around rotted veneer is still a failed transom.
💸 Cost difference: Marine plywood for transoms generally costs noticeably more than Exterior panels; check local pricing. For illustration: if a marine sheet costs twice what an Exterior sheet does and your transom takes two sheets, the upgrade costs about the same as two extra Exterior sheets. That’s small next to cutting out and rebuilding a rotted transom a second time.
How to Laminate Marine Plywood for Transoms
Laminating marine plywood for transoms works best in stages, with a slow hardener and every surface wetted out first.
Dry the hull and the wood. System Three says to hold off coating until the wood’s moisture content is 12% or less.
Make a cardboard template of the opening and trace it onto the panels.
Scarf, don’t butt, any joint within a layer, and stagger joints between layers. See our scarf and butt jointsguide.
Wet out both surfaces with plain epoxy. In the Chris-Craft repair, the crew coated both sides of the 3/4-inch plywood with neat epoxy while neat epoxy also went on the transom.
Spread thickened epoxy evenly. The same crew thickened epoxy with 406 colloidal silica to a mayonnaise consistency and spread it with a notched spreader for an even layer.
Bond in stages with a slow hardener. They bonded only the first layer in the first session, using 105 Resin with 206 Slow Hardener for enough working time.
Clamp evenly and moderately. You want light squeeze-out, not a joint squeezed dry.
Fillet and glass the inside face. That repair finished with a non-sag 406 fillet to the hull sides and bottom, then biaxial glass with mat matching the original inner laminate.
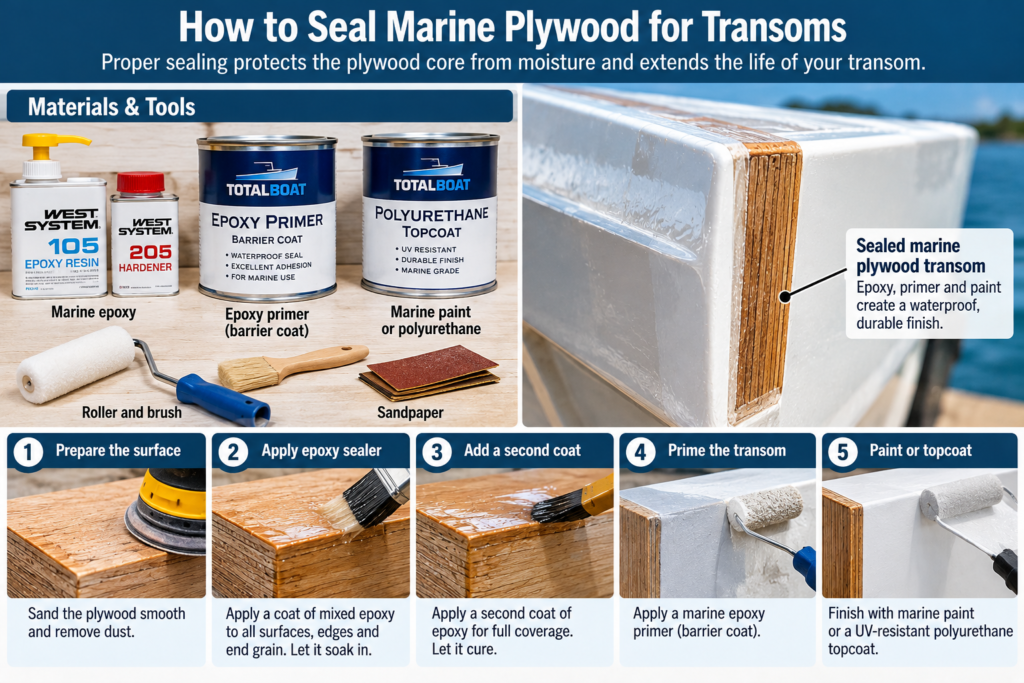
How to Seal Marine Plywood for Transoms
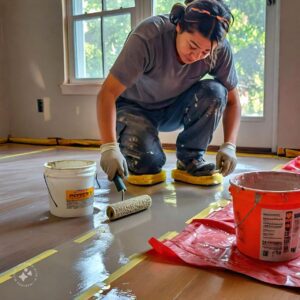
Sealing marine plywood for transoms means barrier-coating every surface with epoxy, sealing every penetration through the core, and protecting the epoxy from sunlight.
Barrier Coat Every Surface
WEST SYSTEM calls for at least two coats for an effective moisture barrier, three if you’ll be sanding. Protection improves with more coats, up to about six coats or roughly 20 mils. Put extra coats on edges, cutouts and drain openings, because end grain absorbs water fastest.
Seal Every Bolt Hole
For through-bolted hardware, one common method is to:
Drill an oversized hole through the wood core.
Wet out the exposed wood with epoxy.
Fill the hole with a suitable thickened epoxy mixture.
Let it cure fully, then redrill to the required fastener diameter.
The bolt then passes through cured epoxy instead of bare wood. WEST SYSTEM documents a related fastener bonding technique that uses a hole 1/4 inch larger than the fastener, filled with thickened epoxy and fully cured before any load goes on. Follow the hardware manufacturer’s requirements for hole size, backing plates, bedding and bolt torque.
Protect Epoxy From Sunlight
System Three says outdoor epoxy needs a UV-protective topcoat such as marine spar varnish. Paint, gelcoat or varnish works, as long as no epoxy is left exposed.
The original laminate schedule or load requirements are unknown. Get a professional evaluation before you rebuild a structural transom.
Rot has spread into stringers or the floor. A transom-only repair won’t hold if the structure it ties into is soft. Check first with our guide on whether wood rot is structural.
The wood can’t be dried. Epoxy over damp wood traps the moisture inside.
Shop temperature is below the hardener’s data-sheet minimum. The epoxy may not cure properly.
The engine is bigger than the capacity plate allows. A sturdier transom doesn’t change the boat’s rating.
A sterndrive install where you can’t hold the manual’s finished thickness and flatness. Have a marine shop do it.
Common Mistakes With Marine Plywood for Transoms
❌ Mistakes that ruin a new transom
Drilling bolt holes through bare core. Water follows the bolt in, and the new core starts rotting from the inside.
Assuming marine plywood won’t rot. It isn’t treated, so wet wood still decays.
Skipping the wet-out coat. Dry wood absorbs resin from the joint and leaves a weak, starved bond.
Sizing plywood without counting skins and bond lines. The finished transom ends up too thick or too thin for the engine.
Leaving cutouts unsealed. Drain and cable holes let water reach exposed end grain.
Using CDX to save money. Its Exposure 1 bond isn’t built for permanent wetting.
FAQ
How thick should a boat transom be? It should match the original transom and your engine’s installation manual. Many outboard rebuilds start with two 3/4-inch plywood layers, but the finished thickness, including fiberglass skins, is what has to meet the spec.
Can I use exterior plywood for a transom? It’s possible but riskier. Under PS 1, Exterior grades can have inner-ply gaps up to 1 inch, while marine grade limits gaps to 1/8 inch.
Is marine plywood void-free? No. PS 1 marine grade allows core gaps up to 1/8 inch.
How many coats of epoxy does a transom need? WEST SYSTEM recommends at least two coats for a moisture barrier, or three if you’ll sand. Put extra coats on edges and cutouts.
Do I still need to seal marine plywood? Yes. Marine plywood isn’t preservative-treated, so the wood can rot if water reaches it.
Build marine plywood for transoms in layers, often starting with two 3/4-inch panels, to the finished thickness your original transom and engine manual require. The panel grade gets you a durable glue line and small core gaps. Sealing every surface and every bolt hole with epoxy is what stops the rot.