Walk through rural America and you’ll start noticing a charming trend on barns, sheds, and even garages—large, colorful quilt block patterns painted right onto the buildings. These aren’t just for show—they’re barn quilts, a modern folk art tradition that pays homage to quilting heritage in a big, bold way.
Whether you’re a quilter, a farmer, or just a lover of rustic decor, making your own barn quilt is one of the most satisfying and creative DIY projects you can take on. This step-by-step guide covers everything you need to know to create your own barn quilt—from choosing a pattern to painting tips that will make it last.
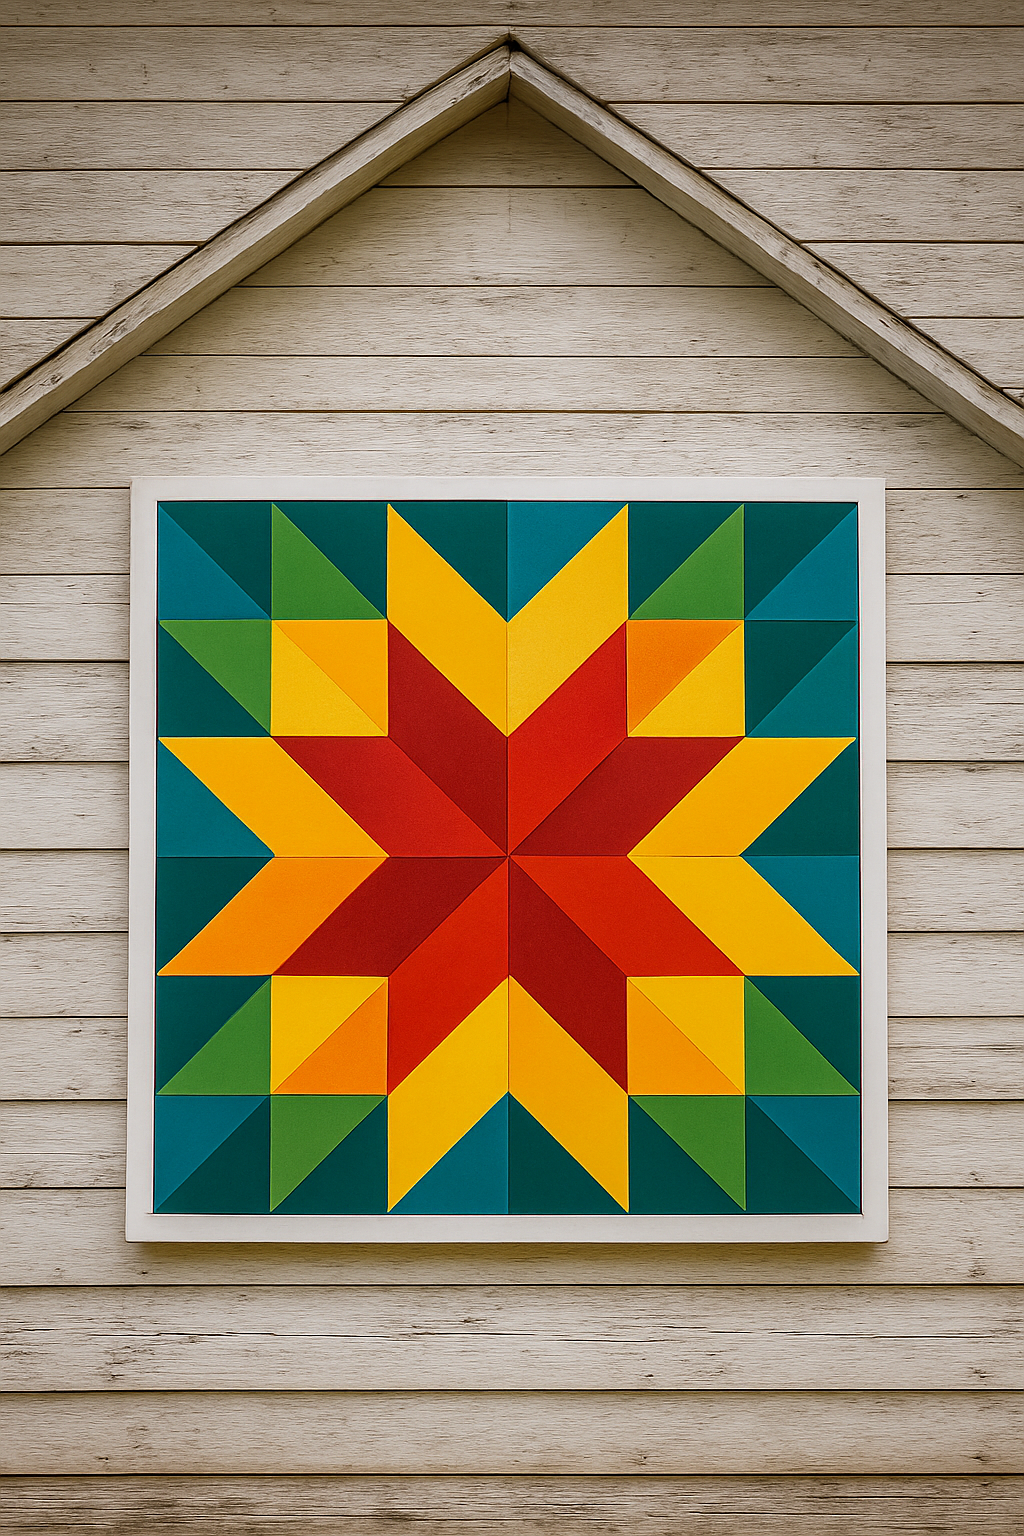
What Is a Barn Quilt?
A barn quilt is a large, painted wood square that replicates a quilt block design. They’re often 4×4 feet or 8×8 feet and mounted to the side of a barn or shed. Some communities have entire quilt trails—driving routes where you can spot dozens of barn quilts on local farms and homes.
Barn quilts aren’t just decorative—they celebrate the history of quilting and the agricultural traditions that once centered life around the barn. Today, they’re popular with artists, woodworkers, and homeowners looking to add color and storytelling to their space.
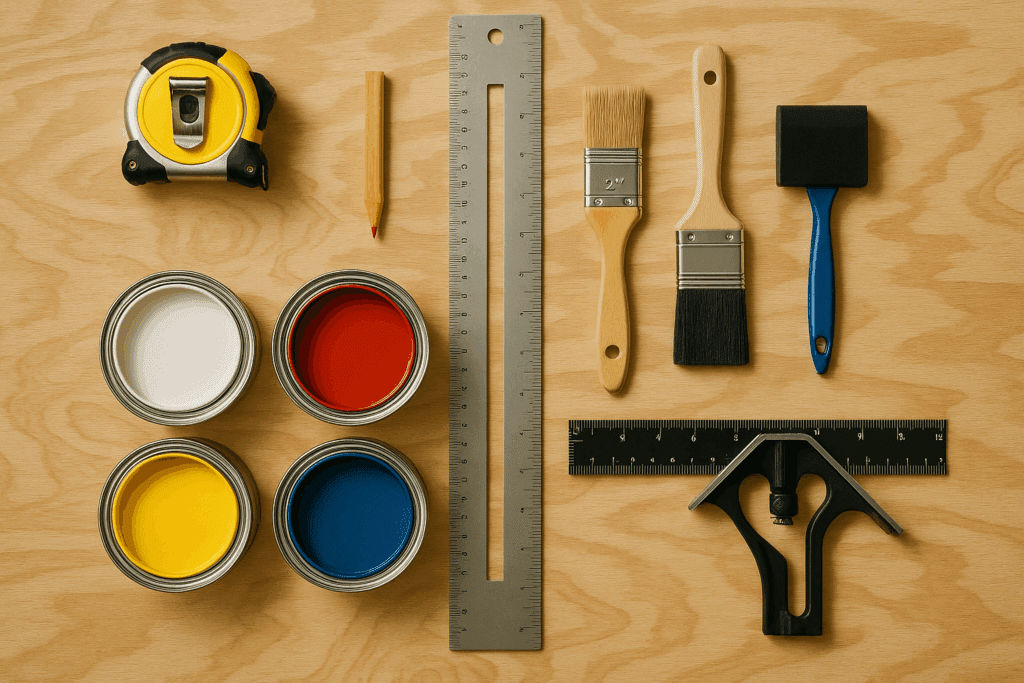
Materials You’ll Need
Before you get started, gather all your materials. You don’t need expensive tools—just the right ones.
You’ll also need a printed template of your desired quilt block and a flat, clean work surface.
Choosing the Right Pattern
Barn quilts are based on traditional quilt blocks like the Ohio Star, Flying Geese, or Log Cabin. These geometric designs are both visually striking and simple enough to replicate on a large wooden panel.
If you’re new to this, choose a design with fewer color changes and larger shapes. Once you’re comfortable, you can graduate to more intricate designs like the Mariner’s Compass or Feathered Star.
📌 Pro Tip: Use a Quilt Design Software or Free Pattern Printouts
Many quilting websites offer free barn quilt patterns that can be printed and scaled. You can also grid out your own using graph paper.
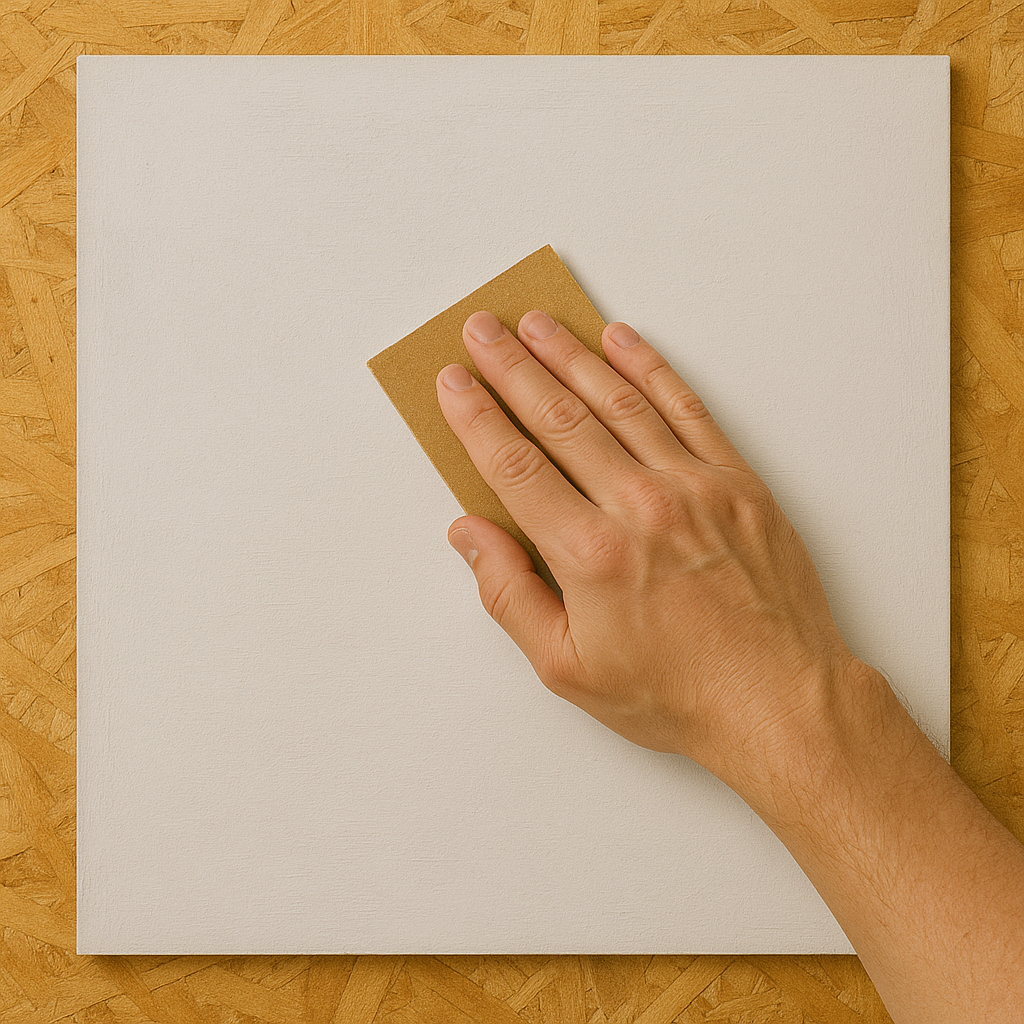
Prepping the Plywood Panel
Start with a good-quality 1/2″ or 3/4″ exterior-grade plywood panel. Smooth plywood will save you a ton of sanding time.
Steps:
Cut the board to size (commonly 2’x2’, 4’x4’, or 8’x8’ depending on your display space).
Sand all edges and surfaces thoroughly.
Prime both sides with an exterior primer to protect against moisture.
This is where many DIYers skimp—don’t. Priming all surfaces ensures your barn quilt lasts for years.
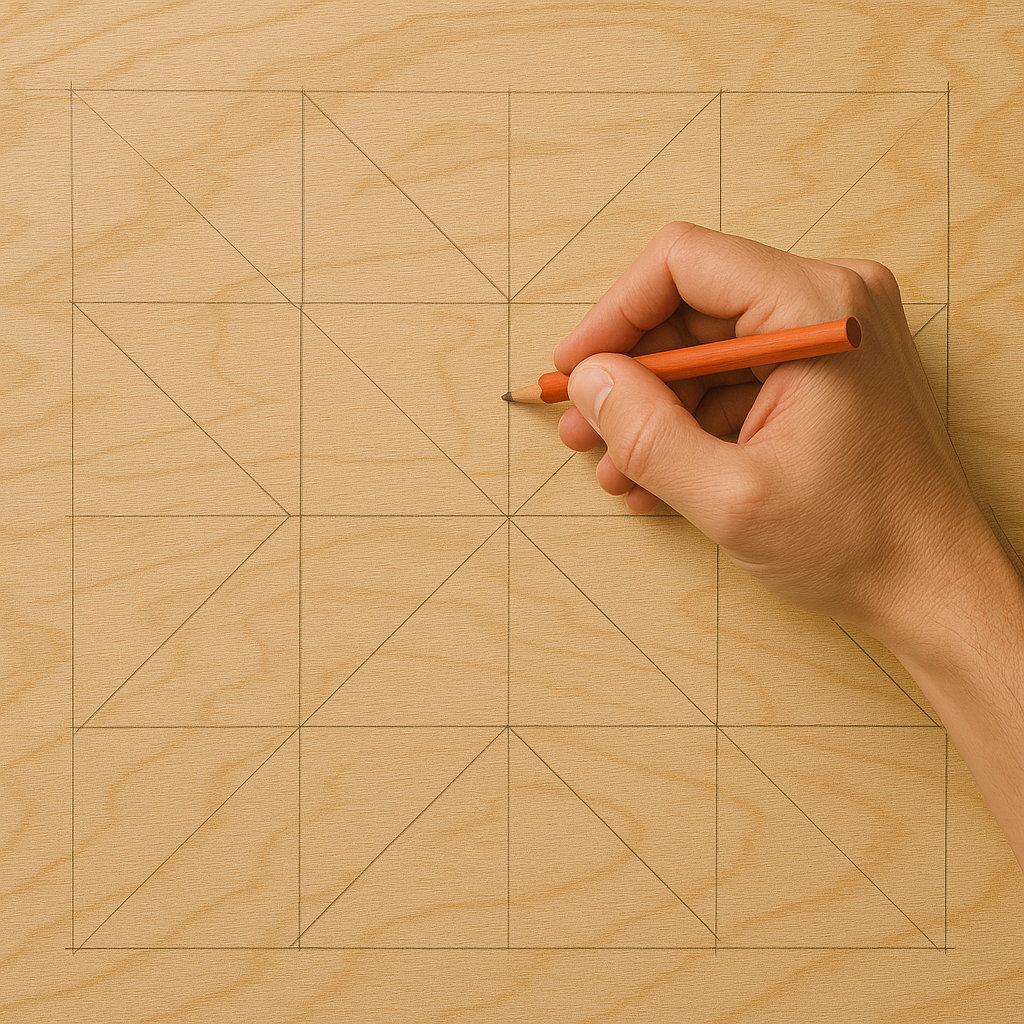
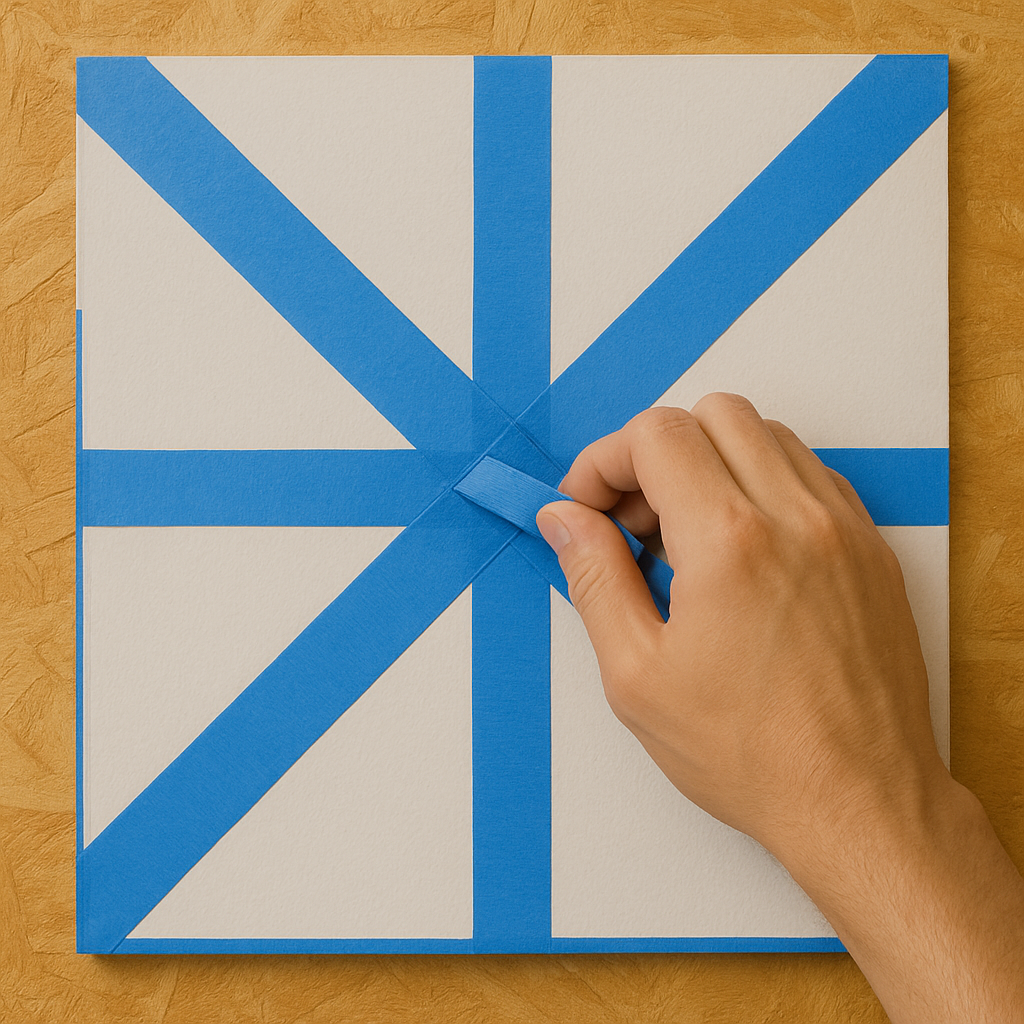
Taping and Painting the Design
Once your base coat is dry, it’s time to lay out your quilt design.
Step-by-Step:
Draw a grid on your panel to match your quilt block pattern.
Use painter’s tape to block off sections you’ll paint first.
Paint one color at a time. Allow it to dry fully before taping over.
Repeat the taping and painting process until your entire quilt block is complete.
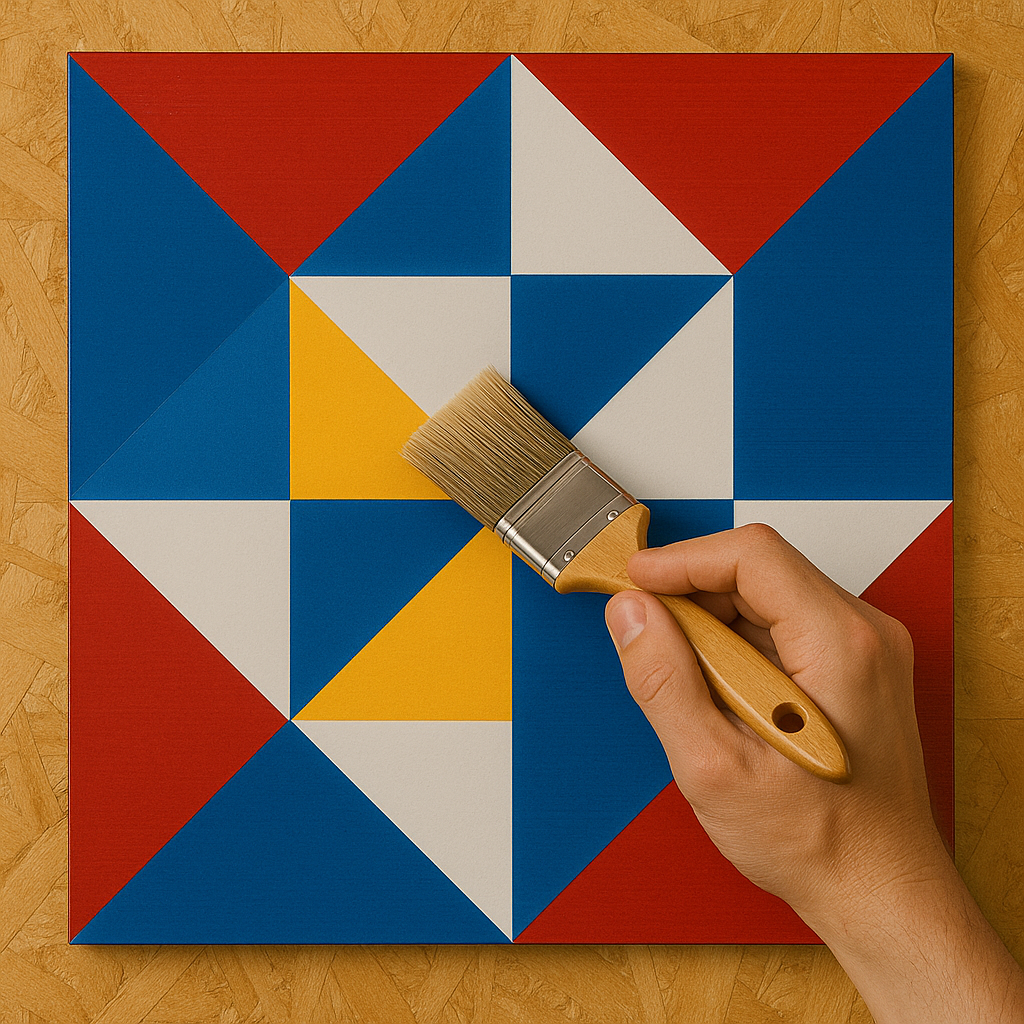
📌 Pro Tip: Label Each Section
Mark each color section lightly with a pencil (“R” for red, “B” for blue, etc.) to avoid confusion later.
Let each layer dry completely before taping over it.
Once finished, seal your barn quilt with an exterior-grade polyurethane or sealer to guard against rain, sun, and snow.
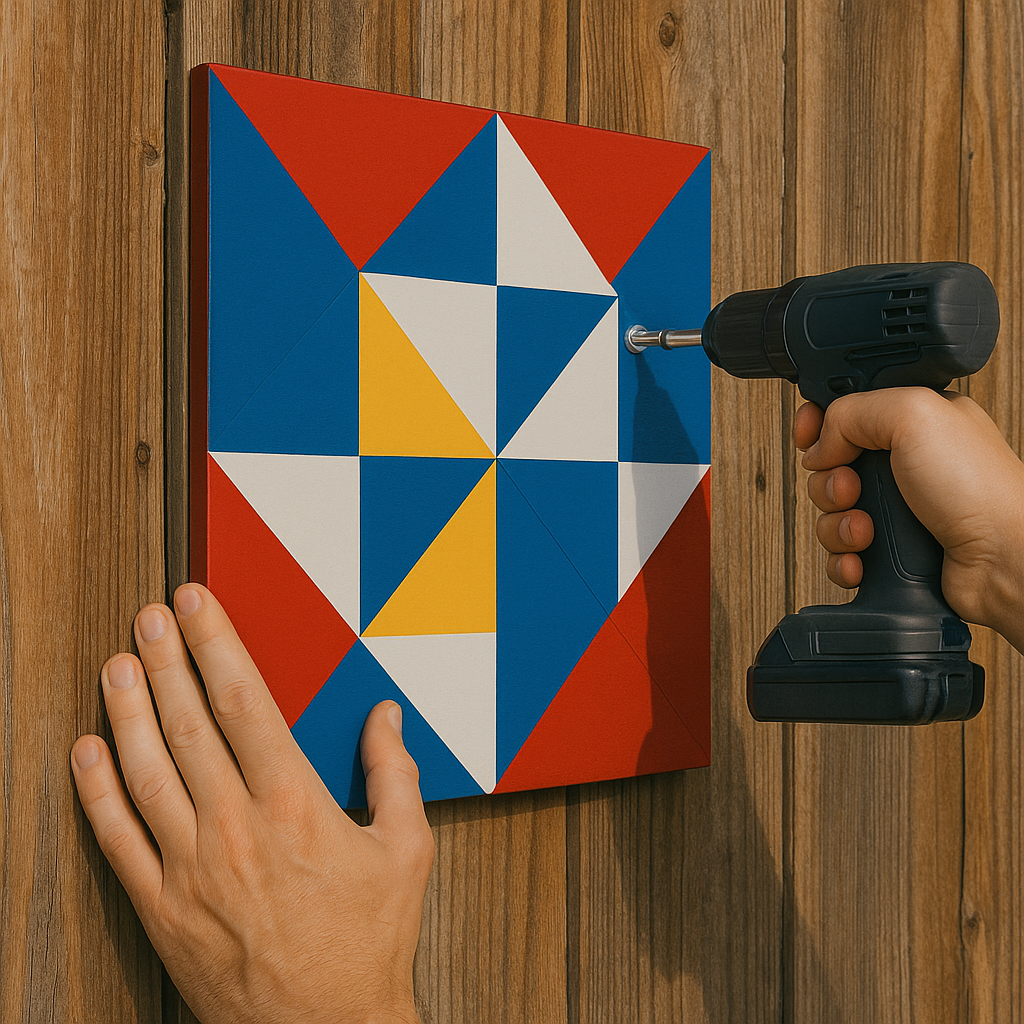
Mounting Your Barn Quilt
Where and how you mount your barn quilt depends on the size and your barn or shed. Most people use heavy-duty exterior screws or construction adhesive for permanent attachment.
Best Practices:
Mount it on the leeward side of the building (out of the wind).
Avoid direct sun exposure if possible to reduce fading.
Use zinc-coated screws to prevent rust.
Consider adding a backframe or French cleat system for easy hanging/removal.
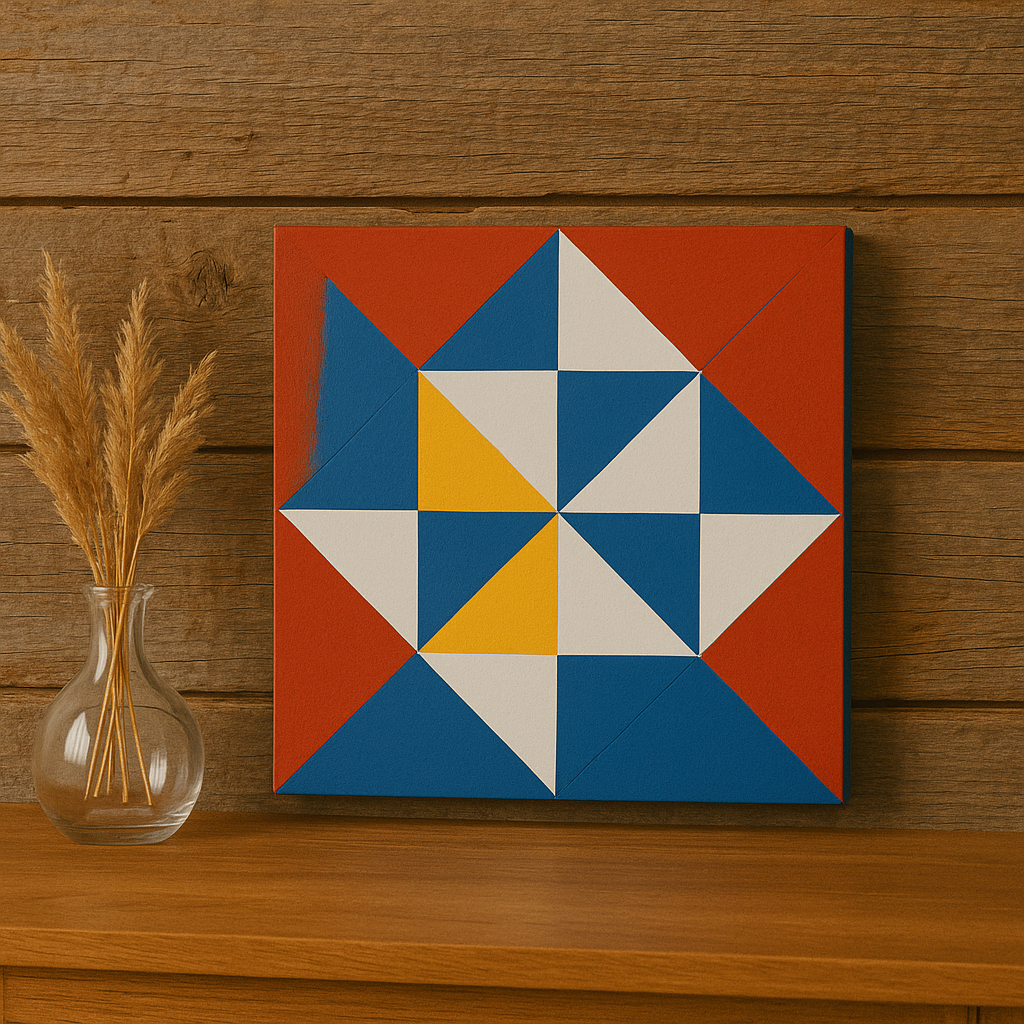
Indoor Display Options
You don’t have to limit barn quilts to barns! Many crafters are making smaller versions to display:
Over fireplaces
In dining rooms
As porch or garden decor
On gallery walls
Consider using a 2’x2’ panel for indoor use and swap plywood for lightweight MDF.
Adding a Personal Touch: Custom Designs and Storytelling
One of the most powerful aspects of barn quilts is the ability to turn them into personal statements. While traditional quilt patterns are timeless, many DIYers and artists today are choosing to design custom barn quilts that reflect their family stories, local history, or personal milestones.
Some barn quilts commemorate a marriage, feature symbolic animals, or incorporate initials and meaningful dates. Others may use favorite colors from a grandparent’s original hand-sewn quilt. Designing your pattern might seem intimidating, but it’s entirely doable with a pencil, graph paper, and a little imagination. Start with a simple grid layout—like a 4×4 or 5×5 square—and experiment with shapes like triangles, diamonds, and stars. Use colored pencils to test different palettes and see what resonates with you emotionally or visually. Once you find the right look, transfer your design to the primed plywood panel using chalk lines or a light pencil sketch.
Another popular approach is to create a series of smaller barn quilts that tell a story when viewed together, almost like panels in a comic strip or chapters in a book. For example, a homesteading family might display four 2×2′ barn quilts representing the four seasons, each one themed with different colors and motifs: snowflakes and blue for winter, green leaves for spring, golden wheat for summer, and burnt orange tones for fall. You could also reflect regional heritage by incorporating Native American patterns, Scandinavian stars, or Appalachian basket blocks, depending on your family or location. This storytelling aspect has become so meaningful that some towns have turned barn quilts into official tourist attractions, known as “barn quilt trails.” You can even register your quilt with local guilds or art groups to have it included on a community map.
Whether you’re honoring a loved one or just infusing a little personal flair into your farm or porch, your barn quilt becomes more than a decoration—it becomes a symbol. It speaks to visitors without saying a word, capturing the spirit of the land, the house, or the hands that built it. So don’t hesitate to make it your own—because every barn quilt, whether traditional or custom, carries a story worth telling.
FAQs About Barn Quilts
❓ What size should a barn quilt be?
For a traditional barn display, 4×4 feet is the most common. For garages or sheds, 2×2 feet is usually plenty.
❓ Can I use regular craft paint?
No—only use exterior latex paint. Craft paint will fade and peel quickly outdoors.
Anywhere from 2 to 5 days, depending on drying times and complexity of the pattern.
Final Thoughts
Barn quilts are more than just art—they’re conversation starters, heritage displays, and ways to connect to the land and history around you. Whether you make one for your barn or your front porch, the process is deeply satisfying.
Start with a bold, simple pattern. Don’t rush the prep or painting. And most of all, have fun bringing your design to life, one color block at a time.
How to Make Cornhole Boards by Admin March 25, 2025 DIY I’ve built a few cornhole boards over the years — mostly for family barbecues and neighborhood game nights. It’s one of those backyard projects that’s…
How to Make a Bucket Toilet by Admin August 2, 2023 DIY Anyone who enjoys hunting or fishing has probably seen a bucket toilet sometimes. More and more campers are using them as well. Instead of buying…


")

")

