If you’ve ever needed to remove wood from concrete—like a broken fence post, a rotting expansion joint, or even leftover framing lumber—you know it’s not always an easy task. But it’s a common one for homeowners and DIYers. Wood and concrete often meet in home construction, and over time, that wood can rot, crack, or just wear out.
This guide walks you through practical ways to remove wood from concrete step by step. Whether you’re dealing with a crumbling joint in your driveway or a post that snapped off at the base, we’ve got you covered with real-world solutions and helpful tools.
Why You Might Need to Remove Wood from Concrete
This kind of project comes up more often than you might expect. Here are a few common reasons:
A fence post has rotted right where it meets the concrete (yep, that’s the usual spot)
The wooden expansion joints in your sidewalk are cracked or completely falling apart
You want to reuse an old concrete slab, but there’s still wood stuck in it
The goal is to remove the wood without damaging the surrounding concrete, which is easier said than done—but totally doable with the right approach.
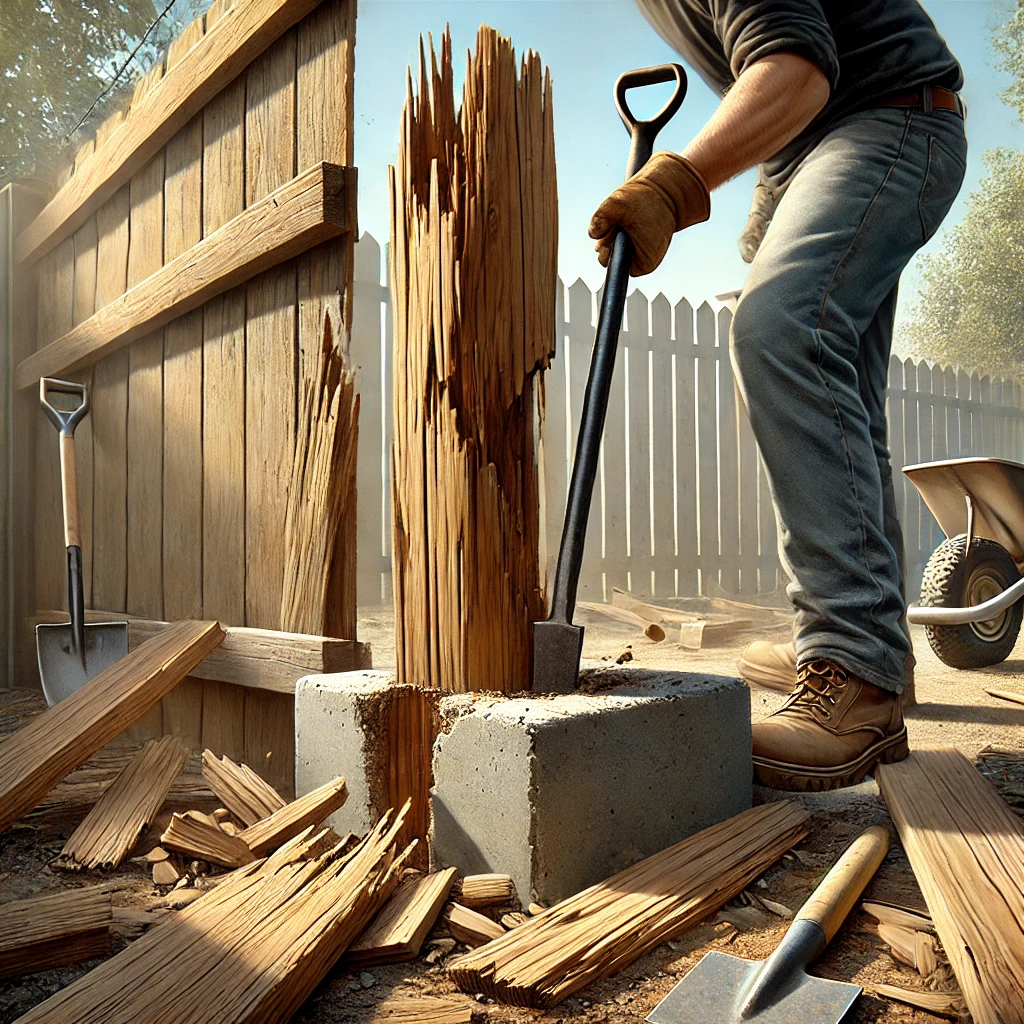
Scenario 1: Removing a Rotted Fence Post from Concrete
Fence posts are often set into concrete to keep them upright and strong. But over time, moisture builds up just above the concrete line, and that’s where wood tends to rot. The top might look fine, but near the base? Not so much.
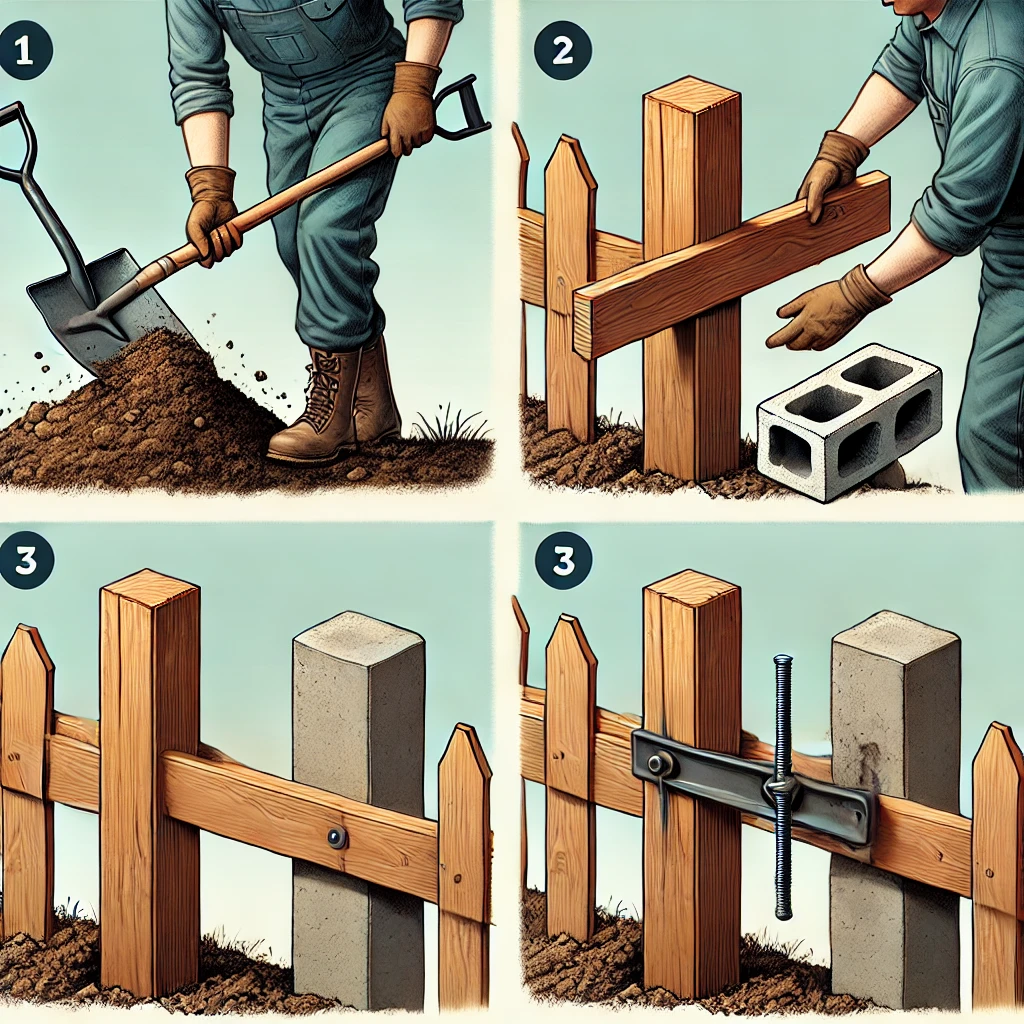
Option 1: Pull Out the Post and the Concrete Base
This method works best when the post is still mostly intact and the concrete isn’t too large.
Use a shovel to dig around the post and expose the entire concrete base.
Screw or bolt a long 2×4 to the bottom part of the post.
Place a stone, cinder block, or chunk of wood a foot away to use as a pivot point.
Push down on the long 2×4 like a lever. With enough force and patience, the whole thing should pop loose.
If the post is too far gone or the concrete is massive, it’s time to go with the second option.
Option 2: Leave the Concrete, Just Remove the Wood
When the concrete base is part of a larger slab, or it’s just too much to move, your best bet is to dig out the rotted wood.
A hookaroon (yep, it’s a real tool—used in logging)
A bent pry bar or tough screwdriver
What to do:
Clear out any dirt or debris around the exposed wood.
Start chipping or prying the loose wood piece by piece. This will take time—rotted wood breaks apart easily but not always where you want it to.
Keep working at it until you’ve got the hole clean.
Once the space is clear, you can either install a new post (which may need a little trimming to fit) or use a surface-mounted base.
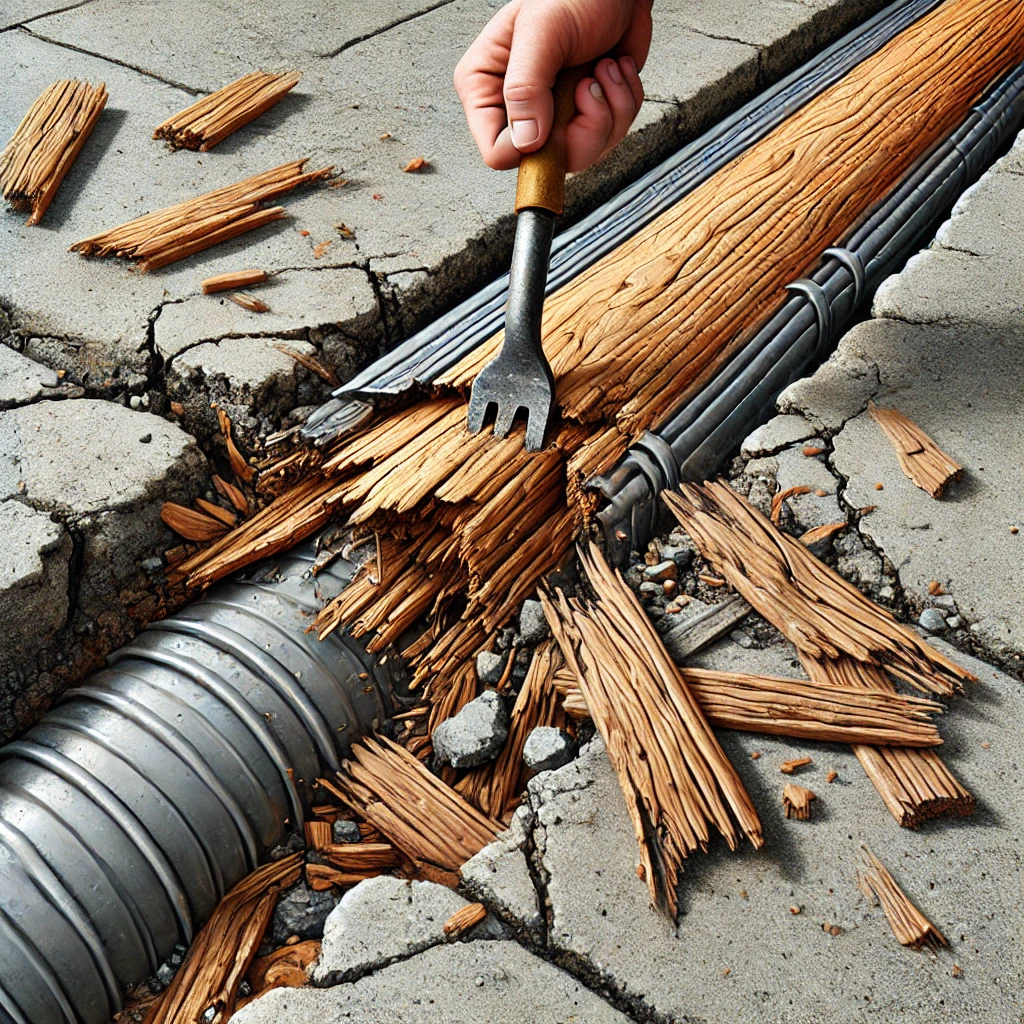
Scenario 2: Replacing Old Wood Expansion Joints
Expansion joints give concrete room to expand and contract with temperature changes. In the past, these joints were made of wood, but over time, those pieces rot or crumble and need to be replaced.
Here’s how to swap them out:
Use a pry bar to break up the old wood into strips.
Carefully pull each chunk out of the joint so you don’t crack the surrounding concrete.
Clear out any leftover debris or splinters.
Insert a new vinyl expansion joint and tap it into place with a rubber mallet.
Add some gravel or sand to seal things off if the ends are open.
Vinyl is more flexible and weather-resistant than wood, so it’ll last longer and save you future headaches.
Bonus Tip: When You Can’t (or Don’t Want to) Remove the Concrete Base
Sometimes, the concrete is just too large or too deep to mess with. In that case, you have a couple of workarounds:
Surface-Mounted Post Base: Cut the old post flush with the concrete and screw a metal bracket to the surface. It won’t be as strong as a buried post, but it works fine for light-duty builds like shade awnings or trellises.
Steel Sleeve Base: These bases come with a vertical metal tube. Drill a hole into the concrete (or remaining wood), insert the sleeve, and pour some concrete around it for extra strength. It’s a nice middle ground when you want a secure post but don’t want to start from scratch.
Final Thoughts
Removing wood from concrete isn’t exactly glamorous work, but it’s something almost every homeowner or DIYer runs into eventually. Whether you’re pulling a rotted post, fixing an old joint, or just making space for something new, the key is patience and the right tools.
Take your time, don’t rush the process, and know that every chunk of wood you pry out is strengthening and improving your space. You’ve got this.