Chair Seat Replacement

Most reupholstery projects are usually best left to the professionals, as they require a heavy-duty sewing machine. There is an exception though; that’s reupholstering dining room chairs. The vast majority of dining room chairs don’t require any sewing to reupholster them, unless they have a removable cushion that is made with piping on the edges. For the rest, the only specialty tool that’s required is a staple gun; pneumatic is best, but a spring-loaded one will work.

Some people try to reupholster these chairs by attaching new upholstery fabric over the old. This is somewhat workable, but it ignores the fact that if the fabric is worn to the point where it is in need of replacement, the foam rubber padding on the seat is probably worn out as well. It is best, when refurbishing these seats, to go all the way down to the wood and start over.

The hardest part of this project is usually selecting the upholstery fabric. This is heavier fabric than that which is used for making clothing or crafts projects and is not at all stretchy. Fabrics which stretch will not provide the right results when used for any sort of upholstery work. In addition to the upholstery fabric itself, 1” thick high density foam rubber and ½” polyester batting will be needed, as well as spray adhesive especially formulated for the foam rubber.

Disassembly

The first step in the process is to remove the seat from the chair and disassemble it. Flip the chair over and set it on the workbench or tabletop, with the back of the chair hanging off the edge. There will be screws going through the chair’s skirt, into the seat. Remove all those screws to get the seat loose from the chair frame. The chair frame can then be set aside.

There may or may not be a dust cover on the bottom of the seat. If there is, it tears off easily, giving access to the edges of the existing upholstery and the staples or tacks that have held it in place. Remove all the staples or tacks, allowing the fabric to be removed. There will next be a layer of batting, which also needs its tacks or staples removed, so that it can come off. Finally, the foam rubber padding can be removed from the wood part of the seat. It may need to be scraped off, if it was glued in place.

Note that furniture made before the 1950s might not have foam rubber padding. Before that time a variety of natural fibers were used for upholstery padding, the best of which were horsehair. Straw and cotton batting were also used. It is possible that older furniture may have foam rubber, if it had previously been reupholstered. If the chair still has any of these old paddings in place, it would be beneficial to retain the old stuffing, as that would add to the value of the furniture. Additional layers of the original material can be added or foam can be used in conjunction with the original materials. Please note that it is still possible to buy horsehair chair padding.

Repairing or Replacing the Wood Seat

Chairs manufactured after the 1920s are likely to have plywood seats; but those built before that will be made of panels constructed of edge-glued boards. Ash, beech, birch, cherry, mahogany, maple, oak, pecan (or hickory), poplar, teak and walnut were all popular woods used in making furniture. In most cases, it is best to retain the existing wood core for the seat, if it is still in usable condition. I recently refinished some chairs where the seat core had been made of material that was too thin and had sagged over the 80 or so years of the set’s existence. That was surprising, as the entire dining set, including buffet and hutch, was made of solid walnut.

Plywood panels are unlikely to be damaged and can be reused. edge-glued ones may have come apart at the seams and need to be glued back together. As the glue used in that time was horse-hide glue, often referred to as “woodworker’s brown glue” today, more glue can be added, without sanding off the old glue. The new glue will soften the old, allowing for a strong joint. However, it will probably be necessary to cut some cauls to match the curvature of the seat’s edge, so that F-clamp or pipe clamps can be used to hold the pieces together while the glue dries.

If the wood part of the seat is broken to the point of not being usable or if it is missing altogether, it will be necessary to cut a new one out of wood. In the interest of preserving historic accuracy and to maintain the value of antique sets, it is best to make a new edge-glued panel out of the same kind and thickness of hardwood that was originally used. But in the case of newer sets, plywood is the norm. old chairs might have seats that are as much as one inch thick, but plywood seats will normally be ¾”. While any plywood will work, Baltic-birch or applewood are the favorites for this amongst those who regularly refurbish furniture.

The old wood seat can be used as a pattern for cutting the new one. In the case where that is missing, try using a seat from another chair in the set. In the case where it is a stand-alone chair and not part of a set, the seat frame itself can be used as a pattern. Trace around both the outside and inside of the frame, which should give two lines that are ¾” apart. Then split the difference between those two lines, making a third line that will be the outline for the new part.

Trace the pattern onto the wood that is being used for the new seat core and cut it out on a bandsaw or with a jigsaw. Take a moment to remove any splinters along the edges and round the bottom edge of the seat’s edge slightly, so as to help prevent it from chafing on the wood. Mark the centerline on the front and back of the bottom side of the seat.

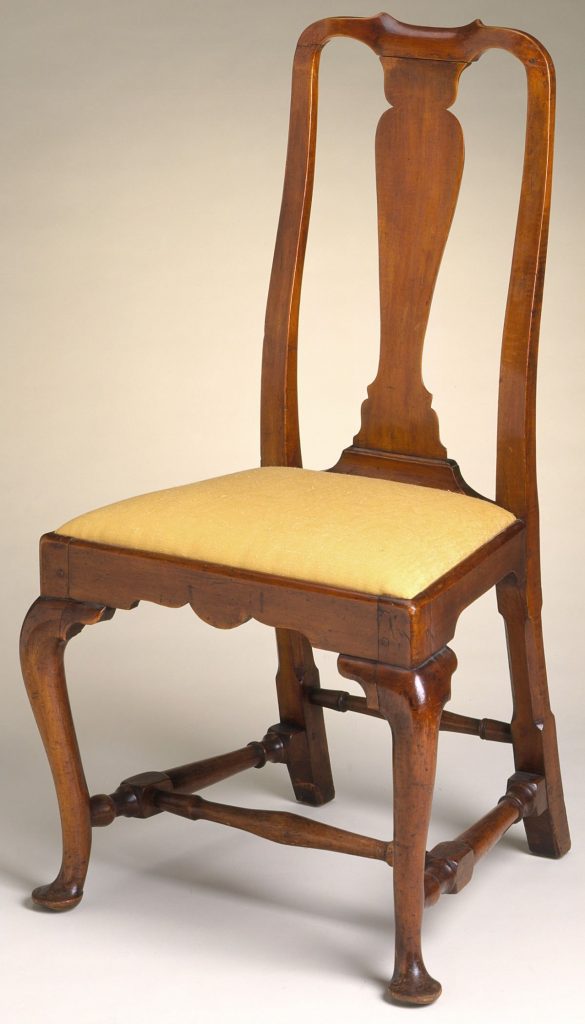
wooden chair with, yellow seat
Wooden chair with yellow seat, Ashley Van Haeften

Upholstering the Seat

The first step in upholstering the seat is to attach the foam. Typically, 1” thick high-density foam is used for this. Avoid low density foam, as only an inch of it doesn’t provide enough padding on top of the wood. If there are existing horsehair pads that are going to be retained and reused, ½” of high-density foam can be used instead of 1”.

The foam needs to be cut out to the exact shape and size as the wood seat core. A special spray adhesive for foam rubber is applied to the wood seat core and the foam is put into place, pressing down on it to ensure that it makes contact with the adhesive all along its surface. If a rounded edge is desired, spray the same adhesive along the edge of the foam and allow it a few minutes to become tacky. Then fold the edge of the foam down, doubling it over, so that the top edge makes contact with the top edge of the wood. Repeat this step all the way around the seat.

For the second layer, ½” thick Dacron-polyester batting is used. A piece 3” larger than the chair seat, on all sides, needs to be cut and overlaid on the foam rubber, centering it. This layer is attached to the outer edge of the wood seat with staples. Start from the center, stretching the material and stapling each side. Then continue working out from that center, working around the seat, stretching each location before stapling it. The finished result should be taut and smooth, without wrinkles. Cut the excess batting off, flush with the bottom of the wood core to the seat.

The upholstery fabric is the next part to be installed. It should be cut 4” larger than the seat, all the way around, to provide sufficient material to be pulled on to stretch the fabric while stapling it to the seat. Cut a small notch on the centerline, at the front and back edges of this fabric, to help ensure that it gets properly aligned to the seat. Some fabric designs will look wrong if they are canted to one side slightly.

Starting from the back of the chair seat, fold the fabric over the edge and align the notch in the edge of the fabric with the centerline mark. Staple the fabric in the center, to the bottom of the seat core; then turn the seat around, so that the same can be done at the front side, also in the center. Be sure to stretch the fabric well before stapling it. Repeat this process for the two remaining sides, taking care when stretching the fabric to keep the fabric’s pattern straight on the chair and not pulled crooked.

With those four staples in, start working around the chair, continuing the process of stapling, working out from the center and stretching the fabric every time. Check frequently to ensure that the fabric’s design is remaining straight and not being pulled crookedly.

The corner can be a bit tricky. It is necessary to fold the fabric neatly, so as to make sure that any folded seam is right on the corner. This shouldn’t really show up from the top of the chair seat, but it might when looking at the seat from the side, so its worth taking an extra minute or two to make sure that it is folded straight, before stapling it. At the same time, make sure that the folded fabric doesn’t cause a lump that will make it difficult to reattach the seat back to the chair’s frame.

With the upholstery fabric installed, take a large, sharp pair of scissors and cut the excess fabric off at about one inch from the line of staples.

Adding a dust cover to the bottom of the seat provides a nice clean look. While not always done, this is common on finer furniture. A black cambric upholstery fabric is used for this, which is inexpensive. There are two ways of installing it; on the bottom of the seat and on the bottom of the seat frame, after reinstalling the seat.

The cambric fabric should be cut roughly 1” large than the dimensions of the seat, all the way around. The edges are folded over, putting them right at the bottom edge of the seat or slightly inside the edge (1/4”) and it is stapled only to the bottom. The same method of starting in the middle, stretching the fabric and working around the chair, outwards from the middle, that was used for the batting and upholstery fabric is used, stapling through the folded edge.

Reassemble the Chair

With the reupholstery work completed, all that needs to be done is reinstall the seat on the chair frame. Align the seat as it was before and use the same hardware to install it. That means straight-blade screw for older furniture, but this is important for retaining the historic accuracy of the piece. Please note that it is usually not a good idea to use a drill/driver for reassembly of the chair, as the screws can catch in a thread of the fabric and pull it out of the weave.

While the chair is upside-down on the workbench, take a moment to check all the screw in the corner and hold the arms in place. Tighten as necessary so that the chair isn’t sent back to the workshop by an irate wife for this additional repair.

If the dust cover was not installed on the bottom of the chair seat, install it on the bottom edge of the chair’s skirt, keeping its edge ¼” back from the edge, so that it will not be seen.