This post contains affiliate links. As an Amazon Associate, theplywood.com earns from qualifying purchases at no extra cost to you.
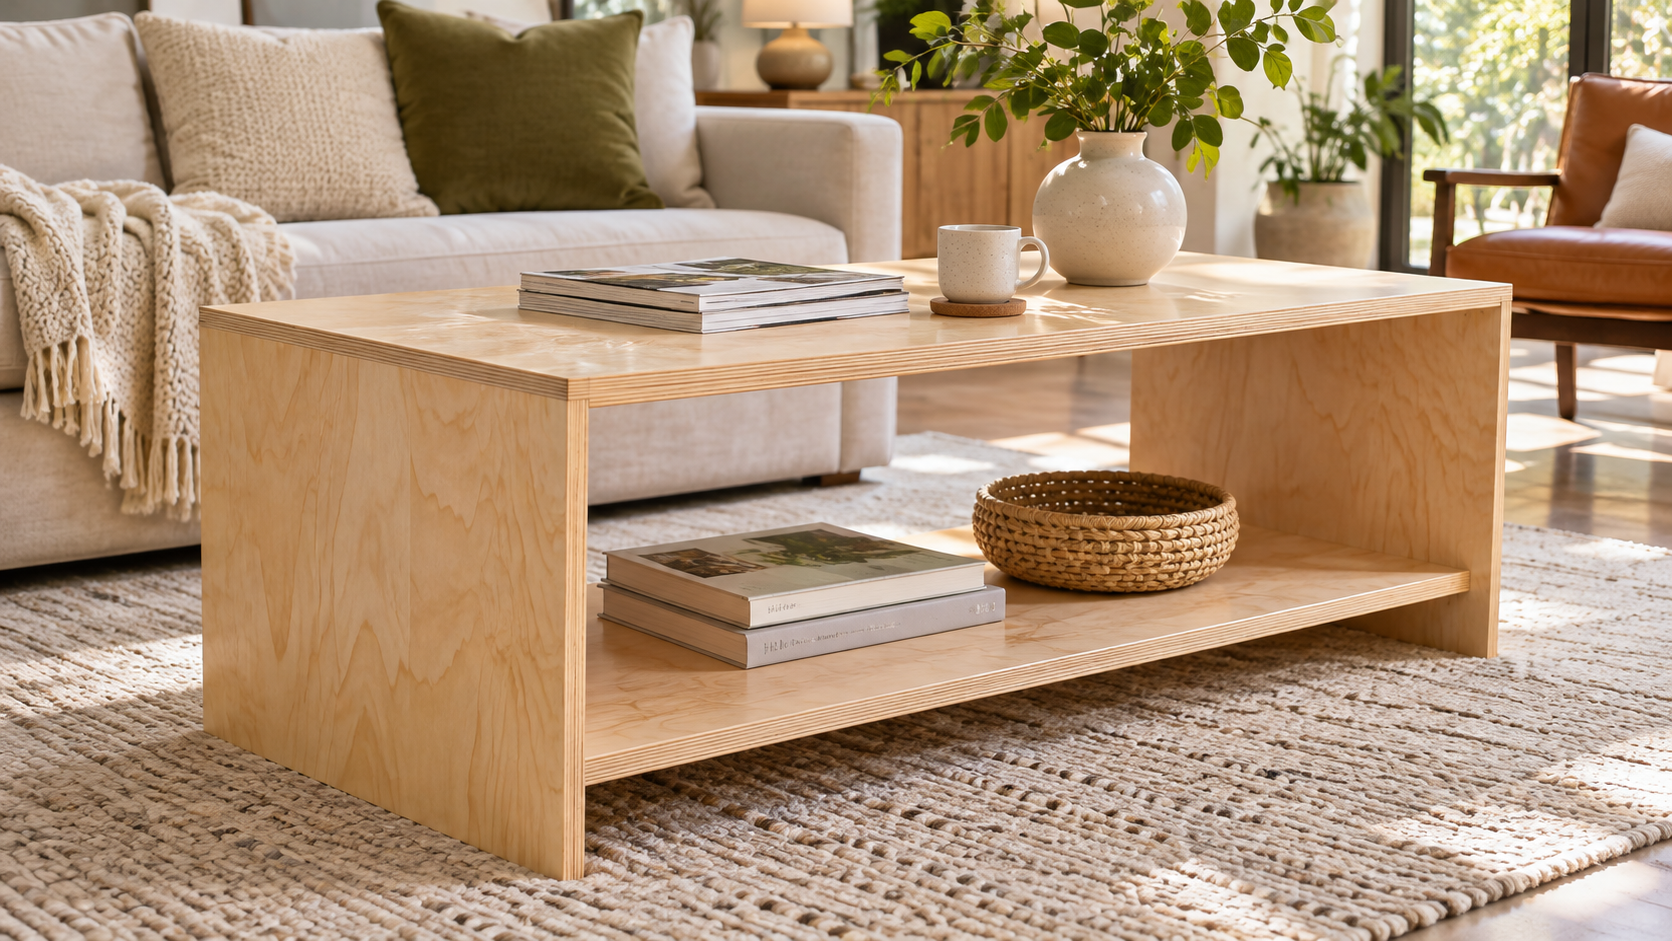
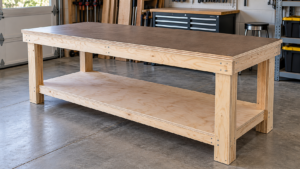
A 48″ x 24″ x 18″ plywood coffee table with a lower shelf costs about $135–$200 in materials if you build it from birch plywood. With sanded pine plywood it’s about $90–$160. Everything comes out of one 4×8 sheet of 3/4″ plywood, and you’ll have two usable offcuts left over.
Quick Answer
Materials cost: About $135–$200 (birch) or $90–$160 (sanded pine)
Finished size: 48″ long x 24″ deep x about 18″ tall
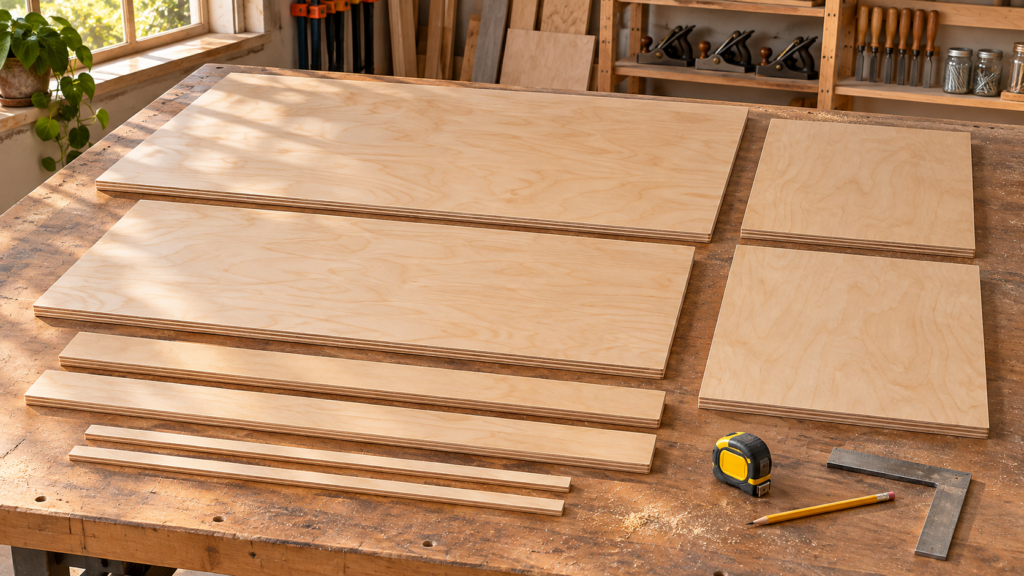
Plywood: One 4×8 sheet of 3/4″ plywood
Parts: 6, plus 2 optional shelf stiffeners cut from the leftover
Fasteners: 28 pocket screws, or 34 with the stiffeners (1-1/4″ coarse thread)
Edge banding: About 30–38 ft. One 50 ft roll covers it.
Build time: One weekend, plus however long your finish says to dry between coats
Full Cost Breakdown
Prices were checked in November 2026 at Home Depot, Lowe’s and other U.S. retailers. Lumber prices vary by region and change often, so check your local store before you buy.
Item
Quantity
Typical price
3/4″ birch plywood, 4×8
1 sheet
$75–$90
or 23/32″ sanded pine plywood, 4×8
1 sheet
$27–$50
Iron-on birch edge banding, 7/8″ x 50 ft
1 roll
$15–$20
1-1/4″ coarse-thread pocket screws
1 box of 100
$8–$15
Wood glue, 8 oz
1 bottle
$5–$10
Water-based polyurethane
1 quart
$20–$32
Sandpaper (120, 180, 220 grit)
1 pack per grit
$10–$25
Felt furniture pads
1 pack
$3–$6
Total with birch plywood
About $135–$200
Total with sanded pine plywood
About $90–$160
Where the money goes: The plywood sheet is the biggest line, and it’s the only one that changes much between the two versions. Everything else costs about the same either way. At these prices, birch adds roughly $25–$60 to the whole table. If you plan to stain the table or leave it natural, that’s usually worth paying. If you’re painting, buy the pine. The pine total assumes the same clear finish, so if you paint, swap the poly line for primer and paint.
Not included: tools. You’ll need a circular saw with a straightedge guide (or a table saw), a pocket-hole jig, a drill/driver, two or more clamps, a household iron, an edge banding trimmer and a sander. Some home centers will make basic panel cuts for you, but policies vary, so ask before you go.
Cost check: Buying a second “just in case” sheet nearly doubles your plywood cost, and you won’t need it. The leftover pieces can replace a stretcher or a stiffener. They’re too small to recut the top, an end panel or the shelf, so measure twice on those four parts.
Cut List
All sizes are for 3/4″ plywood. Width is the first number and length is the second. The grain runs along the length.
Part
Qty
Size (W x L)
Grain runs
Notes
Top
1
24″ x 48″
Along 48″
Best face up
End panels
2
24″ x 17-1/4″
Vertical (along 17-1/4″)
Grain flows down from the top
Lower shelf
1
22″ x 46-1/2″*
Along 46-1/2″
Set 1″ back from the front and back edges
Stretchers
2
4″ x 46-1/2″*
Along 46-1/2″
Go under the top, front and back
Shelf stiffeners (optional)
2
1-1/2″ x 46-1/2″*
Along 46-1/2″
Glued on edge under the shelf’s front and back
Measure your sheet before cutting these. Plywood sold as “3/4”” is often thinner, and many sheets measure about 23/32″ (0.703″). These parts should equal 48″ minus twice your actual thickness. For a 23/32″ sheet that’s 46-9/16″, not 46-1/2″.
Warning: Cut the shelf, stretchers and stiffeners last, after you’ve measured the actual space between the assembled end panels. A part that’s 1/16″ short leaves a gap you’ll see. One that’s 1/16″ long pushes the ends out of square.
Sheet Layout (One 4×8 Sheet)
The face grain runs along the 8 ft length of the sheet. This layout keeps the grain running the long way on the top and up and down on the ends, so it looks continuous where the top meets the legs. All leftover sizes assume a 1/8″ saw blade. A thicker or thinner blade will change them slightly.
Cut 1: Crosscut the sheet at 48″. This gives you Piece A (48″ x 48″) and Piece B (48″ x about 47-7/8″).
Piece A: top and shelf
Step
Cut
Result
A1
Rip at 24″
Top: 24″ x 48″
A2
Rip the remainder at 22″
Shelf blank, 22″ x 48″
A3
Crosscut the shelf blank to final length
Shelf: 22″ x 46-1/2″*
—
Waste
About 1-3/4″ x 48″ strip, plus a short end piece
Piece B: ends, stretchers, stiffeners
Step
Cut
Result
B1
Rip at 24″
End blank, 24″ x 47-7/8″
B2
Crosscut two pieces at 17-1/4″
2 end panels: 24″ x 17-1/4″
B3
From the other half (about 23-7/8″ wide), rip two strips at 4″
Stretcher blanks
B4
Rip two more strips at 1-1/2″ (optional)
Stiffener blanks
B5
Crosscut all strips to final length
2 stretchers and 2 stiffeners at 46-1/2″*
Usable leftovers:
About 24″ x 13-1/8″, left over from the end-panel blank
About 12-3/8″ x 47-7/8″ if you cut the stiffeners, or about 15-5/8″ x 47-7/8″ if you skip them
Recommended Supplies
Pocket-hole jig: A Kreg pocket-hole jig handles every joint in this build. Kreg’s screw guide calls for 1-1/4″ coarse-thread screws in 3/4″ plywood.
Edge banding trimmer: A double-sided edge banding trimmer trims both sides of the banding in one pass and is much safer for the veneer than a utility knife.
Finish:Water-based polyurethane, quart. It stays clearer on light woods than oil-based poly, which tends to yellow as it ages.
How It Goes Together
1. Edge Band Before Assembly
Iron banding onto every edge that will show before you join any parts:
all four edges of the top
the front and back edges of both end panels
the front and back edges of the shelf
the bottom edge of the front stretcher
the bottom edges of the stiffeners, if you use them
That’s about 30 ft without stiffeners and about 38 ft with them. It’s hard to trim banding cleanly once the parts are joined at inside corners.
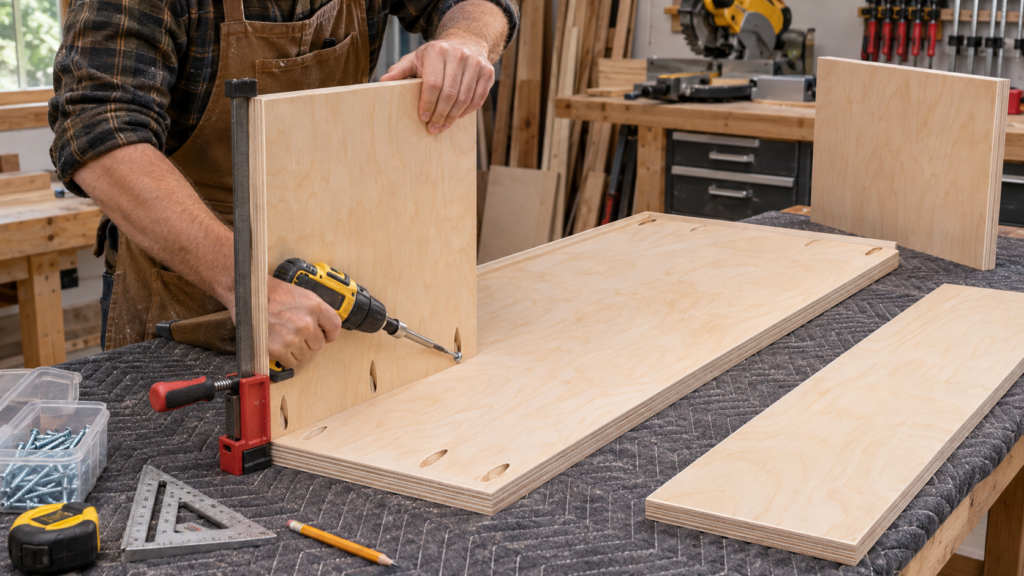
End panels: 3 holes along the top edge, on the inside face, to fasten into the top
Shelf: 3 holes on each end, on the underside
Stretchers: 2 holes on each end and 4 along the top edge, all on the inside face
Stiffeners (optional): 3 holes along one long edge, on the inside face, to fasten up into the shelf
3. Attach the Ends to the Top
Lay the top face-down on a clean blanket. Stand each end panel flush with the end of the top, glue it, clamp it and drive the screws. Check that each end is square to the top before the glue sets.
4. Add the Stretchers
Fit one stretcher at the front and one at the back, both 1″ back from the edges. Screw them into the end panels and up into the top. The stretchers keep the table from wobbling side to side, and they stiffen the top.
5. Stiffen and Install the Shelf
If you’re using stiffeners, attach them first. Glue each one on edge to the underside of the shelf, flush with the front or back edge, and drive the pocket screws up into the shelf. Next, measure the space between the end panels at the shelf height (4″ up from the floor). Glue the shelf in, set 1″ back from the front and back edges, and screw it in from underneath.
6. Sand and Finish
Sand with 120, then 180, then 220 grit, going easy on the veneer and on the banded edges. Apply three coats of water-based poly, sanding lightly with 220 between coats. Go by the label for drying time between coats. Stick felt pads on the four bottom corners.
How Much Weight the Shelf Can Hold
The top is braced by two stretchers. The shelf isn’t braced by anything. It’s a single 3/4″ panel spanning about 46″ between the end panels, and plywood that carries a steady load over a span that long can slowly sag in the middle over months.
Fine without stiffeners: magazines, remotes, baskets, board games, a few books
Add the stiffeners if you’re storing: full rows of hardcover books, vinyl records, or anything that would stay on the shelf and be heavy to lift with one hand
Still too much, even with stiffeners: anyone sitting or standing on the shelf or the top
The two stiffeners turn the front and back of the shelf into small beams. They’re cut from the leftover plywood, so they add only a little glue and six screws. If you want actual sag numbers for your expected load, a free shelf-sag calculator such as the Sagulator will estimate it for your span and material.
Choosing the Plywood
For a table you’ll stain or leave natural, birch plywood is the usual choice. Its faces are smooth and even, and the edges look clean if you ever leave them exposed. Hardwood plywood faces are graded under ANSI/HPVA HP-1. Pick the sheet with the better face and use it for the top. You can browse other species in our hardwood plywood section. If you’re painting, a sanded pine sheet is a fine way to save $25–$60, because voids and grain changes disappear under primer.
Common Mistakes (and What They Cost You)
Cutting the shelf to 46-1/2″ without measuring the sheet. With thinner-than-nominal plywood you get a visible gap at each end, or the shelf rattles. Measure first, or cut the shelf to fit after the ends are on.
Running the top’s grain the short way. The top looks off, and the grain won’t flow into the legs. Cut the top with its 48″ length along the sheet’s 8 ft length.
Loading an unstiffened shelf with books. It can slowly sag in the middle, and once plywood has taken a set, it won’t flatten back out. Add the stiffeners up front.
Banding after assembly. You can’t get the trimmer into the inside corners, so the edges come out ragged and you redo them by hand. Band each part flat before assembly.
Putting pocket holes on a face people can see. Plugging them takes a lot of time and still shows through a clear finish. Plan every hole on an inside or bottom face before you drill.
Staining birch without a pre-stain conditioner. Birch tends to blotch. Test on your leftover piece first, or use a gel stain or a clear finish.
When This Plan Isn’t the Right Fit
Outdoor use: Don’t use this design outside. A panel with an exterior-rated glue bond won’t come apart from moisture, but the glue doesn’t make the wood itself any more rot-resistant. Decay resistance and the bond rating are separate questions.
Heavy storage: If the shelf will carry heavy loads every day, add the stiffeners, or add a center support from the shelf to the floor.
A much longer table: If you go past about 54″, you need a second sheet, and the layout above no longer applies.
FAQ
How much does it cost to build a plywood coffee table? About $135–$200 in materials with birch plywood, or about $90–$160 with sanded pine plywood, at November 2026 U.S. prices. Tools aren’t included.
How many sheets of plywood do I need for a coffee table? One 4×8 sheet of 3/4″ plywood covers all parts of this 48″ x 24″ table, including the optional shelf stiffeners. You’ll have a 24″ x 13″ piece and a narrow full-length piece left over.
Can I use 1/2″ plywood instead of 3/4″? It isn’t a good idea for the top or the shelf. 1/2″ plywood sags more over a 46″ span and gives pocket screws less material to grip.
How much weight can the shelf hold? Without stiffeners, keep it to light items: magazines, baskets, a few books. For full rows of books or records, glue the two 1-1/2″ stiffeners under the front and back edges.
What screws do I use for pocket holes in 3/4″ plywood? 1-1/4″ coarse-thread pocket screws, per Kreg’s screw guide.
Can I paint instead of clear-coating? Yes. Prime first, sand the primer lightly, then paint. If you’re painting, buy sanded pine plywood to save money.
Bottom Line
One sheet of 3/4″ plywood and about $135–$200 in materials gets you a solid 48″ x 24″ coffee table with a shelf. Choosing pine instead of birch saves you $25–$60, and the rest of the costs stay about the same. Measure your actual sheet thickness before cutting the long parts, band every edge before assembly, and add the shelf stiffeners if the shelf will hold books.
Related Posts:
Cheap DIY Garage Storage Shelves: 2x4 Plan and Cut List by Admin November 2, 2026 DIY This post contains affiliate links. As an Amazon Associate, theplywood.com earns from qualifying purchases. A freestanding 2x4 frame with plywood decks is often the lowest-cost…