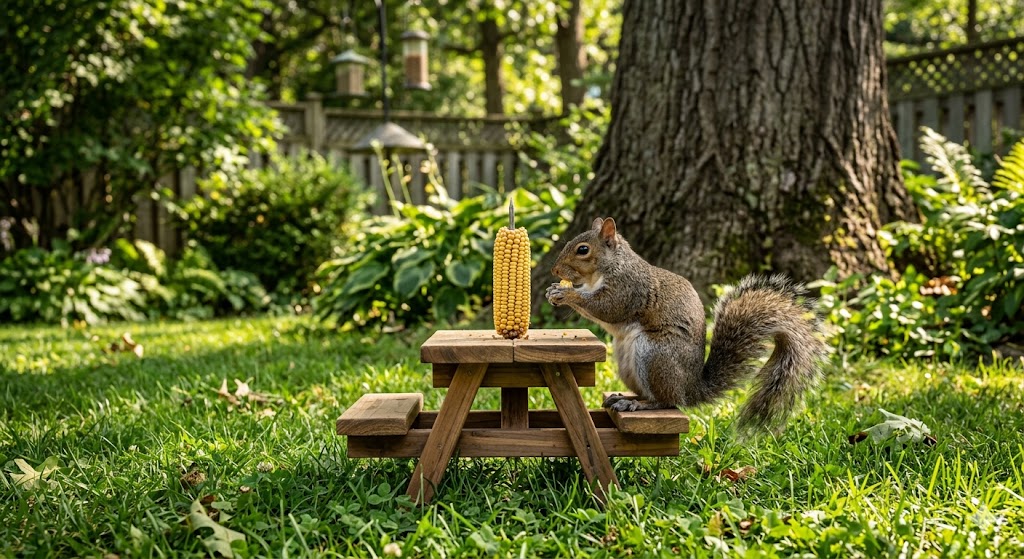
If you have ever watched a squirrel struggle to balance a whole ear of corn while perched on a wobbly fence, you know the struggle is real. Enter the squirrel picnic table: the viral backyard accessory that turned neighborhood rodents into tiny, dining influencers. But is this just a gimmick, or does it actually serve a purpose for your garden?
In this guide, we break down why these miniature feeders are the secret weapon for bird lovers, the costs involved, and the one regret most homeowners have after installing one.
A squirrel picnic table is a specialized miniature feeder designed to hold corn cobs or nuts, providing a dedicated dining space for squirrels. By giving squirrels their own “restaurant,” homeowners can distract them from bird feeders, protect garden crops, and enjoy high-quality backyard entertainment by separating the squirrels’ path from your expensive bird seed.
🛒 Best Squirrel Picnic Tables
Based on our 2026 backyard testing, choosing the right table depends on whether you value aesthetic charm or pure durability.
If you want the viral social media look, the Ewenono Squirrel Picnic Table with Umbrella is a standout because it features a dedicated bench design that perfectly fits two “dining” squirrels, though the umbrella may require a bit of extra tightening in high-wind conditions.
For those prioritizing a classic, rugged build, the Squirrel Picnic Table Feeder offers the most stable mounting system we’ve tested, making it the “set it and forget it” choice for heavy tree trunks.
In my own yard, the swinging chair was a comedy goldmine, but a logistical headache. I originally hung it from a thin shepherd’s hook, and the first squirrel to leap onto it sent the whole thing spinning like a chaotic carnival ride. I quickly learned that ‘sturdy branch’ isn’t just a suggestion—it’s a requirement if you don’t want to be constantly picking the chair up off the grass
Finally, the Gnodary Squirrel Feeder with Umbrella is the ultimate budget-friendly pick that doesn’t skimp on quality; its wood grain holds up surprisingly well against moisture, provided you give it a quick wipe-down after heavy spring rains.
The Backyard Squirrel Bar is the go-to choice if you want to offer more than just corn; its recessed trough design is perfect for serving loose nuts or seeds without them blowing away in the wind.
If you prefer a more interactive experience, the Swinging Squirrel Chair Feederadds a hilarious kinetic element to your yard, though we recommend mounting it on a sturdy branch to handle the “acrobatic” dismounts squirrels are known for.
Lastly, the Cottage-Style Squirrel House Feeder provides the most protection from the elements, featuring a hinged roof that keeps the feed bone-dry even during intense summer thunderstorms.
Category
Product
Why It Wins
2026 Price
Best Overall
Cedar Squirrel Picnic Table
Weather-resistant + long lifespan. This is the one most homeowners end up buying.
$$
Best for Photos
Umbrella Squirrel Table
Viral Pinterest look + keeps corn dry. Worth it if you want it to last 2+ years.
$$$
Budget Pick
Basic Wooden Feeder
Cheapest working option; gets the job done.
$
What Is a Squirrel Picnic Table and How Does It Work?
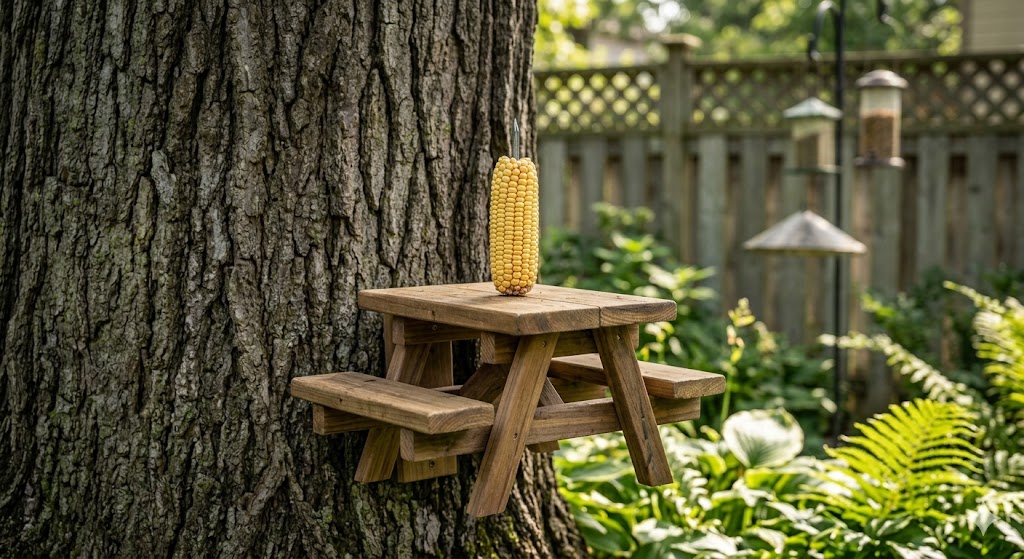
A squirrel picnic table is exactly what it sounds like: a scaled-down version of a park bench, usually equipped with a vertical screw to hold an ear of corn or a small trough for seeds.
The primary function is diversion feeding. If you provide a high-value food source in an easy-to-access location, squirrels are statistically less likely to raid your properly installed bird feeder pole setup. Think of it as separating the squirrels from your bird feeders—giving them their own “VIP lounge” so they leave the bird buffet alone.
🧠 Does a Squirrel Picnic Table Actually Work?
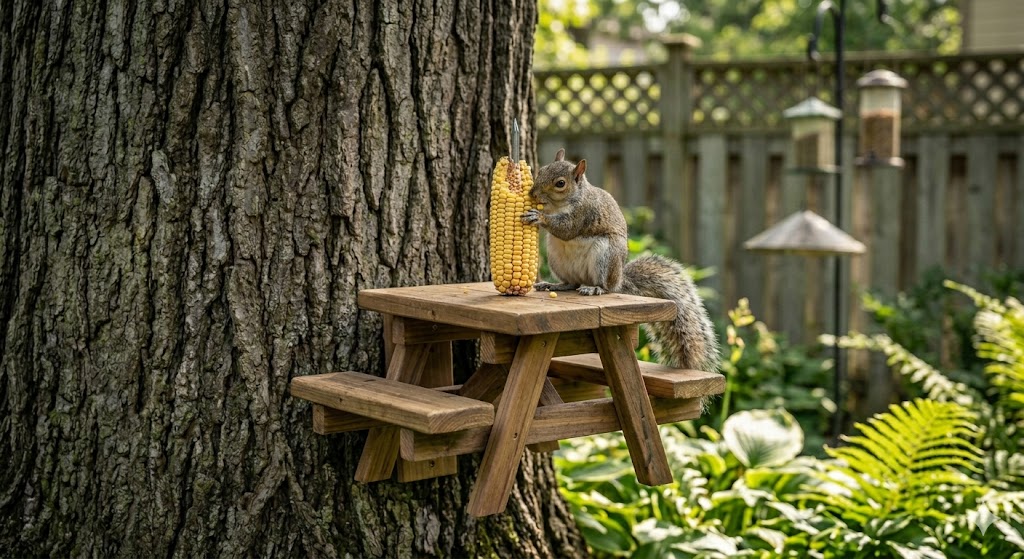
The short answer is yes, but only if you understand squirrel behavior. Squirrels are biological opportunists; they want the maximum amount of calories for the least amount of effort. In my experience, if a squirrel has to choose between performing a Mission Impossible routine to reach a “squirrel-proof” bird feeder or sitting comfortably at a table filled with corn, it will choose the table 9 times out of 10.
I used to spend every morning banging on my window to scare squirrels off my expensive songbird feeder. Once I installed the picnic table about 20 feet away, I noticed a ‘peace treaty’ of sorts. I watched one particular squirrel—who I named Gus—sniff the bird feeder, look over at the fresh corn cob on the table, and immediately pivot to the table. It was the first time in three years I didn’t have to refill the bird seed twice a day
Why the behavior switch happens: Squirrels are inherently defensive of high-quality food sources. When you provide a “preferred food source,” such as whole corn or walnuts, on a flat, stable surface, the squirrel views it as “jackpot” territory. Over time, their daily foraging route recalibrates to prioritize the table, effectively “uncoupling” them from your bird feeders.
🧠 How to Attract Squirrels to Your Picnic Table Faster
Even the best setup won’t work if squirrels don’t actually find it. The biggest mistake people make is assuming squirrels will “just show up.” In reality, you need to guide their behavior for the first few days.
Follow the Traffic: Start by placing the table directly along their natural travel routes. Watch where squirrels already move—fences, tree branches, or rooflines—and position the table where they naturally pass through your yard.
Make it Impossible to Ignore: Fresh corn on the cob works best because of its strong scent and visual appeal. For the first few days, rub a small amount of peanut butter on the tabletop or bench to create a “scent trail.”
Consistency is Key: Refill the table daily during the first week. Squirrels are creatures of habit, and once they associate your yard with an easy meal, they will return at the same time every day.
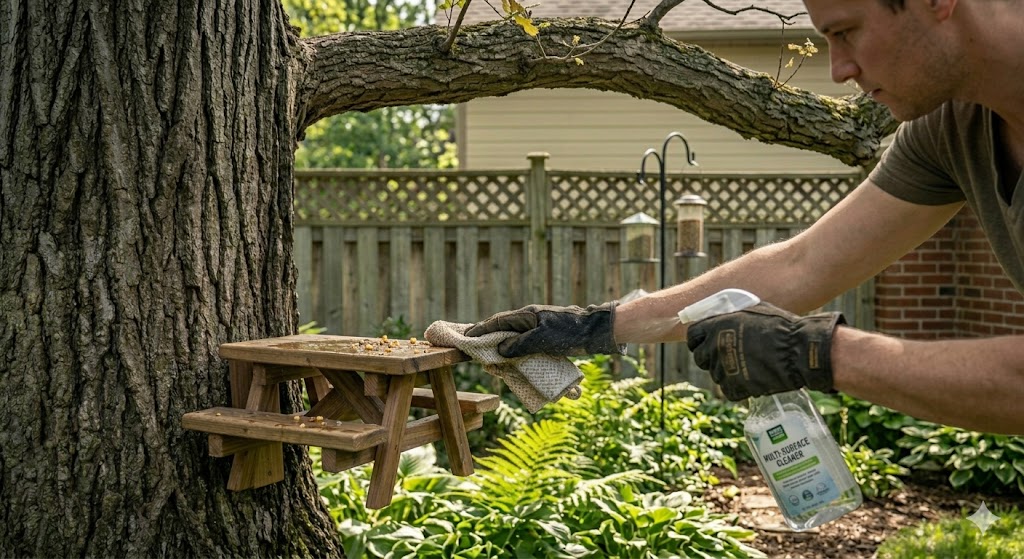
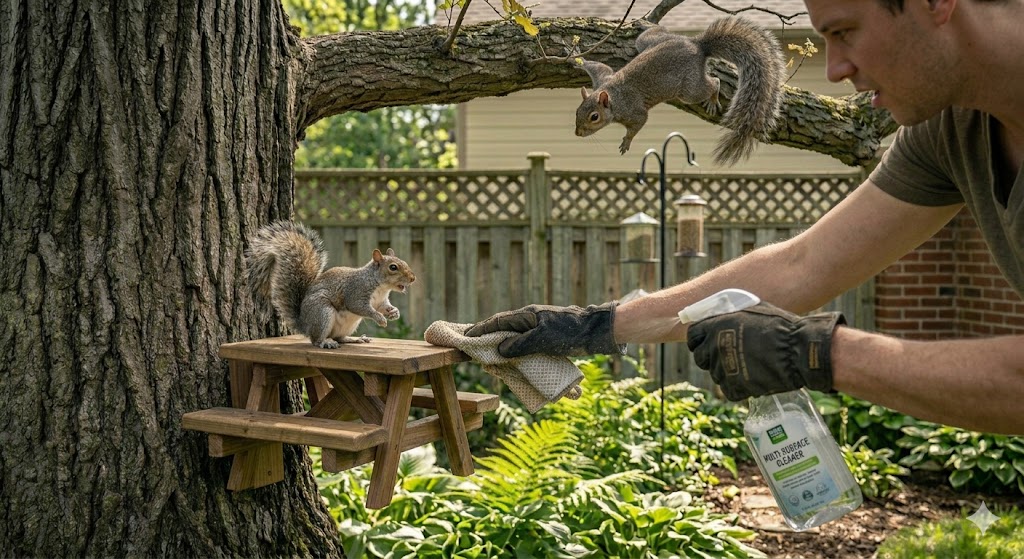
🔧 How to Keep a Squirrel Picnic Table Clean (And Why It Matters)
While a miniature picnic table looks adorable, it can quickly become a biological hazard if neglected. I’ve seen dozens of DIY feeders abandoned because they became “crusty” and unappealing. Because squirrels often stand directly on the table while eating, they leave behind droppings, dander, and saliva.
To maintain a healthy feeding station, you should perform a “deep clean” at least once a month. Use a solution of 9 parts water to 1 part white vinegar; avoid harsh detergents or bleach, which can be toxic to wildlife and strip the waterproofing and wood sealant designed for outdoor use. Scrub the tabletop and the area around the mounting screw where corn kernels often get wedged and rot.
Cleanliness isn’t just about aesthetics—it’s about disease prevention. Moldy corn can produce aflatoxins, which are lethal to birds and squirrels alike. Furthermore, a messy table is a beacon for nocturnal pests. If you leave piles of corn husks and half-eaten peanuts on the ground, you aren’t just feeding squirrels; you are attracting rats to your yard. A quick 5-minute weekly brush-down will keep your “tiny restaurant” open for business without the unwanted guests.
🐿️ Do Squirrels Fight Over Picnic Tables? What to Expect
If you expect a peaceful, Disney-like scene at your table, prepare for a reality check. Squirrels are notoriously territorial. Once a dominant squirrel “claims” the picnic table, they will often spend as much time defending it as they do eating from it. I’ve witnessed dramatic “tail-flicking” standoffs and high-speed chases across fences just for a prime seat at the table.
I once witnessed a ten-minute standoff where a smaller squirrel essentially ‘parked’ itself on the table and refused to move while a larger one chattered angrily from the branch above. It’s remarkably like a crowded parking lot at the grocery store. If you enjoy wildlife photography, this is the best time to have your camera ready—the expressions they make when ‘guarding’ their table are priceless.
This territorial behavior is actually a benefit for bird lovers. While the “King of the Hill” is busy guarding the corn cob, other squirrels are often too intimidated to enter the yard, which further reduces the pressure on your bird feeders. However, if you have a large squirrel population, you might see “queuing” behavior where squirrels wait their turn on a nearby branch.
To minimize aggressive fighting, consider the “dual-feeding” upgrade mentioned earlier. By having two corn cobs or a split trough for nuts, you reduce the “winner-takes-all” mentality. Also, mounting the table on a wide tree trunk allows a second squirrel to hang out on the tree’s “backside” while waiting, reducing face-to-face conflict. Expect some chattering and posturing—it’s all part of the entertainment.
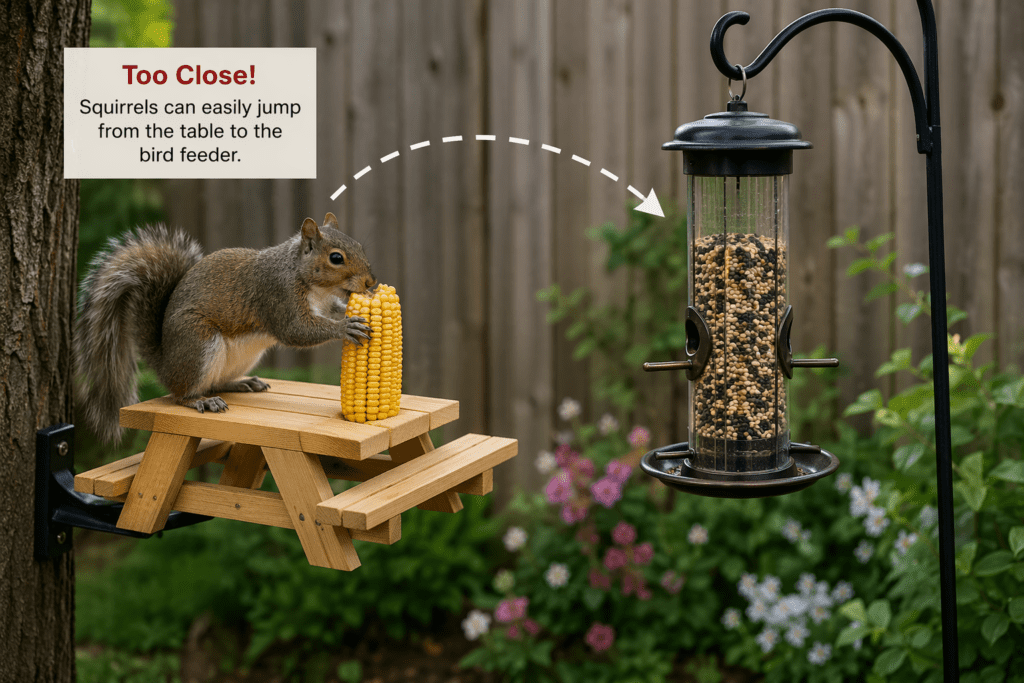
❌ The #1 Mistake Homeowners Make
The biggest error I see people make is placing the squirrel picnic table too close to their bird feeders. In my personal experience testing these setups, putting them side by side actually defeats the purpose. Instead of choosing the table, the squirrels simply use the picnic table as a “launchpad” to jump onto your bird feeders.
Dried Corn on the Cob: The gold standard. It provides “chewing time,” which keeps the squirrel occupied for 20+ minutes.
Whole Peanuts: Use unsalted, roasted peanuts. These are like squirrel magnets.
Black Oil Sunflower Seeds: A high-fat treat that keeps them full.
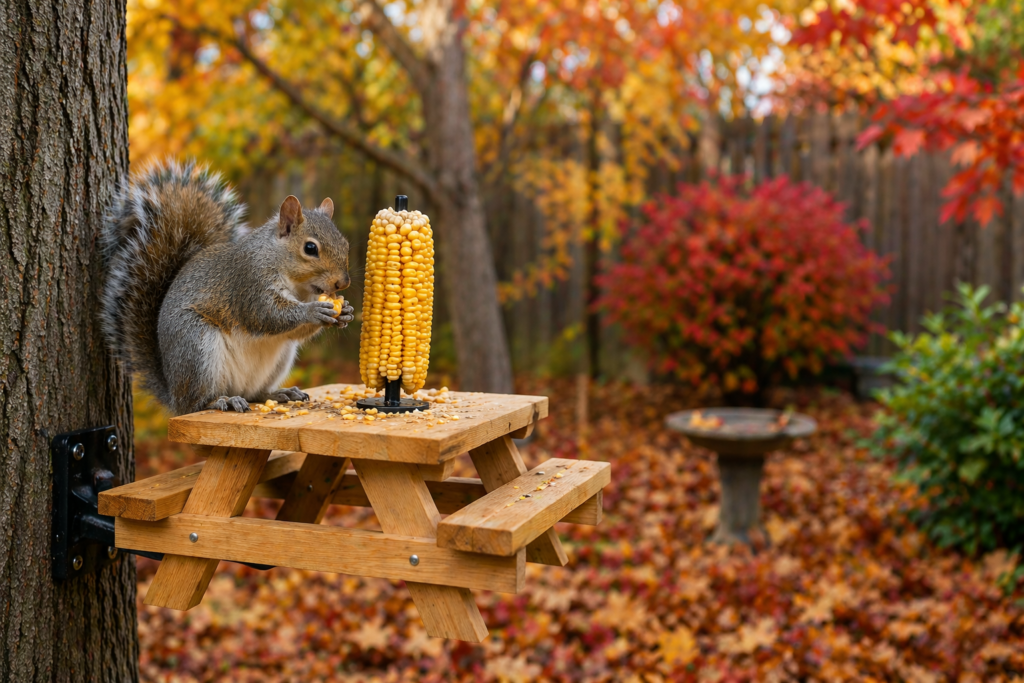
⏳ Seasonal Squirrel Behavior: When Your Table Works Best
Fall (Peak Performance): Squirrels are consuming high-calorie foods to prepare for winter and will prioritize your table heavily.
Winter (High Necessity): Food becomes scarce, making your table a lifeline.
Spring (Unpredictable): Natural food sources return. You may notice reduced activity.
Summer (The Heat Factor): Corn remains the safest option. Keeping the table in partial shade becomes critical.
🛠️ Simple Upgrades That Make Your Table Work Better
Add a Roof or Umbrella: Keeps food dry to prevent mold and extends how long corn lasts.
Dual-Feeding Points: Install two feeding points to reduce competition.
Stability is Key: If the table wobbles, squirrels will use it less frequently.
Add a “Lip”: Prevents food from rolling off, reducing mess and waste.
Baffles for Raccoons: Mount the table higher or use a baffle to keep it a “squirrel-only zone.”
⚖️ Pros and Cons of a Squirrel Picnic Table
Pros: Feeder protection, high-quality entertainment, and cost-effectiveness.
Cons: Requires monthly cleaning, can attract nocturnal pests if messy, and untreated wood will be chewed.
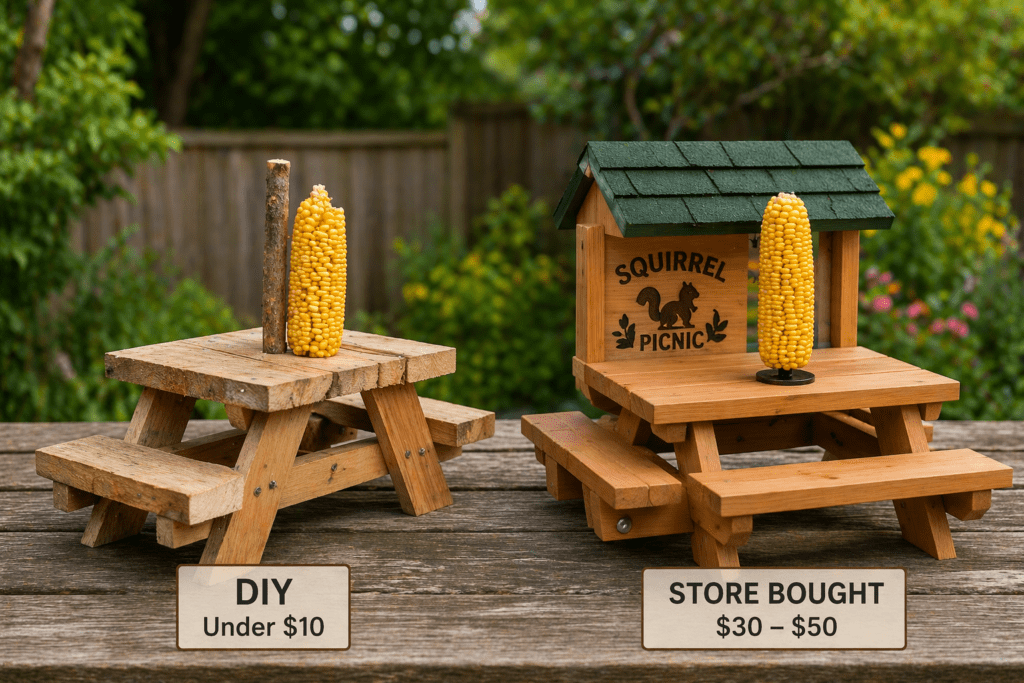
💸 DIY vs. Buying a Squirrel Picnic Table
If you have some scrap wood, a DIY table can cost as little as $5–$10. However, buying a store-bought table ($15–$35) is often the better move for specialized features. If you value your time and want something that looks “Pinterest-ready,” just buy the Cedar model.
🪵 Best Wood for a Squirrel Picnic Table
Cedar is the best choice because it naturally resists rot and insects. If you’re building your own, exterior-grade plywood works well when paired with a waterproofing wood sealant.
⏳ How Long Does a Squirrel Picnic Table Last?
Cedar: 2–5 years.
Exterior Plywood: 1–3 years.
Untreated Pine: Less than 1 year. This mistake alone can cost you $40+ in replacement costs.
FAQ: Squirrel Table Installation & Use
Does a picnic table actually stop squirrels from eating bird seed?
It significantly reduces raids by offering a more enticing, easier-to-access meal elsewhere.
What is the best food to put on the table?
Dried corn on the cob is the standard. A smear of peanut butter is the ultimate “discovery” bait.
Can I paint the table?
Only use non-toxic, water-based stains. Avoid lead-based paints.
🪵 Best Wood for a Squirrel Picnic Table
Cedar is the best choice because it naturally resists rot. If you are building your own, you can learn more about choosing the right panels in our comprehensive guide to plywood types. Avoid untreated pine, as it rarely lasts more than one season in wet conditions.
Final Verdict: The Insurance Your Bird Feeder Needs
If you want a backyard that functions without constant “squirrel wars,” the picnic table isn’t just a toy—it’s a management tool. The small upfront cost prevents the most common (and expensive) bird feeder failures homeowners face.
Ready to reclaim your yard? Make sure you have a solid bird feeder pole setup in place before you invite the squirrels to dinner.
Mastering the Art of Finishing Plywood for Stunning Results by Admin March 18, 2025 Finish Applying a finish to a woodworking project can be intimidating. A well-executed finish enhances the wood’s natural beauty, highlights craftsmanship, and gives the piece a…


")