One Saturday morning, I grabbed a couple of pine boards and carried them out to the driveway. A cool breeze was in the air, and the boards were still a little dusty from the hardware store. I brushed off some leaves, set the wood on sawhorses, and quickly sketched out a rough plan: one wide seat, two legs, and a single stretcher underneath.
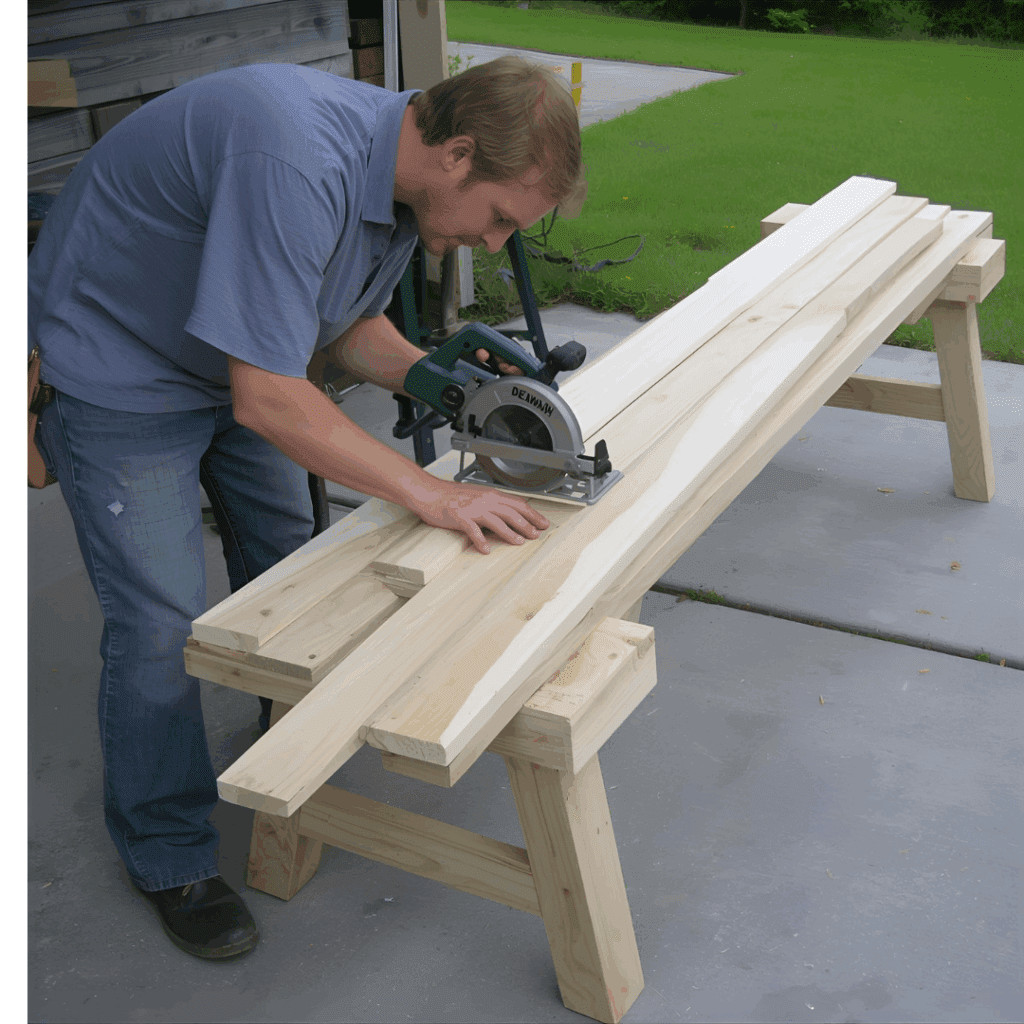
With only a circular saw, an old drill, and a well‑worn tape measure, I started cutting. The first slice through the pine released that fresh, resinous smell that always makes me pause for a second. I measured carefully, marked each line with a sharp pencil, and pre‑drilled the holes to avoid splitting the boards. By lunchtime, the frame was sturdy, and I spent the afternoon sanding the edges until they felt soft and smooth.
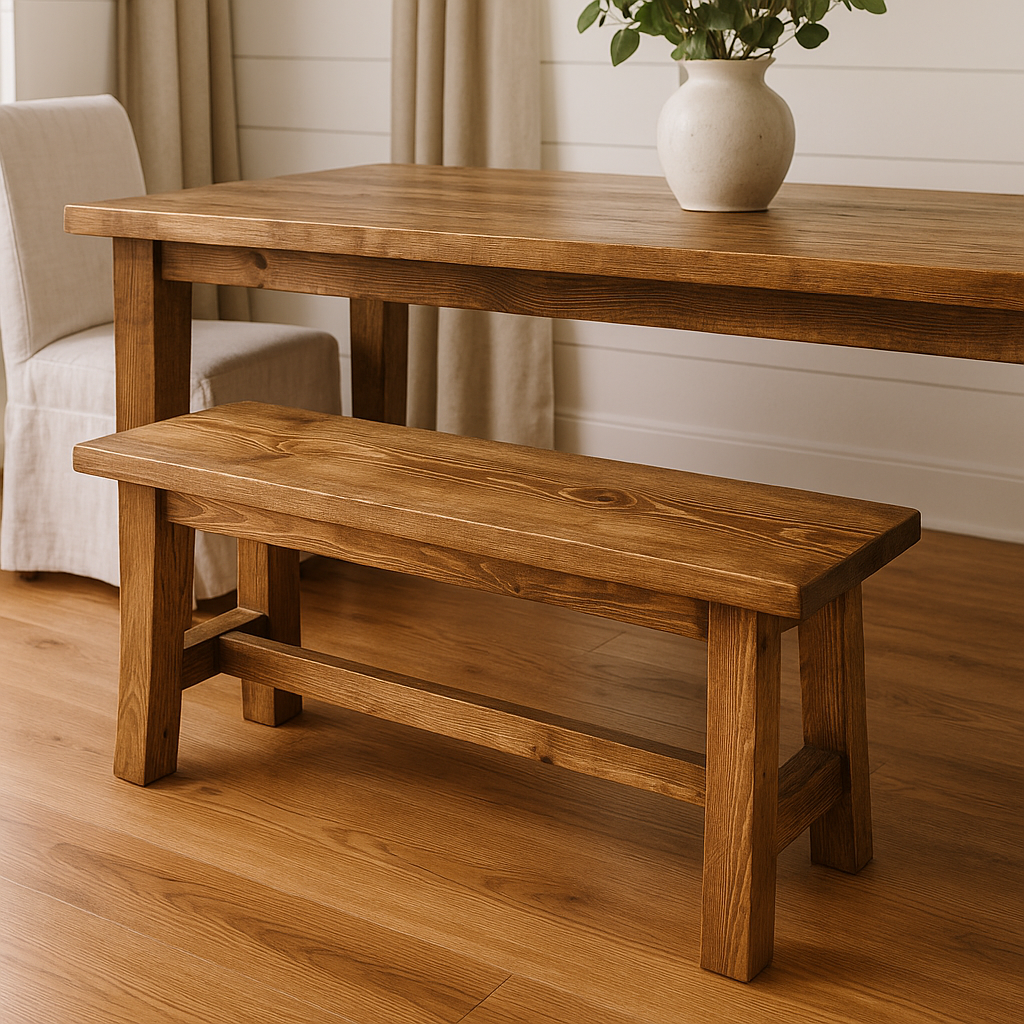
When the sun dipped low, I brushed on a warm walnut stain and wiped away the excess. The wood grain shimmered under a thin coat of protective finish. That night, I set the bench in our dining room. My kids jumped on it right away, laughing and using it as their new fort. Watching them play on something I built with my own hands gave me a quiet pride that no store‑bought bench could match.
If you’ve ever wanted to try your first woodworking project, start here. A simple farmhouse bench is forgiving, beginner‑friendly, and leaves you with a piece that truly feels like home.
Why Build Your Own Farmhouse Bench?
When I first started woodworking, a DIY farmhouse bench was my very first project. I wanted something practical, stylish, and easy to build without expensive tools. After building my first one, I realized that making your own bench is not only about saving money—it’s about learning fundamental woodworking skills and creating a unique piece for your home.
Here are some extended reasons to take on this beginner project:
Cost-effective – Building a bench yourself can cost $40–$75, compared to $200–$400 for store-bought versions.
Custom sizing – You can adjust the length to perfectly fit your dining table or entryway.
One reason I recommend this bench for beginners is that you don’t need a full woodworking shop to get started. The tools are basic, and the lumber is easy to find at any home improvement store.
Clamps (optional) – to hold boards while fastening
If you’ve never used a saw before, start with a circular saw. It’s easy to handle, and with a simple guide or speed square, you can make perfectly straight cuts.
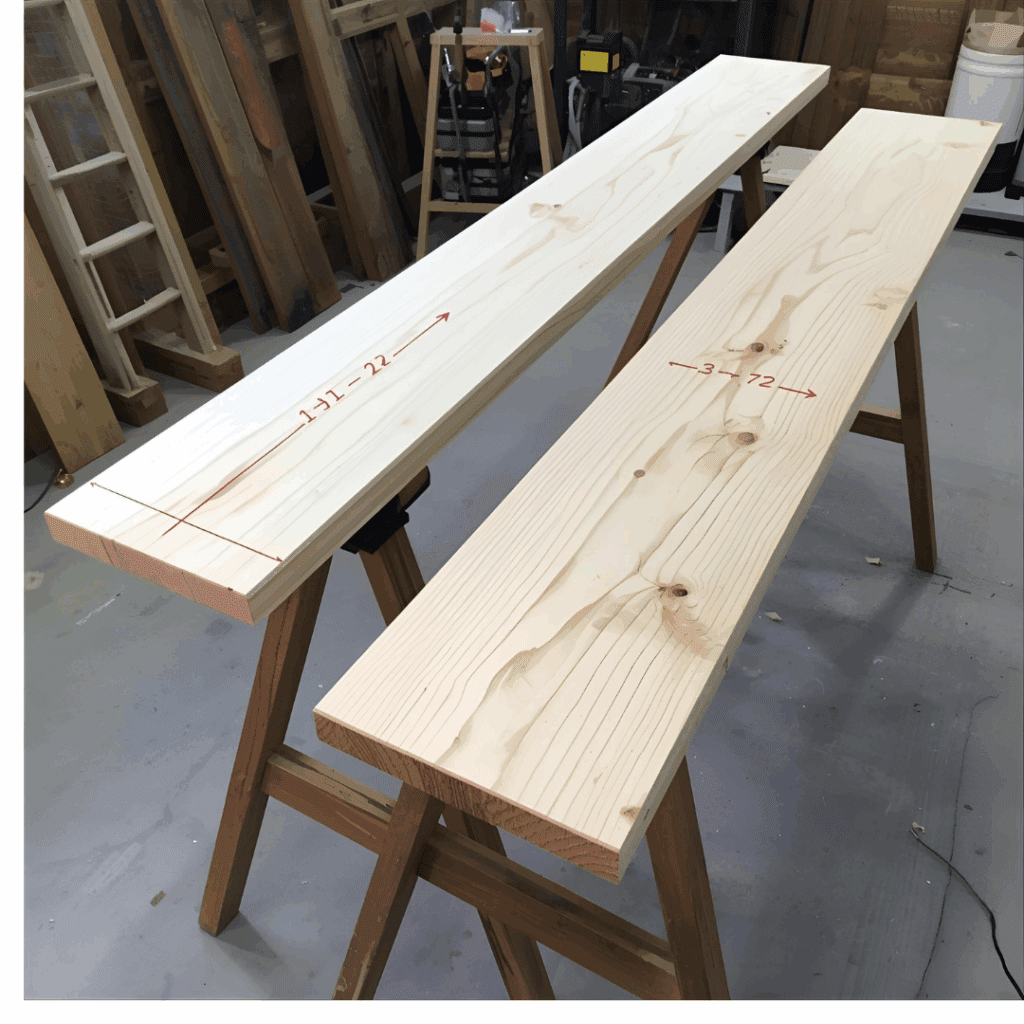
Step 1: Measure and Cut the Lumber
The first thing I did was drag my boards out into the driveway. I like to see what I’m working with—sometimes a 2×4 looks fine in the garage, and then you lay it flat and realize it’s got a bow in it. I flipped them around, picked the straightest sides for the cuts, and trimmed off a rough end or two.
For this bench, I went with:
Seat: 48″ long, roughly 10–12″ wide
Legs: about 17–18″ tall
Long stretcher: 40″
Optional center stretcher: same 40″ if you want extra support
I wasn’t chasing perfection. If I’m within a hair, that’s good enough for a bench.
A couple of things I always remind myself:
Measure twice, even if you’re “sure.” I’ve been wrong plenty.
Use a square and a sharp pencil—eyeballing lines is how I end up swearing.
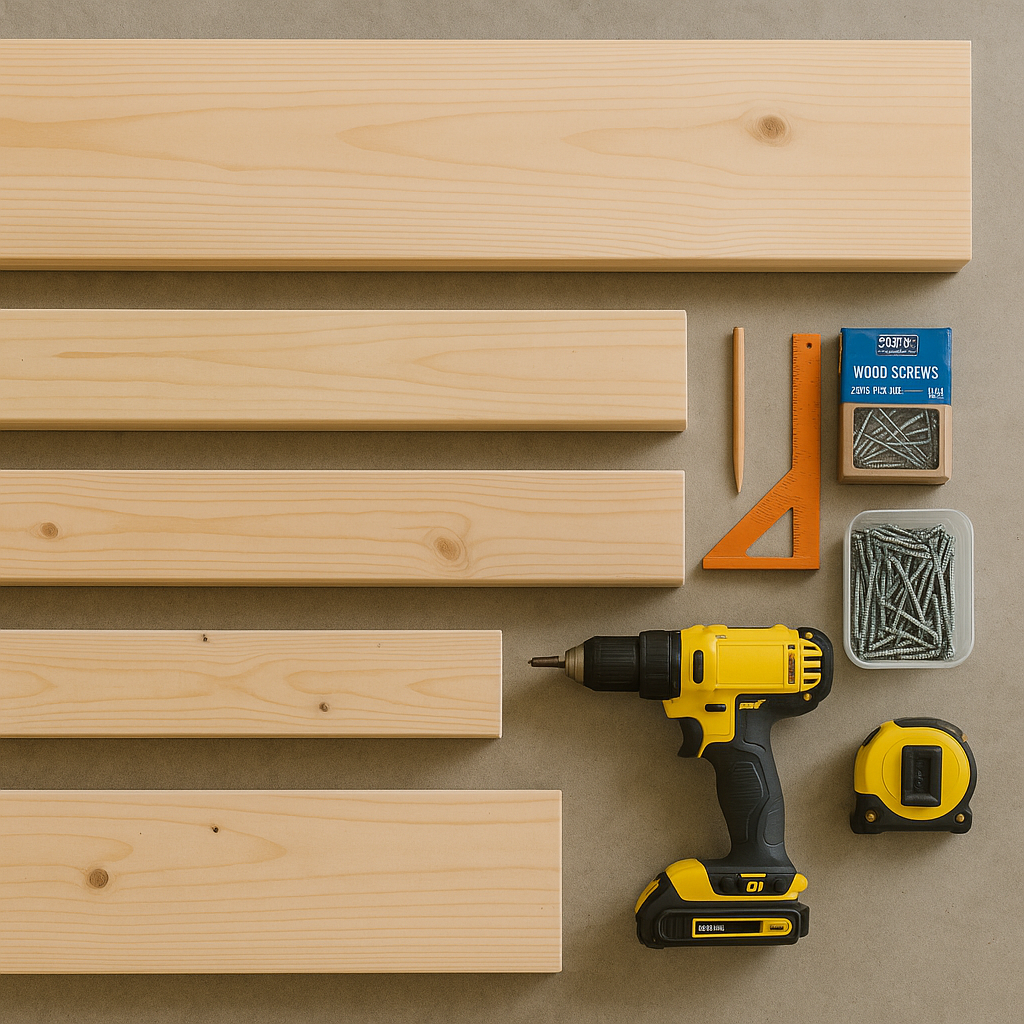
I cut all the pieces first and threw a bit of masking tape on each with a note: seat, leg, stretcher. Saves the “which board is this again?” headache later.
Once the cuts are done and the pieces are stacked, the fun part—actually putting it together—goes a lot faster.
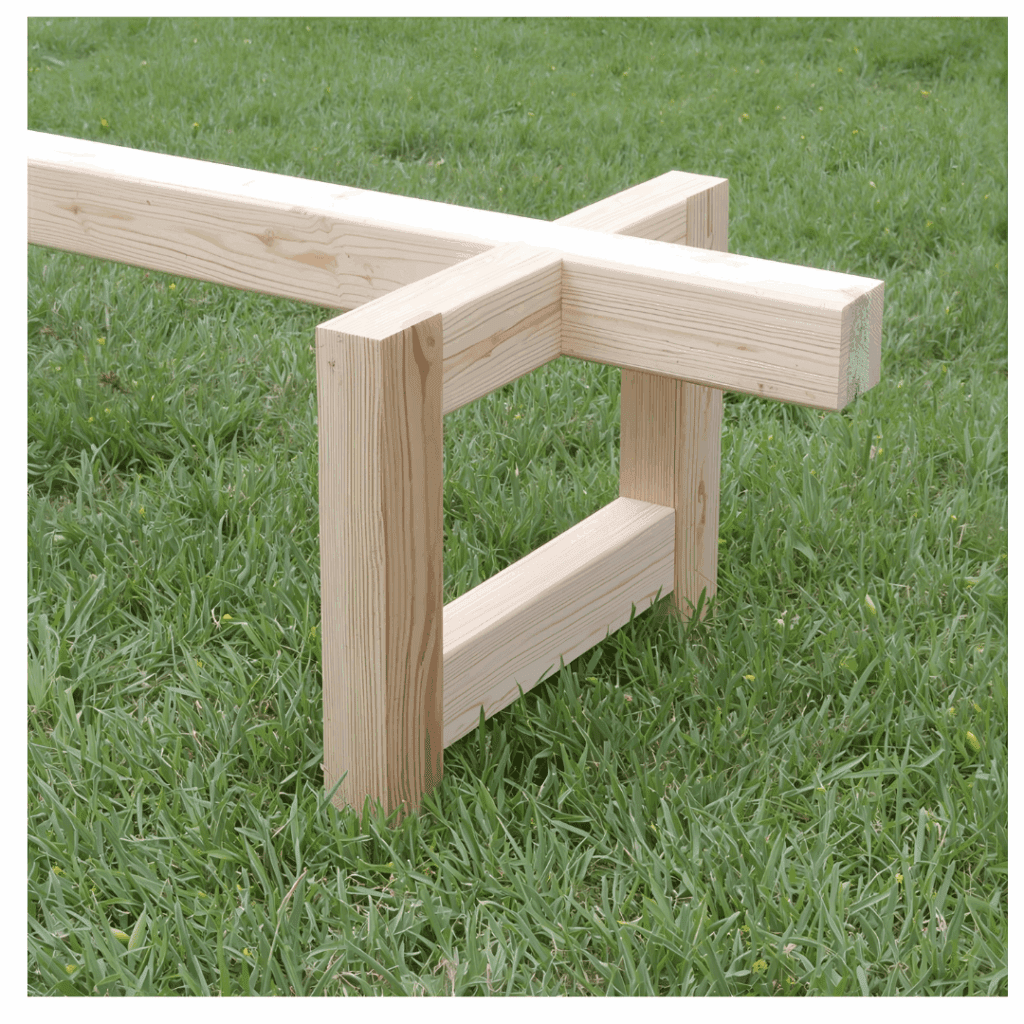
The legs are really what make this thing stand up, so I started with those. Each one is basically an “H” made out of 2x4s. Nothing fancy.
I cut two pieces for the verticals and one shorter piece for the crossbar. I like to lay everything out on the concrete first, just to see how it looks before I start screwing things together. Once it felt right, I glued the joints and ran in a couple of screws on each side.
If you want to dress it up a bit, you can shave a little angle off the bottoms of the legs so they don’t look so square. I’ve done it with a circular saw before—just a quick 10–15 degree cut—and it makes the bench feel more “farmhouse” without extra work. And if your bench is going to take a beating (kids, porch life, or both), adding a small diagonal brace to the “H” will keep it from wobbling over time.
Once both legs were done, I set them aside and got ready for the next step.
Pro Tip: Pocket holes create stronger joints and hide screws. The Kreg Pocket Hole Jig is a great beginner tool.
Step 3: Build the Bench Legs
I always start with the legs because once those are solid, the rest of the bench comes together fast. Each leg is just an “H” made from 2x4s.
I cut two pieces for the uprights and one for the crossbar. Before I touched the screws, I laid them out on the driveway to see how they all lined up. Once it looked square enough, I glued the joints and drove in a couple of screws.
If you want the legs to look a little nicer, shave a small angle off the bottoms—maybe 10 or 15 degrees. It’s quick, and it gives the bench that farmhouse feel. I’ve also added diagonal braces on benches that get a lot of use. They’re optional, but they keep the legs rock solid.
After both “H” shapes were built, I set them aside and swept the sawdust off my pants before moving to the next part.
Once your base is solid, it’s time to add the seat:
Flip the seat board upside down.
Center the assembled legs and stretcher on top.
Secure the seat with 2.5″ screws through the leg tops into the seat board.
I like to add a bead of wood glue along the top of the legs for extra stability. If your bench will be outdoors, use outdoor-rated glue and screws.
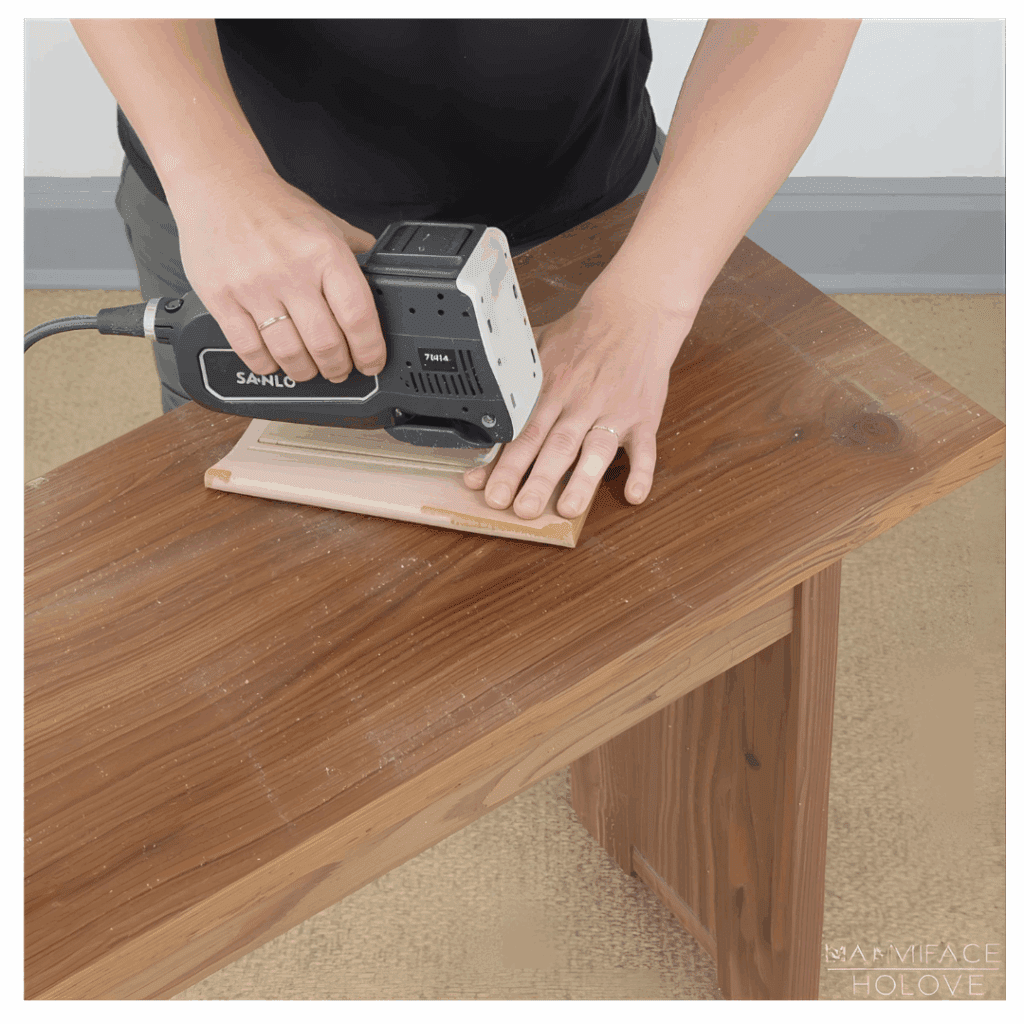
Step 5: Sand and Finish Your Farmhouse Bench
This is the part that turns a pile of lumber into something you want in your house.
First, run a hand along the edges—any spot that catches on a splinter gets a quick pass with sandpaper. Start with 80-grit to knock down the saw marks, move to 120 for a finer surface, and finish with 220 for that silky, ready-to-finish feel. The edges get lightly rounded as well, making sure no one scrapes their legs when sitting down.
Once it felt good, I wiped the whole thing with a damp rag to clear the dust and grabbed my finish. You can go in a lot of directions here:
Rustic: A simple vinegar-and-steel-wool mix will give the wood a weathered, aged look.
Classic farmhouse: I love Minwax Dark Walnut—it instantly makes pine look richer.
Modern farmhouse: Paint the legs white and leave the top natural or lightly stained.
After staining, I brush on a protective coat—polyurethane works great for dining benches since it can handle spills and messy kids. Once it dried, I sat on it, gave it a little shake, and finally called it done.
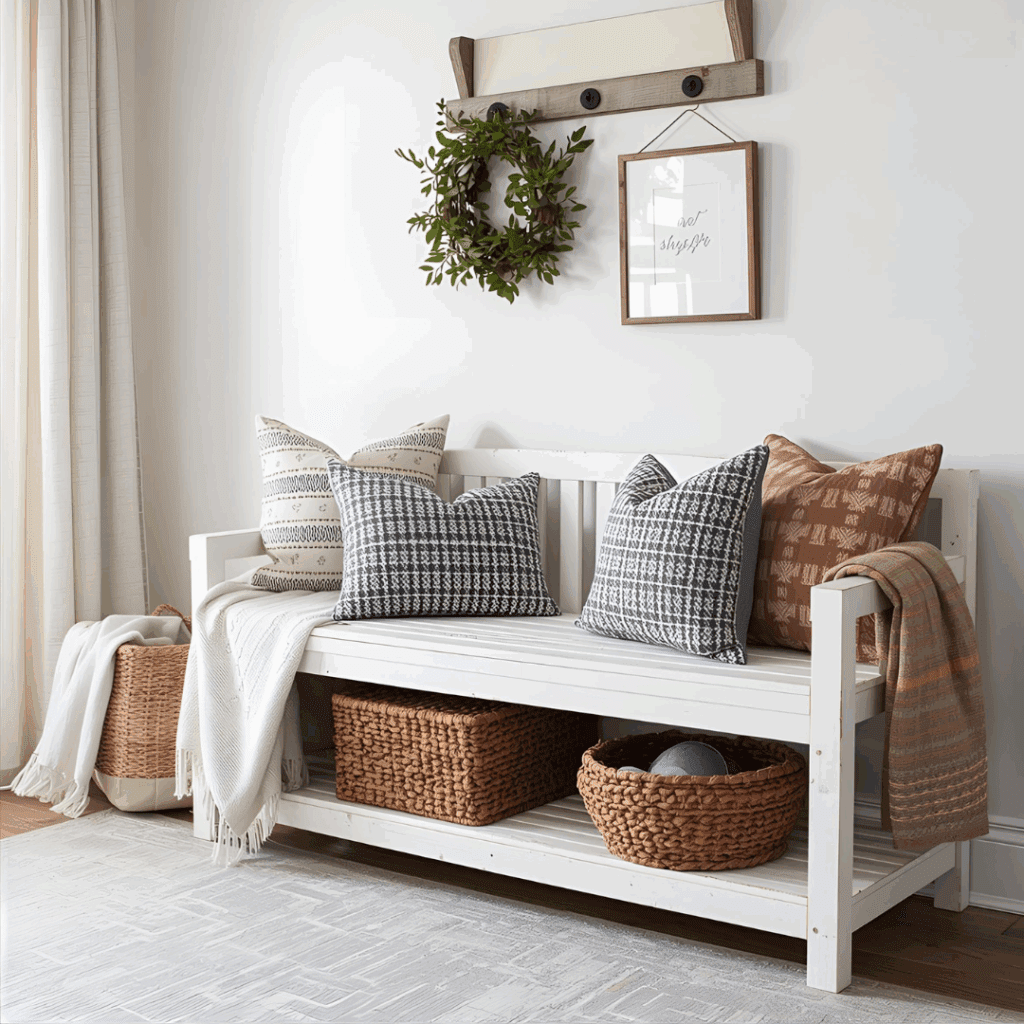
Styling and Decorating Your Farmhouse Bench
Once my bench was built and the finish had dried, the best part started—actually making it feel like it belonged in the house. A plain bench is nice, but a styled bench looks like it was always meant to be there.
Finding the Right Spot I moved mine around the house a couple of times before committing. In the dining room, it gave the table a laid-back, family-style vibe. Later, I tried it in the entryway with a couple of baskets under it for shoes—super handy when the kids come running in from outside. If your bench is sealed well, it’s also great on a porch or patio for that “sit and sip your coffee” moment in the morning.
Playing With the Seasons I realized a simple bench is like a blank canvas—you can dress it up however you want.
Spring: I put a small vase of daffodils and a pastel pillow on mine.
Summer: I usually keep it bare except for a woven basket or maybe a little herb pot.
Fall: Pumpkins, a plaid throw, and a lantern make it look cozy without much effort.
Winter: I’ve draped a faux fur throw across it and added a chunky pillow—it practically invites you to sit down with a cup of cocoa.
Little Details That Make It Yours Pillows, throws, baskets—those are easy wins. But if you really want your bench to feel personal, add something custom. I’ve seen people stencil their last name on the backrest (if you add one) or burn a small design into the corner of the seat with a woodburning tool. Even using a mix of stains or a light whitewash can make the bench feel like a one-of-a-kind piece.
Over time, I realized the bench changes with the house. Some weeks it’s seating, some weeks it’s a drop zone for shoes, and around the holidays it turns into a mini display. That’s the charm of a DIY piece—it grows with you.
Add decorative aprons under the seat for a polished look.
Use reclaimed wood for a vintage farmhouse feel.
Paint the legs and distress them with sandpaper for a shabby chic effect.
Upholster the seat for extra comfort.
Pro Tips for Beginners
Always check for level and square before final fastening.
Test the bench by gently rocking it before finishing.
Seal the wood if using the bench outdoors.
If you enjoy this project, you might also like DIY Shuffleboard Table for a fun weekend build.
Final Thoughts
A DIY farmhouse bench for beginners is the perfect first woodworking project: affordable, functional, and rewarding. In about a weekend, you’ll have a handmade bench that enhances your home and gives you the pride of creating it yourself.
Printable DIY farmhouse bench building plans with measurements and assembly instructions.
Maple Plywood DIY Guide: Projects & Finishing Tips by Admin August 23, 2025 Hardwood My First Experience With Maple Plywood When I first started messing with plywood, I honestly didn’t care what I was buying. Pine was cheap, easy…
Cedar Plywood: A Complete DIY & Builder’s Guide by Admin September 8, 2025 Softwood If you’ve ever stepped into a cedar-lined closet or opened an old cedar chest, you know the scent. That fresh, woodsy smell isn’t just nostalgic—it’s…