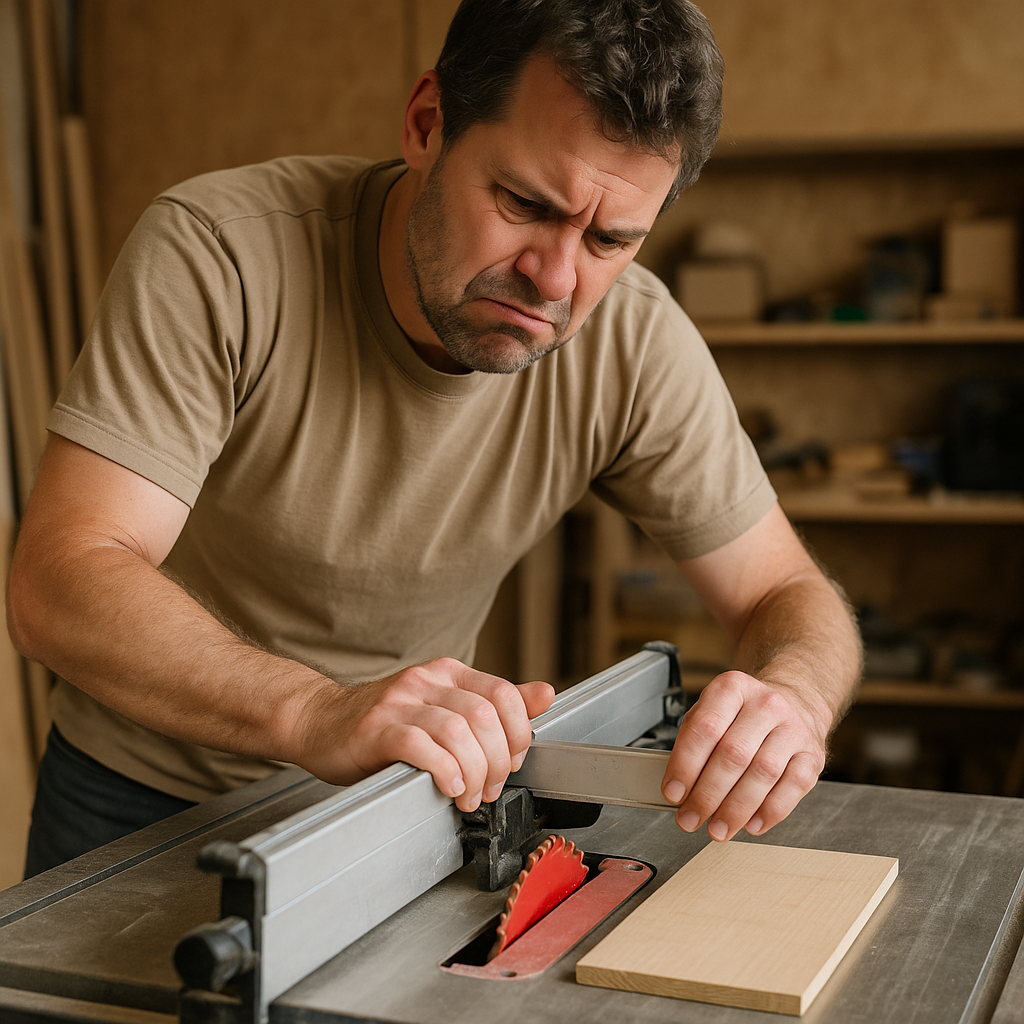
The table saw fence — I used to ignore it. Thought the blade did all the work. Keep it sharp, keep it spinning, and everything else would fall into place. Yeah… no. A fence that doesn’t lock square will mess you up fast. Wood starts drifting, the cut feels off, and sometimes the saw barks back with a kick that makes you jump.
My old contractor saw had one of those flimsy stock fences. I’d nudge it into place, tighten it down, and halfway through the cut, I could feel the board binding. You hear it too — that high, angry whine that says the blade’s fighting. I burned edges, wasted plywood, and said a few words I won’t repeat here. Finally, I gave in and bought a T-square fence. Night and day. Ripping a 4×8 sheet stopped being a wrestling match. Cuts ran smoothly, panels actually fit, and for once, I didn’t feel like the saw was out to get me.
A table saw fence is a straight guide that runs parallel to the saw blade. It acts as a reference edge, ensuring your stock stays aligned during the cut. Most fences ride along a set of front and rear rails, locking in place when you set the measurement.
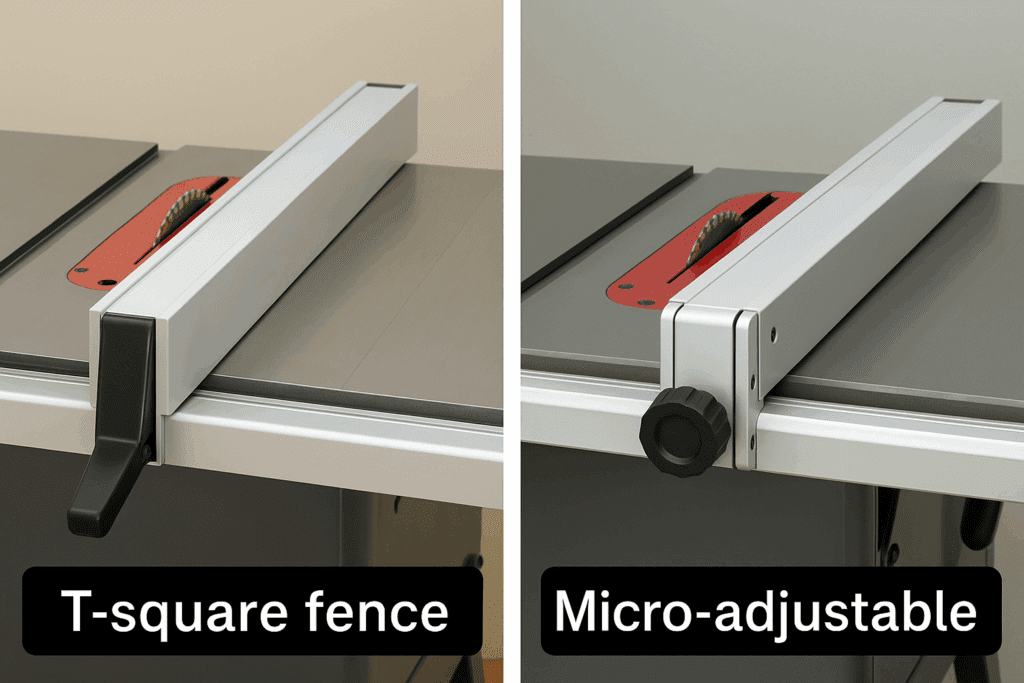
The two most common types are:
T-square fences – Named for their T-shaped head, they lock onto the front rail and stay perfectly square.
Micro-adjustable fences – Feature knobs that let you fine-tune the fence by fractions of a millimeter.
Without a fence, you’d be free-handing cuts — and that’s a recipe for waste, inaccuracy, and accidents.
Benefits of a Quality Fence
A cheap or flimsy fence can ruin your projects, but investing in a solid upgrade offers several advantages:
Perfectly straight cuts – Eliminates drift and wandering cuts.
Safety first – Keeps boards tight against the blade path, reducing kickback.
Repeatable accuracy – Lock the fence once and cut dozens of identical strips.
Expanded versatility – Attach jigs, sacrificial fences, or featherboards.
Better workflow – Spend less time re-measuring, more time building.
How to Choose the Right Table Saw Fence
Not every fence fits every saw, so you’ll want to consider:
Compatibility: Check your saw model and rail spacing.
Accuracy: A fence should lock down square every time.
Ease of Adjustment: Look for smooth sliding and micro-adjust features.
Durability: Steel and aluminum frames beat plastic.
Length: Longer fences support large panels better.
Amazon Picks: Best Table Saw Fence Upgrades
After testing and researching dozens of options, here are three standout fences for different budgets:
(Affiliate Disclaimer: As an Amazon Associate, we earn from qualifying purchases.)
Installing a Table Saw Fence
Swapping out a table saw fence looks simple on paper. Rails, bolts, a fence head — done, right? In reality, it’s more like tuning up an old guitar. You can rush it, but you’ll regret it later when the thing won’t stay in tune. Expect a couple of hours, maybe less if you don’t stop to sweep sawdust off the bench three times like I usually do.
Here’s how I go about it:
Tear out the old fence and rails Usually just a few bolts, but mine were packed with dust and stubborn from years of use. I’ve dropped enough screws on the floor to learn — keep a magnet tray handy. Saves your knees.
Bolt up the new rails I start with the front rail. Finger-tight only. Then I grab a straightedge and line it against the blade. If that rail’s even a hair off, you’ll chase crooked cuts forever. Once it looks right, I snug it up and do the same with the back rail.
Mount the fence head Sliding it on for the first time feels great — smooth and solid. But don’t trust it yet. I throw a framing square against the blade and nudge things until it’s dead on. A few taps with the heel of my hand usually get it right.
Check the measuring scale The rail tape is never accurate out of the box. I rip a piece of scrap, measure it with my trusty tape, and adjust the fence scale until both numbers agree. That’s when you know you can rely on it.
Run some test cuts I grab whatever scraps are lying around — 2×4 chunks, plywood strips. Push them through slowly. If the cuts line up, I know the fence is dialed. If not, back to adjusting.
Once it’s all set, the saw feels brand new. The fence glides across the rails, locks down with a firm click, and suddenly the saw works with you instead of against you. It’s one of those shop upgrades you wonder why you didn’t do sooner.
👉 Quick tip: blow off the rails before each cut. A single line of sawdust under there can throw things out just enough to mess up accuracy.
Not everyone is ready to shell out a few hundred dollars for a new table saw fence, and that’s okay. There are plenty of clever upgrades you can make with scrap plywood, clamps, and a little creativity. I’ve done all of these at some point, and honestly, a few of them stayed in my shop longer than I expected.
Add an auxiliary fence A strip of plywood or MDF screwed to the face of your existing fence gives you extra height. This makes handling tall stock — like cabinet sides or doors — much safer. I like to drill a couple of countersunk holes and use small screws so the add-on doesn’t shift mid-cut. Bonus: You can replace it anytime if it gets chewed up.
Clamp on a straightedge For quick rip cuts on smaller pieces, a straight board or aluminum guide clamped across the table works surprisingly well. It’s not fancy, but if you only need a few cuts and don’t want to wrestle with your main fence, this trick saves time.
Use featherboards and roller stands These are lifesavers when ripping long boards. Featherboards keep constant pressure against the fence, freeing up your hands, while roller stands support the weight so your board doesn’t dip or drag. If you’ve ever tried ripping an 8-foot 2×10 solo, you know how much difference this makes.
Build a sacrificial fence When cutting dadoes, rabbets, or grooves, you don’t want to damage your good fence. A simple plywood “sacrificial fence” screwed onto the face lets you run the blade right into it. This trick keeps your main fence clean and gives you more options for joinery cuts.
Experiment with T-track or stop blocks If you want to get fancy, rout a T-slot into an auxiliary fence. This lets you add stop blocks or jigs for repetitive cuts. It’s a simple upgrade that makes your fence far more versatile without spending big money.
The nice thing about DIY upgrades is that they let you experiment. You learn what works for your projects, and if you eventually buy a new fence system, you’ll already know which features matter most.
Even with the best fence, errors happen. Avoid these pitfalls:
❌ Skipping alignment checks – Always square the fence to the blade.
❌ Over-tightening locks – Can warp lighter fences.
❌ Ignoring dust buildup – Sawdust under rails affects accuracy.
❌ Using a fence for crosscuts – Never trap wood between the blade and the fence during crosscuts (use a miter gauge instead).
FAQs About Table Saw Fences
1. Can I build my own table saw fence? Sure — lots of folks knock one together with plywood, a bit of angle iron, and clamps. It’ll work for light cuts, but a factory fence locks tighter and adjusts quicker. Homemade is fine short term, but I wouldn’t rely on it forever.
2. How do I square a table saw fence? Unplug the saw, set a carpenter’s square against the blade, and bring the fence into line. On newer fences, you’ll often find set screws that let you fine-tune without much fuss.
3. Do I need to upgrade my stock fence? If it slips, drifts, or makes you measure twice just to trust it, then yes. A good fence turns even a budget saw into something you can actually depend on.
4. What’s the best fence for cutting plywood? Longer fences give more control. The Vega U50 is solid for full 4×8 sheets. I always use outfeed rollers, too — wrestling panels alone is asking for trouble.
5. Can a table saw fence work for dadoes? Yes, but don’t cut into your main fence. Screw on a scrap plywood face and let the blade run into that. Keeps your fence clean and cuts smoothly.
6. How often should I check fence alignment? Pretty often. I give mine a quick check before bigger jobs, and always after moving the saw. Bumps and vibration knock things out of line more than you’d think.
7. Should I buy a universal fence or a brand-specific one? Universal ones like the Shop Fox W1410 fit a wide range of saws. Brand-matched versions, like Delta’s, usually bolt up easier if you’ve got their saw already.
8. Can I use a router table fence on a table saw? You can, but it’s not ideal. Router fences flex too much under heavy ripping. For safety and accuracy, stick with a fence built for a table saw.
9. How much should I spend on a fence upgrade? Around $150–$400 covers most good systems. The pricier models last decades and feel smoother to use day in and day out.
10. Is a sliding table a substitute for a fence? Nope. Sliding tables are great for crosscuts and breaking down panels, but ripping boards still calls for a fence. They work best as a pair.
Final Thoughts
Your table saw is only as good as its fence. A sturdy, well-aligned table saw fence system not only improves accuracy but also makes woodworking safer and more enjoyable.
Whether you upgrade to a Delta, Shop Fox, or Vega system, or build your own auxiliary add-ons, the goal is the same: straight, repeatable, and safe cuts every time.
For my own shop, upgrading to a micro-adjustable T-square fence was one of the best investments I’ve made. It turned my saw into a precision machine and eliminated the frustration of misaligned cuts.
If you want to take your woodworking to the next level, start with your fence. Your projects — and your safety — will thank you.
Related Posts:
Table Saw Push Stick by Admin July 8, 2023 DIY Power tools can be dangerous but easy to use. People get injured all the time doing seemingly effortless, normal work on their power tools; often…
Miter Saw Table by Admin June 29, 2023 Installing The miter saw table has become one of the most useful power tools in many workshops, replacing the radial arm saw, which has all but…