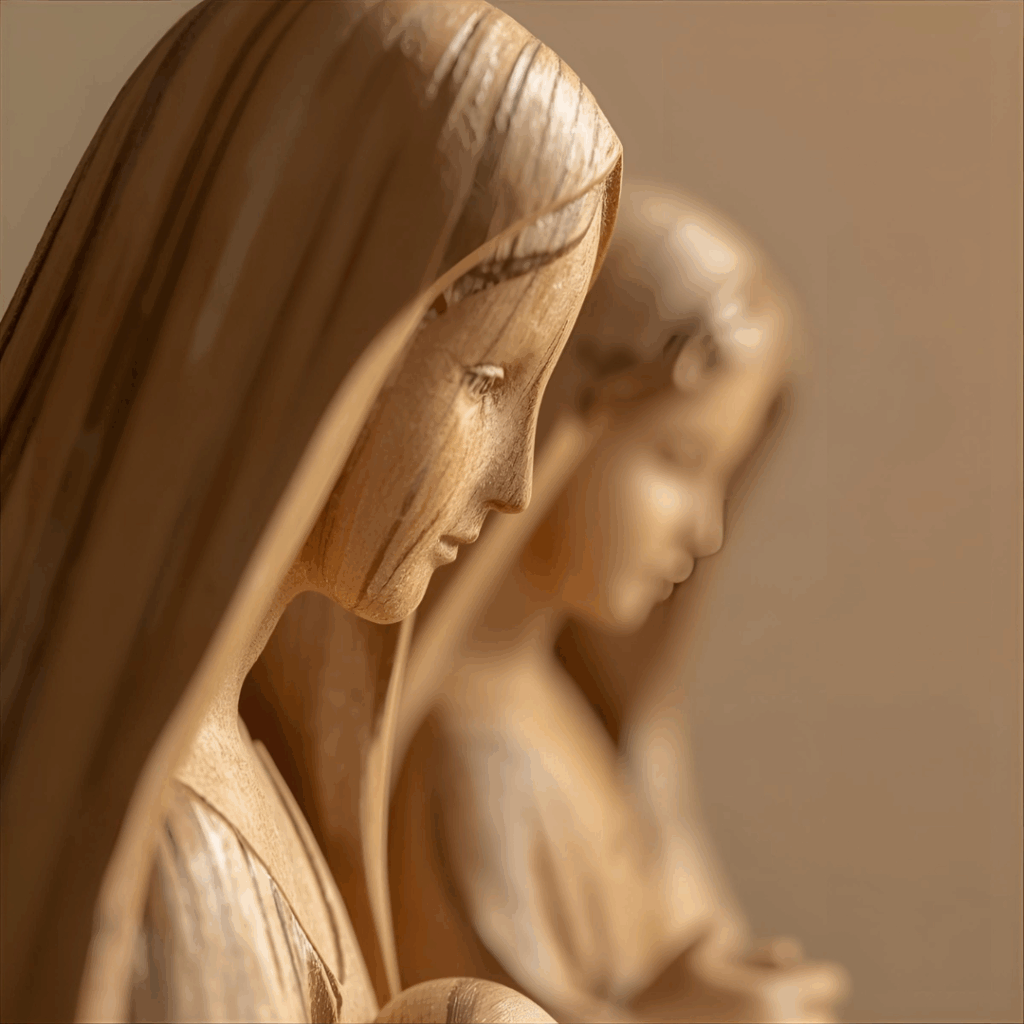
The nativity scene has been a Christmas symbol for centuries — a reminder of simplicity, faith, and craftsmanship. Long before plastic molds and store-bought figurines, families used to carve their own wooden scenes and pass them down for generations.
Building one yourself brings back that old-world charm. You get to choose the wood grain, carve soft edges that feel handmade, and paint with your own color palette. It’s one of those rare projects that mixes creativity, meaning, and woodworking in perfect balance. And unlike most DIY builds, a nativity set doesn’t need precision-cut joints or hidden screws — it’s about feel and expression more than perfection.
Choosing a Style for Your Nativity Set
Before you start cutting, take a few minutes to picture what you want this set to feel like. Some people like the rustic farmhouse look — rough edges, visible grain, soft stains that show the wood’s age. Others prefer a cleaner, Scandinavian style with simple lines and pale tones that fit easily into modern décor. And then there’s the colorful folk-art approach, where every piece bursts with pattern and paint. There’s no wrong choice, just what fits your home and your hands.
When I made my first nativity set, I didn’t have a clue what I was doing. I just wanted something for the table at Christmas. I grabbed a couple of scraps of plywood, sanded them a bit, slapped on some walnut stain, and figured that was enough. A week later, I saw a neighbor’s set—painted soft blue and cream—and it looked beautiful. Mine suddenly felt flat. Same idea, but theirs had warmth to it. That’s when I realized how much color changes the whole mood.
If you like that old-time feel, go with warm stains like golden oak or chestnut. Leave a few marks and rough spots. They make the wood look honest. For something clean and modern, sand everything until it’s smooth and paint with calm shades—off-white, pale green, maybe gray. Seal it with a light satin coat so it doesn’t glare.
If you’re more into color, just have fun. Mix a few bright paints, maybe add tiny dots or a touch of gold. Test everything first on scrap wood. Put it near a window and look again when the light changes. Morning sun and lamplight never look the same. When one feels right, you’ll know. From there, it’s easy—your hands just keep moving and the piece sort of finishes itself.
Tools and Materials You’ll Need
Don’t overthink it — most of what you need for this project fits easily on a small workbench.
Tools
Jigsaw or scroll saw
Dremel rotary tool with sanding and engraving bits
Sandpaper (120, 180, and 220 grit)
Small drill and bits (for holes or pegs)
Clamps
Wood glue
Small paintbrushes
Optional: carving knife or file for details
Materials
¼” or ½” birch plywood (for figures and base)
1×2 pine or poplar boards (for the stable structure)
You can use scraps of plywood left over from past projects — the beauty of this build is how little wood it actually needs.
Choosing the Right Wood
For smooth carving and a clean finish, birch plywood is your best choice. It’s stable, fine-grained, and holds paint beautifully. If you want a visible texture, oak plywood gives a rustic, traditional look. Avoid MDF or particle board; they crumble under detailed cuts.
If you’re making the stable or base, softwoods like pine or poplar work perfectly. They’re easy to glue and forgiving when drilling or screwing.
Plywood Grades Explained — it’ll help you identify smoother, higher-grade sheets for decorative projects like this.
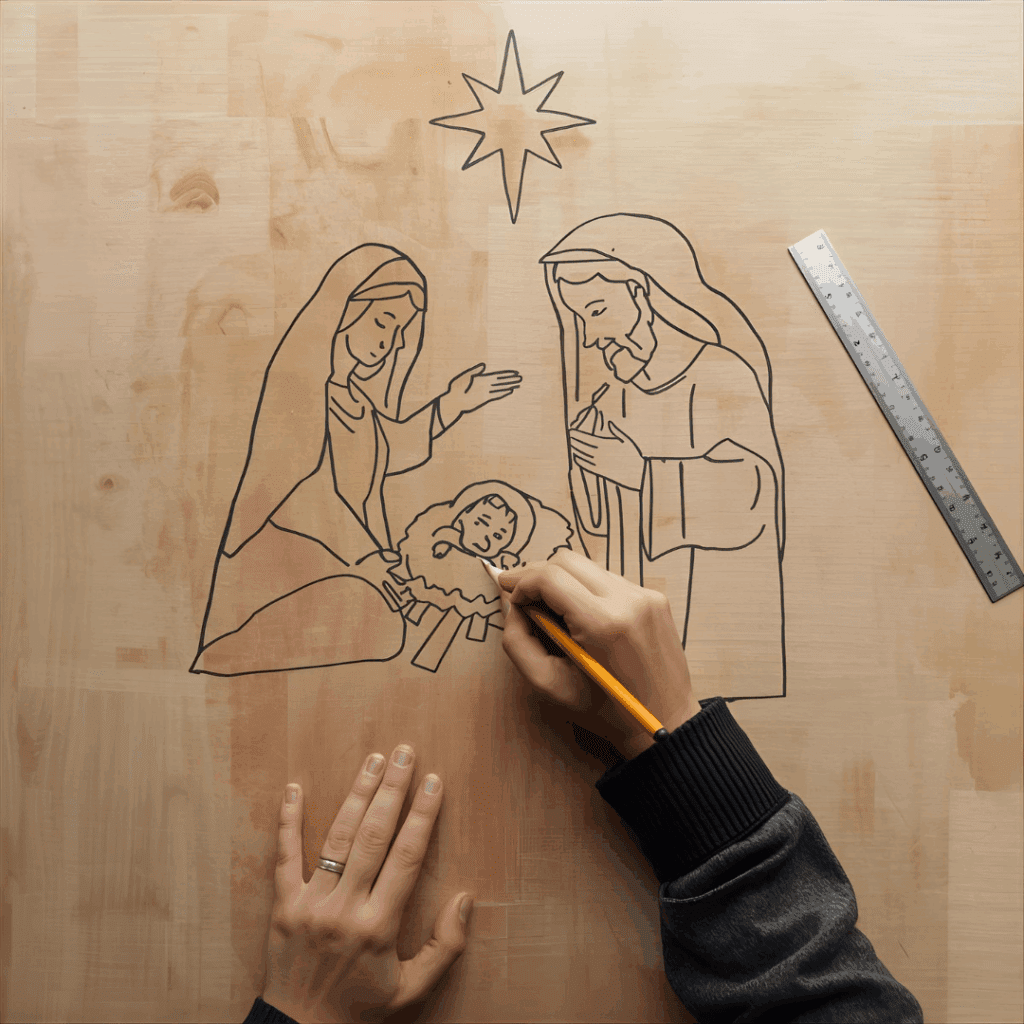
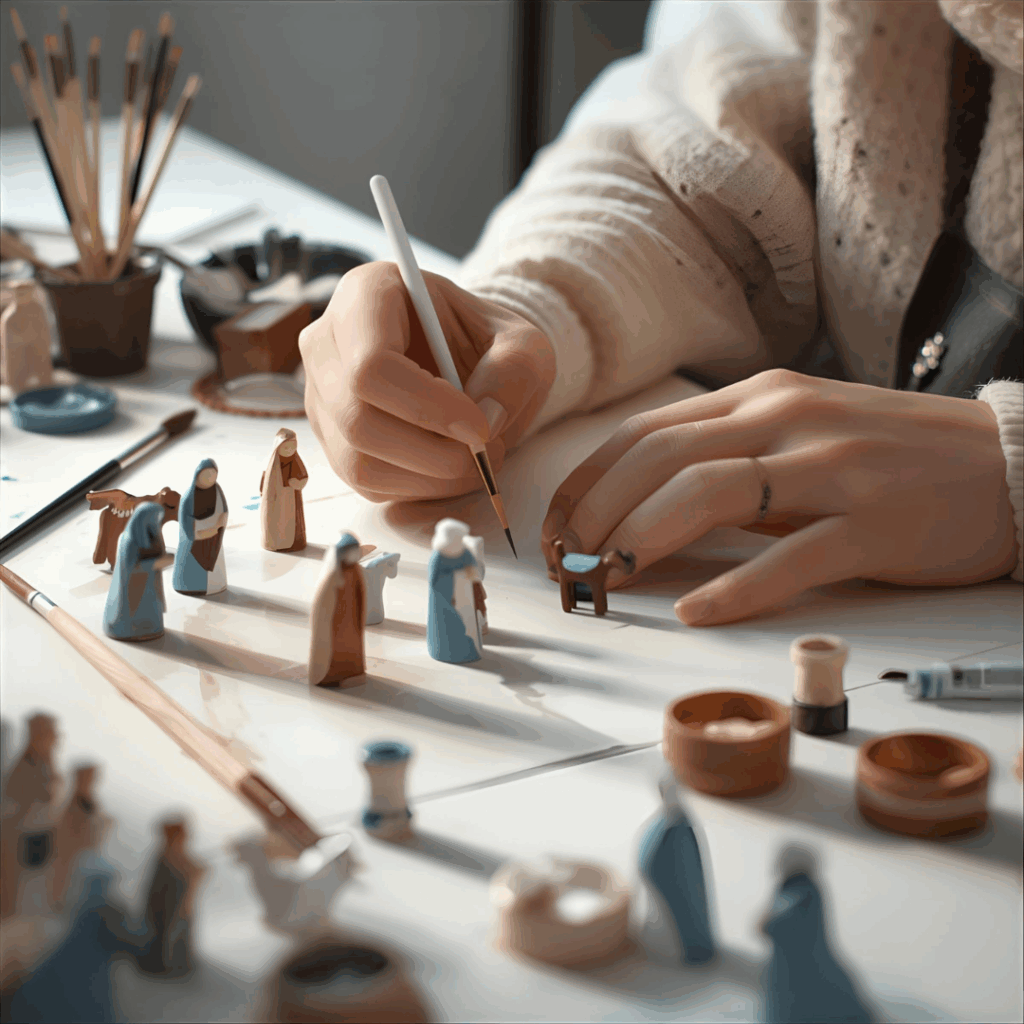
Step 1: Sketch Your Figures
Every great nativity set starts with a sketch. You don’t need to be an artist — think in silhouettes. Trace or print outlines of Mary, Joseph, baby Jesus, an angel, a shepherd, a few animals, and the star. Use a pencil to transfer the shapes onto your plywood.
Keep the tallest figures around 5–6 inches tall. The baby Jesus is approximately 2 inches tall, and the animals are slightly shorter. Scale everything to fit comfortably within a 12–18-inch-wide base.
If you’re comfortable with a digital template, you can even print silhouettes and glue them temporarily to the wood for cutting. This gives cleaner lines when you follow with a jigsaw.
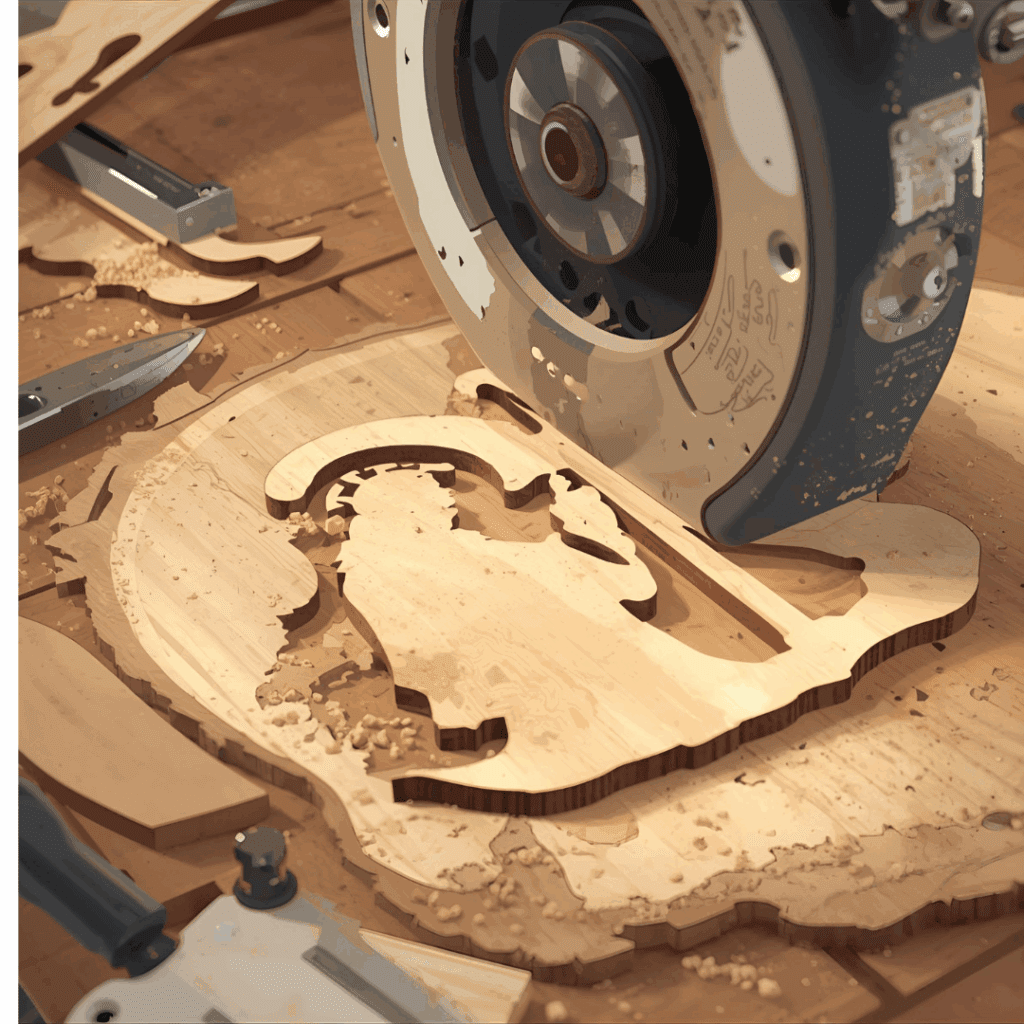
Step 2: Cut the Shapes
Clamp your plywood securely to your work surface. Using your jigsaw or scroll saw, slowly follow each outline. Let the blade do the work — pushing too fast will splinter the thin wood.
When all your pieces are cut, sand the edges lightly with 120-grit paper, then refine with 220-grit. You’ll immediately see the difference: soft curves and edges that feel pleasant to the touch.
If you’re using a Dremel, this is the moment to play. The sanding drum can add folds to cloaks, fur textures on animals, or even gentle indentations for faces. Don’t aim for perfection — the slight imperfections give it warmth and charm.
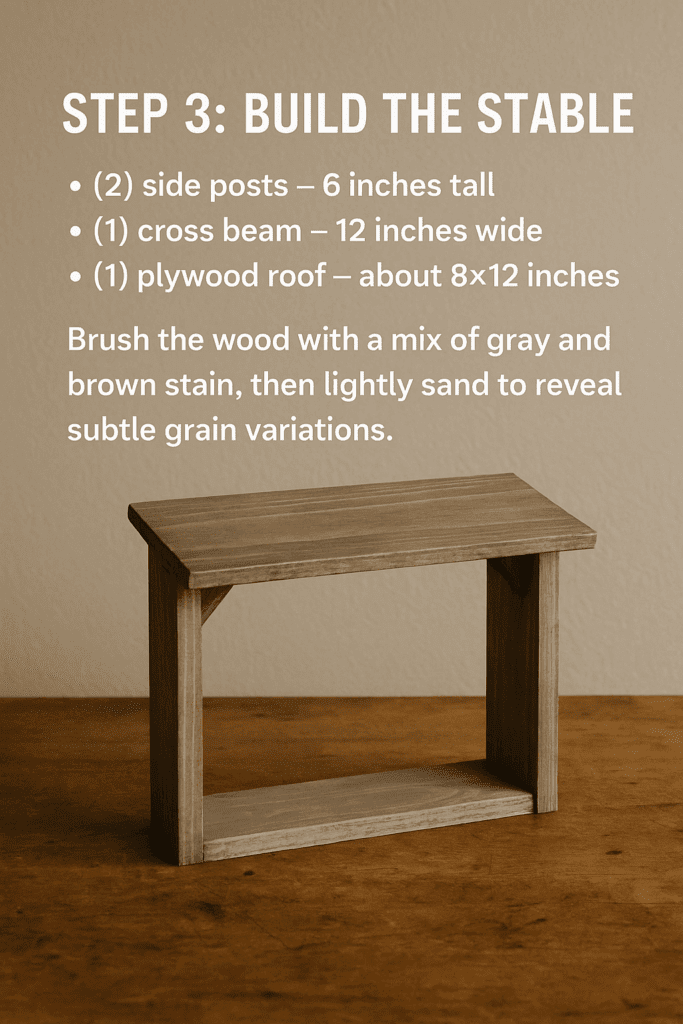
Step 3: Build the Stable Nativity Set
The stable is the heart of your display. It doesn’t need to be ornate, just sturdy enough to hold your figures and light.
Cut your 1×2 pine boards as follows:
(2) side posts – 6 inches tall
(1) cross beam – 12 inches wide
(1) plywood roof – about 8×12 inches
Glue and clamp the frame together, then add the roof. You can attach it with small finishing nails or wood screws. If you prefer the aged-barn look, brush the wood with a mix of gray and brown stain, then lightly sand it when dry to reveal subtle grain variations.
Want a sleeker design? Paint the stable a solid color (black or white) and keep your figures natural — it gives a clean Scandinavian look.
Step 4: Sand and Smooth Everything
Before painting or staining, make sure all your figures and the stable are smooth. Use 180-grit to round the edges and 220-grit for the final pass. Wipe everything with a slightly damp cloth to remove dust.
A light hand sanding between coats of paint or sealer will give you a silky, professional finish.
Option 1 – Natural Finish: Apply a light stain such as honey pine or walnut, then seal with clear polyurethane. The grain patterns give each piece personality.
Option 2 – Painted Finish: Use acrylic paints. Stick to muted earth tones — terracotta, cream, soft blue, and brown — for an elegant look. Thin your paint slightly with water for a washed, vintage effect.
Let each coat dry before adding details. Please don’t overdo it; sometimes a simple outline and a hint of color tell the story best.
When finished, seal everything with a clear Polycrylic coat for protection.
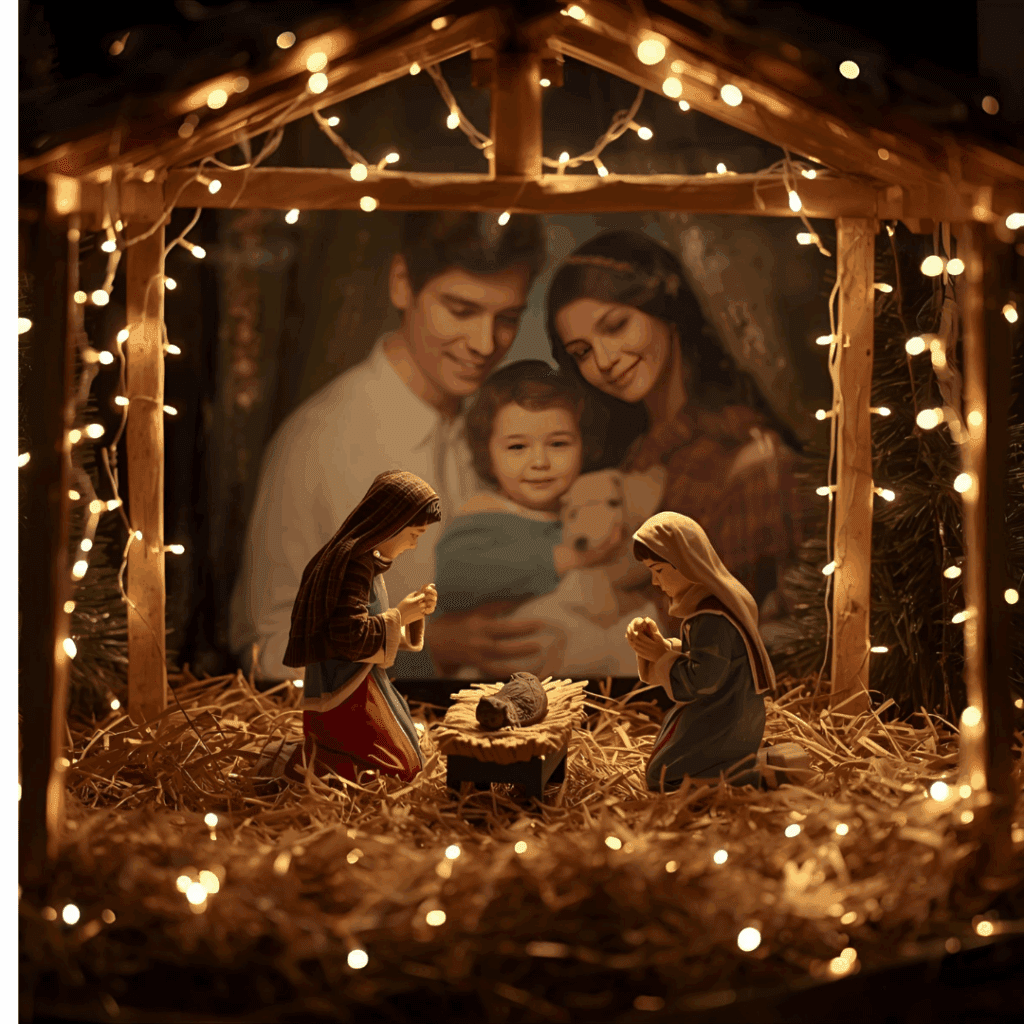
Step 6: Assemble and Arrange
Attach your stable to a small plywood base using screws or glue. Arrange the figures around the manger scene, starting with the Holy Family at the center. Use wood glue or a drop of hot glue to fix pieces in place if you prefer a permanent display.
If you want to swap figures seasonally or reposition them, consider drilling small holes under the base and using pegs for removable placement.
For ambiance, hide a small LED tealight behind the manger. The glow gives a lifelike warmth that turns a simple set into something magical.
Add a thin layer of hay or raffia beneath the stable for realism.
Glue a small wooden star or use gold foil above the roofline.
Line the base with a narrow strip of burlap or felt for contrast.
If you’re making this as a family project, let the kids paint small animals or the star. Imperfect brushstrokes make it more personal.
Step 8: Protect and Store
Once the season ends, wrap each piece in soft cloth or tissue and store in a dry box. Avoid plastic bags — they trap moisture and cause cracking. If you notice dull spots the following year, wipe them with a fresh coat of clear sealer and let it dry overnight.
Your DIY nativity set can last decades with just this simple care.
Tips for Personalizing Your Nativity Scene
I never start this part with a plan. I just mess around until something feels right. The shop’s usually cold, the radio’s on low, and there’s sawdust on everything. I grab a scrap, sketch a line, and change my mind halfway through. That’s how most of my best details happen.
The first year I made a set, the jigsaw slipped and left a nick on Joseph’s arm. I stared at it for a while, thinking I’d ruined it. Then I sanded the edges and decided it looked like a fold in his sleeve. Funny how mistakes fix themselves if you let them.
I’ve used whatever’s nearby for details—an old nail to scratch the year on the base, a bit of tin foil for a star. My daughter once painted a crooked blue stripe on Mary’s robe; I left it. She was five. Every year we unpack the box, she points at that line and laughs. That’s the good stuff.
If you’re making your own, leave space for those moments. Maybe burn your initials under the roof, or glue a scrap of fabric from an old shirt inside the stable. Add a tiny bird, a cat, a sliver of straw from your backyard. Don’t worry if things don’t line up. When you see it later—the uneven paint, the thumbprint in the stain—you’ll remember the day you built it, not the part you got “right.”
Step 9: Passing Down a Handmade Tradition
There’s a moment that hits me every year when I see my kids arrange the same nativity figures I cut and painted long ago. Their little fingers place each one just slightly off center, but that’s the beauty of it.
A store-bought nativity might look perfect, but a handmade one feels alive — it tells a story that continues to grow. When you make something by hand, you’re not just crafting wood — you’re shaping memory.
That’s what makes this project so satisfying. It’s more than décor; it’s something that connects generations.
Final Thoughts
Making your own nativity set doesn’t just fill a shelf — it fills your home with warmth. You’ll hear the saw hum, smell the pine dust, and feel the calm of creating something meaningful. It’s woodworking with purpose, a small weekend project that turns into a family heirloom.
When the holidays arrive, your handmade nativity scene will remind you why you build — not for perfection, but for connection. That’s the real beauty of crafting with wood.
Related Posts:
How to Make a Wooden Bowl: A Step-by-Step Guide by Admin March 8, 2025 DIY Crafting a handmade wooden bowl is a fun and rewarding project. Whether you're a beginner or an experienced woodworker, this guide will help you easily…


")


")
