I didn’t start using Rhino lining plywood because I wanted something extreme or clever. I ended up there because I got tired of replacing plywood that should have lasted longer.
If you’ve built anything outdoors with plywood — a trailer floor, a ramp, a shed base, a truck bed insert — you’ve probably gone through the same cycle. You choose exterior plywood. You seal it. You paint it. Maybe you even feel proud of how thorough you were.
Then a year or two goes by.
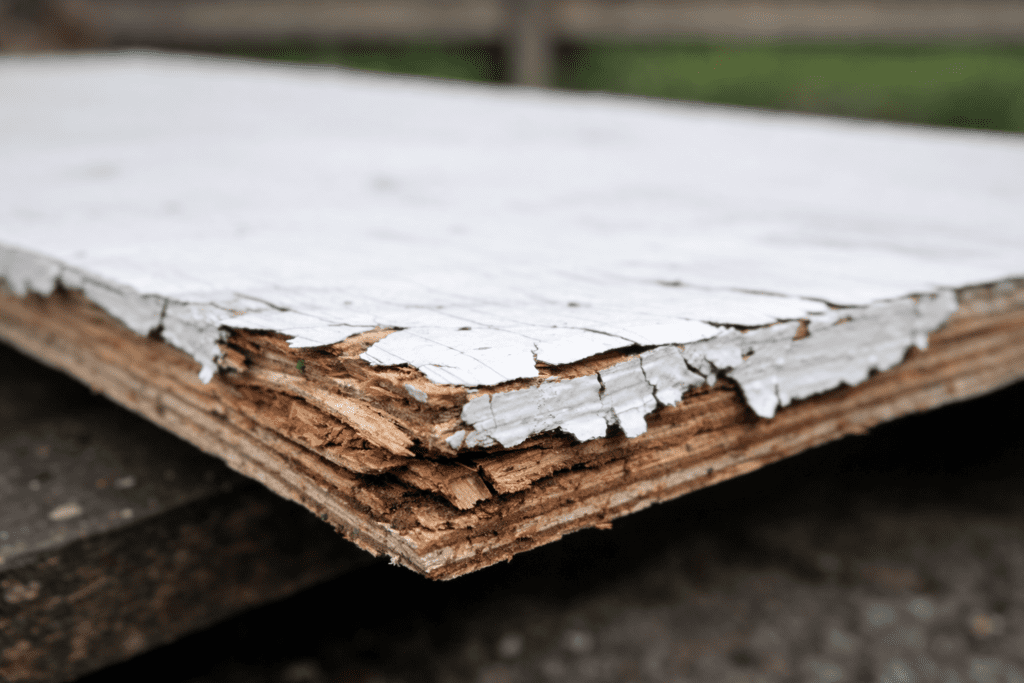
Nothing catastrophic happens. It’s worse than that. The plywood just slowly starts letting you down. The edges swell a little. The fasteners don’t feel as tight. The surface still looks okay, but you know it’s not the same.
That’s where this story starts.
I didn’t realize it at the time, but this was my first real step toward Rhino lining plywood as a long-term solution instead of another temporary fix.
This article isn’t a theory. It’s what I learned after actually coating plywood with bed liner, living with it, and seeing where it works, where it doesn’t, and what makes the difference between success and disappointment.
Why I Started Looking for Something Tougher Than Paint
Paint was just what I used. I didn’t really think about it much at the time. If plywood was going outside, paint was applied to it. Sometimes exterior paint, sometimes porch or deck paint, sometimes whatever can was already open. It looked sealed when it dried, and that was usually enough to move on.
Most of the problems showed up later, not all at once. Edges that didn’t feel right anymore. Spots that seemed different from what they had been. I noticed those things without really connecting them to anything specific.
At some point, I tried polyurethane. I couldn’t tell you which project it was. I remember using oil-based paint because it took longer to dry and felt tougher. It held up better at first, but the surface always changed once things started sliding across it. Not broken, just worn down faster than I expected.
Epoxy came after that. It felt more serious. Mixing it, waiting, watching it cure. The plywood didn’t feel like plywood anymore once it hardened, and I liked that. I thought that was the whole idea.
What I didn’t expect was how easy it was for one small spot to change everything. A chip near a screw. I didn’t even notice it right away. When I did, something underneath had already shifted. The surface still looked fine, which made it harder to catch.
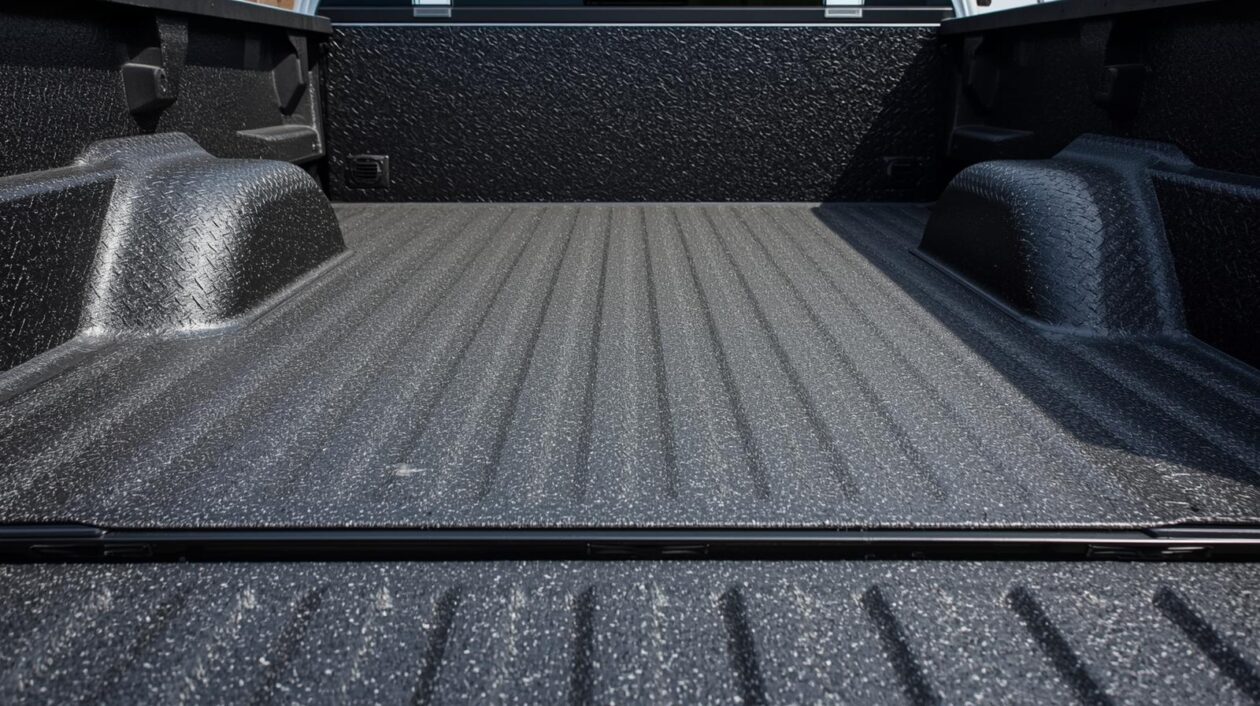
The thing that stuck with me wasn’t fixing my own work. It was standing on someone else’s trailer floor years later. Plywood with bed liner on it. Not clean, not smooth, clearly used. But solid. The edges weren’t soft. It didn’t flex the way mine usually did by that point.
That floor had been around longer than more than one of my own.
What Rhino Lining Plywood Actually Does to Wood
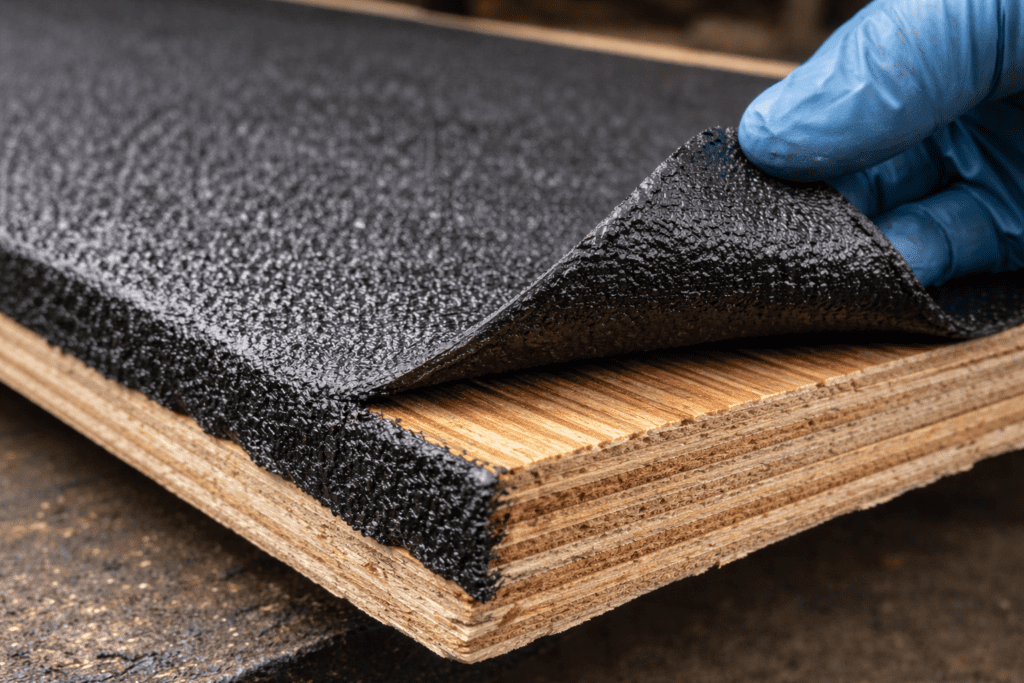
“Rhino lining plywood” isn’t a special wood product. It’s plywood coated with the same kind of protective liner used in truck beds.
The term comes from Rhino Linings, but the idea applies to other polyurethane and polyurea bed liners as well.
What makes this type of coating different isn’t hardness — it’s flexibility.
Plywood expands and contracts with humidity. It flexes under load. Hard coatings resist that movement until they crack. Bed liner behaves differently. It stretches. It absorbs impact. It deforms and recovers instead of breaking.
That flexibility is why bed liner survives where paint and epoxy eventually fail.
Mistakes I Made the First Time I Tried This
When I finished the first panel, I remember thinking it had gone about as well as it could have. The liner went on evenly, nothing looked thin, and there wasn’t anything obvious that felt wrong. At the time, I didn’t spend much energy second-guessing it. I had other things to work on, and this part felt checked off.
It wasn’t until much later that I started noticing small differences. Not damage, exactly. Just certain areas behaving differently than others. The surface still looked fine, which made it harder to tell what was actually changing.
The edges were the first places that caught my attention, although even then it wasn’t obvious what they were trying to tell me. They didn’t fail all at once. They just didn’t feel the same way the rest of the panel did, and that feeling kept coming back.
I hadn’t treated the edges as anything separate when I started. Everything got coated the same way, and I assumed that was enough. Looking back, that assumption probably carried more weight than I realized at the time.
After that first attempt, I started handling the edges differently. Not because I had some clear rule in mind, but because ignoring them seemed to be where things drifted first. Treating them separately didn’t fix everything or make the process cleaner, but it did change how the panel held up over time.
It wasn’t a dramatic difference. Just enough to notice — which, in hindsight, mattered more than I expected.
Choosing the Right Plywood Before Adding a Bed Liner
Speaking from experience, no coating fixes bad plywood. I’ve tested this y more than once, and interior plywood still fails. MDF still swells. Particleboard still turns to mush.
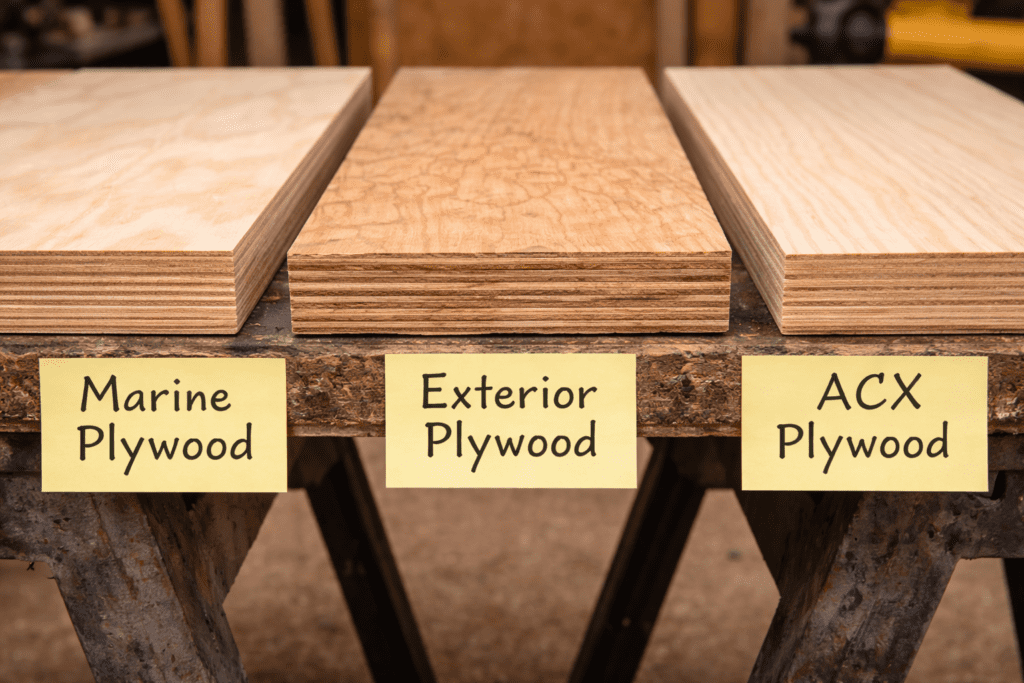
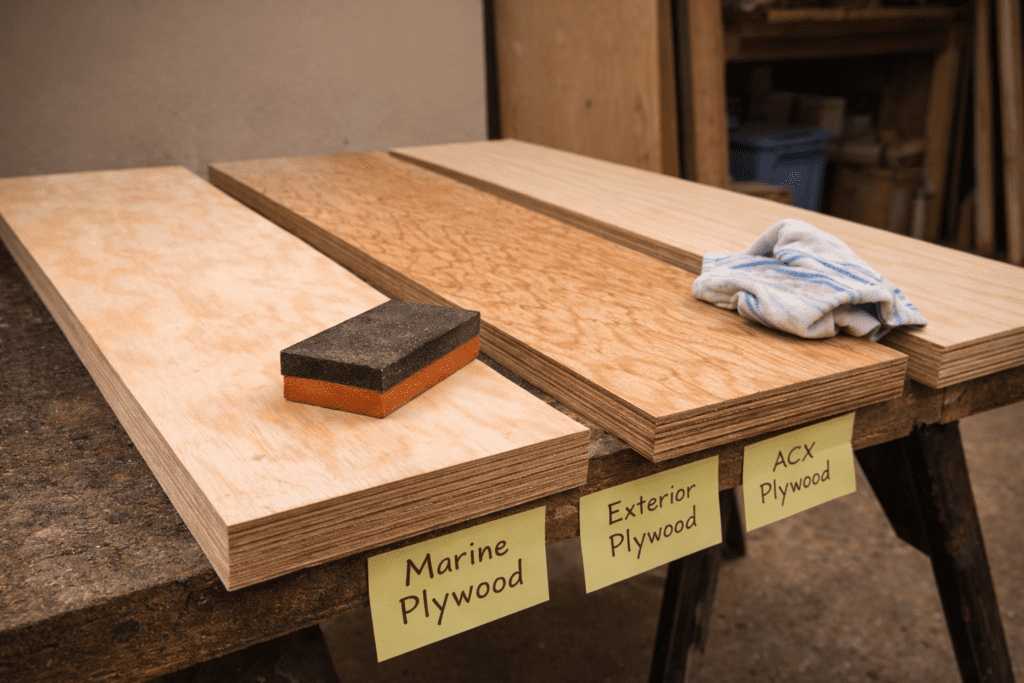
For projects where I plan to use bed liner, I stick to three types:
Marine plywood for permanent or structural builds
Exterior plywood for trailers, ramps, and sheds
ACX plywood when I want a smoother face under the coating
If you’re unsure which to use, it helps to understand the differences between ACX plywood, exterior plywood, and marine plywood before you coat anything. The liner protects the surface, but the core still has to do its job.
Prep Work That Determines Whether Rhino-Lined Plywood Lasts
This is the part I always underestimate, even though it’s the part that causes the most problems later. It doesn’t feel productive, and it doesn’t look like progress, which is probably why it’s so easy to rush past.
I’ve learned to pay attention to how the plywood feels before anything else happens. If it still feels cool, I leave it alone. Sometimes that means bringing sheets inside and forgetting about them for a couple of days. Sometimes longer. There isn’t a fixed rule — it’s more about not forcing the process before the material is ready.
I don’t sand much at this stage. Just enough to knock down the surface and break that factory sheen so the coating has something to grab onto. Going too smooth never helped me here.
Cleaning matters more than I thought it would. Dust, fingerprints, whatever’s left behind from handling — all of it shows up later if it’s ignored. Once that’s taken care of, everything else finally starts to make sense.
Only then do I even think about opening the liner.
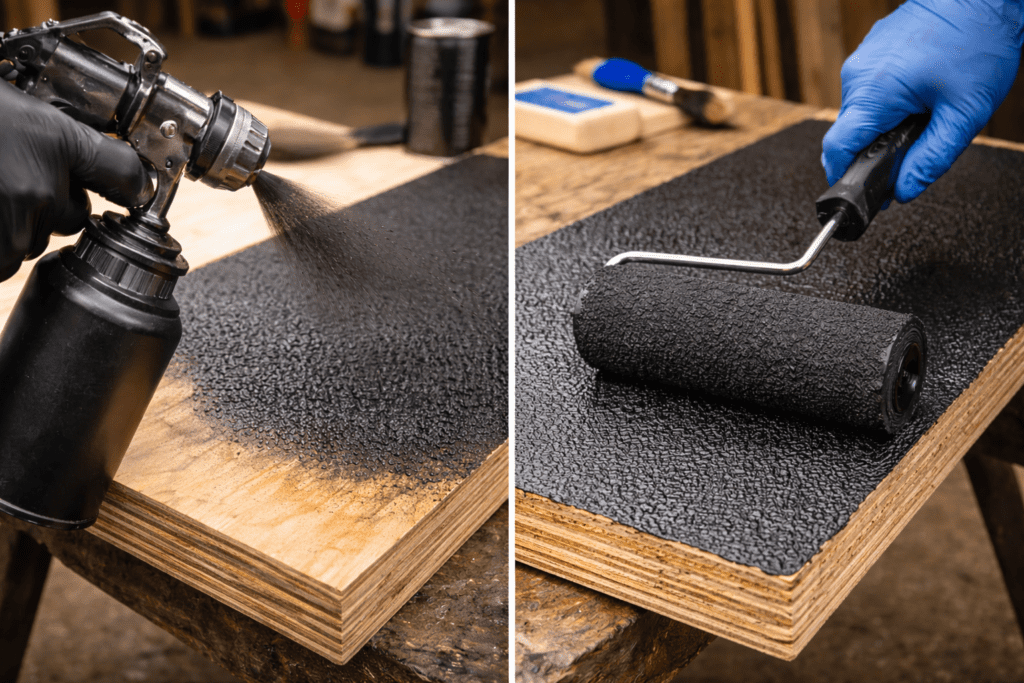
Applying a Bed Liner to Plywood (What Worked for Me)
This was something I didn’t really think about much at first. Once the liner cured and everything looked uniform, it was easy to assume the job was finished. Nothing felt wrong right away, and there wasn’t an obvious signal that anything needed to be different.
What changed over time was the way the surface reacted to use. Not in a dramatic way — more subtle than that. Some areas felt slightly different under pressure, especially on panels that flexed even a little. It wasn’t enough to point to one mistake, but it kept showing up often enough to get my attention.
After a few projects, I stopped trying to get there in one pass. I let the coating build up more gradually and gave it more time between applications. The surface ended up feeling less stressed that way, like it could move without fighting itself.
Any time I tried to stretch the material too far, it caught up with me later. Not immediately — which is what makes it tempting — but eventually. And by then, fixing it usually meant more work than slowing down would have in the first place.
How Thick a Liner Needs to Be in Real Use
This part took me a while to really notice, mostly because nothing looked wrong in the beginning. The surface cured, the texture was there, and at a glance it felt finished. That’s usually the point where it’s tempting to move on and not think about it anymore.
What changed later wasn’t obvious failure. It was more about how the surface felt after some use. Certain areas didn’t bounce back the same way. Others seemed a little stiffer, almost like they were fighting the movement underneath instead of working with it.
After running into that more than once, I stopped trying to get everything done in one go. I started letting the coating build up over time instead, giving each pass a chance to settle before adding more. The end result didn’t look dramatically different, but it behaved differently, especially on panels that flexed even a little.
Any time I tried to stretch the material by keeping things thin, it eventually showed up again somewhere else. Not right away — which is why it’s easy to miss — but later on, when fixing it meant undoing more than I saved.
Where Rhino Lined Plywood Works — and Where It Doesn’t
I don’t use this approach everywhere.
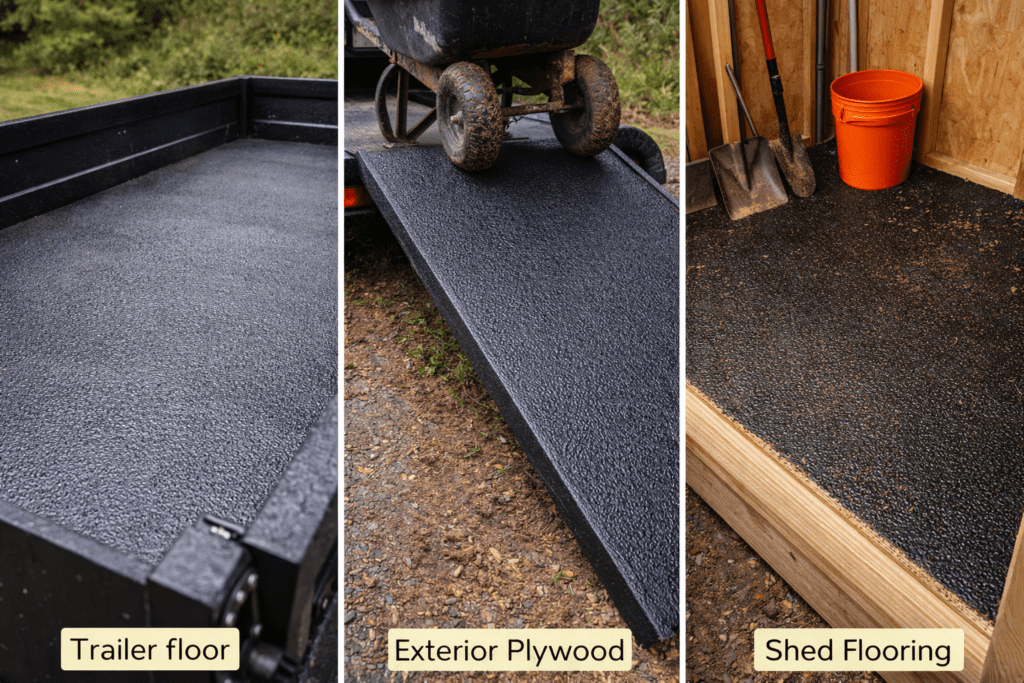
It works extremely well for:
Trailer floors
Plywood truck beds
Ramps
Shed floors
Utility work surfaces
It does not make sense for:
Furniture
Cabinets
Decorative interior panels
Once the bed liner is on the plywood, removing it is miserable. This is a commitment, not an experiment.
Comparing Rhino Lining Plywood to Paint and Epoxy
I don’t think bed liner is “better” in every situation. I think it’s better where movement and abuse are constant.
According to material guidance from APA – The Engineered Wood Association, moisture cycling and edge exposure are the primary causes of plywood failure — exactly the areas bed liner handles best.
Cost, Longevity, and Whether I’d Do It Again
Yes, bed liner costs more upfront. There’s no avoiding that.
But I stopped thinking about coating cost and started thinking about replacement cycles. Replacing plywood — even cheap plywood — costs time, labor, and frustration.
For anything that’s hard to replace later, Rhino lining earns its keep.
Living With It Long Term
This is the part most articles skip.
Once cured, Rhino-lined plywood needs almost no maintenance. I hose it off. Occasionally, I scrub it with mild detergent. That’s it.
That’s the biggest advantage I’ve found with Rhino lining plywood — once it’s done, it mostly stays out of your way.
Fasteners stay sealed. Edges stay stable. The surface stays usable.
It’s boring — and boring is exactly what you want from a protective system.
Final Thoughts After Living With It
I didn’t start using Rhino lining because it felt new or interesting. It came later than that, after I’d already tried enough other options to know what they didn’t do. At some point it stopped being about finding the best-looking solution and turned into finding something that didn’t need to be revisited every couple of years.
It isn’t a clean or elegant approach, and once it’s on, you’re committed. The cost is hard to ignore too, especially the first time around. None of that really disappears with use.
What did change was how often I had to think about the plywood afterward. On trailers, ramps, truck beds, and other outdoor builds, it simply stayed the way I expected it to. Not perfect — just intact. Over time, that mattered more than the tradeoffs.
How to Make A Humidor the Easy Way by Admin September 8, 2023 DIY Simple cigar humidors aren't at all difficult to make an easy way to build. Not only will you save a little cash by building a…

")

")
")
