Of all the types of woodworking out there, carving can be the least expensive to get into. That’s not to say that it’s impossible to spend a lot on woodcarving, because it’s quite possible. As in any other area of woodworking, how much one ultimately spends depends a lot on how deeply the carver wants to get into the craft. My father, whose retirement business was custom gunstock carving, used a pneumatic rotary tool for his work, something like an air-driven Dremel tool. That was an expensive tool, justified by the fact that he was carving professionally. But a reasonable quality beginner’s set of carving tools can be bought for less than $20.
Compared to the tools one buys for other types of woodworking, such as building furniture, wood carving tools are inexpensive, especially for the beginner. Not only that, but the wood that one carves is not that expensive, especially at the beginning, as small pieces of unmilled wood are all that’s required; not wood that has been cut, planed and sanded.
For that matter, material can be found for free for woodcarving. Amongst my personal woodworking, I’m a woodturner; yet I pay almost nothing for the materials I use. Rather, I keep my eyes open for homes where people have cut down a tree and then ask the owner if I can dig through the pile of logs they have sitting there waiting for the trash. I’ve got enough wood in my drying shed to last me for at least the next year and it hasn’t cost me a cent.
Of course, buying wood carving tools doesn’t end with buying a basic set of carving tools any more than making furniture stops with buying a table saw, some chisels and a plane. I recently saw a video tour of a renowned furniture maker’s shop, where he had over 1,200 hand planes, each in its place and each with its own purpose. Woodworking of any sort is a field where the trick isn’t completing a set of tools, but rather reaching a point where the woodworker is satisfied with what they have. As best I know, that point never exists; there’s always something more to add to one’s collection.
In justification of that (something I have to do regularly in my own mind), many tools that woodworkers buy allow them to do things they couldn’t do before. That includes buying tools which are an upgrade of something already in one’s kit. Increasing one’s range of capabilities is a worthy investment, as it can save money in doing projects for the home and family, which others would have to pay for someone else to do. I believe that my tools have more than paid for themselves in the money they have saved in building furniture, remodeling and repairs to the home.
Categories of Wood Carving
Wood carving itself can be broken down into several different sub-genres, including chip carving, relief carving, whittling, wood turning and chainsaw carving, in addition to general wood carving. Each of these sub-genres has its own set of tools, although there is some crossover between them.
Amongst those categories we find chip carving and whittling, which are almost the same, especially in the tools required. Those two methods can be referred to as knife carving, as opposed to other sorts of carving that is done using mostly chisels and gouges. Even so, while this differentiation does exist, there is a clear crossover between the two, as there are times when some tools for carving are used for chip carving or where knives and scoops are needed for carving.
The different categories of carving can be defined by both the methodology and what is carved:
Whittling – Done with a knife, whittling is casual carving, mostly to produce spoons and other small useful objects. Whittling can literally be done with a pocket knife, but a few other specialty knives are used, including a hook blade scoop for hollowing.
Chip Carving – Used mostly for making small figurines, chip carving is distinct in that the chips made into the wood as part of the carving process are not smoothed or sanded out, but rather left visible as an element of the design.
Relief Carving – Carving into a flat surface to create a design. Relief carving can be simple or extremely intricate, giving the impression of the carving being much deeper than it is. Relief carving is often used in providing decoration to the wood elements of furniture.
General wood Carving – Differs from relief carving in that it is carved in three dimensions. While there may be one main direction intended for viewing the piece, it is executed in such a way as to be viewed from any angle, except for perhaps below the base. wood carving of this type can be considered to be the most complex, with the widest variety of tools used; but it also provides the ability to produce the greatest range of finished work.
Chainsaw Carving – Chainsaw carving is unique in that the entire project or nearly the entire project is produced using chainsaws of different sizes. These are typically large pieces, but even so, the best practitioners of this craft are able to produce incredibly detailed pieces, even though they are typically working with entire logs or tree trunks.
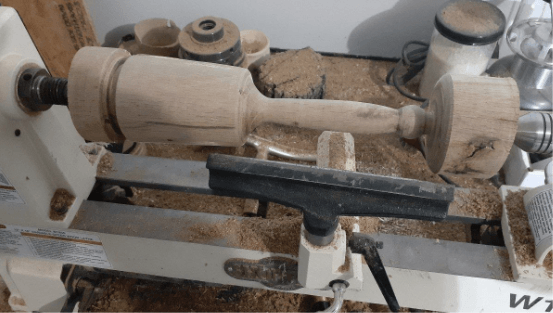
Wood Turning – While wood turning is its own distinct genre of woodworking, it is often included in the overall category of wood carving, due to the fact that wood is being removed, using chisels, to produce the finished piece.
It should be noted that there are also power tools used for most of these categories. But other than chainsaw carving and wood turning, the tools used do not make them a separate category. Rather, relief carving, for example, can be done with manual chisels or with power carving tools.
What’s in a Set of Carving Knives?
The simplest possible set of wood carving tools would be knives for wood chipping or whittling. This set of tools would consist of:
Cutting knife – This is the main knife used, with a stiff and strong blade that allows the carver to take off a lot of material or make smaller cuts. The stiffness of the blade provides positive control of the cut
Detail knife – For detail work a smaller knife is used
Sweep knife – This is a gouge-shaped knife, much like the gouges used in carving and specifically used for cleaning out inside curves and surfaces
Hook blade – The prime tool for making concave curved surfaces, used by pulling the knife towards the woodcarver
V-tool – Another tool borrowed from general woodcarving, that consists of a V shaped tool, making a V shaped gouge, that is used primarily to outline areas and provide separation of different parts of the carving
Besides this, the wood carver engaged in chip carving or whittling would probably need a couple of saws, including a coping saw or band saw to rough cut the outline of the carving.
Those who want to get into more general carving, rather than chip carving, will need a more extensive set of tools, although as already mentioned, a basic beginner’s set can be purchased relatively cheaply.
Carving chisels are usually made with a wood handle that is intended to be comfortable to hold. The carver will need to be able to maintain a solid grip on these tools, while striking them with a wooden mallet. Wood mallets are used, rather than a hammer, because the handle is wood. If a metal hammer were to strike the handle, then it would damage it, eventually causing it to split. Wood carving mallets are different from other types, in that they are round, designed so that the woodcarver doesn’t need to concern themselves with which side of the mallet they are striking the chisel with.
Wood carving mallet
There is a secondary type of wood carving chisel with mushroom-shaped handles. These are designed for palm carving, where the force is applied by hand, without a mallet. Palm chisels, as they are called, are used predominantly for detail work, as well as woodcut printing. It is not necessary to have palm chisels to start out in carving, but they are useful for certain work.
The various different types of carving chisels included in a typical woodcarving set include:
Flat chisels – Much like bench chisels, these are actually rarely used in woodcarving, as the sharp corners can dig into the project, causing unwanted lines. Nevertheless, they can be useful for rough shaping.
U–Gouges – These are the workhorse of wood carving, used for the majority of the cutting and shaping. U-Gouges come in a variety of sizes and curvatures or “sweeps.” Typically, one third of the tools in a starter set will be U-Gouges of one size or another; usually with the widest one being about ½” wide, as most beginning carvers do smaller pieces.
V–Gouges – Much like the U-Gouge has a cross section shaped like a U, the V-Gouge has a cross section shaped like a V. They can come with the legs of the V at either a 90 or 60 degree angle. More than anything, these are used to outline various parts of the carving. For example, when relief carving a flower, the edges of the petals would be outlined with a V-Gouge, to visually separate them from the center of the flower and the background.
Spoon Gauges – Like their name implies, these gauges are spoon shaped, although narrower. They are used any place where a deeper convex curve is needed, then can be cut with a U-Gouge.
Skewed Chisel – A chisel where the cutting edge is at an angle, not perpendicular to the axis of the tool. These are very useful for doing an outside chamfer on a shape. Going back to the example of a flower, they would be used to do a chamfer on the outside edge of the flower.
Other than these tools, the woodcarver can add an almost infinite supply of other tools to their collection, including tools that might be used for other types of woodworking. This especially includes power saws and sanders, for both roughing out the wood blank and sanding the finished work smooth. Carvers who want to do large relief carvings might find it useful to have a jointer, so that they can true up the edges of boards for gluing together. The band saw is probably the most useful saw for roughing out a piece of work.
Power Carving
I mentioned earlier that my dad was a woodcarver and his retirement business was carving custom gun stocks. This was incredibly detailed work and was done mostly with a rotary carving tool. These tools come in a variety of styles, including the pneumatic one my dad used. A Dremel rotary tool can be used for power carving, although it turns at a slower rate than most power carving tools. I use a flex-shaft tool, which can be likened to a civilian version of a dental drill. It isn’t as fast as the pneumatic tool, but is still faster than a Dremel. The smaller head and chuck are easier to work with than holding the tool’s motor in one’s hand.
A wide range of cutting tools can be inserted into the chuck or collet of these tools, allowing a considerable variety of cuts to be made. Some of the more common cutting tools used are:
Grinding Stones – Grinding stones are just what they sound like, small stones which are porous, allowing them to grind away at the material. They come in a variety of shapes including cylinders, spheres, pear shaped and cone shaped.
Burrs – The distinguishing characteristic of any burr is that it has a bunch of sharp knobs or points sticking out of whatever the base shape of the bit is. Burrs can be cylindrical, spherical or cone shaped and grind away the material, much like a small grinding stone would. By and large, burrs will outlast grinding stones.
Carbide Bits – The easiest way to imagine the various types of carbide bits are like miniature router bits or end mills, without the bearing. They come in a variety of shapes and sizes, allowing for different sorts of cuts. My favorite carbide bits are teardrop shaped, with the shaft attached to the wide end of the teardrop. They are two-fluted bits, allowing for good cleanout of the chips being created. I have two different sizes of these, allowing for rough and fine detail work.
Sanding – Small sanding drums and disks are also available for insertion into these tools, allowing for fine detail sanding. Even so, it can be useful to sand larger areas with other powered sanders, like belt sanders, the various types of vibratory sanders and an oscillating spindle sander.
Keep in mind that all these bits are small, typically being no more than ½” long and 1/4” in diameter. There are a few that are larger than that, but they really aren’t intended for carving large areas. They are best used when carving details, leaving the large areas for other tools.
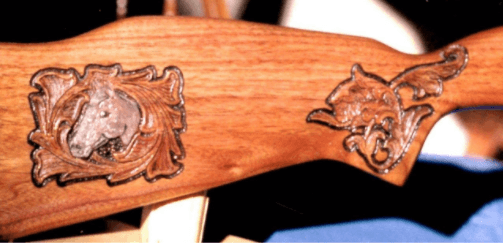
Custom gunstock carving
Selecting Carving Tools
As with any tool, quality is an issue when buying carving tools. The main difference between inexpensive starter sets and the best of carving tools is the quality of the steel used. While it might be a good idea to start out with a low-cost set, so as to gain some experience and determine whether or not one wants to continue carving, eventually it will be best to step up to a higher grade of steel.
Buying a good honing stone is just as important as buying good tools. Carving tools will need regular sharpening, as wood is a fibrous material that readily dulls even the best of edges. Frequent sharpening is a requirement.
While all the handles on these tools are made of wood, quality tools will be made of higher grade hardwoods. This is important, as carving required striking that handle repeatedly with a mallet. While the majority of that is light tapping, heavier blows can be expected at times.
Related Posts:
Tools on the Wall by Admin February 19, 2022 DIY One of the problems in any workshop is where to put all the tools. Woodworkers and others who like to work with their hands have…
Vinyl Stencils for Wood by Admin April 30, 2021 Tools Stenciled signs on wood are one of the trendy home décor items we find everywhere from knick-knack shops to truck stops. Some carry witty or…
Wood Floor Inlay by Admin May 1, 2021 Installing Wood floors have made a comeback, with many people preferring them over other flooring options. That’s not surprising, considering wood flooring’s natural beauty and durability.…