Walkout basement can be used for very different purposes .Roughly 133 million houses in the United States, about 37 million were built with a basement, giving the homeowner more usable space. In many of those cases, the homes were built without the basement being finished, either to use that space as a bedroom, storage or to hold in reserve for additional family living space sometime in the future.
Those homeowners with the foresight to have their dream home, first family, or home built on an unfinished basement provide themselves with great living space and the ability to gain more living space at a much lower rate than adding to their home.
The twin drawbacks to building living space in the basement are the lack of natural light and the limited outdoor access to the basement. The lack of natural light can be rectified with electric lights or by larger windows and corresponding window wells.
Access is a bit trickier, but it is possible to add an outside access or walkout basement cost and can make walkout basements that out to almost any basement. Basements with open windows and doors to the outdoors are commonly called “daylight basements,” while a walkout basement gives direct access to the outdoors through a doorway.
Of course, the easiest basements to turn a walkout entrance into a walkout basement are those basements or those walkout basements not built on a hill, where more space in one wall of the basement is exposed above ground. In those walk-out basements, in this case, the work is mineralized, requiring only cutting a hole in the wall for the door, adding a steel lintel above that doorway, putting a concrete pad outside the doorway, and installing a door.
But most homes require more work than that, as the home isn’t built on a slope or a hillside. This puts the floor of the home gym in the basement below ground level, requiring a few different types of excavation to put the entryway in.
We’ll look at this process as it includes everything necessary for completing the simpler installation of a door into the daylight basement of a home where one wall of the home plans the whole basement space is exposed, eliminating the need for extensive excavating.
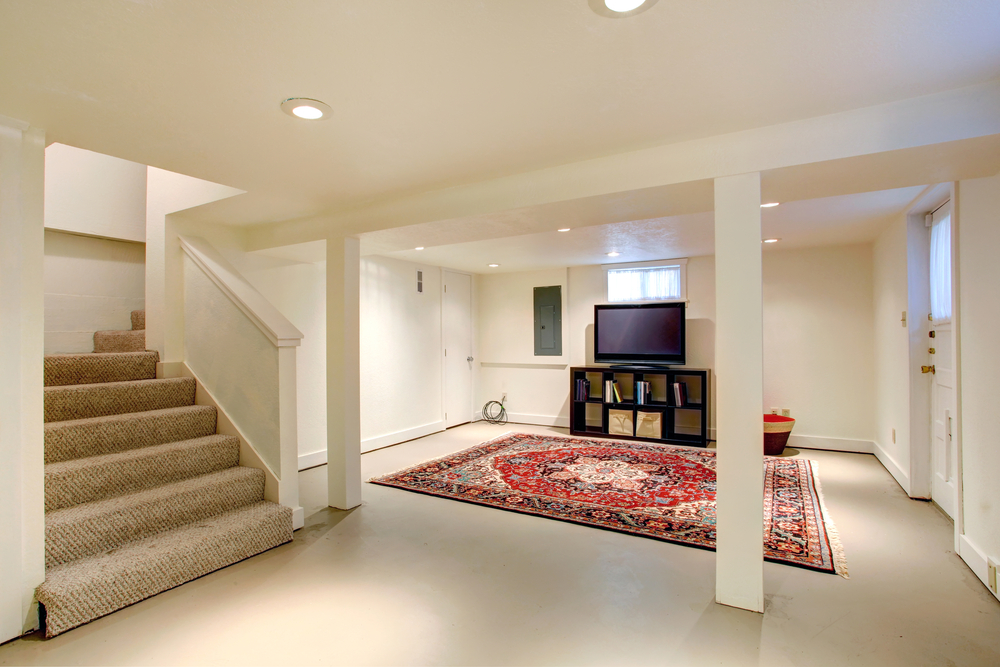
House interior. Ideas for basement room. Entertainment room with tv
Figure Out the Drainage First
One major consideration for installing an entryway into a basement is drainage. Unless the walkout can be built without excavation, there’s a good chance that water will collect in the stairwell every time it rains. The real question is how much rain will collect and how often it will happen. Drainage of some sort must be provided as part of building the walkout.
A typical 3’ wide basement stairwell, with a 3’x 3’ landing at the bottom, equals just shy of 38 square feet. Assuming no other rain falls into the stairwell, all the rain that falls into those 38 square feet will end up in the 3’x 3’ landing at the bottom. So, one inch of rainfall will turn into 4.2” of standing rain on that slab. If the slab isn’t far enough below the level of the doorsill or there isn’t sufficient drainage, that stairwell will become an access point for water to flood the basement.
There are several ways of handling this problem. Which one is used depends a lot on how much rainfall there is in the area. Building a basement around it isn’t sufficient to accommodate the average rainfall, as that will still leave an opportunity for water to leak in when there is more severe rain. The stairwell and the associated drainage must account for the worst expected rainfall in that area.
The first thing that can be done and should be done in all cases is to make the landing at the bottom of the stairwell below the basement or ground level part of the slope of the basement floor. It is customary for homeowners to build it 4” to 6” lower than the basement level or ground level, creating outdoor space for a drain sump for the water. Angle the basement floor towards the center of the daylight basement, putting a drain in the center.
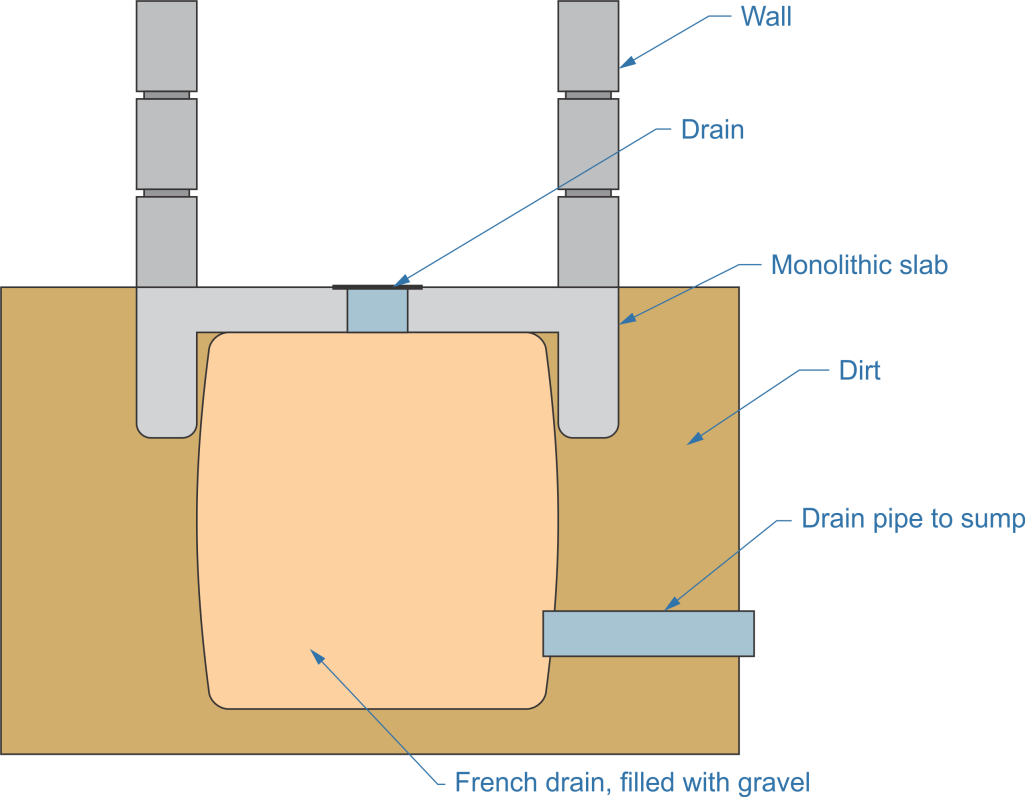
In colder climates and places with little rainfall, a French drain can be installed below the landing or outside the basement. This requires excavating a couple of feet deeper than traditional, walkout and walkout up the basement or house plans, and then filling the hole with large gravel before pouring the slab at the bottom of the walkout or stairs.
Crushed gravel leaves about 40% air space when placed in a pit like this, so two feet of French drain will be able to hold 40% of that much additional space of empty storage space in water or about 9.6” of water. Added to the 4” of water that can sit on top of the slab before the basement starts to flood, that equals extra storage space of just over 3” of rain before the basement starts to flood. Increasing the French drain to 3’ deep would increase the storage capacity to 4-3/8” of rain.
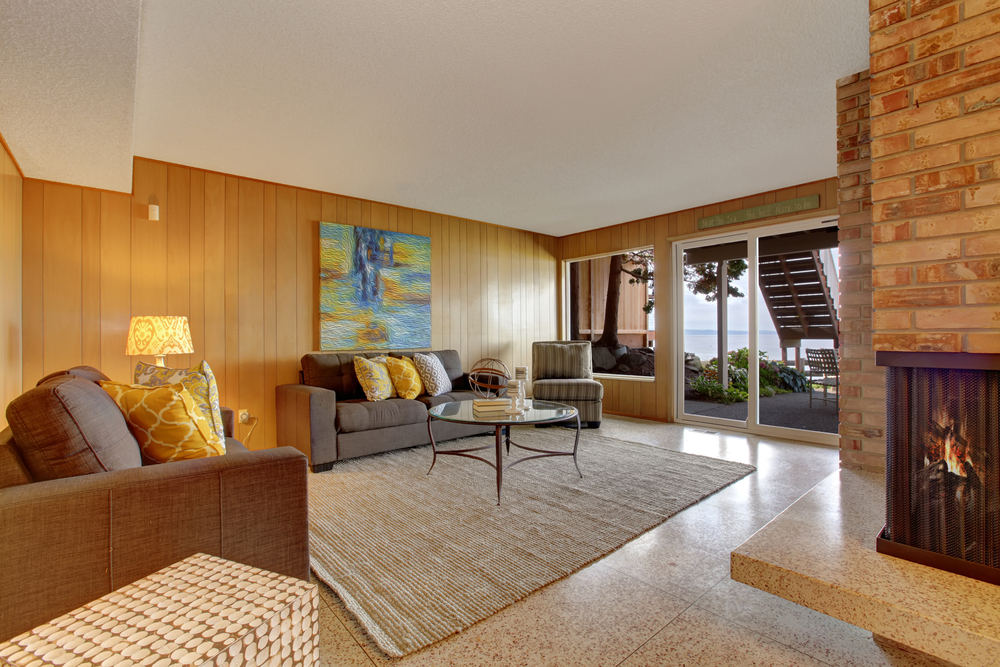
Basement living room with wooden wall trim, brick fireplace and exit to walkout patio
If that’s not enough drainage to cover the worst-case incident, then it will be necessary to install a sump and sump pump, either in the daylight basement, under the slab, where the French drain would otherwise be, or inside the basement, under the floor, with a pipe connecting the French drain to the sump. This is better because the sump can be covered by a removable cover in case the pump needs maintenance. However, more excavation must be done by digging underneath the footer without damaging it. Damage to the footer could result in serious foundation issues down the road.
Roofing over the Stairwell?
Another option to help keep the stairwell from flooding the finished basement below when it rains is building a roof over it. This is normally done after the stairwell is built, but some contractors will build a temporary lean-to-style roof to cover it during construction, especially if they expect inclement weather. It’s easier to build a temporary roof than to constantly pump out the excavation or try to work in the mud.
A roof doesn’t have to be fancy to be effective. All that’s required is a framework and corrugated metal or plastic roofing. It needs to be mounted high enough to protect people from banging their heads while at the same time providing the necessary protection from the rain. That might mean providing sufficient overhang to prevent rain from getting in or where the predominant wind comes from that side of the house, walling off the outside of the roof covering as well.
Making the Stairwell
Before digging, it is important to lay out the stairwell, making sure it will fit in the intended area. Some people have the stairwell stick straight out from the wall, but it is more common to bend it 90 degrees to run alongside the home wall. A few people go a step further, putting a small patio at the bottom of the stairs and having the stairway up the side of the patio wall.
One of the big advantages of building a walkout in the stairwell alongside the basement wall, besides it not being as big a trip hazard, is that it can eliminate the need to build a wall on both sides of the walkout between the traditional basement and the staircase if the walkout is properly planned and executed.
The big thing is making sure the stairs themselves butt up against the foundation wall well, without a crack, and that the seam is filled with an expansion joint material. With that in place and the concrete wall cleaned up, there’s no reason to walk out basement and spend the time and money building a wall on that side of the stairway.
Another decision that must be made is the material the stairwell will be made from. There are two basic possibilities: poured concrete or cinder block. For the do-it-yourselfer, building with a cinder block is easier and cheaper than putting up forms and pouring concrete.
Paying the cost for the material to make the forms is unrealistic for a one-time project. Even so, some concrete will be needed for the landing at the bottom of the stairs and the surface of the stairs themselves. The cinder blocks would be used for the walls.
It is easiest to dig out extra living space under the stairwell with an excavator, although digging it out by hand could make for a great day or two of upper body workouts for those so inclined. Either way, the hole for livable space needs to be dug wider and deeper than the actual stairwell, allowing for great living space for extra bedrooms and access to the outer side of the room through the wall.
Avoid digging more space out too much where the stairs themselves go, sloping the floor to the approximate angle of the stairs. Once the wall is built, this sloping lot of extra space will need to be backfilled with some of the removed dirt, packing it down so that it doesn’t sink over time.
With the hole excavated, lay out a house plan for the traditional basement door opening. Check it from the inside, using windows or whatever other reference points are available, to ensure that the door excavations are in the right place. Patching custom excavating a hole in the traditional basement front wall and making another doorway is an expensive mistake.
Installing the Landing for Walkout Basement
The first thing to build the basement house is the French drain or sump, the project’s lowest point. If a sump is to be installed inside the exterior entrance to the first walkout basement, then it might be necessary to cut the door out at this point; but if not, it’s best to wait until daylight basement and the stairwell walkout basement is complete.
The landing slab cannot be poured directly on top of the gravel used for the French drain, so one of two things has to be done. The first is to install a stormwater pit, to be used as a French drain, and the second is to fill the pit with gravel and then cover it with corrugated metal, with a drain hole in the middle.
A short piece of pipe would need to be placed in this hole, with the idea that it can be cut off so that the drain will end up flush with the surface of the concrete.
Before pouring the slab, install rebar in a grid pattern or remesh to strengthen the concrete against breaking. Like any rock, concrete is strong in compression but not tension. That’s why stone and concrete can be broken with a chisel. The rebar or remesh strengthens tension, helping keep the concrete from breaking. Some standoffs should be used to hold the rebar or remesh up 2” off the ground level to end up in the middle of the slab rather than at the bottom.
It is best to do a monolithic pour here rather than just a slab, although most people use it. While a slab will work, the edges of that slab will have to support the weight of the walls being built onto them. That’s a lot of extra weight for the slab to support. Digging down a foot around the edges to form an integral footer and adding rebar all the way around, a couple of inches up off the bottom of retaining walls in that basement trench, will help ensure that there will not be any need for future slab replacement.
Monolithic slab
Adding the Stairs for Walkout Basement
With the foundation in place, it’s possible to walk out basement house plans and start building walls; but that’s not necessarily advisable. The only wall that could be built in the lower part of the house plans a wall that encloses a separate entrance to the daylight basement and separates the apartment from the family room. A separate entrance walks up the basement to separate the apartment from the landing. Where that has to interface with the wall for the staircase, the wall would have to wait until the staircase is in place.
Professional contractors who work with concrete always pour the stair as one unit, building a form that allows the concrete to flow downhill, filling in each step. This can be tricky to work with, especially for someone unaccustomed to working with concrete.
Therefore, I would recommend pouring each step, one at a time. That allows the form for each step to be constructed separately, and the step poured flush with the top of that form. Once set, the form can be removed and reinstalled for the next step.
The steps themselves need to be 4” thick, just like the slab at the landing. They will also need to have rebar installed in them. That rebar should come up through the back of the step, forming a pin embedded into the next step and tying them together.
Ideally, the rebar should be bent into an “L” so that the same piece runs the depth of the step tread and then runs up the slope into the stair above, but if the necessary equipment to bend the rebar is not available, the contractor can then tie the two piece together with baling wire when installing them.
Stairs
Notice in the picture above that the dirt has been dug out in a stair-step pattern to match the concrete stairs poured on top of it. Concrete is expensive, so avoiding wasting concrete in construction is important.
Digging the dirt out in this manner allows the 4” slab thickness to be maintained for both the step tread and the riser without wasting concrete. If too much dirt is dug out, the excess space can be filled with packed dirt, gravel, or scrap wood.
Building the Walls
The basement walls are fairly easy to build if they are built out of cement or cinder blocks. These are stacked in an offset manner, just like a brick wall, with mortar in the spaces between the blocks.
The only difficulty is ensuring that the type of basement wall remains straight and level while it is being built. Running a string from corner to corner is normally used for that, as the string provides a ready reference for where the top outer edge of the blocks should be.
Installing the Door for Walkout Basement
In most cases, it’s a good idea to wait until the stairwell is installed before cutting through the basement wall and installing the door. The cutting needs to be done with a diamond-bladed saw, which most do-it-yourselfers would have to rent, or a masonry saw blade mounted to a circular saw. Keep the blade from overheating, which will cause excessive wear on the saw. It will probably be necessary to score the concrete wall on both sides and break out the middle part with a sledgehammer. A grinder can smooth out the wall’s middle part, where the blade from the saw didn’t reach. The door opening must be 2” wider than the frame and 1” taller.
If the basement walls were made of concrete block instead of poured concrete, some voids would appear in the cutout’s edges. These can be filled with 2”x 4” sections, glued in place with construction adhesive. The surface of these blocks must be installed flush with the cutout.
A steel lintel will need to be installed on the top of the door opening to support the remainder of the wall above the door opening. This usually requires cutting horizontal slits into the wall at the top corner of the opening so that the weight of the lintel supports can be transferred to the wall on either side of the opening. The lintel should fit into these and rest snugly against the concrete or block above the door opening. Use mortar to hold the lintel in place.
Both wood and metal door frames can be installed into exterior walls of a concrete mall, although it is typical to use metal frames rather than wood doors. In either case, it will need to be a door frame designed for use in masonry walls, and the sliding door will need to have a jamb depth equal to the wall thickness.
Set the frame in place and mark where the mounting holes must be drilled. With metal frames, this is done by inserting the anchors into the frame and then hitting their heads with a hammer, allowing the point of the fastener to make a dent in the concrete. With wood frames, a punch needs to be used. Drill the holes in the sides of the door frame and set the door frame back in place, shimming it as necessary and attaching it with threaded anchors.
With the windows, doors, and door frame in place, all that remains is to hang the door and install the lockset. Caulk around the edges of the door frame, between it and the concrete. If a wood frame was installed, brick mold should be added, snug against the masonry, and nailed to the exterior door and frame.
Related Posts:
Finishing Basement Walls without Drywall by Admin April 2, 2022 Finish The number of new homes being built with basements is declining; at the same time that there is a surge in the interest in finish…
Wood Burning Stove in Basement by Admin April 6, 2022 Installing Many Americans choose the option of having their homes built with an unfinished basement, if they are fortunate enough to live in a part of…
How to Frame a Basement Wall by Admin June 17, 2023 Installing Average home ownership today is a mere eight years. That's up, as in the decade from 2000 to 2009, it was only four years. According…