Nativity scenes are one of the most classic Christmas decorations there is. Sometimes called a “crèche” or a “Christmas crib,” the scene depicts the birth of Jesus Christ in Bethlehem, slightly more than 2,000 years ago. While some people in modern times are trying to eliminate the religious significance of the Christmas holiday, the holiday itself was started by the Catholic Church, in 336 AD, as a celebration of the birth of Christ. The name “Christmas” even alludes to this, as it is a shortening of “the Mass of Christ.”
The contents of a Nativity scene, as well as its size, can vary greatly. At the most basic level, the scene consists of three pieces, representing Joseph, Mary and the cradle with the baby Jesus. Stepping up from there would be a seven piece set, adding the Wise Men and possibly a camel or an angel. Eleven piece sets include animals and perhaps a shepherd or two. At the top end, we find 21 piece sets, which will add more animals and backdrop pieces, including the stable and trees.
While the idea of Jesus being born in a stable comes directly from the Bible, the idea of a stable has changed considerably from that time. We most often understand a stable to be a roughly constructed shed where animals were kept and those Nativity scenes which include a stable depict it that way. But in reality, caves were most often used as stables in the Middle East during that time.
The figurines used in the scene can be made from a wide range of materials and can appear almost lifelike or totally abstract. For a home built wooden Nativity scene, they are most often silhouettes cut out of plywood and then painted. Carved wooden nativity scenes can be quite attractive, but are beyond the ability of most woodworkers, unless of course they are already woodcarvers.
Homemade wooden Nativity scenes come in a wide range of sizes, running from ones which are small enough to be used as Christmas tree ornaments, all the way up to life-sized silhouettes placed in the front yard of a home as part of the Christmas décor. Regardless of the size, the home nativity scene is made more or less the same way; it’s just a matter of scaling up the size.
How to Make Large Patterns
If all that’s desired is a small wooden Nativity scene, a pattern can be found online and printed off of any computer. But the biggest that most computer printers will print is 8-1/2” x 14”, assuming that there is legal sized paper available for the printer. That’s not exactly something that most people have in their homes, limiting the size of the print to 8-1/2” x 11”. That’s great for a tabletop Nativity scene or even one to put under the Christmas tree, but not for something to put in the yard, in front of a house.
Method #1
Many computer graphics programs allow for printing across multiple pages, in what is called “tiled printing.” Microsoft Publisher, which is included in many versions of Microsoft Office, is one such program. It may not be obvious that the program does allow for tiled printing; but it will show up when “print setup” is selected. If the program allows for it, increase the size of the overlap between pages to one inch, as that will make it easier to align the pages when putting them together.
The key to making this work well is to take a lot of time to tape the pages together, making sure that they are properly aligned. Getting one seam off by a small fraction of an inch or by a couple of degrees may not seem like much, but it multiplies as you add additional pages, to the point where things no longer line up.
Method #2
Today’s large-screen televisions give us the opportunity to blow patterns up right on the TV screen. All that’s needed is a laptop computer and a HDMI cable. Most laptops have a HDMI connection on them, allowing them to be connected to the television. Whatever is on the computer’s monitor can then be projected on the television. Once there, it can be traced onto a large sheet of white butcher paper. Of course, the size will be limited to how big the television screen is, but by rotating the image so that it is horizontal, it can be made taller.
Method #3
People who have a video projector, even a low-price video projector, can project the image from their computer or laptop on a wall. Taping paper on the wall allows the pattern to then be traced onto butcher paper or cardboard. It can even be projected directly onto plywood and traced onto the surface of the plywood, without the intermediate step of making a pattern. I’ve traced a lot of things this way, up to life-sized cutouts.
Choosing Material for the Nativity Scene
The silhouette Nativity scenes we’re talking about making are generally cut out of plywood. Our first concern is whether the Nativity will be used outdoors or indoors. In the case of it being used outdoors, exterior grade plywood should be used. Avoid plywood alternatives, such as MDF or OSB, as they are more susceptible to moisture damage than construction-grade plywood. Avoid pressure-treated plywood, if the Nativity is going to be painted, as pressure-treated wood needs to sit in the open air for at least six months, before painting.
If possible, choose plywood without any voids in the core veneer layers, such as marine plywood. That’s going to push the price up though, which may not be within the project budget. As an alternative, the voids in the edges of the plywood can be filled, either with wood putty or with painter’s caulking.
As for material thickness, that depends mostly on how big the Nativity scene is going to be. The larger the scene, the thicker the plywood needed. A small, tabletop unit can be cut out of ¼” thick plywood, but a life-sized one needs to be made out of 5/8” or ¾” plywood. Even then, it might be necessary to add some supports to the back side of the pieces, so as to help keep them flat. Smaller yard Nativity scenes can be made from ½” thick plywood.
If available, it is best to buy plywood that has at least one A or B grade side. That may not be possible in exterior grade plywood, which is usually made C-D grade. But if it is available, that saves time in not having to fill in knotholes and splits in the surface of the plywood, before painting it. Lower grade plywood will still work, it will just take a bit more time to finish the project.
Cutting Out the Nativity Scene Figures
With the pattern transferred onto the plywood, the individual figures can be cut out. There are a number of different saws that can be used to do this, depending on the size of the figurines and the thickness of the material. For a small Nativity, made out of ¼” plywood, the best saw would probably be a scroll saw. On larger Nativity scenes, with ½” or ¾” plywood, a handheld jigsaw will most likely be the tool of choice.
Another option is to use a Rotozip tool. This is a rotary cutter, somewhat like a small router. The Rotozip bit is a spiral rotary cutting bit, designed for cutting freehand at high speed. While it takes some time to get used to using the tool, anyone who has used a router can work one. I use Rotozip blades, but put them in a cordless router, using a step-down collet to make them fit.
In my own experience with a Rotozip, I’ve found that extreme care must be taken to stay on the line. The tool doesn’t naturally wander a lot, but can if it is not held under firm control. It can be difficult to see the blade and where it is in relation to the line, so be sure to make a dark line when tracing the pattern onto the wood. It can also be useful to wear a headlamp, so as to provide directed lighting at the point where the cutting is happening. Work so that the line being cut is always coming towards you, so that you can see it and where the bit is in contact with it at all times.
Regardless of which type of saw is used to cut out the figures for the Nativity scene, there’s a good chance that some sanding or filing will be needed to clean up and smooth out the edges. Taking the time to do that will not only help the overall project look better, but can have a big impact on how well the Nativity scene lasts, if it is to be displayed outdoors.
Each separate piece of the Nativity scene will need its own stand to hold it up. There are a number of different ways of doing this, but the most common is to attach a baseboard, with an angled support running from the back of the figure, down to that base. For larger Nativity scenes, attaching that piece with a hinge can make it easier to collapse the Nativity scene for storage.
Another option to be considered, especially on yard Nativity scenes is to attach round steel “legs” to the back of the pieces, which can be pushed into the ground. If this option is chosen, use a minimum of ¼” diameter steel rod, although 3/8” is better. The rod will need to be welded to a flat metal tab, with hole in it, which can then be used to attach it to the back of the figure, with screws. Sharpen the bottom end somewhat with a grinder to make it easier to push into the ground and add a tab for pushing it down with a foot, rather than having to pound the stake into the ground. Paint the metal to protect it.
Making the Stable
A Nativity scene can be made with or without a stable, depending on the woodworker’s preference. As we really don’t know exactly what the stable looked like, the whole idea of adding it is merely aesthetic. Nevertheless, many people like the visual effect of adding the stable.
One historic theory is that Jesus wasn’t actually born in a stable, but in what is known as a “sukkah.” This theory stems from the fact that theologians believe that Jesus wasn’t actually born on December 25th, but rather in the fall. If this theory is correct, one possible time period that has been proposed is during the Jewish celebration of Sukkot, otherwise known as the Feast of Tabernacles. That feast commemorates the 40 years that the nation of Israel wandered in the desert. As part of the celebration, Jews build a sukkah, which is a flimsy temporary shelter, often decorated with bright ribbons and fruit, much like a Christmas tree. They will eat their meals during the week of celebration.
A couple of distinguishing features of any sukkah is that they must only have three walls. The walls and roof must be of flimsy enough construction that there are gaps through which the sky and the surrounding terrain can be seen. Following in this pattern, any stable made for a Nativity scene should be flimsy, with gaps in the walls. It is not uncommon to make them from repurposed wood, such as pallet wood. Walls of the stable are often uneven, as well as the two sides of the roof; a back may or may not be provided, depending on what the woodworker desires.
Finishing the Pieces
Any Nativity scene should have the pieces finished before setting it up. This does not necessarily mean painting all the details. The Nativity scene is a common enough item that even a well-executed silhouette is going to be recognizable to most people.
Nativity scenes used outdoors are especially in need of good finishing, to protect the wood from damage. Plywood soaks up water, especially along the edges, and the rosin used to glue the veneers together is not necessarily waterproof, even on exterior grade plywood. Besides that, if the plywood purchased has any knots, voids or splits in it, those are prime places to soak up moisture.
These issues need to be dealt with, so that the Nativity scene will last and can be used year after year. Probably the best way of dealing with the edges of the wood is to fill the grain and any voids with painter’s caulk. Use a finger to apply the caulking, ensuring that the entire edge is covered.
As for knots and splits on the face and reverse surfaces, they can be filled with wood putty, spackling or drywall mud. Any of these can also be used to fill any irregularity in the surface, making it smooth. Once dry, the filler should be sanded smooth before painting. Paint the entire surface, especially the edges, with at least two coats of a heavy-bodied exterior paint.
Setting up the Nativity Scene
Regardless of where the nativity scene is set up, indoors or out, most people set it on something. For indoor setups, this is usually on a piece of rumpled fabric. Outdoors that fabric is replaced by spreading straw on the ground. While neither is required, they do help give the impression that the Nativity scene is in a stable.
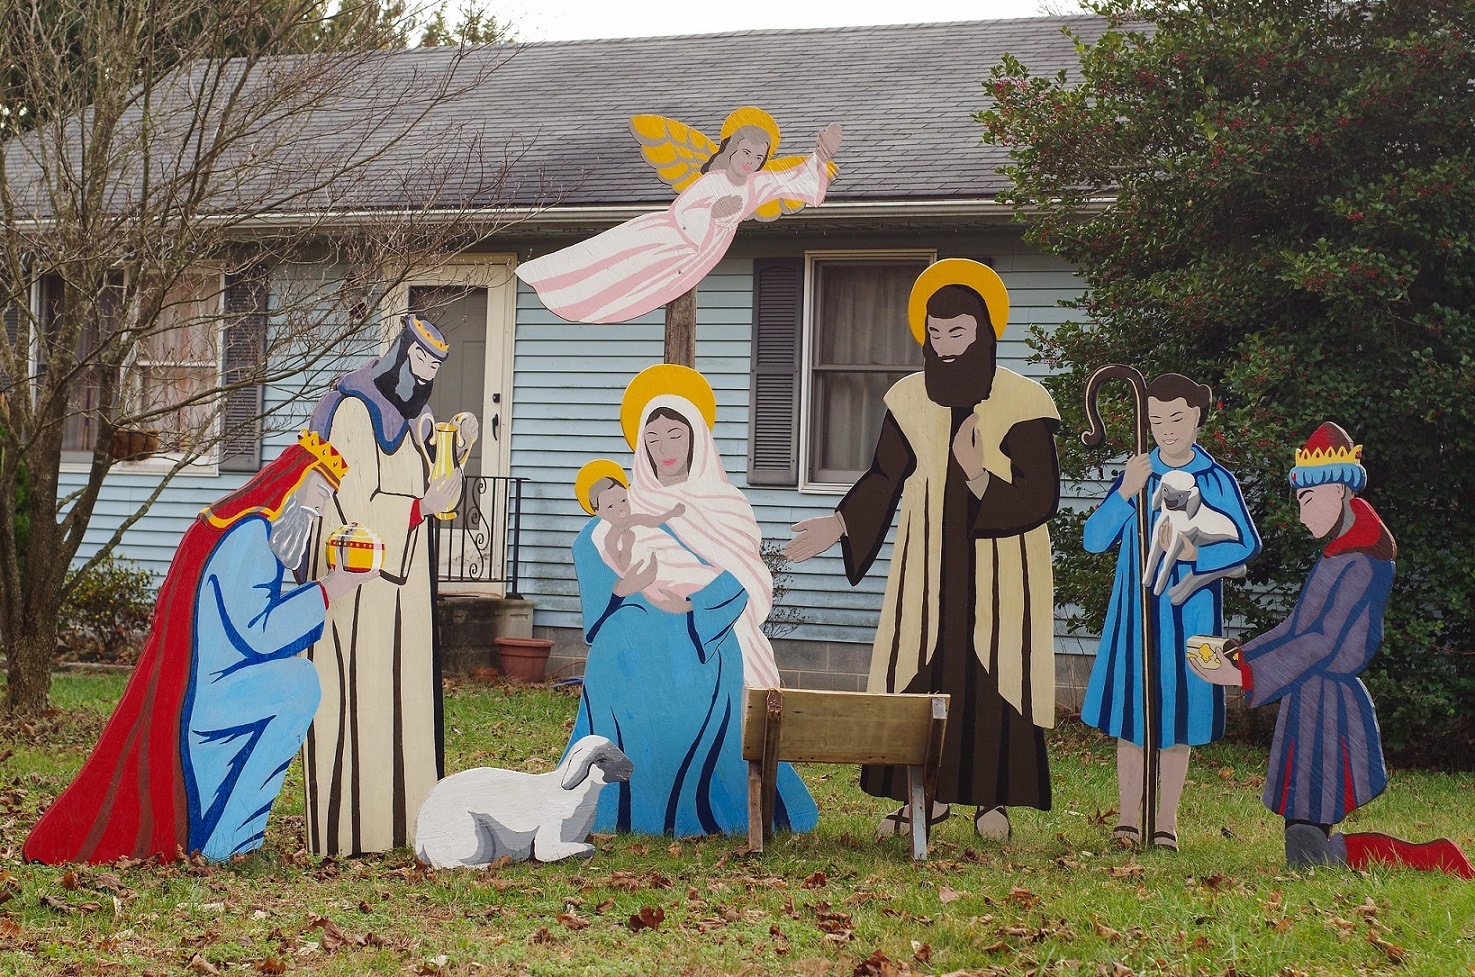
The physical and visual centerpiece of any Nativity scene is the crib or manger, with the baby Jesus inside it. Mary and Joseph are placed on either side of this, with Mary being slightly closer. Wise men are clustered together to one side, along with their camels (if camels are part of the scene) usually the left side as the Nativity scene is viewed. Shepherds are placed on the opposite side, along with sheep and any other animals. An angel or star might be attached to the peak of the stable, just above the manger.
Related Posts:
Swing Set Ladder by Admin December 30, 2021 DIY One thing that every child wants, besides a pony, is their own swing set/jungle gym/playhouse in the backyard. While electronic toys seem to have largely…
How to Make a Wooden Car by Admin April 23, 2021 DIY Wooden cars are classic toys, of the type that our granddads and great-granddads played with. They’re the kind of toys which can be made in…
Wooden Garden Troughs by Admin May 20, 2021 DIY Adding green growing things to any living space just makes it more livable. Interior decorators and workplace designers figured this out long ago. That’s why…