When lumber is sawn from logs, its moisture content can be as high as 100%. That’s not to say that the whole board is water, but rather that the board contains the maximum water content possible, about 50% by weight. As with any other plant or animal cells, the cells that make up the wood in trees are largely filled with water, other than the cell wall membrane and specific structures within the cell.
This water naturally dries out of the wood over time, as long as it isn’t replenished. Dry or drying wood doesn’t readily absorb moisture out of the air and it is even somewhat reluctant to absorb water directly, other than at the end grain. But that doesn’t mean that the water will soak all the way through the boards; that takes a considerable amount of time. In most cases, all that will happen is the ends will swell, possibly causing some cracking in the board.
The loss of moisture in wood does two things to it. First, it causes the cells to collapse. How fast the wood dries will affect how those cells collapse, which can have some effect on the color and appearance of the grain. Secondly, as the wood dries, it shrinks. How much it shrinks depends on the type of wood and its original moisture content. Some woods, like oak, have lower natural moisture content, so they shrink less.
The shrinking of wood can have a number of different effects on it, depending on the grain of the specific board, how it is stacked and how unevenly it dries. No wood dries perfectly evenly, as the center of the board is not exposed to the air like the outer surface is. Nor can moist evaporate out of a board at the long grain as quickly as it does at the end grain.
Common problems that occur in boards as they dry include warping, twisting, cupping and checking (cracking). I have a number of log sections, which I’ve saved for wood turning, almost all of which have cracked considerably. This problem is especially true in cases where I haven’t split those logs, as logs with the pith intact tend to crack more, because of the wood around the pith drying out and shrinking, while the pith doesn’t dry as much.
Nevertheless, proper drying of lumber is essential before the wood can be used in projects. This is even more critical in fine furniture building, as even a small change in the wood can mar an otherwise perfect piece, forcing the woodworker to either patch or remake the piece.
Drying is done in one of two ways; air drying and kiln drying. When kiln drying is used, the wood is often air dried first, before moving it to the kiln. That reduces kiln drying time, reducing the overall cost of the wood.
Air Drying
Since kiln dried wood is first air dried, it’s only appropriate that we discuss the air drying process, before moving on to kiln drying. Boards cut from a log are considered “green” and need to be dried for any use. This is even true of logs which are used for firewood; but is even more important if it is going to be used for any quality woodworking. Air drying is totally natural and is preferred by many woodworkers for that reason. It is fairly widely believed that air drying is better because it puts the wood under less strain, therefore not building stresses into the lumber.
The process of air drying literally starts the moment the tree is cut. But in the lumber industry it is considered to begin after logs are cut into boards. This is true whether lumber is bought from the lumberyard or it comes out of a home sawmill.
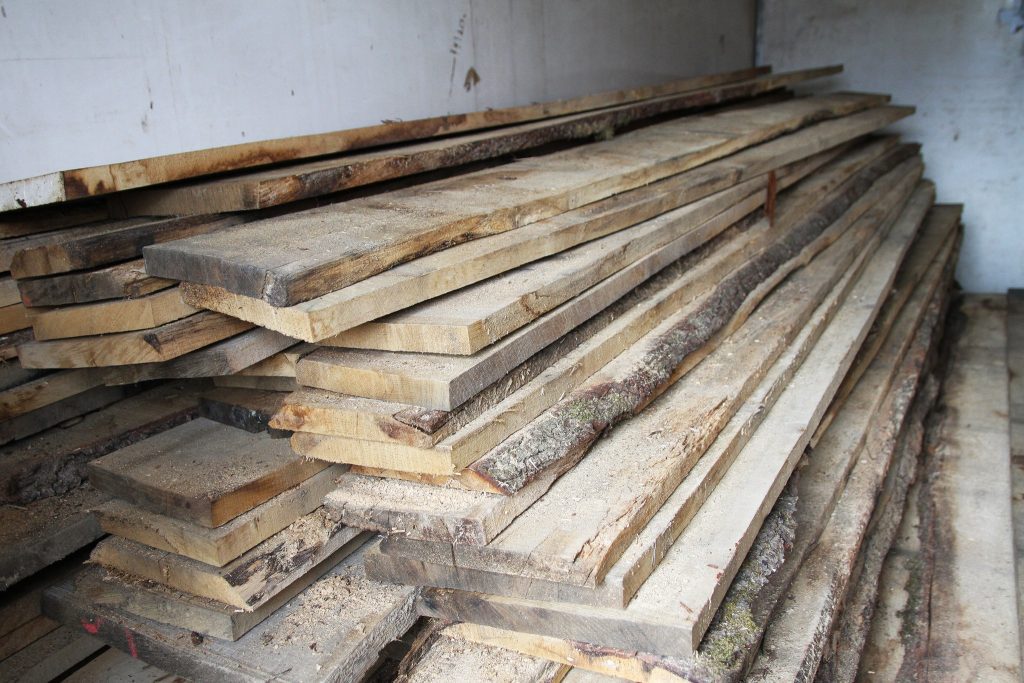
Wood must be stacked for drying, unless one wants it to become twisted and warped. This is done first by raising it up off the ground, usually 12” or more. Supports are required every 24” to prevent the possibility of the wood sagging between those supports. Layers of boards are separated by “stickers” (1/2” square strips of wood), which are located vertically in columns directly above the bottom supports. The entire stack is covered by a sheet of plywood or corrugated roofing material, overhanging the ends by 24” and spaced 6” above the top layer of boards and weighed down with cement blocks. While the weight of the stack helps to keep the lower layers of boards straight, the cement blocks are needed to provide weight pressing down on the top layers.
If I need to stress it, neatness is critical in stacking wood for air drying. The whole idea is to stack the wood in such a way that it is sitting absolutely straight and force it to stay that way, while the moisture is evaporating out of it. Anything that will allow the boards to bend or twist must be eliminated.
This neatness extends to the ground that the boards are stacked on. While sawmills stack wood over dirt, rather than on concrete slabs, they take the time to flatten and smooth the ground before stacking wood there. Levelers are used for the foundation for the stack, if necessary to ensure that the stack is sitting flat and level in all directions.
Wood boards left to air dry need one year for every inch of thickness. That will bring them down to a moisture content of roughly 15%. From there, many woodworkers move the boards to their workshop storage areas, where they leave the boards for a minimum of another three months, so that they can dry further to the 7% to 9% moisture content that is considered ideal.
Kiln Drying
Kiln drying is nearly identical to air drying and generally starts with air drying. It isn’t done until the boards have reached the 15% moist content level. Kiln drying speeds up the process of drying, getting the boards to the ideal 7% to 9% quicker than air drying will.
When sawmills kiln dry wood, they move entire bunks of wood to the kiln together, rather than selecting specific boards to kiln dry. This is both more efficient and eliminates any risk of warping the boards by not getting them stacked back as neatly as they originally were. The typical kiln, which is a large metal or concrete building, can house enough lumber to fill a railroad car.
When we’re talking about kilns for drying wood, we’re not talking about the same sort of kilns that might be used for other purposes. These are very low temperature kilns, which create an environment where the temperature and humidity are tightly controlled, so as to control how fast the wood dries. Typically, softwood is dried at below 115°C (239°F), while hardwoods are dried at below 80°C (176°F). Some difficult to dry species may be dried at an even lower temperature, below 60°C (140°F).
One inch thick lumber typically takes 35 to 45 days to dry down to the 8% moist content level at these temperatures. Two inch thick slabs will take 140 to 180 days. This explains the higher cost of kiln dried woods, as the cost of running those kilns and the time it takes to dry the wood is expensive.
Kiln dried wood will usually be marked to say so, either on tags attached to the individual boards or more likely painted onto the side of a bunk of wood with a stencil. When shopping for wood, one can easily tell if it has been kiln dried by taking a moisture wood level meter to the lumberyard with them. If the wood has a moisture content of less than 10%, chances are high that it has been kiln dried.
Is Kiln Dried Wood Better?
Whether kiln dried wood is better or not is a fiercely debated question. The theory is that the drier wood is better for fine furniture making and other purposes where shrinkage of the boards could cause problems. But the same results can be reached by allowing the boards to sit, stacked in the workshop for a few months, before use. A lot depends on the individual woodworker’s preference.
This does bring an important point to light however. That is, how we stack wood in our workshops can have a major impact on that wood and how easy it will be to work with it, regardless of whether it is wood that we buy at the lumberyard or wood that we cut with our own mill. Any boards, including plywood products, should be either stacked flat or stood on end. When stacked flat, they should be evenly supported at least every 24” to prevent warping. When stacked vertically, they should be set on something to get them up off the floor, if there is any chance of the floor getting wet.
One clear advantage of kiln dried lumber, which cannot be accomplished by air drying, is that the heat used in drying the wood will kill insects that may remain in the wood.
Wood can very easily be air dried at home, if one has the space to do it. While drying indoors is ideal, protecting the boards from the rain, few of us actually have the space to do that. However, air drying can be accomplished outdoors, as long as the stacked lumber has protection from the rain. This protection can come in the form of a shed roof or a tarp. If a tarp is used, be sure to either stretch the tarp over the stacked wood as an awning or to remove the tarp when it is not raining, so as to allow the boards to dry.
At some point in time, those boards will need to be moved into the workshop to finish drying. This can be done at the same point in time as it would be done if they were being dried at a sawmill, when the moist content reaches 15%.
Any available space can be used for making a home wood kiln. I have a shed out back of my home, which somewhat performs this function for me. But I also live in a hot climate, where the sun manages to heat that shed up enough to dry the wood. If I didn’t, I’d need to build a kiln for the wood planks I cut from trees and the logs I cut for wood turning.
Typically, a home kiln is a simple device, made of Styrofoam insulation panels mounted to a 2”x 4” framework. A box fan and a dehumidifier are needed to move air through the kiln and then draw the moist out of that air. Place the fan in an opening made to fit it at one end of the kiln and the dehumidifier at the other end, at the air outlet.
This alone will dry the wood, although it isn’t true kiln dried wood. In order to do that, a heat source is required. This will need to be more than a small electric space heater, of the type which are used in homes to keep that one family member who is always cold from complaining. Those heaters won’t get hot enough to reach the temperatures mentioned above, as there is a safety limit switch inside the heater, causing it to cut off at about 120°F. Heat lamps won’t get much hotter than that. Some sort of industrial heater would be required, with a temperature control.
An alternate heat source is solar power, if one is going to be drying wood often enough to warrant building a more permanent kiln. A solar kiln dryer would have to be built outside the garage, shed or workshop, on the south side, so that it would receive plenty of sun. Watch out for trees or other buildings that might overshadow the kiln, preventing it from working.
Make a box that is big enough to hold the wood to be dried, insulating it except on the top and south sides, where clear glazing should be installed. paint the inside of the kiln black to help it absorb heat from the sun. How hot the kiln will get will depend largely on the ambient temperature and how much sunlight is available, but it is possible to bring the temperature up to 200°F.
Don’t worry about the Styrofoam melting, unless the kiln is built without any heat controller. Styrofoam melts at 464°F, which should be much higher than the kiln is operating. Just make sure that the temperature controller is set and working correctly, before leaving it unsupervised.
But even without a heater and just using the fan and dehumidifier the kiln should be effective enough to dry the wood to working moist content levels within a couple of weeks. Since that’s the purpose of the exercise, it really doesn’t matter if the kiln heats or not.
Small pieces of wood can also be dried in a typical kitchen oven. That works even better if the oven is a convection oven, as the fan will provide a more consistent temperature throughout the oven. Before loading the oven, preheat it to about 225°F. Place a pan of water in the bottom of the oven as well, to provide moisture and prevent the wood from drying too fast. Stack the wood so that pieces aren’t touching each other, either on the oven racks or using sticking it.
Wood dried in this manner can dry in as little as one hour. Regardless, it should be checked for moisture content on an hourly basis, until some history with that wood and that oven can be developed. Different ovens heat differently and how much moisture the wood has in it, before drying, makes a difference. Wood won’t ignite until 572°F, so as long as the actual temperature in the oven is lower than that, the process should be safe.
Related Posts:
Vinyl Stencils for Wood by Admin April 30, 2021 Tools Stenciled signs on wood are one of the trendy home décor items we find everywhere from knick-knack shops to truck stops. Some carry witty or…
Wood Floor Inlay by Admin May 1, 2021 Installing Wood floors have made a comeback, with many people preferring them over other flooring options. That’s not surprising, considering wood flooring’s natural beauty and durability.…
Wood Mallet by Admin June 24, 2021 DIY In our modern age of power tools, the wood mallet has all but been forgotten in the home workshop. Yet this is still a common…