Everyone recognizes the toilet as a basic necessity of life. Our modern plumbing systems aid in keeping us healthy, by properly eliminating waste, which could otherwise contribute to the spread of disease. But what do you do if you don’t have a sewer system to hook up to?
More and more, there are people who are choosing to move “off grid” and live without the conveniences of our modern infrastructure. These people are seeking a simpler lifestyle; one in which they are disconnected from utility companies and their monthly bills. Some do it because they are concerned about a major disaster happening, others just to enjoy the simple things in life.
Either way, these people are choosing to live without a modern sewer system. Some are living without even a septic system on their property. They still have to take care of human waste, albeit in a simpler manner. That’s where a composting toilet comes in.
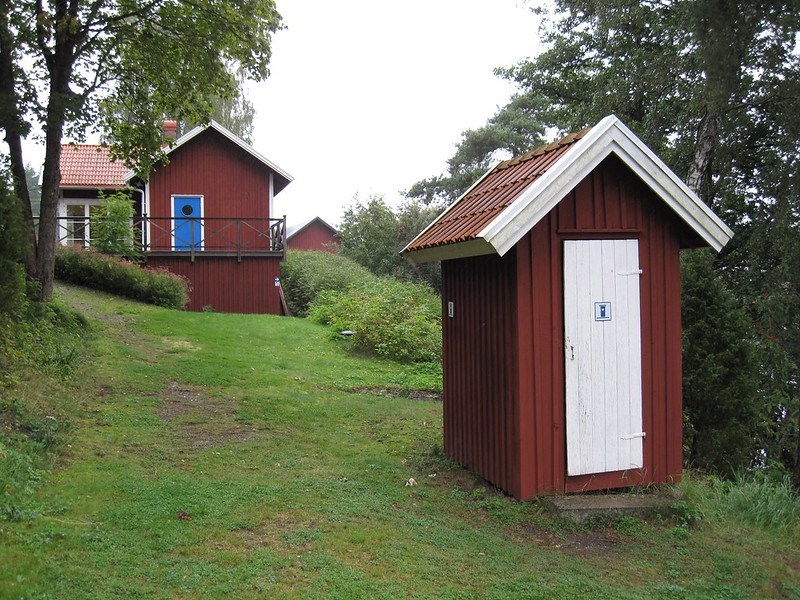
The same sort of toilet is ideal for a hunting cabin out in the woods. Water is usually scarce in those cases and there is no city sewer system to tie into. Yet there is still a need to deal with human waste. While the old outhouse is still an option, a composting toilet is much easier to build and is actually a cleaner option, allowing for the recycling of human waste back into the environment.
While I have never owned a composting toilet myself, I have it on good authority that when properly used, they do not smell. Considering that this opinion was passed on to me by a couple of women, whose noses I’m sure are much more sensitive than my own, I take it as gospel.
What is Composting?
To begin, we need to understand what composting is. If you’ve never done it, composting is a natural process, by which organic matter is broken down to make soil. This happens all the time in the wild, with the debris which litters the forest floor being turned back into nutrients to feed the plants growing there.
Serious gardeners will usually include composting as part of their gardening efforts, keeping a compost bin or pile, where they put plant and grass clippings, as well as leftovers from the kitchen and waste from their chickens, assuming they have chickens. Given time, worms, bacteria and insects break this down, making it usable as fertilizer for their garden. The compost is often used to “top” garden beds in the fall, after harvesting is done, as a preparation for the next spring’s planting.
Both human and animal waste can readily be added to a compost pile, becoming part of this process. If you have dogs and allow them to run free in your backyard, you probably have to clean up after them from time to time. Rather than throwing their waste into the garbage, adding it to the compost bin ensures that those nutrients go back into the soil.
The use of human waste or “humanure” in compost has been in existence for centuries, even though it is not common here in the western world. But many countries in the Far East have used this, especially ones which were short of other fertilizers to use.
In recent times, humanure composting has gained in popularity amongst those who are homesteading, providing them with a way of eliminating waste, while gaining valuable fertilizer for their gardens. All that’s required is a composting toilet and a compost pile or bin in the backyard.
Composting Toilets
There are a number of manufacturers producing composting toilets. However, they tend to be quite expensive; around $1,000. That’s quite a bit, when you consider the average cost of a normal toilet. For those who are trying to go off grid, that’s not a reasonable expenditure.
Most of these commercial composting toilets do the composting in the toilet, which explains part of the cost. They typically separate the urine from the solid waste, dumping the urine into a separate container, which allows it to be disposed of separately. Since urine is biologically sterile (it doesn’t have any bacteria living in it), it can literally be dumped out on the ground, where the minerals in it can help fertilize your yard.
The solids in the composting toilet are left in the toilet, mixed with some sort of bio-mass, such as coir (shredded coconut husk) or peat moss. It breaks down and then is deposited in a tray at the bottom, where it can be removed and either added to a compost bin or put directly onto a garden.
Building a Simple DIY Composting Toilet
At the most basic level, a composting toilet is nothing more than a container with a toilet seat. If you’ve ever seen the toilet seats which clip onto a five-gallon bucket at your local home improvement center, you know what I mean. They’re okay for camping or hunting trips, but I doubt anyone would want to use them regularly. So, most people go beyond that, making their composting toilet a little more attractive, even if they are sticking with the same basic idea.
This means building a cabinet for the bucket to go into and attaching a normal toilet seat on top. If you’ve ever seen an old-fashioned outhouse, you’ve already got the general picture in your mind. The cabinet needs to be just as high as the bucket is, 14.5 inches. Make it big enough for the bucket to sit inside of, with some alignment blocks in the bottom to ensure that you locate the bucket properly when you set it in.
Framing for this cabinet can be made of 2”x 4” construction or smaller material if you like. I would not forego the framing though, as if you are just screwing pieces of plywood together, there’s a chance that the screws will break through the sides of the plywood over time, especially if you have family members who tend to move around while on the toilet.
The front and sides of the cabinet can be covered with ½” to ¾” plywood, depending on what you have available. I would recommend a cabinet grade hardwood plywood, rather than construction grade, for the finer and smoother finish. The top should be made of ¾” plywood or you can laminate ¾” hardwood boards, much as you would for making a table.
The top of the cabinet should be hinged at the back, allowing it to be opened when you need to change the bucket. Make a hole in it, the same size as the top of the bucket (12” in diameter) and aligned with the alignment blocks you mounted in the bottom. Be sure to rout the front edge of the lid with a ¾” rounding bit, so that there is no sharp edge there.
A normal toilet seat can be mounted to the cabinet lid, centered over the hole for the bucket. Align the seat, drill the two holes necessary for mounting it, being sure to have them parallel to the front of the cabinet, and use the hardware included with the seat to mount it.
One of the best designs I’ve ever seen for a home-built composting toilet put the cabinet at an angle, with one corner facing forwards, rather than with a side facing forwards. This put that point (which was rounded) between the legs, allowing the person to sit more comfortably on the seat, with their legs spread a bit to the sides. Such a modification might be more important for people who are somewhat overweight.
You can paint or stain and varnish your composting toilet’s cabinet in any way you like, but I would recommend using an epoxy paint or epoxy instead of varnish, if you’re going for a natural wood look. Epoxy is considerably more durable than varnish or most paints, giving you a finish which will be easy to clean and will not be easily damaged.
Adding a Urine Diverter to the Composting Toilet
Many people who own composting toilets claim that the real smell comes from the urine, not the solid waste. The odor from the solid waste is easily absorbed by the other material added to the toilet. But because urine is liquid, it takes a lot of other materials to absorb it. Urine also makes up the biggest bulk of the material deposited in the toilet.
The solution for this problem is to have the urine go elsewhere than the bucket in the toilet, allowing it to be disposed of separately, and if I might add, more frequently. Commercial composting toilets will have a urine diverter installed, which allows urine to be collected in a separate tank, usually located on the front of the toilet.
For your homemade composting toilet, you’ll need to use a separate container, located inside the same cabinet for the urine collection. That might mean making your cabinet a little bit larger, if you don’t have enough room. I would recommend a sealed container for this, such as a two-gallon water jug. Having a closed container will help reduce any odors coming from the urine.
You can easily make a diverter by cutting the bottom of a five-gallon bucket off at an angle. Draw a line straight across the center of the bucket’s bottom, then mark a point that’s five inches up the side, perpendicular to this line. Set the bucket into the top of another bucket, so that the three points (both ends of the line and the other point) are aligned with the top rim of the bucket and mark the line made by the rim. This line, along with the line you made across the bottom, are the lines for cutting out your diverter.
This is then mounted into the front side of the bucket, using rivets or screws. The curve of the diverter matches the front of the bucket and the straight side cuts across the bucket, somewhere near the middle. Mount it low enough, so that a lid can still be placed on the bucket.
Drill a hole in the diverter, as close to the bottom as possible and attach a fitting there, with a piece of hose (I would recommend a clear vinyl hose) to lead over to the collection container. Drill the lid of this container and add a fitting there as well, for the hose to connect to. Keep in mind that you will need some sort of quick disconnect somewhere in this line, so that you can remove the collection container to empty it.
Repeat this procedure for however many collection buckets you are using for your composting toilet. Each will need its own diverter.
The key to keeping the smell down from any composting toilet is adding material to it to mix with the solid waste, every time it is used. Some common materials used include:
Sawdust
Wood ash
Crushed dried leaves
Coir
Peat moss
Any of these materials will break down, along with the humanure, becoming part of the compost. It is necessary to add enough to cover the waste that is deposited in the toilet. As a general rule of thumb, this means one scoop (think a 16 oz cup) for urine and two scoops for feces.
Different people have different ideas of how often you should empty the bucket and replace it. That depends on a couple of different factors, such as whether you have a urine diverter, how many people you have using your composting toilet and the weather. Emptying the bucket in the midst of a winter blizzard isn’t a whole lot of fun.
The urine should be emptied daily, so as to ensure that the container doesn’t fill all the way to the top. As mentioned earlier, urine can be used as a fertilizer, adding minerals back into the soil, as it is mostly water and minerals. However, if you pour urine directly onto your lawn or into your garden, it can “burn” the plant life there with too high a concentration of minerals. Better to thin it down with water, and then use it to water your garden.
If you don’t have a urine diverter installed in your composting toilet, then you should empty the bucket daily, adding the contents to your compost bin. But if you do have a urine diverter, you can allow that bucket to fill as much as you like. The contents will immediately start breaking down, due to the bacteria contained within the feces. If a lid is placed on the bucket, it will continue composting and can be added to the compost bin whenever convenient.
When you add the compost to the bin, rinse out the bucket, to ensure that all solids are removed. Human feces is highly biologically active, with a lot of bacteria in it. While those bacteria can be beneficial, when in our intestines, they can also cause disease if they get anywhere else within our bodies. So cleanliness is important to protect your health.
Don’t worry about the bacteria contaminating your garden. Composting generates a lot of heat, when done properly (you might want to study up on this a bit on some gardening websites). That heat will eventually kill the bacteria, making the compost safe for use in your garden. Just avoid using it prematurely, before that bacterium is dead.
You’ll be able to tell when the bacteria are dead and the compost is ready for use by monitoring the temperature of your compost bin. A long thermometer is useful for this, so that it can get all the way down into the core of your compost heap and measure the temperature there.
Related Posts:
How to Make a Bucket Toilet by Admin August 2, 2023 DIY Anyone who enjoys hunting or fishing has probably seen a bucket toilet sometimes. More and more campers are using them as well. Instead of buying…
DIY Toddler Bed by Admin April 25, 2021 DIY At some point in time, every toddler needs to move out of their crib and into a “big girl bed” or “big boy bed.” This…
DIY Tree Slice Table by Admin June 2, 2021 DIY Tree slices and slabs have been used as crude tables for centuries. While there are examples of elegant wood tables, such as those used by…