One of the joys of buying an older home is the attention to detail put into those homes when they are built, especially the woodwork. Ornate architectural trim, multi-paneled solid wood interior doors, real brass hardware and hardwood floors are all part of the charm of these older homes and the reason why some people like to buy them.
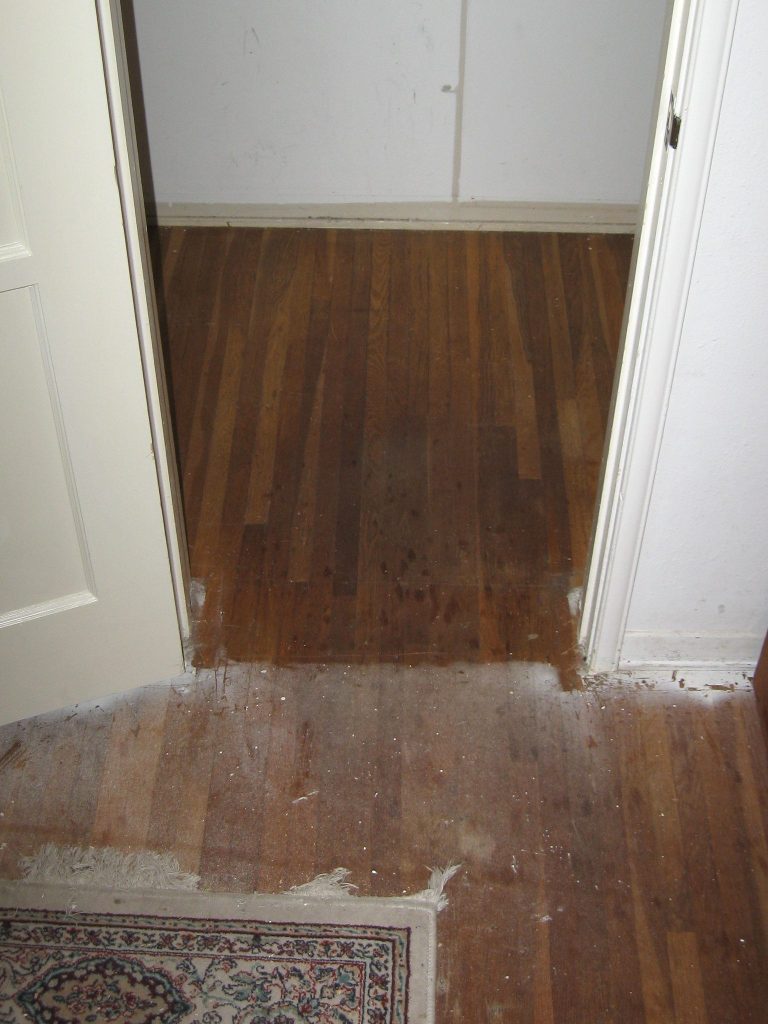
Unfortunately, because they are old, many of these homes are not in as good a shape as they should be, either due to lack of proper maintenance or just due to the age of the home. This includes the hardwood floors, which may be dull, have worn spots where the finish has worn through and by discolored. There was also a time when wall-to-wall carpeting was the in thing to have in one’s home, so many people covered their hardwood floors with carpeting, hiding it away.
Today, hardwood floors have regained their popularity and many people are either installing hardwood floors in their homes or switching back to the original hardwood floors, if they are fortunate enough to have them. But after years of poor maintenance, many of those floors need some serious attention, before they will ever look good again.
Fortunately, there’s a huge difference between those old hardwood floors and the ones installed in more modern homes. The basic difference is that the old ones were solid hardwood, whereas the newer ones are composite construction, which may only have a thin veneer of hardwood on the surface. The better ones will have a thicker layer of hardwood, but they still aren’t solid hardwood like the floors of old. restoring or even refinishing an old hardwood floor is actually much easier than doing so with a new one, because the floor is solid hardwood.
Find Out What’s There
The first step in working on any hardwood floor is figuring out just what’s there. Hardwood floors will often age over time, making it hard to determine just what the original floor looked like. In most cases it will look darker than it originally did, due to the combination of soap and dirt emulsified and layered onto the floor. But that’s not all there is to contend with; it’s important to find out what sort of finish was used to start with.
The easiest way to do this is to find a hidden area of the floor and try to scrape off some of the finish, getting down to the bare wood. If it is actually possible to scrape off the finish, resulting in a thin clear or yellowish film, then the floor was originally finished with some sort of varnish. However if there is no clear film and everything that scrapes off powdered sludge, then the floor was probably originally finished with a penetrating finish, like Tung oil.
In either case, don’t be surprised if most of what scrapes off looks like caked-on dirt. Through the years, previous owners will have cleaned the floor with soapy water, which while removing some dirt, also mixes with the dirt that remains, allowing that to dry onto the floor, gradually covering it with a layer of hardened dirt. This is made even worse if wax was used on the floor, as the floor wax will also absorb the dirt, but will form a harder coating over the surface of the wood than soap and dirt will.
The other possibility is that the wood floor will be covered with carpeting or some other floor covering. That can be a whole lot more difficult to deal with, especially if the carpeting or floor covering was installed using some sort of adhesive.
Deep Cleaning Hardwood Floors
There are several steps involved in truly deep cleaning a hardwood floor. Each is an individual step, building upon the previously completed ones. As the steps are completed, more and more dirt and grime will be removed from the flooring. It is up to the homeowner to decide when the process has gone far enough and they are satisfied with the results.
The first step is always to sweep the floor, removing any loose dirt from the floor. It wouldn’t hurt to go over it with a vacuum cleaner as well, as there is dirt that the vacuum might get, especially in the corner, which is missed by sweeping. Take the time to do a thorough job. Using a dry mop, after sweeping can be useful as well, as a dry mop will catch dust that a broom won’t.
Mop the floor with warm water to which either vinegar, apple cider vinegar or a commercial floor cleaner has been added. For either type of vinegar, one cup per gallon of water is a good mixture. For commercial cleaners, follow the mixing instructions provided on the bottle. If the floor has a buildup of wax on it, it is a good idea to use a floor cleaner that is designed to remove wax.
Since this is a deep cleaning, the floor should only be worked on in small sections at a time, roughly three foot square. The mop should not be soaking, as water will likely find a means of soaking into the wood. Rather, wring out the mop so that it is merely a map. Use a circular motion to draw out the dirt and grime. Once the dirt, grime and wax have been loosened, wring out the mop again and go over the same area, picking up the dirt and any lingering cleaner.
It may be necessary to scrape the seams between individual boards with the edge of a putty knife to get rid of dirt and grime that has built up in the cracks between boards. A lot will depend on the condition of the floor here; floors which have been damaged will require more attention to the seams between the boards, as wear and tear may have opened those seams up.
At any time during this process, there is the possibility that caked-on food or other foreign matter may be encountered on the floor. This should be scraped off, either with a plastic knife or with a putty knife that has had the corner rounded so as to prevent scratching the floor. As much as possible, work the edge of the knife under the edge of that foreign matter and pry it up, rather than actually scraping, which could scratch the floor.
If there is any dried wax, crayon or chewing gum on the floor, they can be removed with ice. Fill a strong plastic bag with ice cubes and place it over the area with the foreign substance, making sure to cover the material to be removed entirely. Allow the ice enough time to freeze the stain, making it brittle. Then use the putty knife to break off the wax or chewing gum.
If a penetrating finish has been used on the floor, the next step would be to use a clean rag, soaked in mineral spirits over the floor, allowing the mineral spirits five minutes to soak into the wood. Then wipe up the excess mineral spirits with a fresh, clean cloth, which has been dampened slightly with water. Finish by wiping the floor with a clean, dry cloth.
Please note that deep cleaning may not remove all stains, especially stains that might have soaked into the wood. Some food stains, pet urine, water and ink may actually soak into the wood, especially if a penetrating wood finish was used. In that case, it may be necessary to either refinish the floor or refinish only that portion of the floor.
Revitalizing Wood Floors
Sometimes it is possible to revitalize old wood floors, rather than refinish them. There are three different methods that can be considered revitalizing and can be selected from.
The first and most common of these is the application of a wax finish to the floor. Wax floor finish has been used for years, as a normal part of cleaning to help maintain the shine on hardwood floors. However, while floor wax can do a lot to make a floor look good, it is dependent on the underlying wood and finish being intact. If the wood floor has been damaged or stained, the wax won’t do much to hide that damage.
Flooring revitalier is similar to wax and will perform much like wax will. They are excellent in cases where the flooring only shows minimal wear. But in cases where the flooring shows significant wear, staining or damage, the revitalizer can’t accomplish much.
The third method is to use a power deck brush to clean the floor. There are various types of these, including models with counter-rotating drum brushes and others with round brushes. They are all intended to do the same thing; remove everything down to the bare wood. These are best for use when the flooring is discolored and greyed to the point where it is necessary to strip off the finish and possibly even the surface of the wood itself, in order to refinish the floors.
As an interesting aside, I recently pressure washed a deck and cedarfence of a family member’s home, which was going to be used as an Airbnb. Although both the decking and the fence were greyed from age, they looked new once they had been pressure washed. However, pressure washing should really only be used outdoors, not inside the home. Using a power deck brush is the closest alternative, giving basically identical results to what I got from that pressure washer.
Once a floor has been deep cleaned, one might think that it is ready for refinish; but that usually isn’t true. Unless the floor has been gone over with a flooring sander or power deck brush, it isn’t really ready for refinishing… at least not a full refinishing.
There are flooring products which are touted to be “refinish” products, intended to go over the existing floor finish, without removing it. While these products do work, they are unable to take care of stains and discoloration in the existing wood. Rather, they will seal those in.
To get rid of those stains, the floor usually needs to be sanded, either by using the aforementioned power deck brush or by using an actual flooring sander. A lot depends on the physical condition of the flooring. If the flooring is damaged, with hole appearing in it or stains in the wood, sanding will be required. Fortunately, with an older home that has a solid hardwood floor, that’s not a problem.
If there are any cracks or nail holes in the wood flooring, they should be filled as part of the sanding operation. It is best to use a wood filler that matches the natural color of the hardwood flooring, rather than trying to use a neutral colored wood putty and then stain it. No wood putty accepts stain as well as the manufacturer claims it will, so it always ends up visible. However, a wood stain that is factory tinted to match wood will usually hold pretty true to its color.
Once the floor has been sanded, it needs to be cleaned thoroughly to remove any and all sawdust. Before that, it’s a good idea to dust the entire room, as the sawdust will have gotten onto furniture, fixtures and walls, just waiting to drop into the new finish. Then sweep, vacuum, damp mop, use a dust mop and do it all again. Getting all the sawdust can be quite challenging, but we really don’t want it to end up in the finish.
Finally, the new finish can be applied. In most cases, the manufacturers of the finish will recommend applying two coats, but it might be a good idea to apply three. This is old wood and will be drier than new wood. So there’s a good chance that the wood will soak up the entire first coat, not allowing any of it to sit on the surface. Adding two more coats ensures a good finish on the floor.
Related Posts:
How to Clean Old Unfinished Wood Floors by Admin May 16, 2022 More About Hardwood floors add a lot to any home. The natural beauty of wood provides warmth and comfort in a way that is both visually attractive…
Hardwood vs Softwood by Admin July 7, 2021 Hardwood All types of wood are broken down into three basic categories: hardwood, softwood and engineered wood. When we’re talking about engineered wood, we’re usually talking…
How To Remove Old Water Stains From Wood by Amy Reed December 7, 2022 DIY Water stains and watermarks are often caused by spills, wet glasses, cold cups, or hot cups being placed on a wooden surface. In rare circumstances,…